Dinosaur Cake: 9 Roar-Worthy Birthday Ideas

There is a specific age when a kid discovers dinosaurs and nothing else exists for a solid year. Every roar gets a soundtrack, every stick becomes a bone, and the birthday cake question answers itself. This is one of the great party themes for home bakers, because a dinosaur cake does not need to look perfect. It needs to look PREHISTORIC. Rough frosting reads as jungle. Crumbly edges read as terrain. Nobody at the table is grading your piping.
This guide has 9 dinosaur cake ideas arranged by skill level, from a ten-minute topper job to a volcano that genuinely erupts with red icing lava. If you are building a whole dinosaur party around the cake, start with the cake and then read our Kids Birthday Party Ideas for the day around it. And for the master list of every theme we cover, our Birthday Cake Ideas guide is the starting point.
Heads up: this post contains affiliate links. If you buy through them, MamaKinder may earn a small commission at no extra cost to you. It helps keep these guides free.
The Two Golden Rules of Dinosaur Cakes
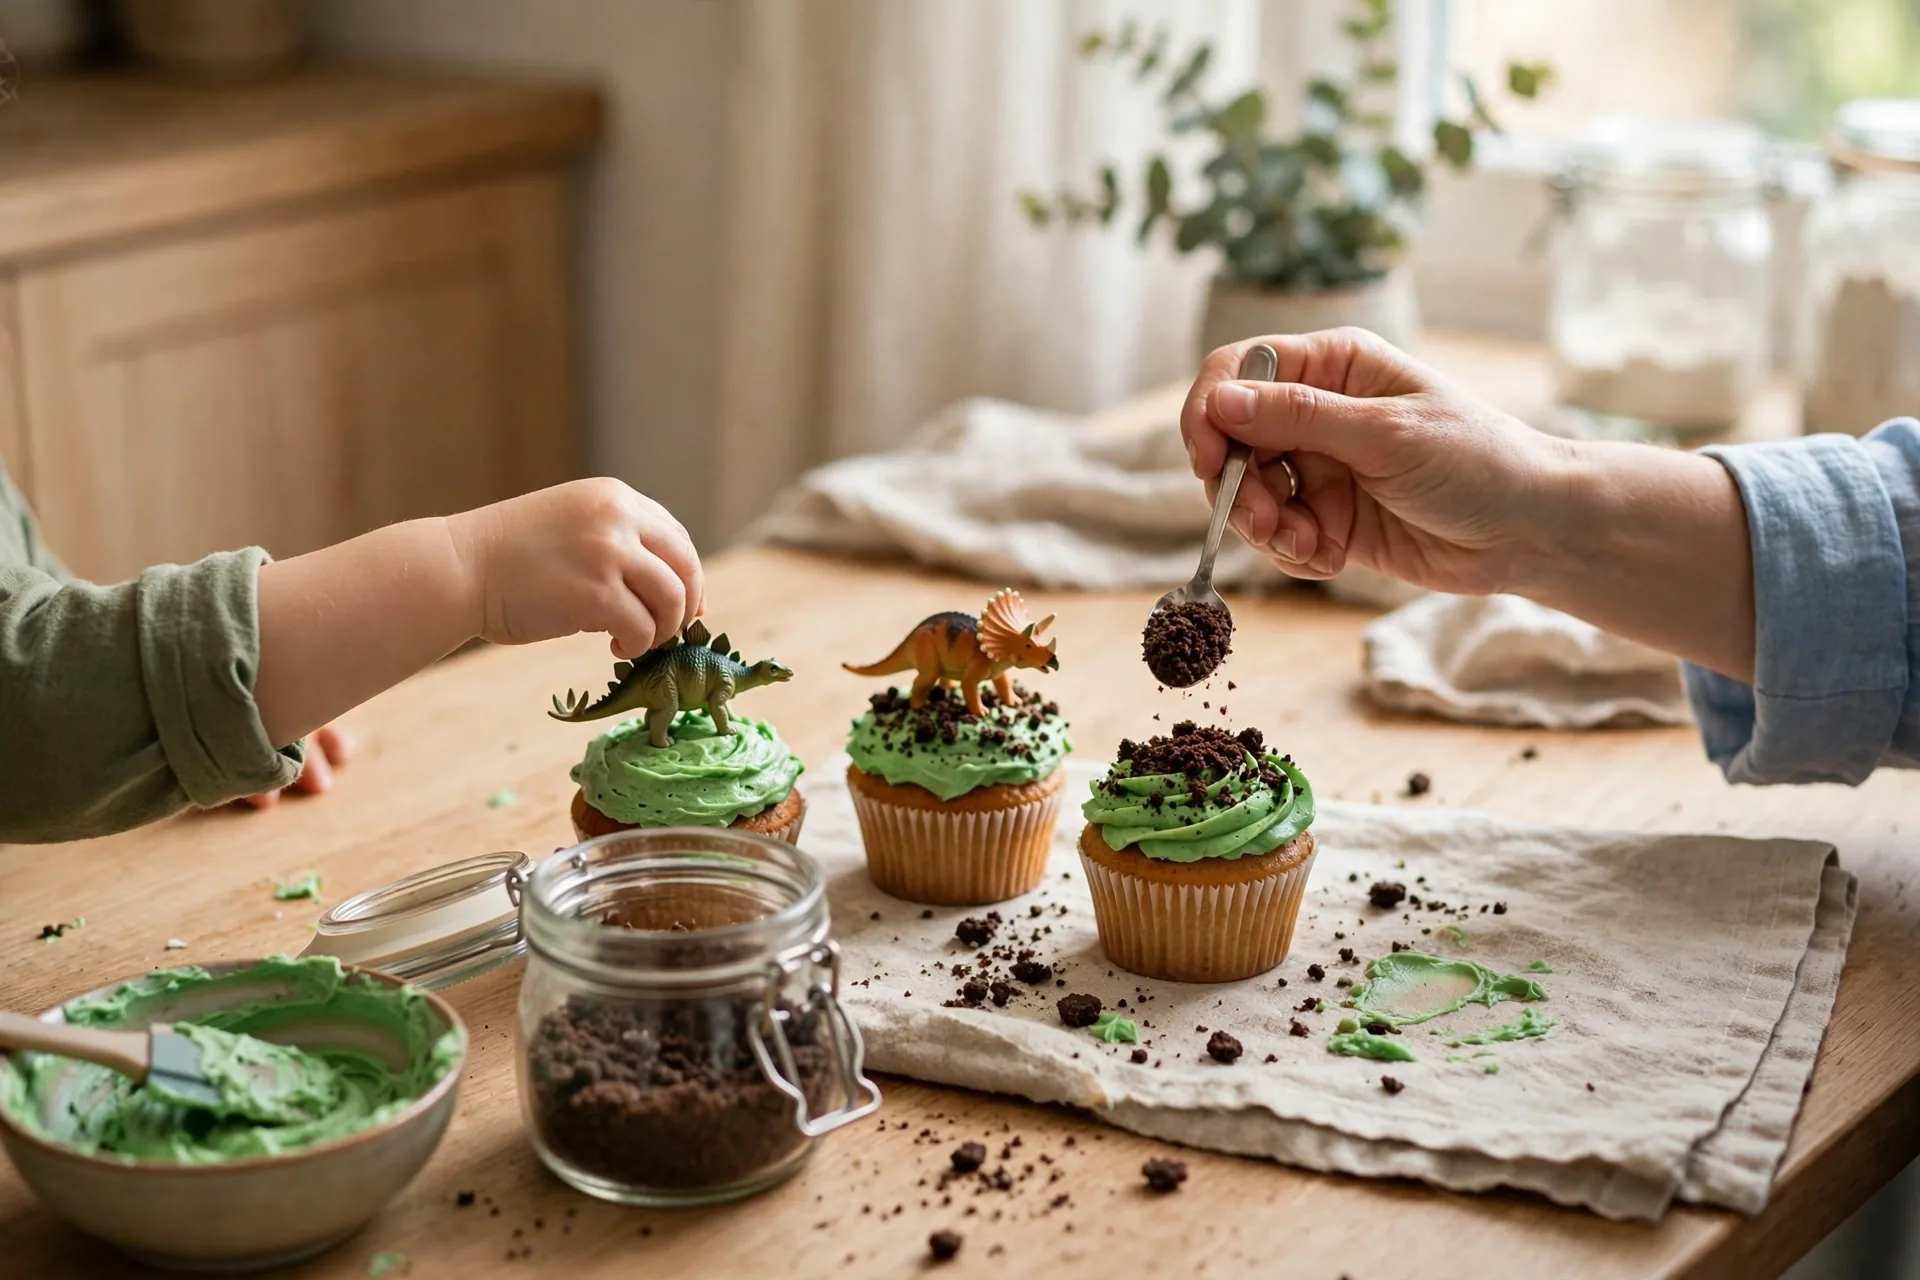
Rule one: texture is your friend. A dinosaur cake is the one theme where rough frosting is correct. Grass-green swirls, chocolate bark streaks, crushed cookie dirt, all of it hides technique. If your buttercream looks lumpy, congratulations. You have made a jungle.
Rule two: toy toppers get the bakery treatment. Wash any toy dinosaur in warm soapy water and dry it completely before it touches frosting. Push it in gently so it stands. Then, right before you slice, lift every toy off and hand them to the birthday kid as party favors. Small dinosaur figures and loose candy pieces stay completely away from under-3s (for the littlest guests, decorate with food only: frosting, cookie crumbs, soft fruit). These rules apply to every cake in this guide.
The 9 Ideas
1. The Toy-Topper Stomp Cake
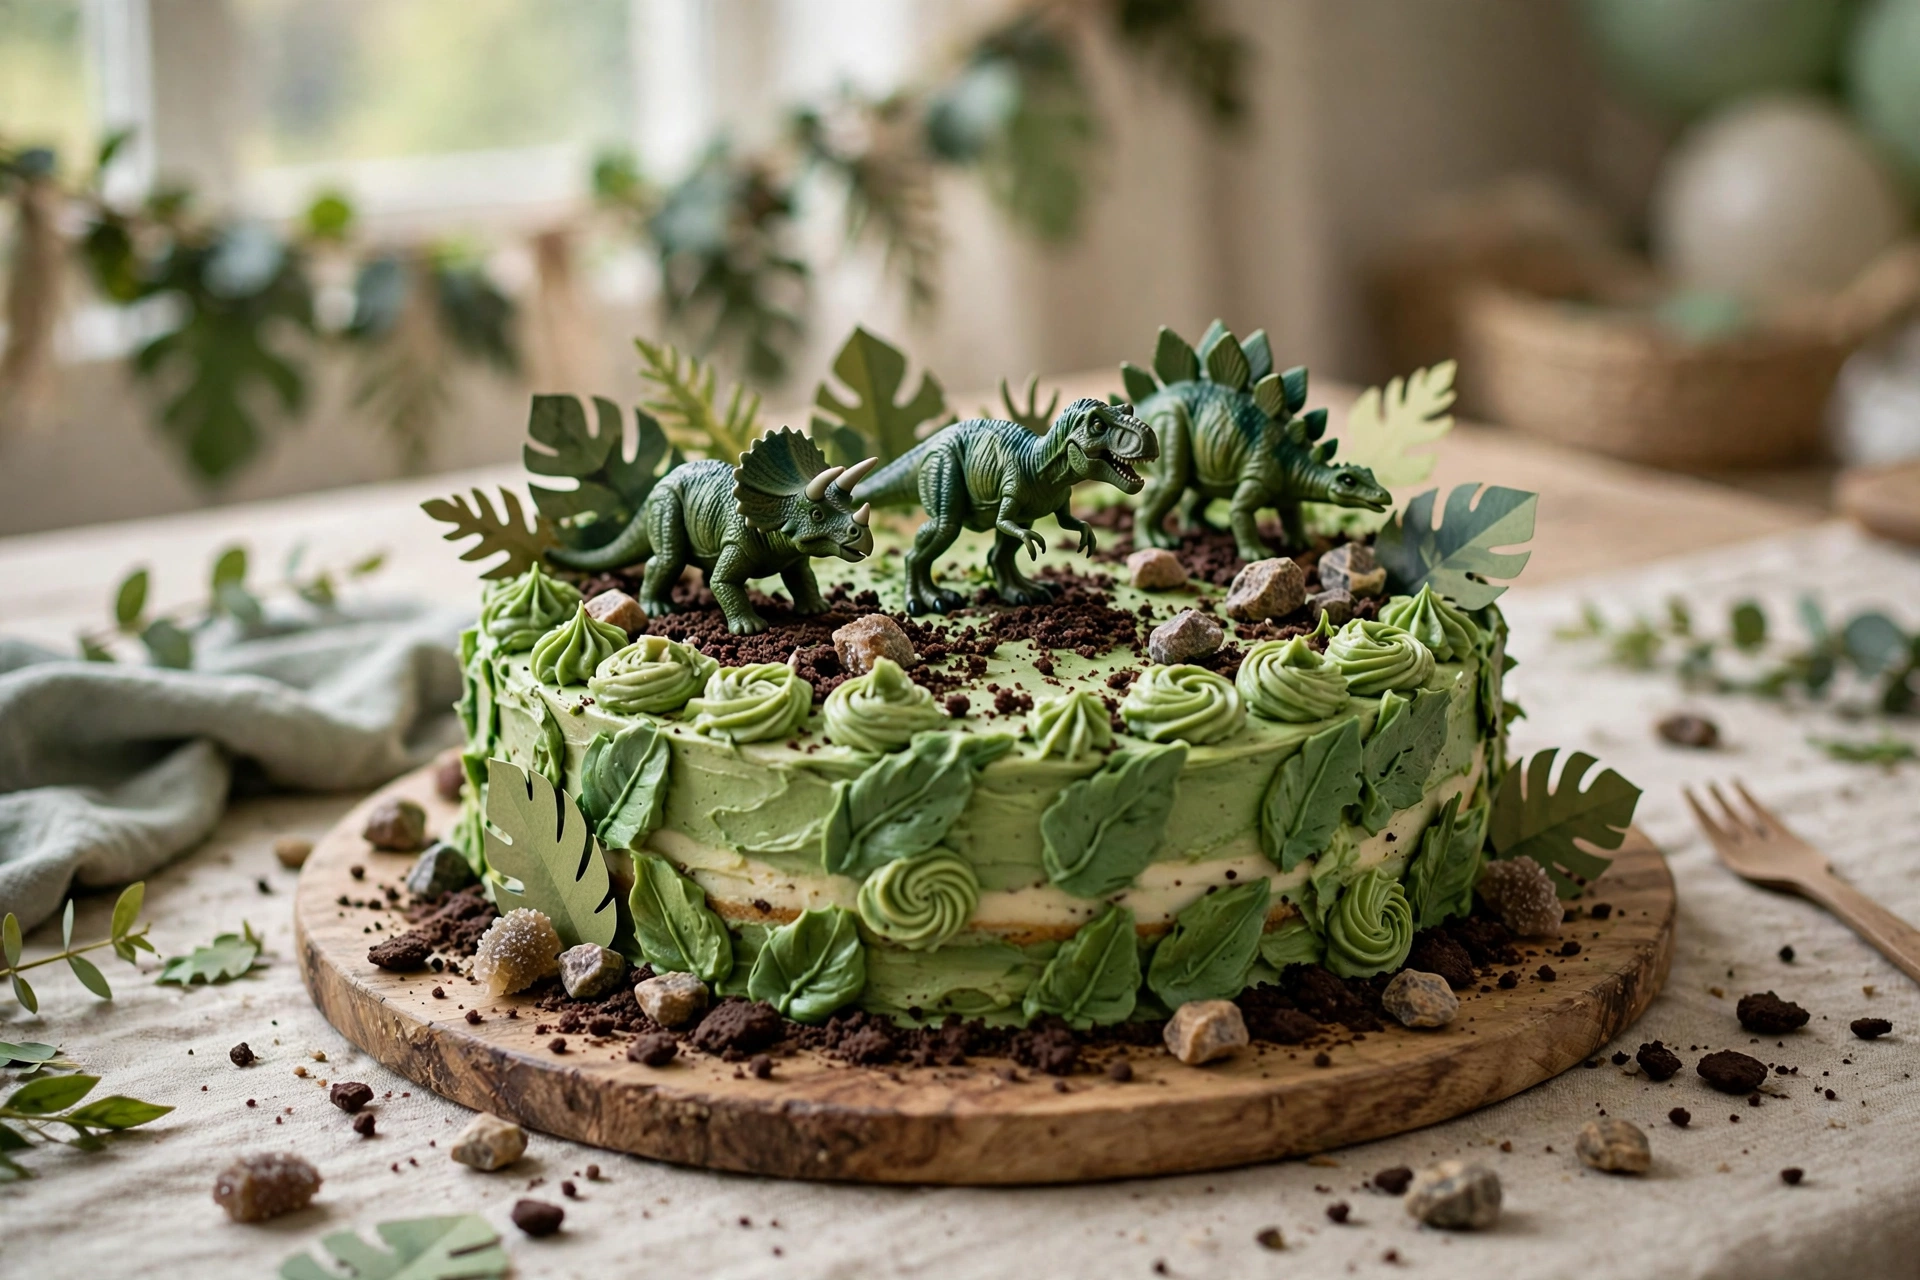
The fastest dinosaur cake ever invented, and honestly the one we recommend first. Bake a round or sheet cake (a box mix is completely fine), frost it green, then stomp clean toy dinosaurs across the top. Crush chocolate sandwich cookies in a zip-top bag and scatter them as dirt. Tuck in a few candy rocks and some paper jungle leaves, and you are done in the time the frosting takes to set.
The green needs to look intentional, not hospital-wall. Tint white vanilla buttercream with green gel coloring a little at a time until you land on leaf green. A little at a time matters: gel is concentrated, and the color deepens as it sits. If you overshoot, a spoonful of plain frosting pulls it back. (White cake plus green frosting is the move. Chocolate cake plus green frosting still works, because the cookie dirt covers everything.)
The topper set is the one purchase worth making for this theme: a 24-piece bag of mini dinosaur figures and skeletons covers the topper job on three of the cakes in this guide, and the kid keeps the dinosaurs afterward as the party favor. That double duty is why toy toppers beat a one-time plastic sign every time.
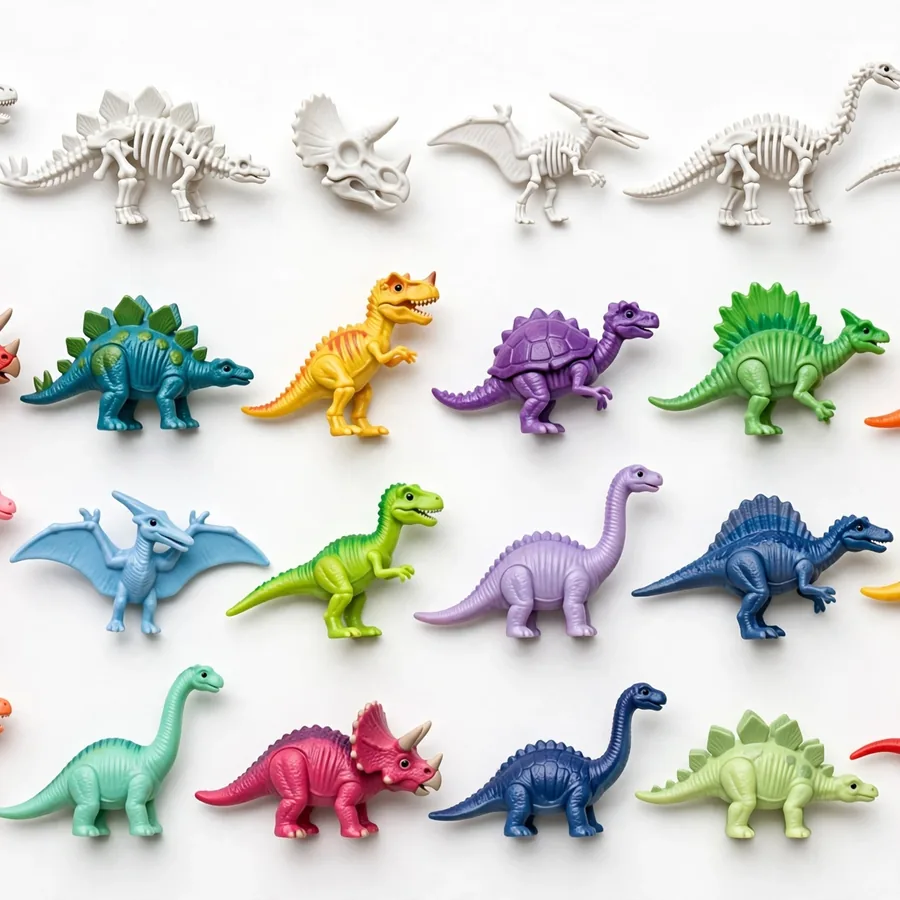
Kindersee Mini Dinosaur Figures & Skeletons, 24 Pieces
The topper set behind cakes #1, #3, #6, and #8 in this guide: 24 mini dinosaur figures and skeletons, assorted, sold as cupcake toppers (they stand fine as cake toppers too). Wash before they go on, lift off before slicing, and the birthday kid keeps them as the party favor.
2. The Cut-and-Arrange Dino Shape
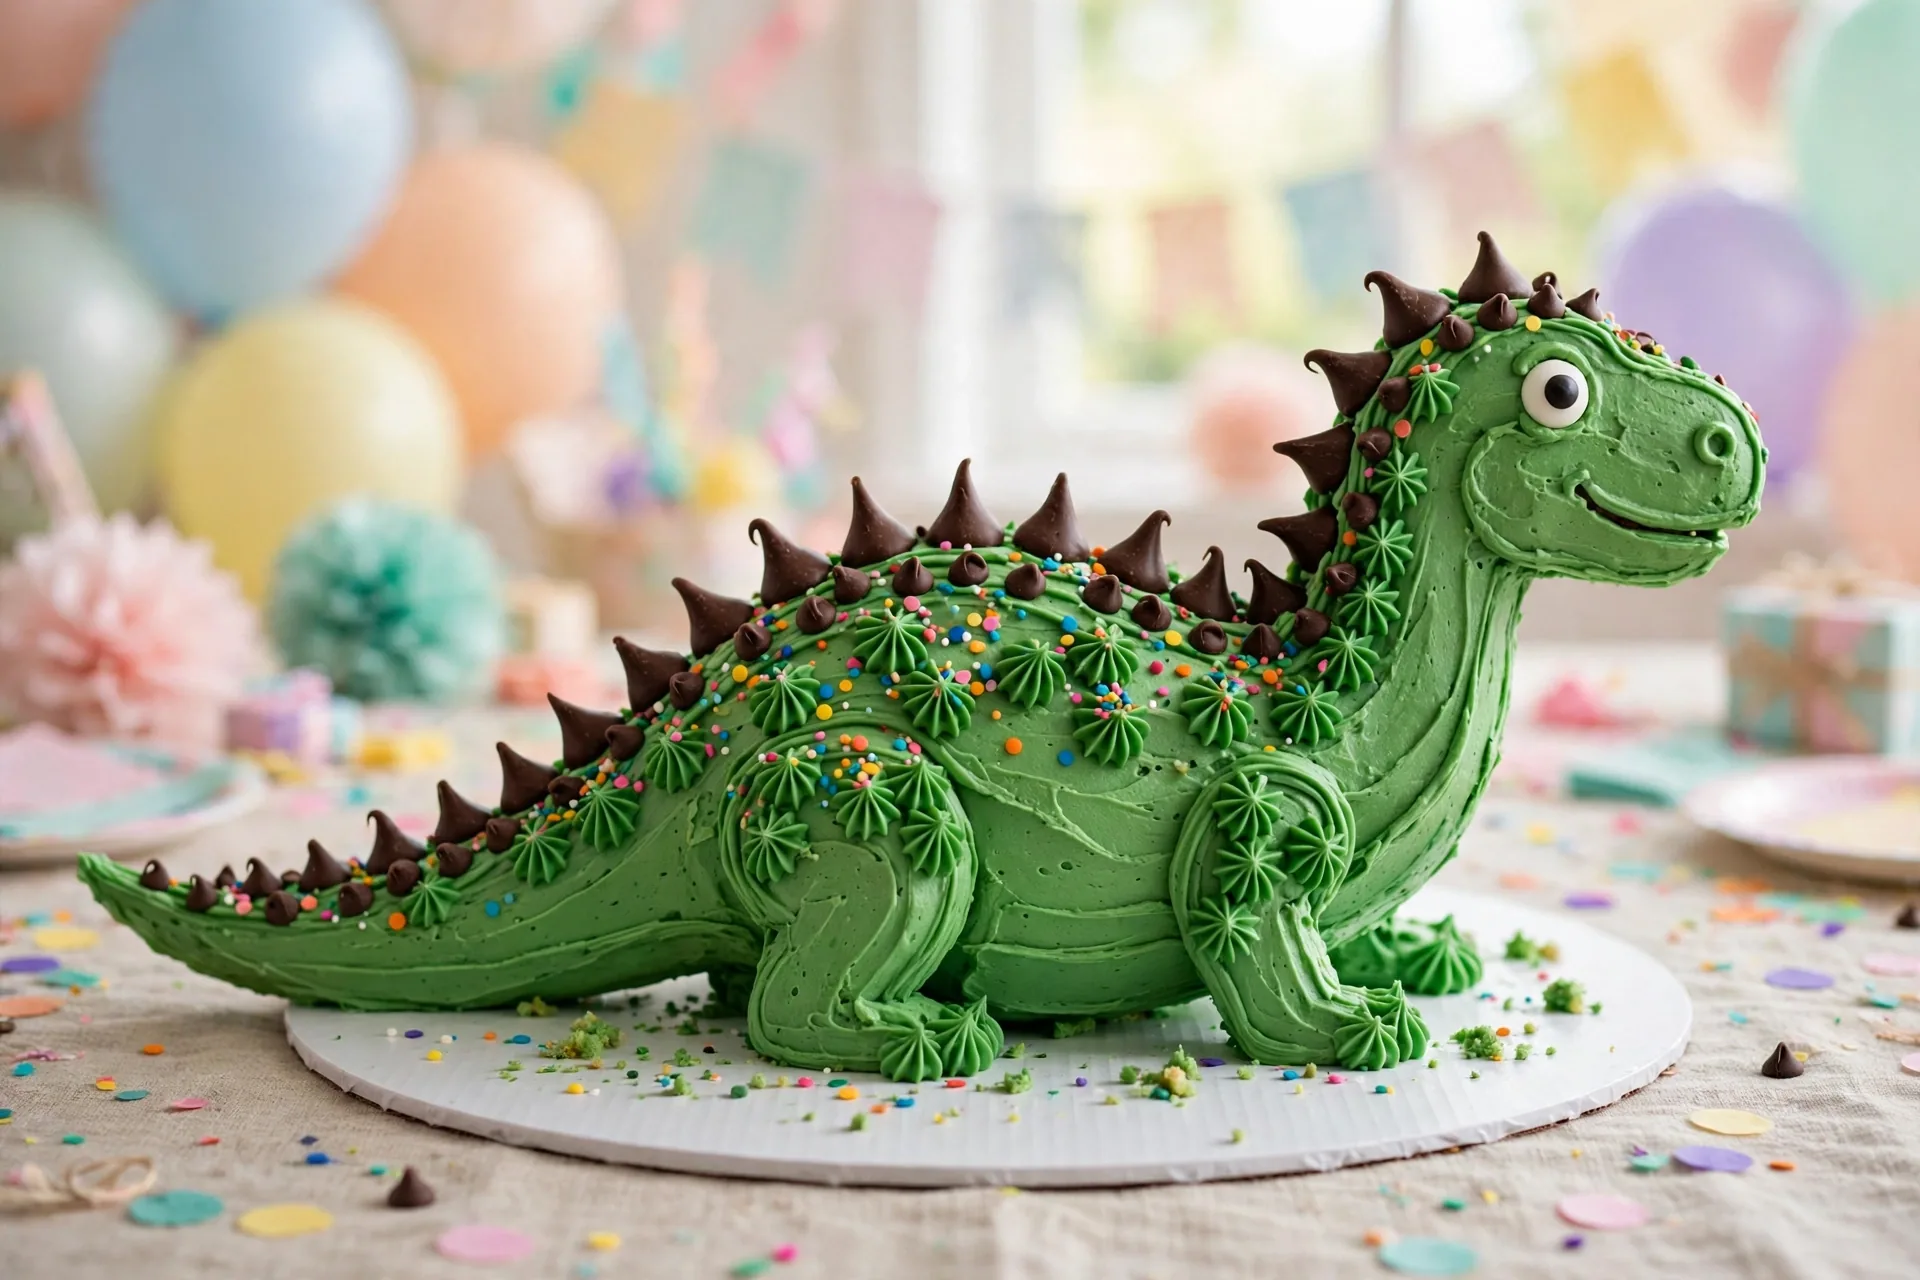
This is the cake from the classic British recipe everyone pins and half the moms in the comments ask how to cut. Here is the version that actually makes sense. Bake two 8-inch round cakes and cool them completely. Sandwich them with a thin layer of buttercream.
Now make ONE cut: slice a wedge out of one side of the double-layer cake, about a sixth of the circle. You now have a body (the big piece) and a wedge. Cut the wedge in half. One half becomes the head, tucked against the body. The other half stretches out as the tail. That is the whole geometry, and it takes one minute once you stop trying to be precise. Chill the assembled shape for 30 minutes (crumbs firm up and frosting goes on cleanly), then frost it green.
Press chocolate chips along the back for stegosaurus spikes, points facing out. Two round chocolates become eyes, and piped white dots on top of them give the eyes their shine. Pipe a row of little white teeth along the mouth line. This cake looks like a cartoon dino plush, which is exactly right for ages 3 to 6. For a first birthday, skip the chips (small pieces) and use piped frosting spikes instead.
3. The Volcano Eruption Cake
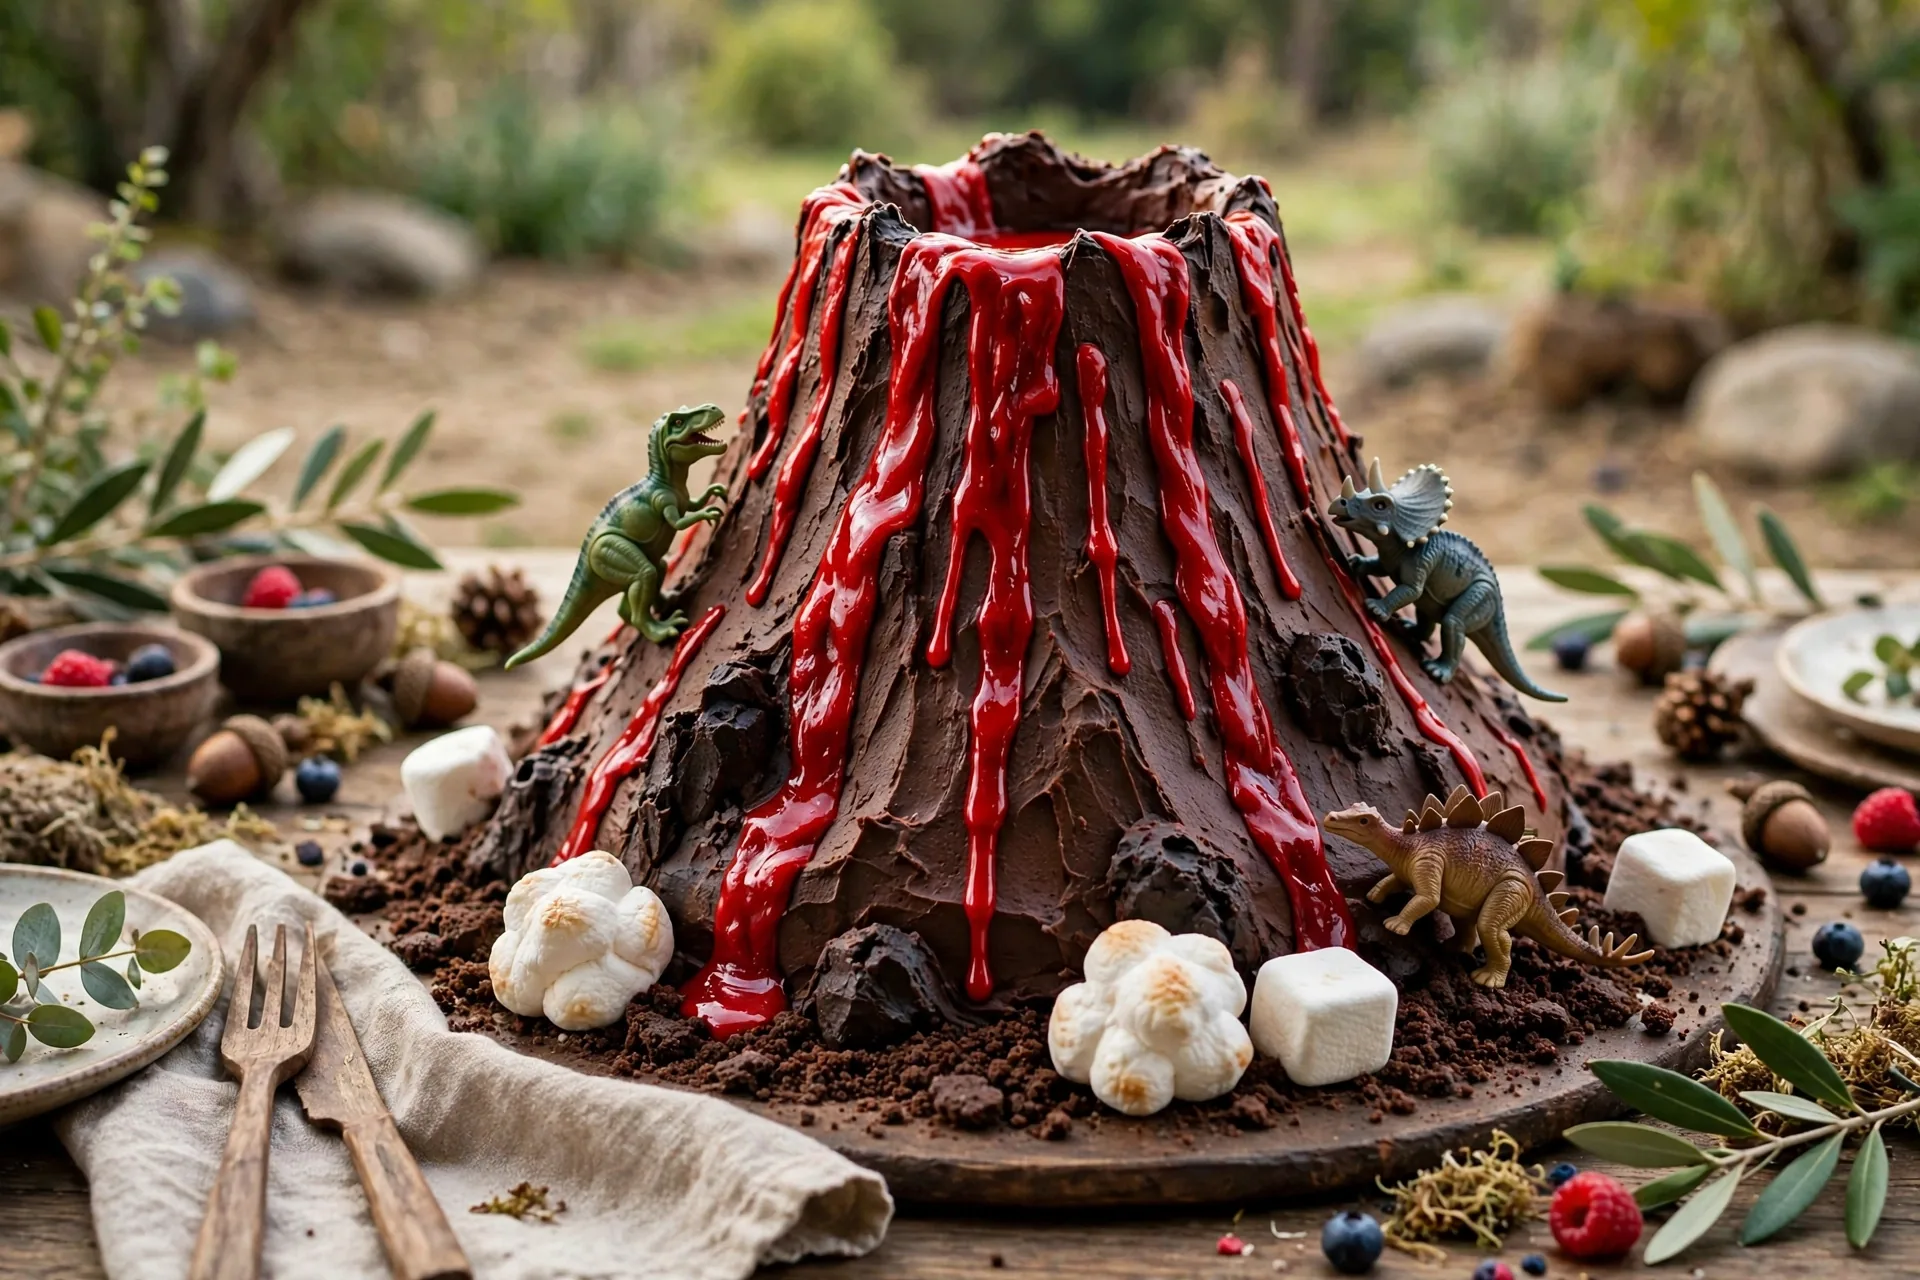
The centerpiece cake. Stack two or three round layers with chocolate frosting (the dirt-colored base IS the theme, no tinting required), then carve the top layer into a cone: shave the edges at an angle with a serrated knife, working slowly. A crumb coat plus 30 minutes in the fridge keeps the carved shape from shedding.
Spread a little apricot jam over the cone for a smooth surface if you want fondant, or skip straight to frosting it chocolate. Cut a small hollow in the top (the volcano mouth) and drizzle red-tinted frosting down the sides in lava rivulets. Pipe it thick around the mouth so it looks mid-eruption. Finish with toy dinosaurs climbing the slopes and crushed cookie dirt around the base.
Two honesty notes from cakes that have actually erupted in our kitchen. Make the lava the morning of the party: red frosting shapes get sticky and weepy by the next day. And put the candle behind the volcano, not inside the mouth (melted wax plus lava frosting is a mess, and paper dino picks near an open flame are a hard no). Grown-ups handle every candle, always.
4. The Dino Egg-Nest Cake
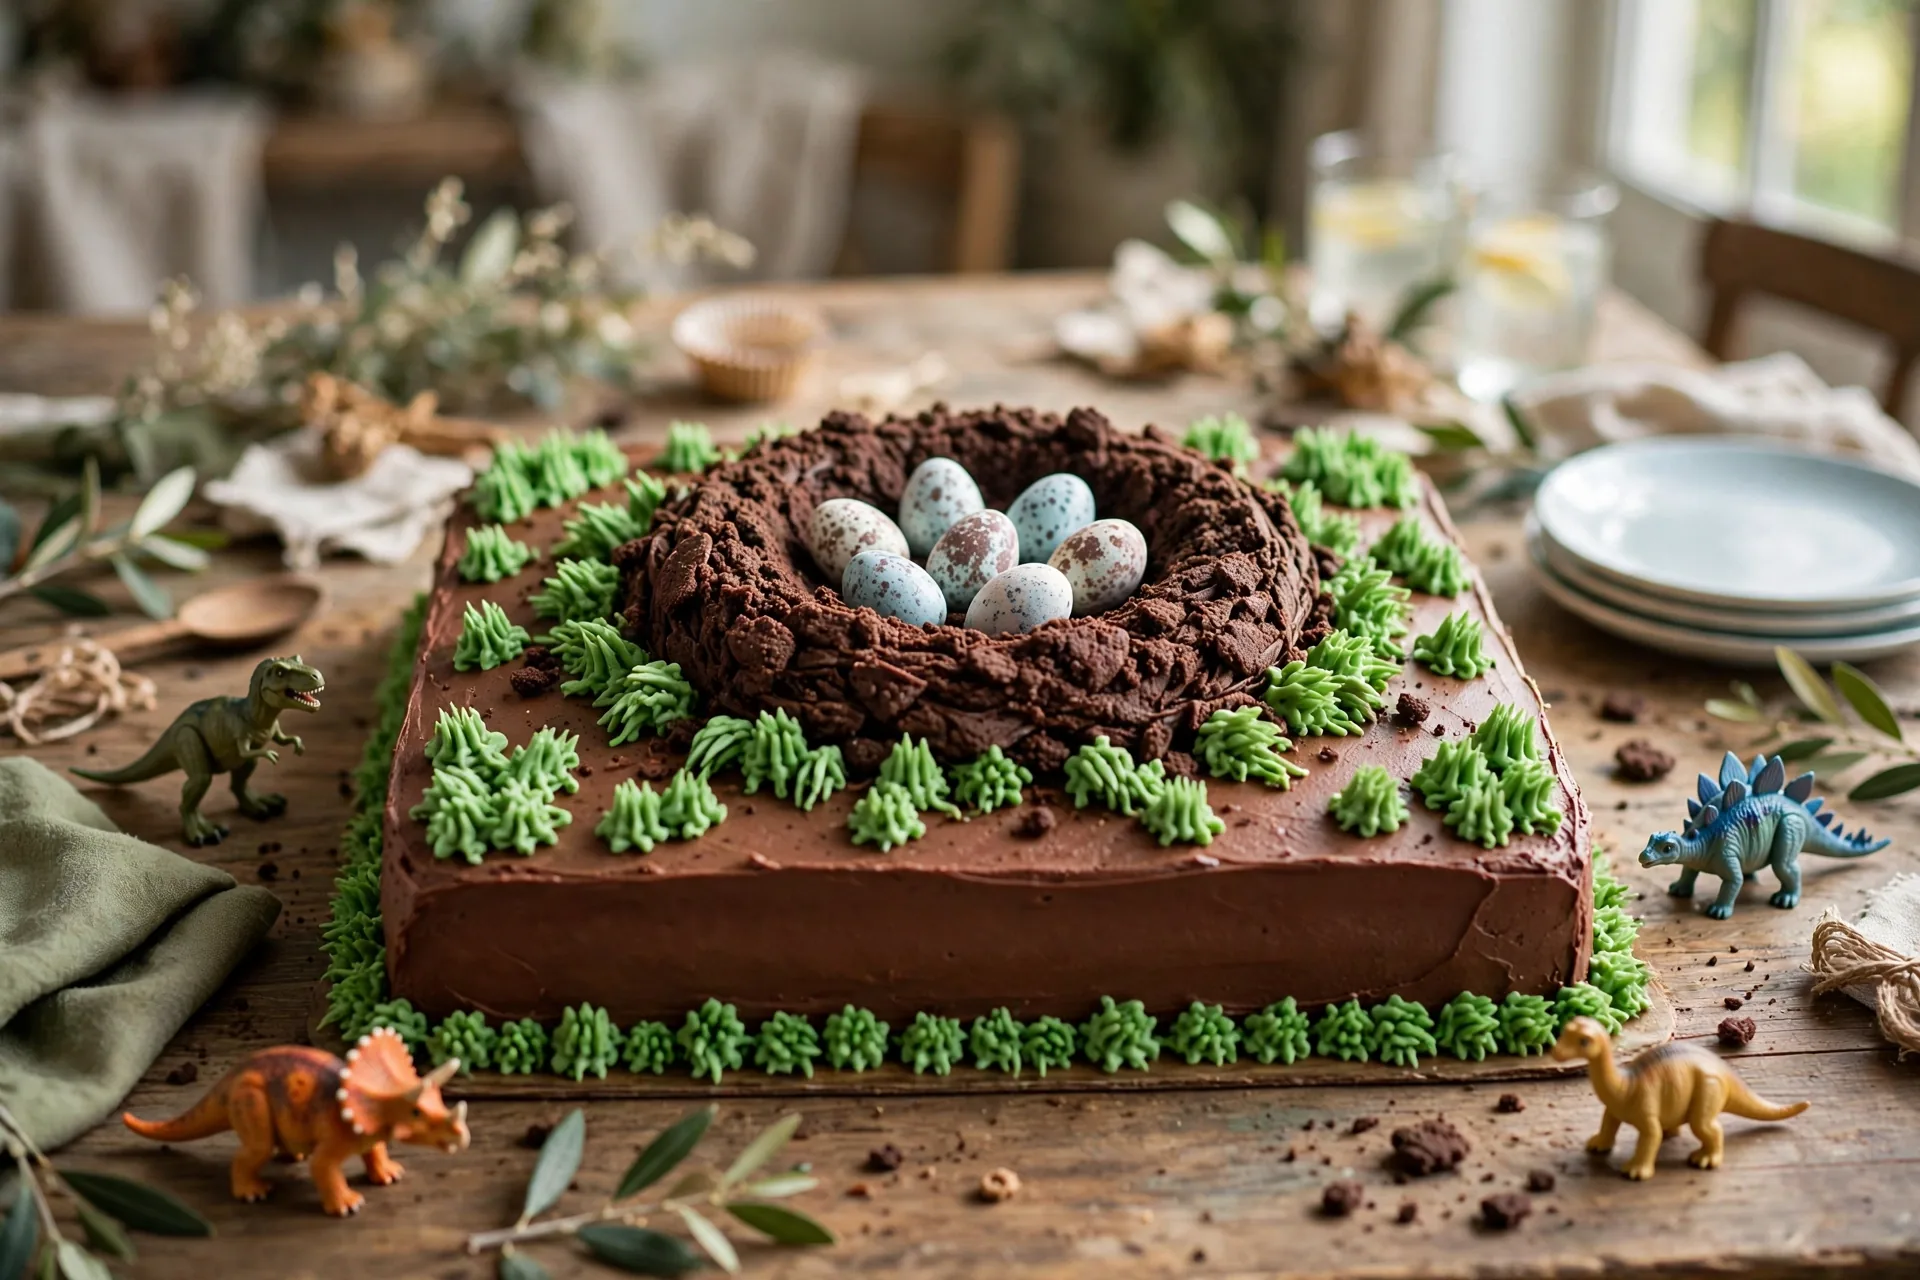
This one gets the biggest gasp from the under-5 crowd, and it is a sheet cake. Frost it chocolate (dirt, again), then build a nest: pipe or pile a ring of crushed chocolate cookies in the middle, and settle speckled candy eggs into it. Chocolate mini eggs in pastel speckles look the most realistic, and a few piped green frosting blades of grass around the nest sell the jungle.
Here is the under-3 safety call to make before you build: candy eggs are a choking risk for toddlers. If the guest list includes under-3s, skip loose candy entirely and build the nest from soft cookies or frosted mini cupcakes arranged in a ring, with no loose pieces. Big kids get the real eggs. This is the kind of split decision that lets one cake work for a mixed-age party without anyone hovering.
For the full nest-build detail with photos of the ring method, this is also one of the builds where piped and fondant accents level it up. When you are ready for the next tier of dino decorating, our Dinosaur Fondant Cake Decorating Ideas guide has fondant eggs, leaves, and dinos.
5. The Stegosaurus Spike Cake
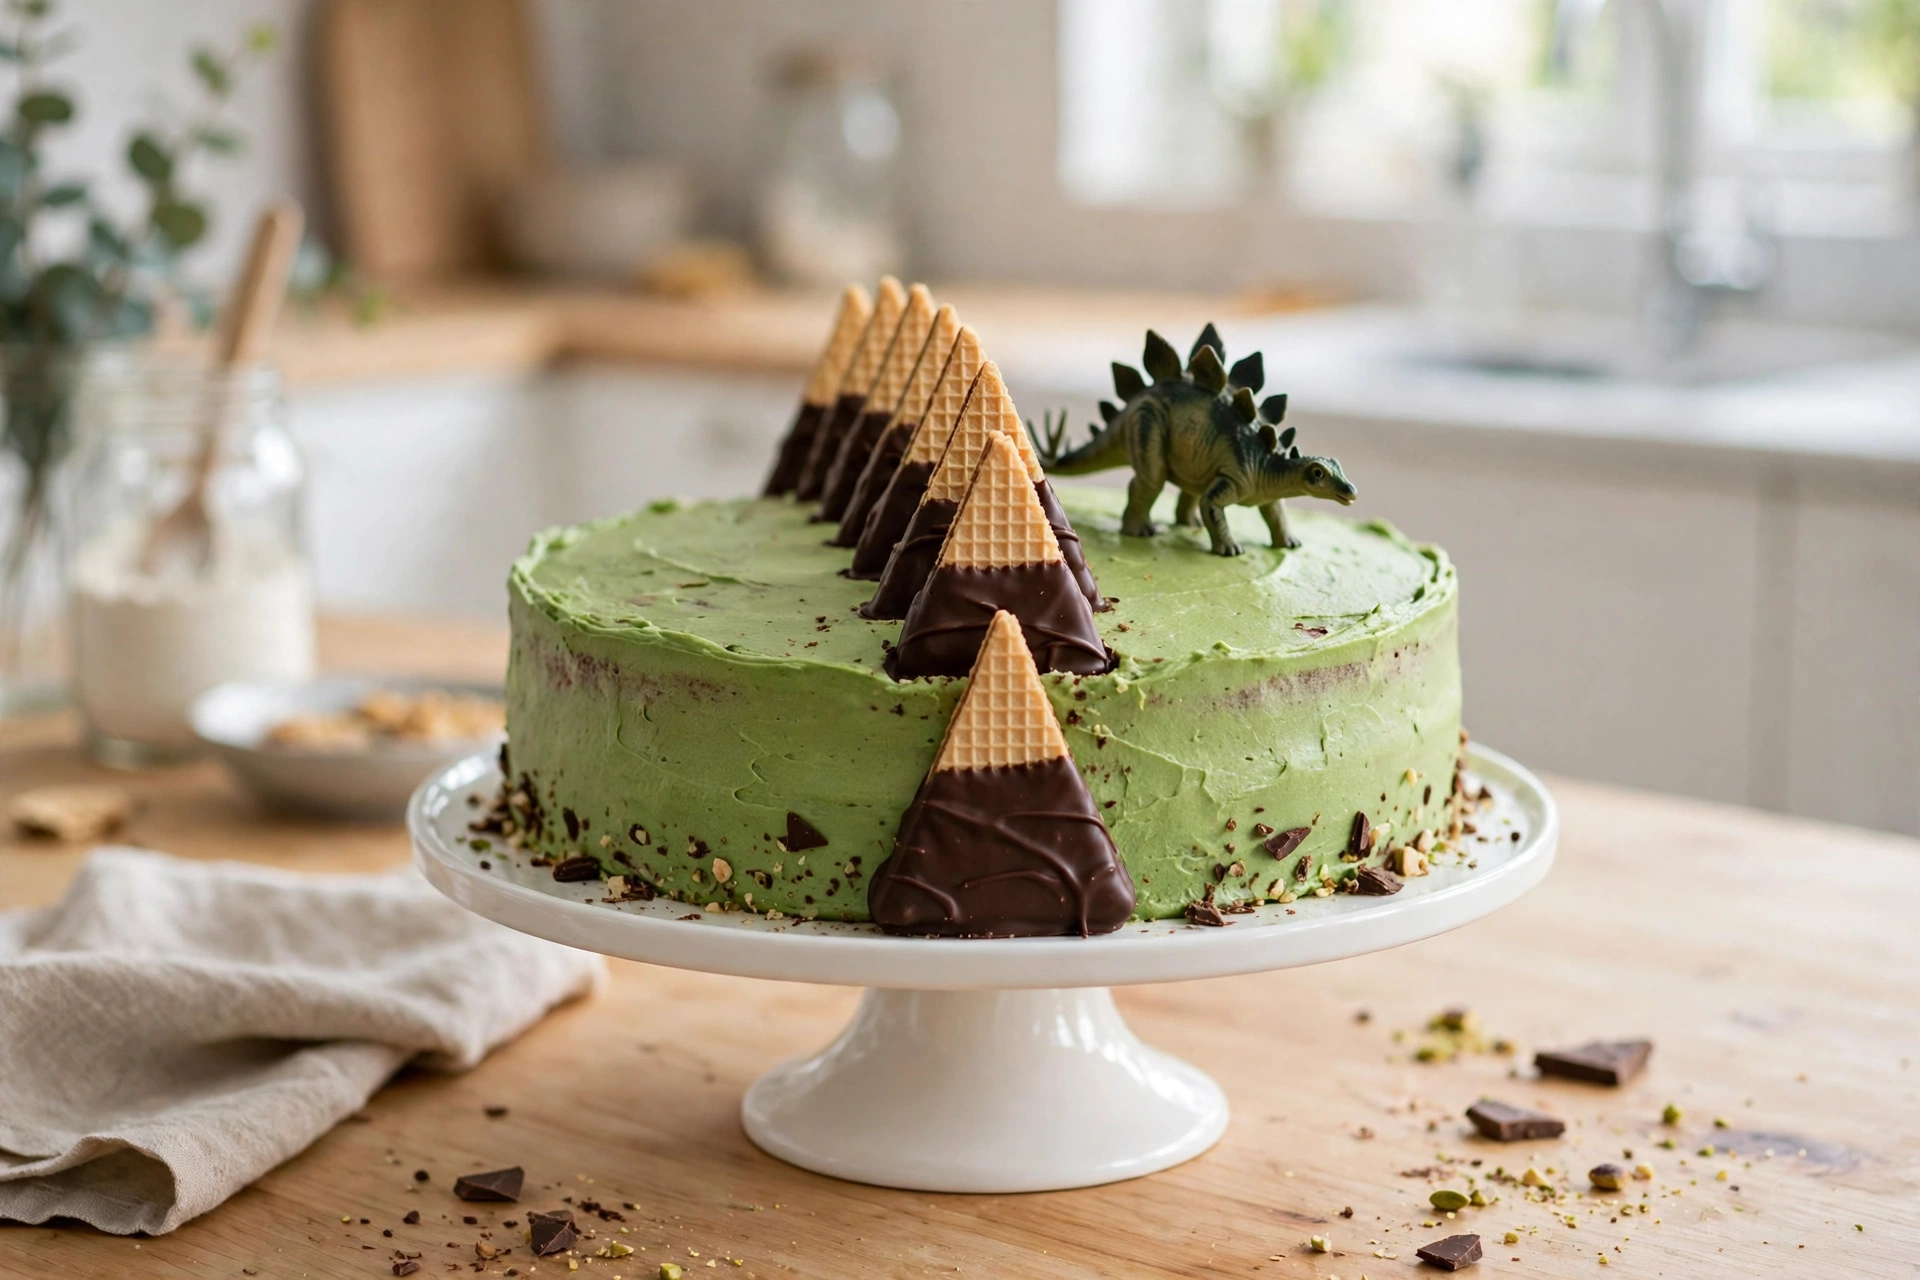
Bake one round cake, frost it green, and give it a back. Stand triangular cookies (wafer or shortbread triangles) in a row down the middle of the cake, points up, pressed into the frosting at a slight tilt. Chocolate-dipped versions look sharpest, but plain works. Chocolate chips in a row give a mini-spike version for smaller cakes or cupcakes.
This is the easiest theme signal in the guide: one row of spikes plus a toy stegosaurus on top, and nobody has to ask what animal it is. If a spike topples, it becomes rubble at the base (prehistoric, remember). For a classroom party, do the cupcake version: one mini spike per cupcake, no slicing, every kid gets the same piece.
6. The Three-Rex Number Cake
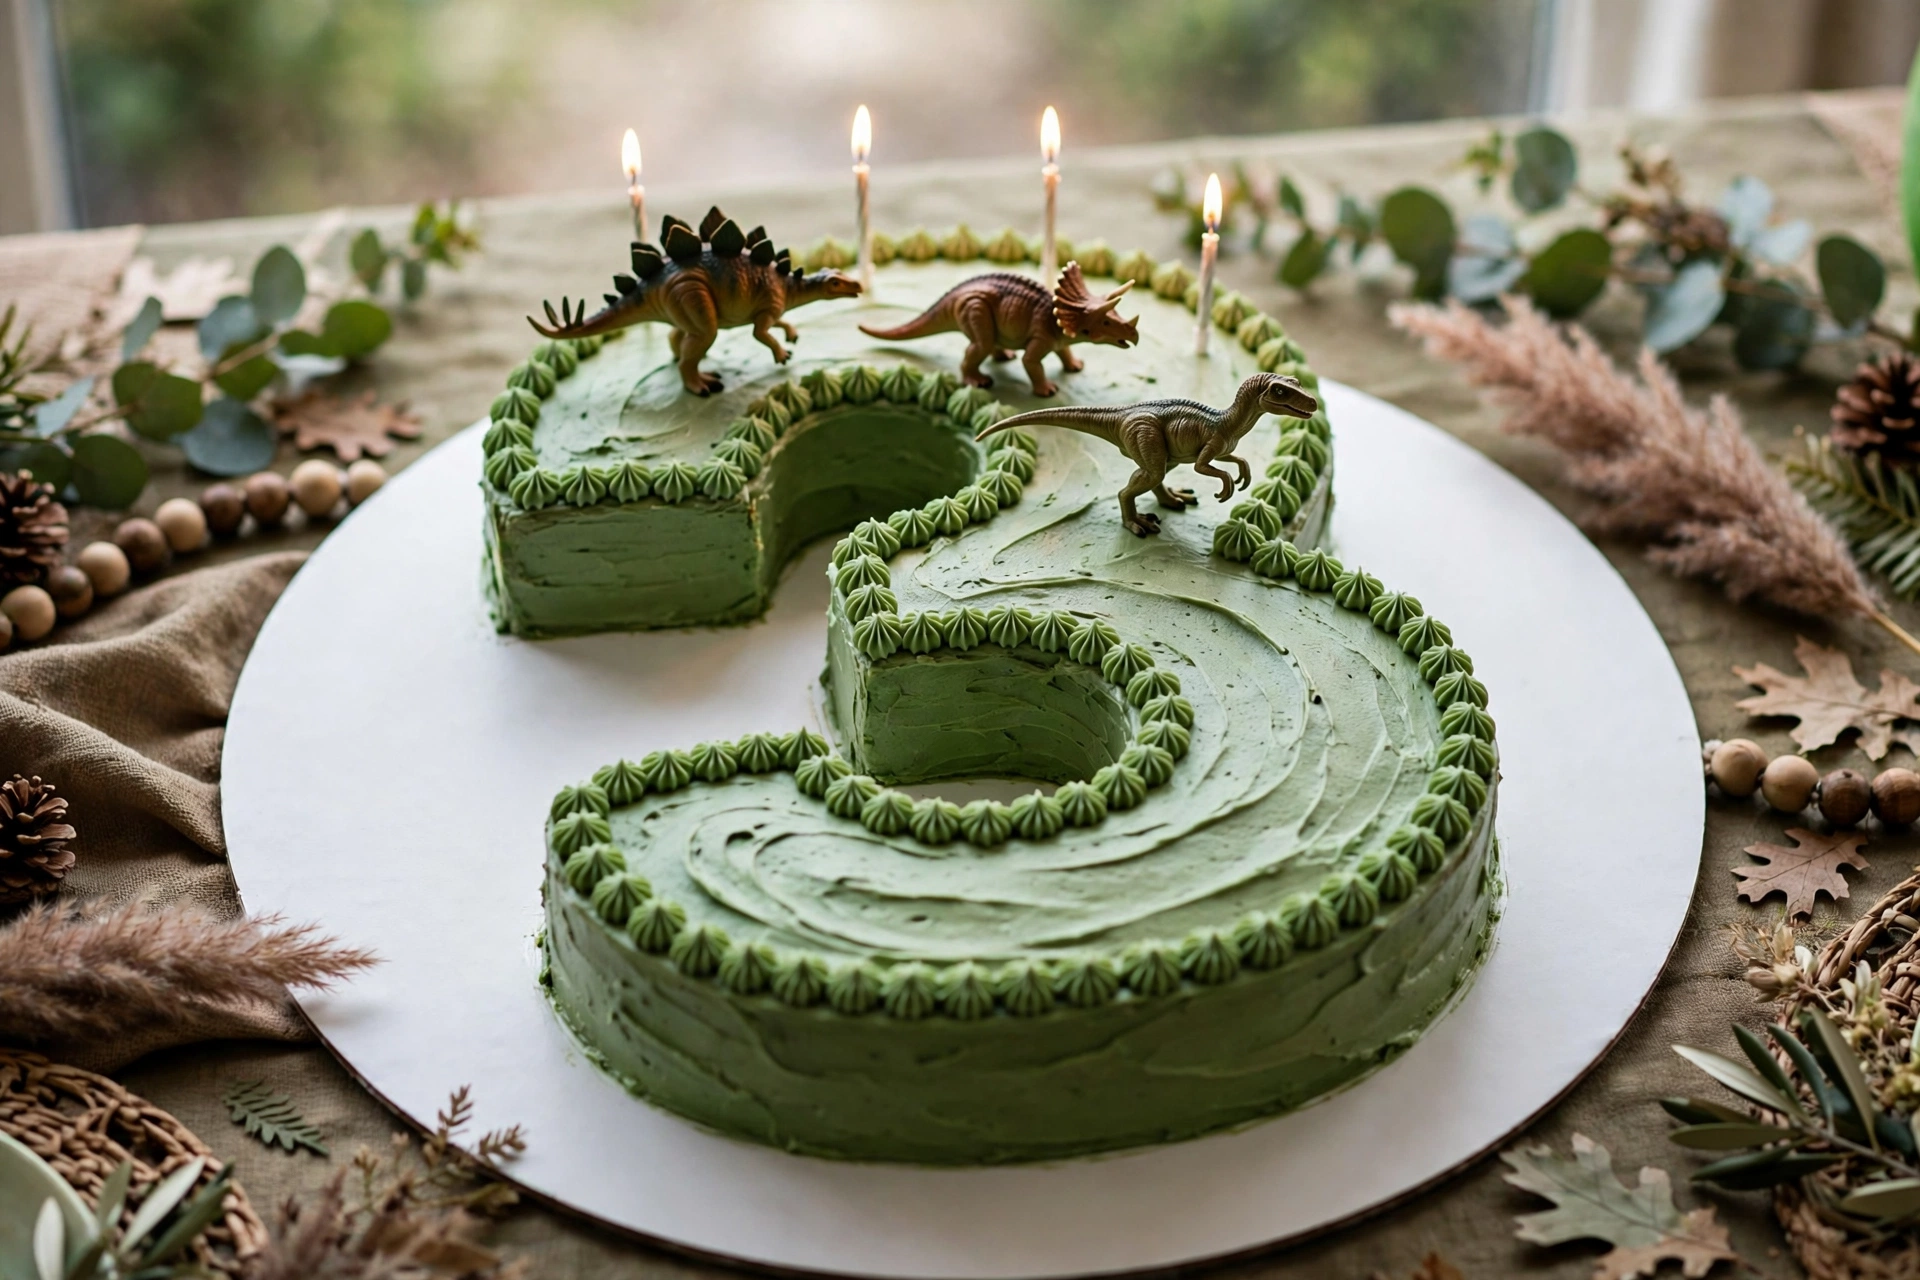
When the birthday kid is turning three, the pun writes the cake. Bake a sheet cake, lay a paper number 3 template on it, cut around it with a serrated knife, and frost green. Toy dinosaurs marching across the top turn a number cake into a dino cake in about five minutes. Frosting is the glue for wobbly edges, so do not fuss over the cut.
This works for any age the pun supports (three is the classic; four works as “Four-saurus” with a little imagination from the birthday kid). The number shape also photographs better than a round cake at the candle moment, because the shape itself is the announcement. Pair it with three candles if the age matches, or one big statement candle behind the number.
7. The Mini Dino Smash Cake
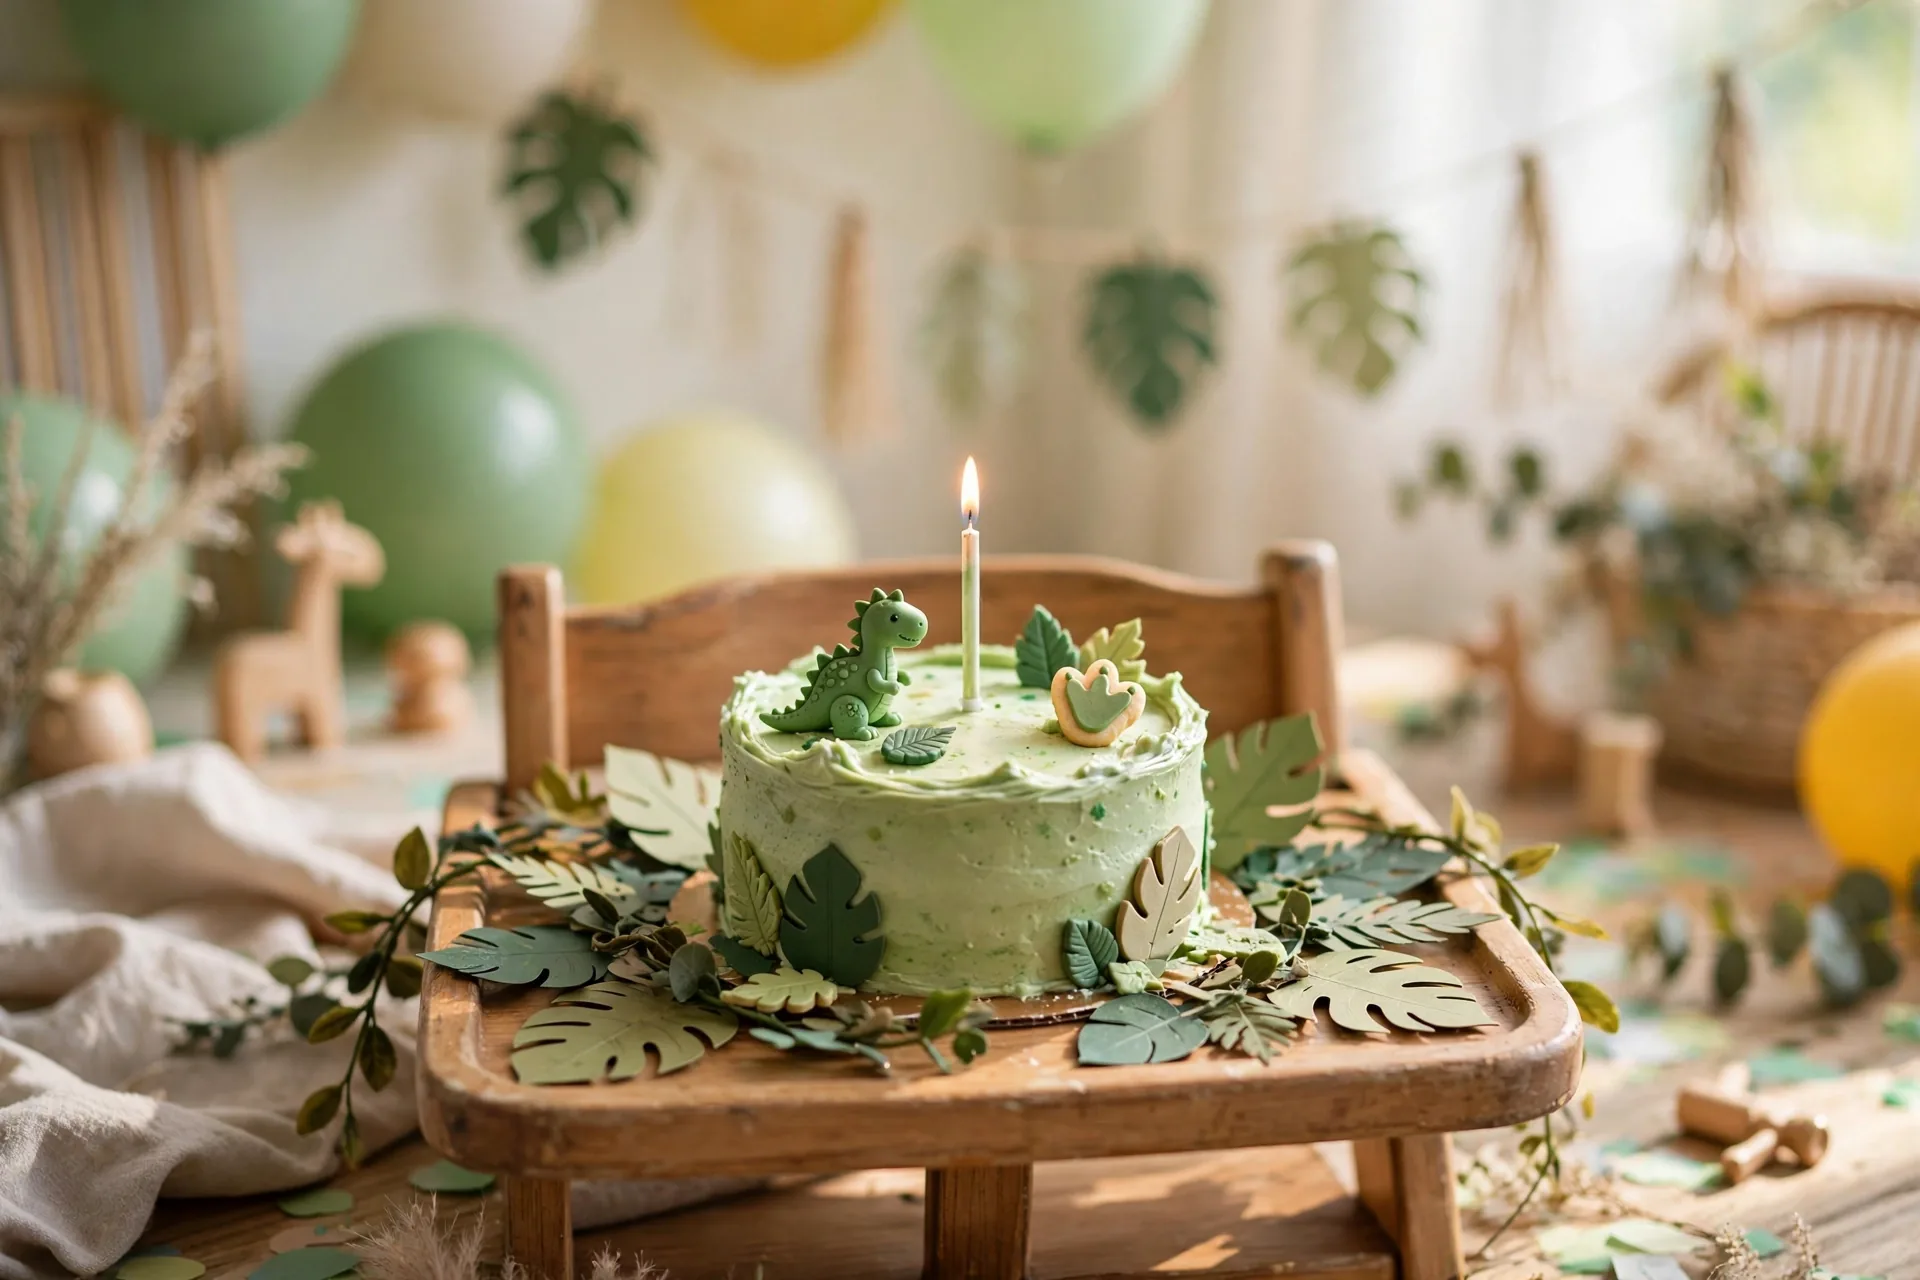
A dinosaur theme does not stop at the first birthday, and neither does the cake. The mini dino smash is a small round cake (6-inch or smaller), frosted rough green, with NO toys and NO loose candy. Decorate it with food only: piped frosting grass, a ring of soft cookie crumbs, maybe a fondant leaf or two if you are already working with fondant.
Keep the frosting soft (whipped cream or thin buttercream) so little hands can actually smash it, and put a towel under the high chair because green frosting travels. Our Smash Cake guide covers sizes, flavors, and the photo playbook for first birthdays, and the two-cake system applies here: the baby destroys the mini, the guests eat the big green sheet cake from the same batter.
8. The Grocery-Store Dino Rescue
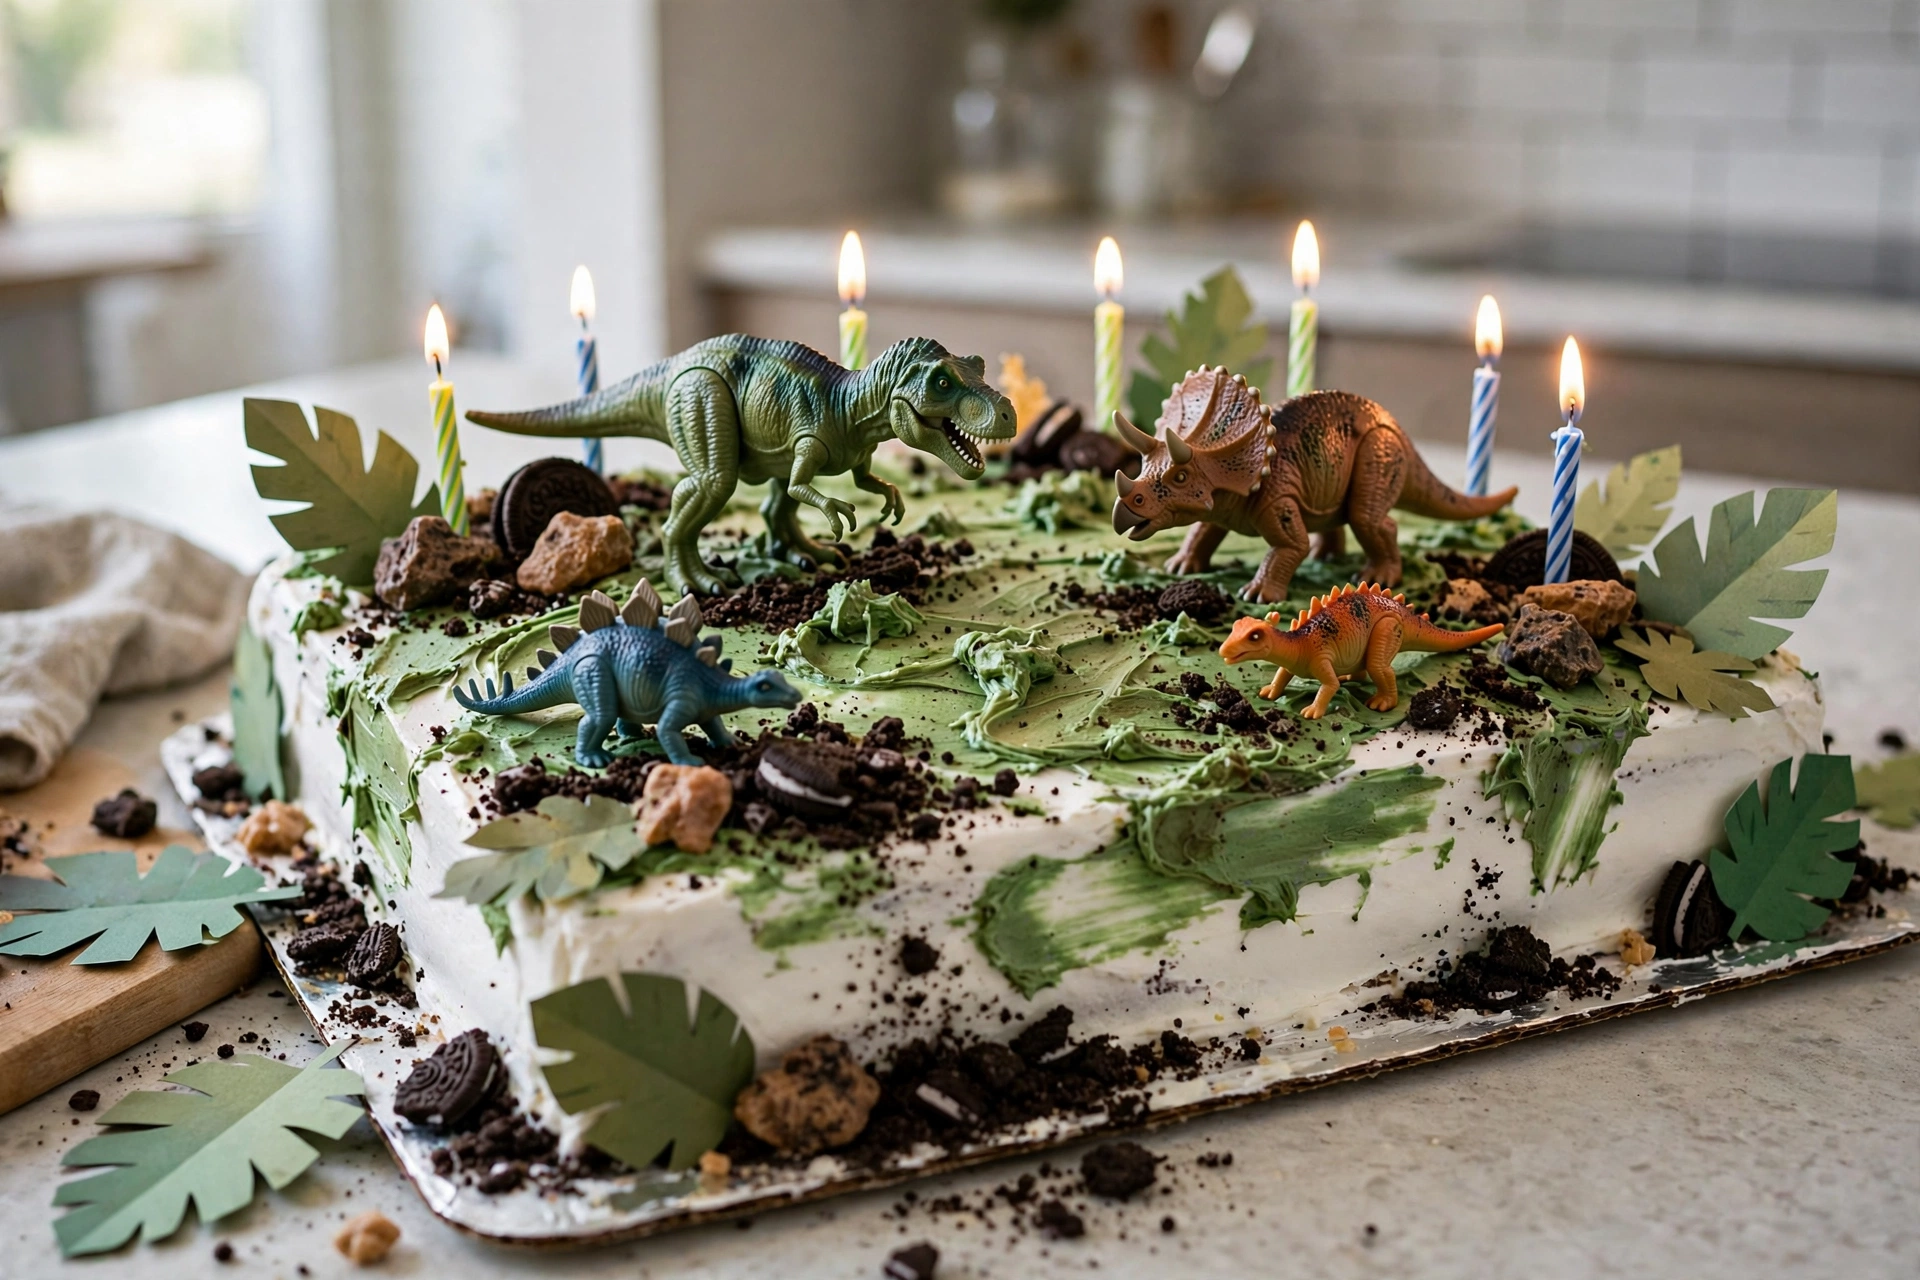
Party is tomorrow, or the cake you baked just died. Here is the rescue: buy a plain frosted sheet cake from the supermarket bakery (white or chocolate, whichever looks freshest), and re-theme it at home in ten minutes. Pipe or smear green frosting over the top if the base is white; if it is chocolate, skip straight to the dirt trick and add crushed cookies on top.
Then stomp the toy dinosaurs across it, add candy rocks and a few paper jungle leaves, and finish with birthday candles. This is cake #1 with a store-bought head start, and it works because the theme signal is the toppers, not the baking. Nobody has ever investigated a rescue cake. (The same rescue trick works for other themes too. Galaxy fans: our Space Cake Ideas guide has the rocket-topper version of this exact move.)
9. The Fossil Dig Cake

Frost a sheet cake brown or tan (chocolate frosting with a little extra cocoa deepens it), then press a fossil dig into the top. Bury white chocolate bones: pretzel sticks dipped in white candy melts make convincing bone shapes, and chocolate-covered raisins pressed into the frosting read as fossil rocks. Add a few toy dinosaur skeletons half-buried in the frosting, and serve it with a little toy brush on the side so the birthday kid can “excavate” their slice.
The bones-and-fossils version is the quietest cake in this guide (no green at all), which makes it the right pick when the dino theme needs to look a little more grown-up, or when green frosting on teeth would start a war at your table. The fossil cookies trick from party blogs works here too: press clean plastic dinosaur toys into rolled cookie dough, bake, and the imprint looks like a fossil stamp.
Toy Dinosaurs vs Edible Dinosaurs: Which One?
You have two honest options for the creatures on the cake, and neither is wrong.
Toy dinosaurs (what we use most). A bag of clean mini figures is washable, reusable, and the kid keeps them as the party favor after the cake. They stand up on their own, they survive frosting, and one bag covers multiple cakes. The rule never changes: wash before, lift off before slicing, small pieces nowhere near under-3s.
Edible dinosaurs. Candy dinos, chocolate dinos, and fondant dinos go straight into the serving and need no removal step. They cost more, melt in a hot car, and cannot be played with afterward, but for a cake served mostly to toddlers they are the safer choice. Pick the one that matches your guest list, not the one that photographs better.
Quick Picks: Where to Start
| Your Situation | Start With | Why It Works |
|---|---|---|
| Zero decorating confidence | The toy-topper stomp (#1) | Toy dinosaurs do all the talking |
| First birthday | The mini dino smash (#7) | Food-only decorations, baby-safe by design |
| Dramatic centerpiece | The volcano eruption (#3) | Lava drama from a carved cone |
| Biggest photo gasp | The cut-and-arrange dino (#2) | A real dino silhouette from one cut |
| Party is tomorrow | The grocery-store rescue (#8) | Ten minutes, store-bought base |
| Under-3s on the guest list | The egg-nest cake (#4) or fossil dig (#9) | Easy to build with no loose candy |
Shop This Post
Everything we used in this guide, in one place:
| Product | Used For | Price |
|---|---|---|
| Kindersee Mini Dinosaur Figures & Skeletons, 24 Pieces |
Toy toppers on cakes #1, #3, #6, and #8 (washed before, lifted off before slicing) | Check Price |
Green gel food coloring, chocolate sandwich cookies, and candy eggs appear throughout this guide as grocery-store supplies: no link needed, buy whatever brand your store carries.
Dinosaur Cake Questions Moms Actually Ask
Are toy dinosaurs on a cake safe?
Yes, handled like bakeries handle them: wash the toys in warm soapy water and dry them fully before they touch frosting, push them in so they stand, and lift every toy off the cake before you slice. Keep small figures and loose candies away from under-3s entirely. For the littlest guests, decorate with food only.
How do I get green frosting without the bitter taste?
Use gel coloring, not liquid, and add it a little at a time to white vanilla buttercream. The color deepens as it sits, so stop one shade lighter than you want. If you need very dark green, start the night before so the color develops instead of you adding more. Chocolate bases (volcano, dirt cakes) need no tinting at all.
Can I make the dinosaur cake the day before?
Bake and frost the day before, yes. A frosted buttercream cake holds happily overnight in the fridge. Add the toppers, candy eggs, and any lava piping the morning of: red frosting weeps, candy goes sticky, and toppers pressed in too early can slide. The volcano’s lava is a same-day-only job.
What about the volcano: is it hard?
It is the most involved cake here, but the carving is forgiving: shave a cone slowly with a serrated knife, crumb coat it, chill it, and the frosting covers the sins. The lava is just red-tinted frosting piped around a hollow. Grown-ups handle the candle, and it goes behind the volcano, not inside the mouth.
The cut-and-shape dino confuses me. Simplify it?
Bake two 8-inch rounds. Cut ONE wedge out of the stack. Half the wedge is the head, half is the tail, the rest is the body. Chill 30 minutes, frost green, chips for spikes, dots for eyes. That is the whole thing: one cut, not a geometry project.
You do not need sculpting skills to make a kid roar. You need green frosting, some cookie dirt, and one good idea. You now have nine. Happy birthday to your favorite little dinosaur.
More cake guides on MamaKinder