
Smash Cake: 9 Tips for the Perfect First Birthday Photos

A smash cake is the little cake your one-year-old destroys on camera while the “real” birthday cake stays pretty for the guests. It is one of the sweetest first-birthday traditions, and one of the easiest to get wrong. Order the wrong cake and your baby just stares at it. Skip the prep and the best photos happen five minutes after everyone gives up.
These 9 smash cake tips cover what size to order, when to book the bakery, how to set up a living-room photo corner, the shoot order that saves your pictures, and what to do when your baby refuses the frosting. Our Birthday Cake Ideas guide has the full party dessert picture; this one is all about the smash.
Heads up: this post contains affiliate links. If you buy through them, MamaKinder may earn a small commission at no extra cost to you, and it helps keep these guides free.

First, the Two-Cake Rule
Every tip below assumes you have TWO cakes: a small smash cake for the baby to destroy, and a separate, larger birthday cake for serving guests. Once a one-year-old has dug into it, there is no cutting pretty slices for grandma, and a cake sized right for tiny hands will never feed a party.
| Smash cake | Party cake | |
|---|---|---|
| Job | Get destroyed on camera | Feed the guests |
| Size | 4 to 6 inches, single tier | Whatever feeds your guest list |
| Decoration | Simple buttercream, light colors | Go as fancy as you like |
| Timing | Ordered 2 to 3 weeks out | Your normal party cake plan |
With that settled, the nine tips.
The 9 Tips
1. Order a Small, Simple Cake in Light Colors

The perfect smash cake is a 4 to 6 inch single-tier cake with soft buttercream frosting in white or pastel shades. Small matters: next to a one-year-old, a tiny cake looks like a big mess even when the baby only dents it. A big cake next to a tiny baby just looks like a cake nobody touched.
Frosting type matters even more. Buttercream smashes beautifully because little hands can squish it. Fondant does not smash well; it is chewy and babies struggle with it, so ask the bakery to keep fondant off entirely. Ask for vanilla or funfetti with plain buttercream. Skip chocolate cake for photos: it reads like dirt on a baby’s face and hands, and dark icing stains. Light colors keep the mess photogenic.
Order the cake at room temperature, not chilled, on the day. A cold, firm cake frustrates the baby; a room-temp cake gives in with one good grab.
2. Book the Bakery Two to Three Weeks Out

Smash cakes are custom orders, even the simple ones, and bakeries need lead time. Put it on the calendar the same week you book anything else for the party.
| When | What to do |
|---|---|
| 3 weeks out | Message the bakery: “4 to 6 inch single-tier vanilla smash cake, plain buttercream, light pastel colors, no fondant, pickup the morning of the party.” |
| 2 weeks out | Confirm pickup time and pay any deposit. |
| 1 week out | Buy the extras: balloons, a white backdrop sheet, wipes, a towel, a change of clothes. |
| 2 to 3 days before | Do the taste test (tip 4). |
| Party morning | Pick up the cake and keep it at room temperature; do not refrigerate before the smash. |
If you are hiring a photographer, book even earlier, when your baby is around 10 or 11 months, so the finished photos are ready for the actual birthday. Tell the bakery it is a smash cake; bakers know the drill and will keep decorations baby-simple.
3. Baking It Yourself Is Fine (Keep It Honest)

You do not need a bakery. A box-mix vanilla cake in a 4 or 6 inch pan, frosted with simple American buttercream, smashes just as well as a bakery cake and photographs identically in the wide shot. The camera does not know you used a mix.
Keep it genuinely simple: one or two thin layers, a crumb coat plus one smooth coat of frosting, and a few swirls or sprinkles on top. The smash destroys the decoration in the first thirty seconds, so rough edges do not matter. A revolving cake stand makes smoothing that single coat much easier; the Kootek revolving cake turntable spins smoothly and gives you even sides in one pass.
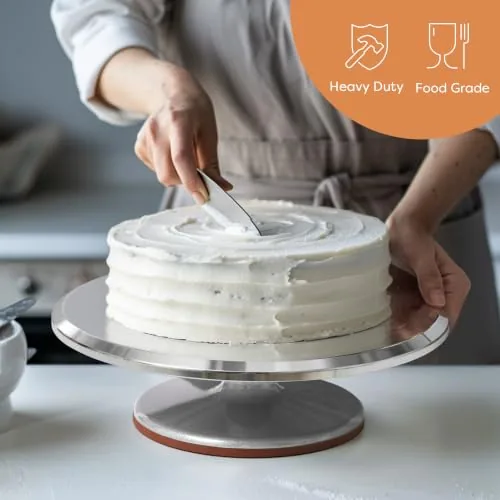
Kootek Revolving Cake Turntable
The honest helper for tip 3: a smooth-spinning turntable makes frosting a tiny 4-inch smash cake far easier, and even sides photograph better in the close-ups.
One honest boundary: if baking stresses you out, order the cake. A relaxed mom gets better photos than a perfect homemade cake ever will. Keep the frosting modestly sweet too: a lightly sweetened buttercream is easier on brand-new taste buds, and very sweet icing is one reason some babies reject the cake on first contact.
4. Do a Taste Test Two Days Before

The number one reason a smash flops is that the baby meets cake and frosting for the very first time on camera, in front of an audience, wearing an outfit. Some babies love it instantly. Many stare, poke it suspiciously, and start crying when the sticky stuff will not wipe off their hands.
Fix it two or three days before the party: give your baby a small cupcake with a dab of the same frosting the smash cake will have. Watch for allergies or sensitivities, especially to dairy, eggs, or nuts; a trial run at home is the safe place to discover a reaction, not the party. Also watch the texture reaction: some babies dislike the feel of frosting more than the taste. If yours just pushes it away, you still have time to switch to a naked or lightly frosted cake.
This one step also moves your baby past the careful exploration phase, so on party day they go straight to the joyful smashing. Let them taste at their own pace and never force a bite; the goal is familiarity, not a full dessert.
5. Shoot in This Order: Clean, Smash, Splash

The order of the photo session is a tip in itself: it protects the pictures you will actually frame. Plan the smash for your baby’s happiest window, usually mid-morning after the first nap, and work in three acts.
Act one: clean portraits. Photograph your baby in a nice outfit BEFORE the cake comes out: the calm, beautiful shots for the frames and the thank-you cards, while everyone is fresh.
Act two: change into the smash outfit (tip 7), bring out the cake, and let the destruction begin. Keep it to fifteen or twenty minutes; that is the real attention window before a one-year-old is done.
Act three: the splash. Fill a small tub with warm water and bubbles nearby, and let the baby splash around for the last few photos. It doubles as the cleanup and produces some of the happiest pictures of the day, because by now your baby is relaxed and giggly. The tub shots are often the parents’ favorites.
6. Build a Five-Minute Backdrop
A clean, uncluttered background makes the photos look professional, and you can build one in your living room in five minutes. Pin a plain white or cream sheet to the wall, lay a white blanket on the floor, add a small balloon garland to one side, and tape up a paper “ONE” banner across the top.

Keep it simple and skip anything shiny or reflective behind the baby; big balloons behind the cake can cast odd colors and shadows in photos, so push them to the sides. Print the banner yourself on cardstock and it looks custom: an Epson EcoTank ET-2800 handles this well, because the EcoTank line uses refillable ink tanks instead of cartridges, so a whole birthday season of banners, name signs, and thank-you tags stays affordable. Match the banner to your party theme, whether that is our Space Cake Ideas galaxy look or our Dinosaur Cake jungle vibe.
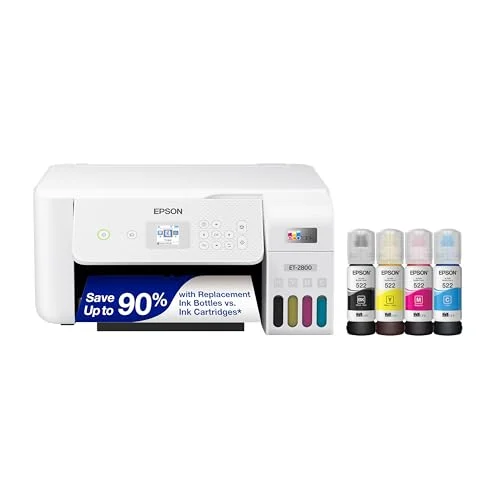
Epson EcoTank ET-2800 Printer
The big-ticket helper for tip 6: Epson’s EcoTank line uses refillable ink tanks instead of cartridges, so DIY smash-cake banners, name signs, and party printables stay affordable all season.
Set up on a hard floor if you have the choice. Wiping buttercream off tile takes seconds; getting it out of carpet takes a weekend.
7. Dress for the Mess (Two Outfits, Not One)

Plan two outfits, not one. The portrait outfit from tip 5’s act one stays clean for the frame-worthy shots. The smash outfit is the one that gets destroyed; choose something washable or disposable. Simple rompers, tutus, suspenders, or just a diaper cover all work; soft cotton wins over stiff party fabric. Let them go barefoot, and skip crowns and headbands, since those become the first thing a frosting-covered baby tries to eat.
Pack for the aftermath too: a full change of clothes for the baby, a towel, and a pack of wipes within arm’s reach of the backdrop. Parents: wear something washable too. Nobody escapes the smash zone clean.
8. Take the Photos Like This (Even on a Phone)

You do not need a hired photographer to get the shot. Set your phone to burst mode before the cake comes out; the best smash photos are the in-between moments, the first surprised grab, the frosting hand lifted in the air, and burst mode catches the ones your thumb would miss.
Get low: kneel so your camera is at the baby’s eye level, not looking down from adult height, and shoot near a big window for soft natural light. Turn off the flash; it flattens everything and startles some babies. Sing the silly song, make the ridiculous face, dance badly. A genuinely laughing baby with frosting on their nose beats a technically perfect photo every time. Our 10 Tips for an Epic DIY Cake Smash Session has the full DIY shoot playbook.
9. Stage the Cleanup Before the First Photo

Decide the cleanup before the party starts: a slippery, frosting-covered one-year-old should not wait while you figure it out.
Set up the cleanup station right next to the backdrop: the warm bubble tub from tip 5, a towel laid out flat, the change of clothes, and the wipes pack. The tub doubles as the final photo act and the bath. After the splash photos, straight into the towel, into the clean outfit, and the baby is happy while the guests are still laughing about the photos.
One safety note that runs through all of this: a smash cake is a supervised activity. Keep small hard decorations, candles, and cake toppers off the smash cake entirely; at one year old, everything goes in the mouth, and small pieces are a choking hazard for under-3s. If you want flowers in the photos, use them in the backdrop, not on the cake, unless they are confirmed food-safe and out of little hands’ reach. And stay within arm’s reach the whole time. The mess is the fun; the supervision is the job.
Shop This Post
The tools that do the heavy lifting in this guide:
| Product | Used For | Price |
|---|---|---|
| Kootek Revolving Cake Turntable |
Smoothing buttercream on a homemade smash cake (tip 3) | Check Price |
| Epson EcoTank ET-2800 Printer |
Printing DIY ONE banners and party signs (tip 6) | Check Price |
Smash Cake Questions Moms Actually Ask
When should I order the smash cake?
Two to three weeks before the party. Tell the bakery exactly what it is: a 4 to 6 inch vanilla smash cake, plain buttercream, light pastel colors, no fondant. Smash cakes are custom orders even when they look simple, and bakeries need the lead time.
What size smash cake does a one-year-old need?
Four to six inches, single tier. Next to a one-year-old, a small cake looks like a glorious mess with barely a dent; anything bigger looks untouched in photos.
What if my baby refuses to smash the cake?
It happens constantly, and it is fixable. First, do not force it; coaxing a crying baby makes the photos worse. Let them lick a dab of frosting off your finger to warm up, or smear a little on their hand so the sticky feeling stops being a surprise. Put a favorite toy or a sibling next to the cake to make the scene feel normal. And if nothing works, pivot: cut a slice and let them eat it with their hands. Eating shots are just as cute.
Can I use a chocolate smash cake?
You can, but the photos suffer. Chocolate cake and dark icing read as dirt or worse on a baby’s face and hands, and they stain everything they touch. If chocolate is the theme, a white cake with light brown buttercream gives the look without the photographic disaster.
Do I really need two cakes?
Yes, the two-cake rule from the start of this guide. The smash cake gets destroyed; the party cake feeds the guests.
Is a smash cake safe for a one-year-old?
With the basics covered, yes. Confirm no dairy, egg, or nut allergies with the taste test a few days before. Keep the cake free of small hard decorations, candles, and toppers; everything is a choking hazard at this age. Supervise within arm’s reach the whole time.
The Mess Is the Memory
A smash cake is not about the cake. It is about the photo of your baby’s face the first time they realize the frosting is delicious, the tiny toes covered in buttercream, and the laughing family pictures you will hang on the wall for years. Order the small cake, schedule it around the nap, shoot clean first and splash last, and let the mess happen. Our Kids Birthday Party Ideas guide has the games, decorations, and timeline to match. Happy smashing, mama.
More cake guides on MamaKinder


