Halloween Painted Pumpkin Ideas: 73 No-Carve Spooky Crafts
The year my oldest was three, we tried carving. The pumpkin ended up with one eye, and my daughter’s only memory of the evening is crying because “the pumpkin smells like soup.” That was our last year carving with little kids in the house. Now we paint — and honestly, the painted ones are better.
Painted pumpkins are the no-carve trick that makes Halloween crafts work for actual little hands: no knife, no fire, no slimy middle. A two-year-old can dot and smear, a four-year-old can paint a real face, and the grown-up handles the spooky details. Here are 73 painted pumpkin ideas using nothing sharper than a paintbrush — every one carving-free, from the five-minute ghost to the porch-stopping chalkboard pumpkin.
Heads up: this post contains affiliate links. If you buy through them, MamaKinder may earn a small commission at no extra cost to you — it helps keep these guides free.
Quick Picks: Which Pumpkin Tonight?
| If this is you… | Start with |
|---|---|
| Toddler with zero fuss to give | #1 Ghost Family — white coat, two eyes, done |
| A 4+ who wants a “scary one” | #7 Mummy — paint-only bandages, no carving anywhere |
| Twenty minutes before dinner | #9 Dot-Print Polka Dots — eraser dots, the fastest finish |
| The porch display needs to impress | #13 Chalkboard Pumpkin — looks like a craft-store buy |
| A kid who hates spooky | #5 Candy Corn Bands — Halloween colors, zero fright |
| You want a keepsake, not a decoration | #15 Thankful Pumpkin — everyone’s writing stays on it all season |
| The porch display needs a showpiece | #46 Porch Greeter — WELCOME lettering, done in one sitting |
| A toddler who wants in on the fun | #57 Handprint Pumpkin — white handprint ghosts, keepsake for years |
The Paint Playbook (Read This First, Paint Better)
Pumpkin skin is waxy, so paint can bead up on the first coat. Wipe the pumpkin with a damp cloth and let it dry fully. Then paint two THIN coats instead of one thick one, drying between — the first may look streaky, the second covers. Painting on wet paint is how cute designs turn muddy; drying between layers is the whole secret.
Which paint depends on who’s painting. Ages 2–4: washable kids’ paint only — it cleans off hands with soap and water, but runs in rain, so those pumpkins live indoors or under cover. Crayola Washable Kids’ Paint is our house’s set. Ages 5 and up: acrylic craft paint — brighter and water-resistant for the porch, but it stains clothes, so smocks go on. Unlike our painted rocks (porous and weather-tough), pumpkin rind is waxy and delicate, so pumpkins get gentler paint and a sheltered spot.
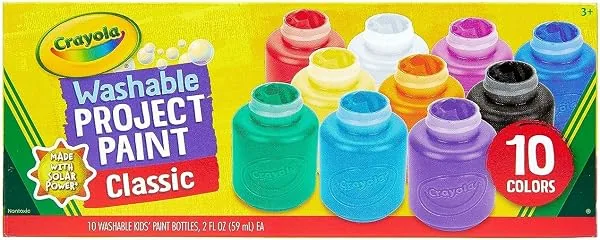
Crayola Washable Kids’ Paint — 10 Colors
The only paint that touches little hands in this guide — washes off skin with soap and water when the masterpiece is done. Ages 2–4 only.
Kid tools vs grown-up tools. Kids get brushes, sponges, and washable paint. Grown-ups get acrylic paint pens for fine details, spray sealers (always outdoors, kids inside), and anything with heat or fumes. Paint pens stay in the adult’s hand for kids under 6; googly eyes are ages 3 and up only — choking hazards for toddlers, and that rule is not flexible.
One setup trick: pour paint into a muffin tin instead of working from the bottle, cover the table with newspaper, and keep baby wipes at the table’s edge. Pumpkin painting is less messy than carving, but it is not mess-free.
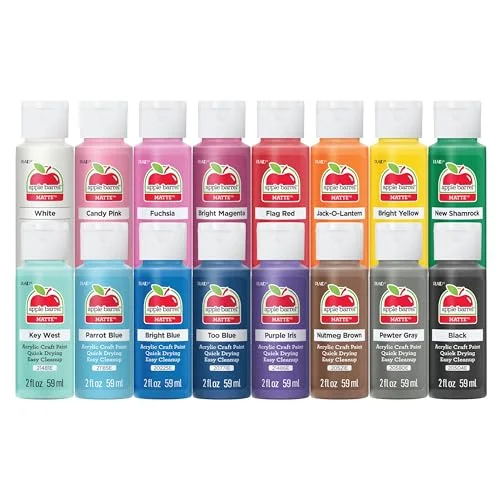
Apple Barrel Acrylic Paint Set, 16 Colors
The acrylic craft paint set behind the ages 5-and-up designs in this guide. Apple Barrel is a water-based craft paint made for surfaces like wood, paper, canvas, rocks, and pumpkins, and its 16 assorted colors cover everything from candy-corn bands to rainbow stripes without a shelf of single bottles. Wet paint cleans up with soap and water, and once dry it is water-resistant, which helps porch pumpkins hold their color. Smocks go on before the lids open, because dried acrylic stays in clothes.
The 73 Painted Pumpkins
1. The Ghost Family
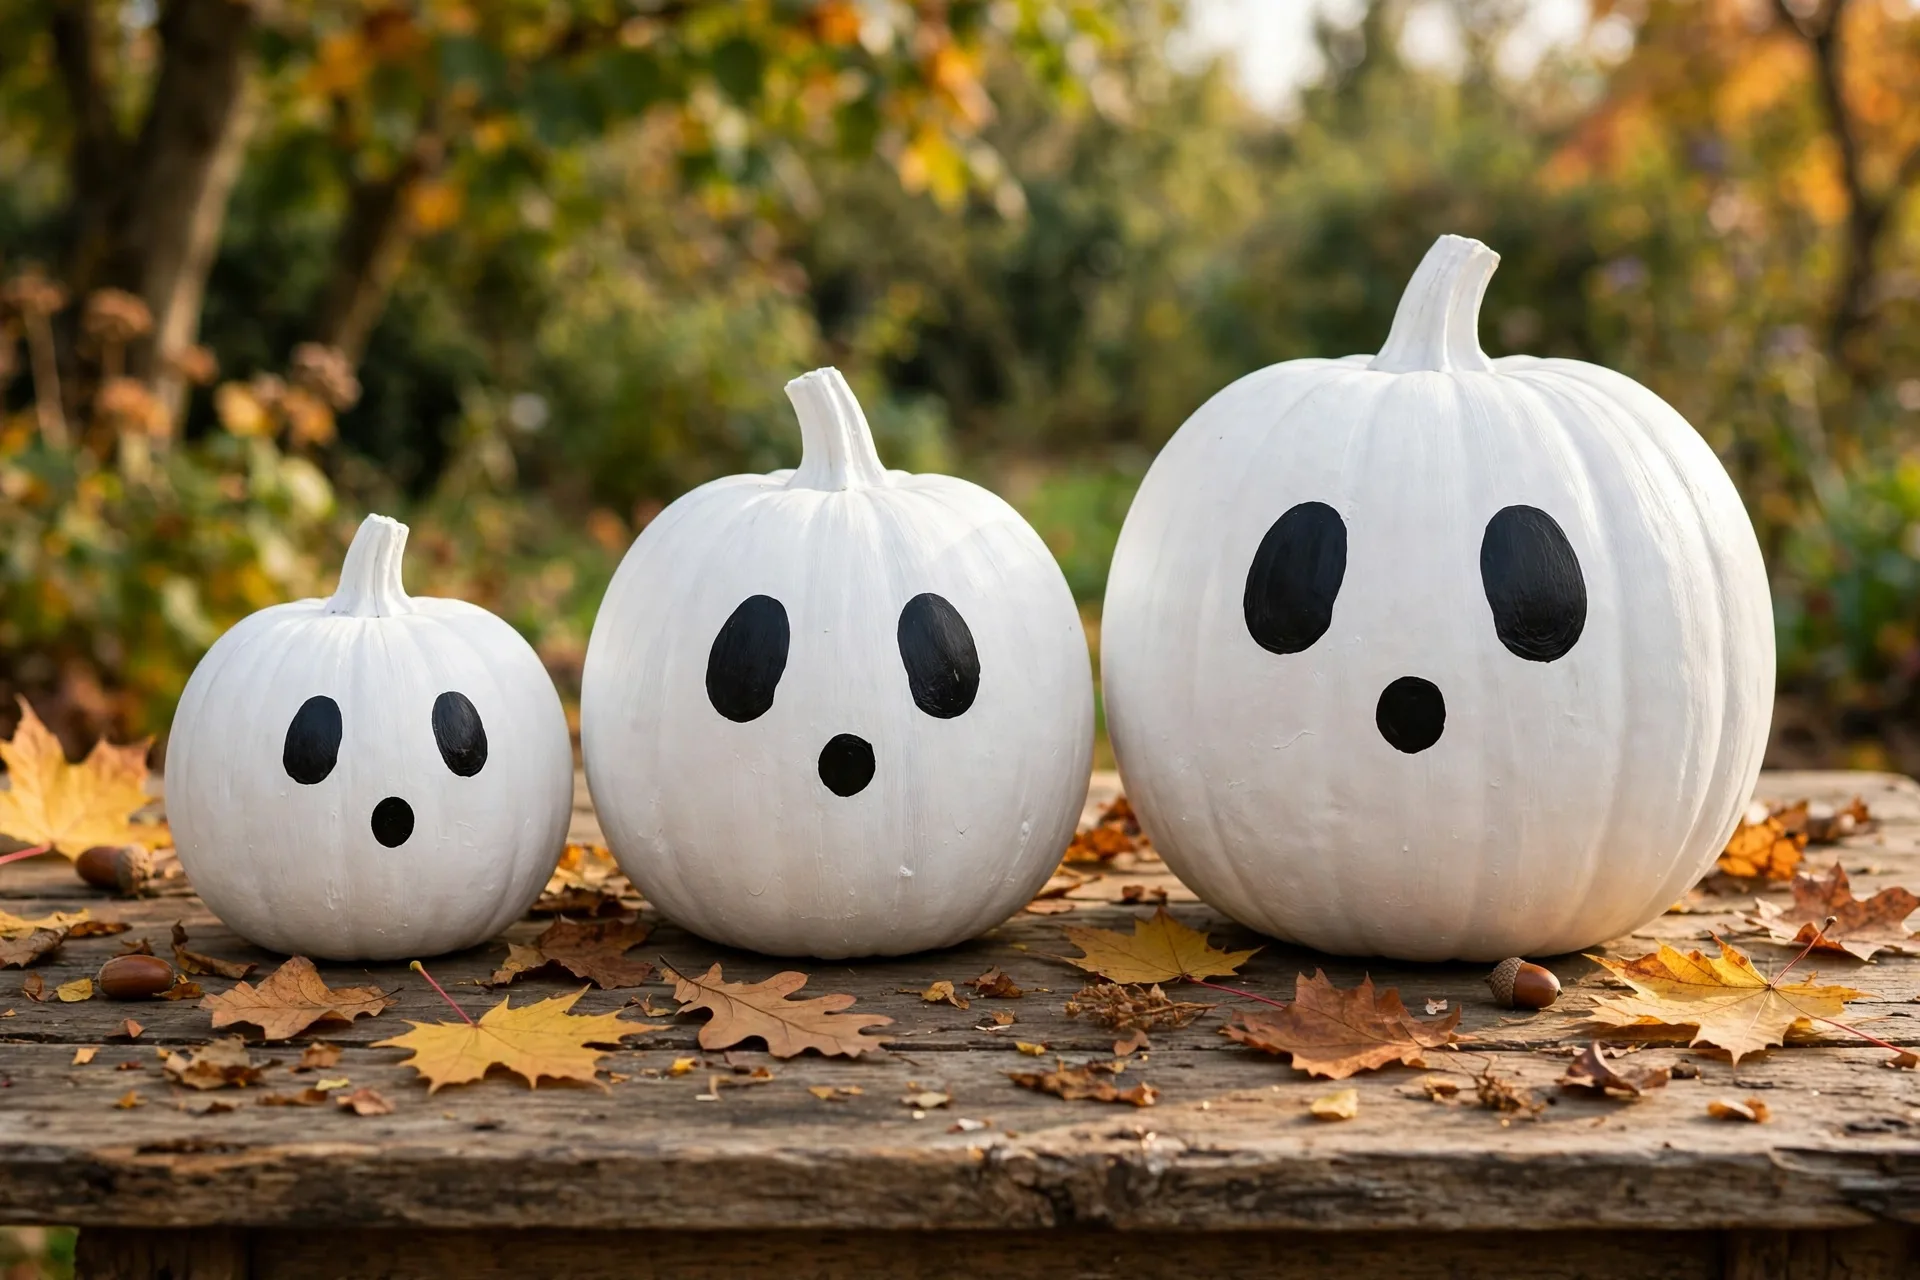
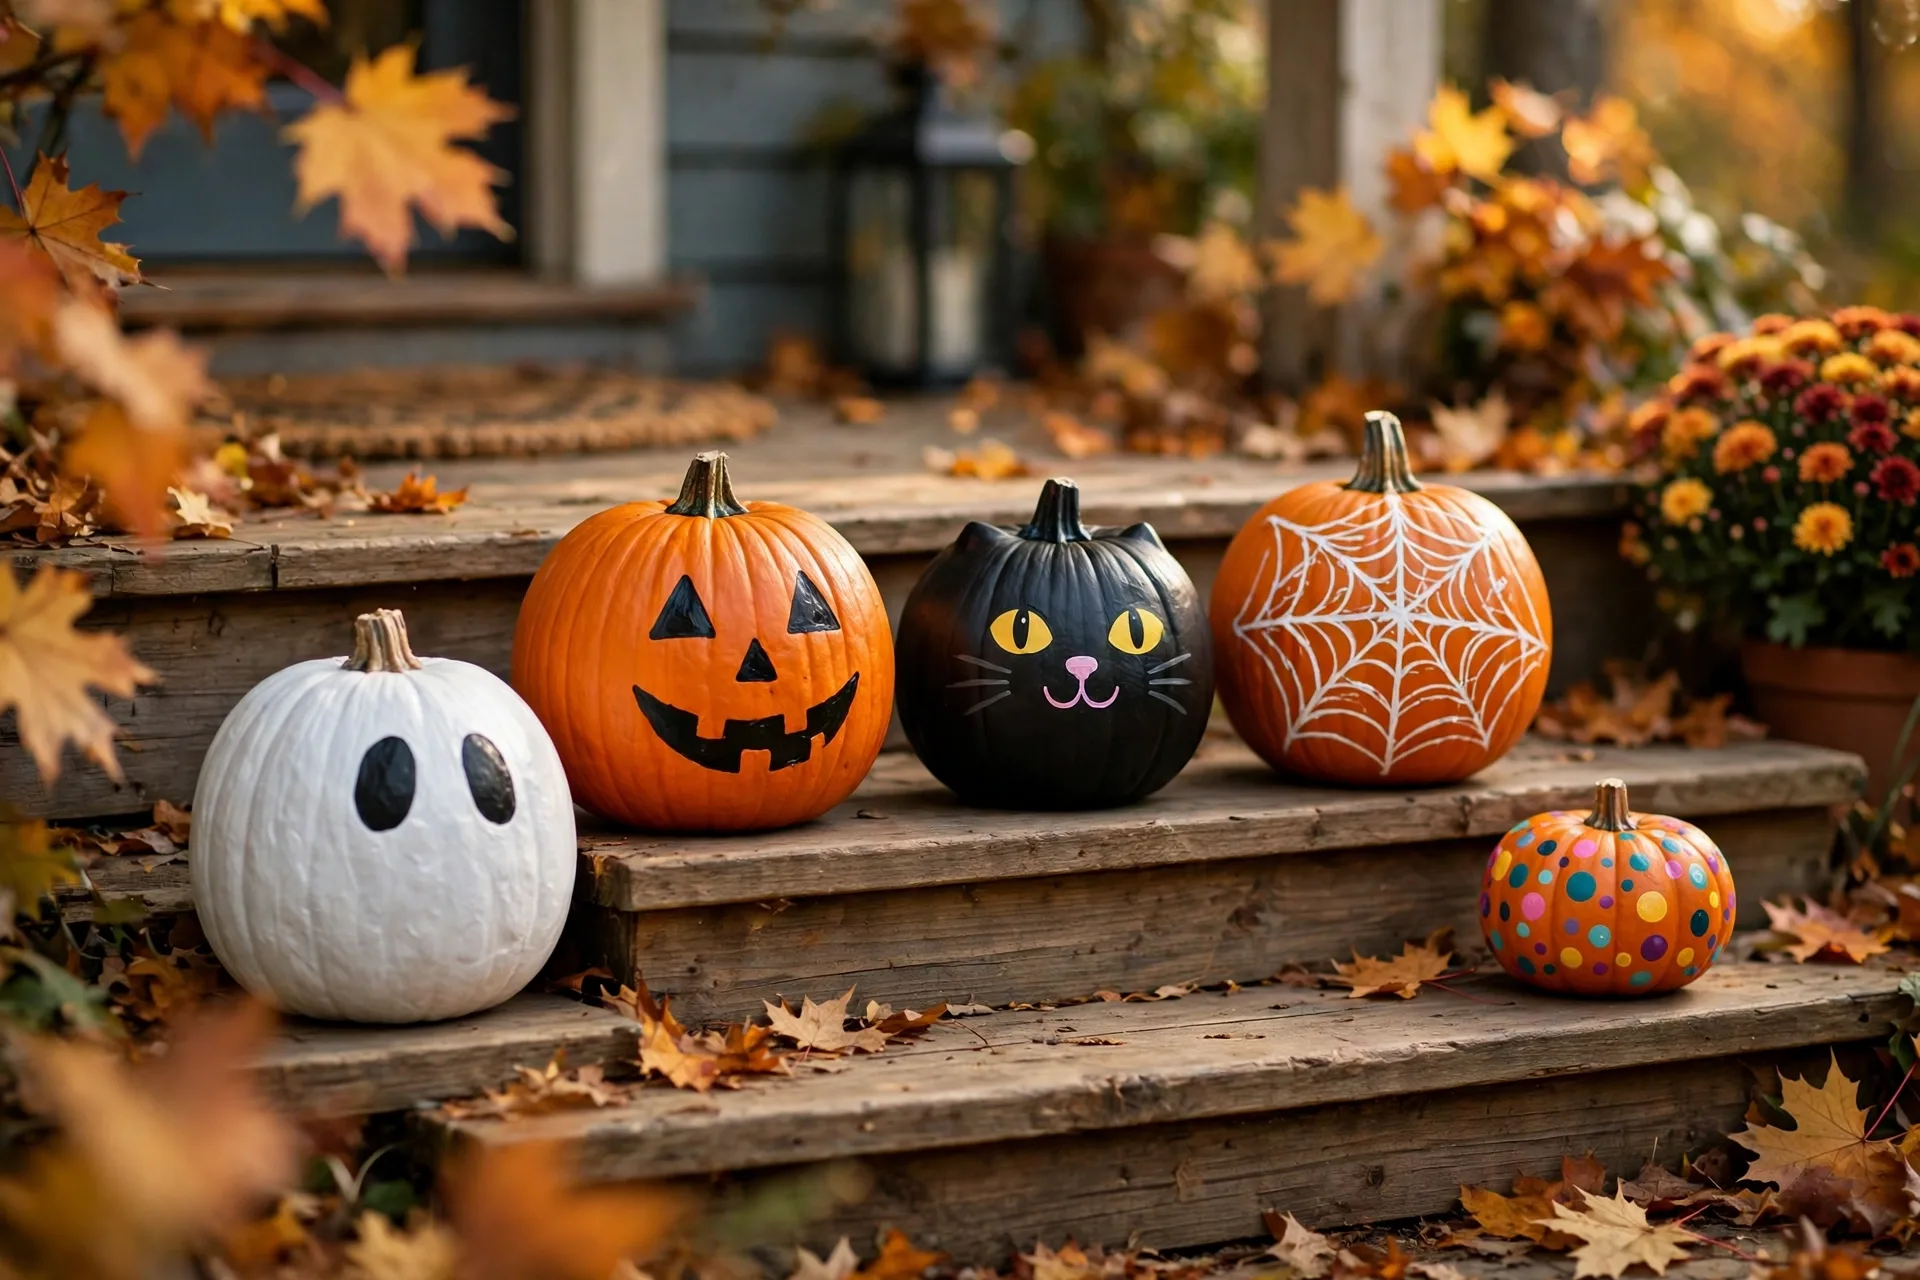
The look: a white ghost with two big black oval eyes — the five-minute classic.
How to make it: Paint the whole pumpkin white — two thin coats, drying between. The grown-up draws two big oval eyes and a small “oooh” mouth with a paint pen. Paint a family of mini pumpkins in different sizes and line them up on the porch step. At night, tuck flameless LED tea lights around them — the white paint catches the glow. Never a real candle near paint, ever.
Ages: 2 and up — the toddler paints the white coats; the grown-up does the face.
Paint notes: White mini pumpkins skip the painting entirely.
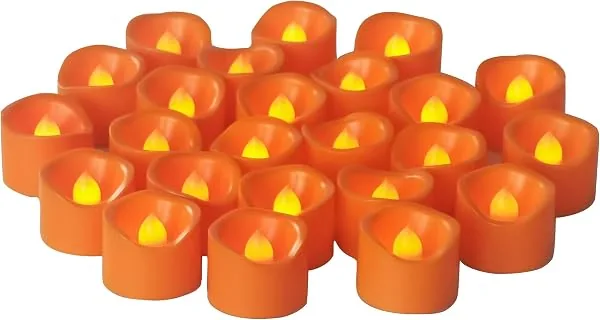
Flameless LED Tea Light Candles
The night glow around the ghost family — warm flicker with zero flame near paint. For porch and mantel display only.
2. Painted Jack-o’-Lantern Faces
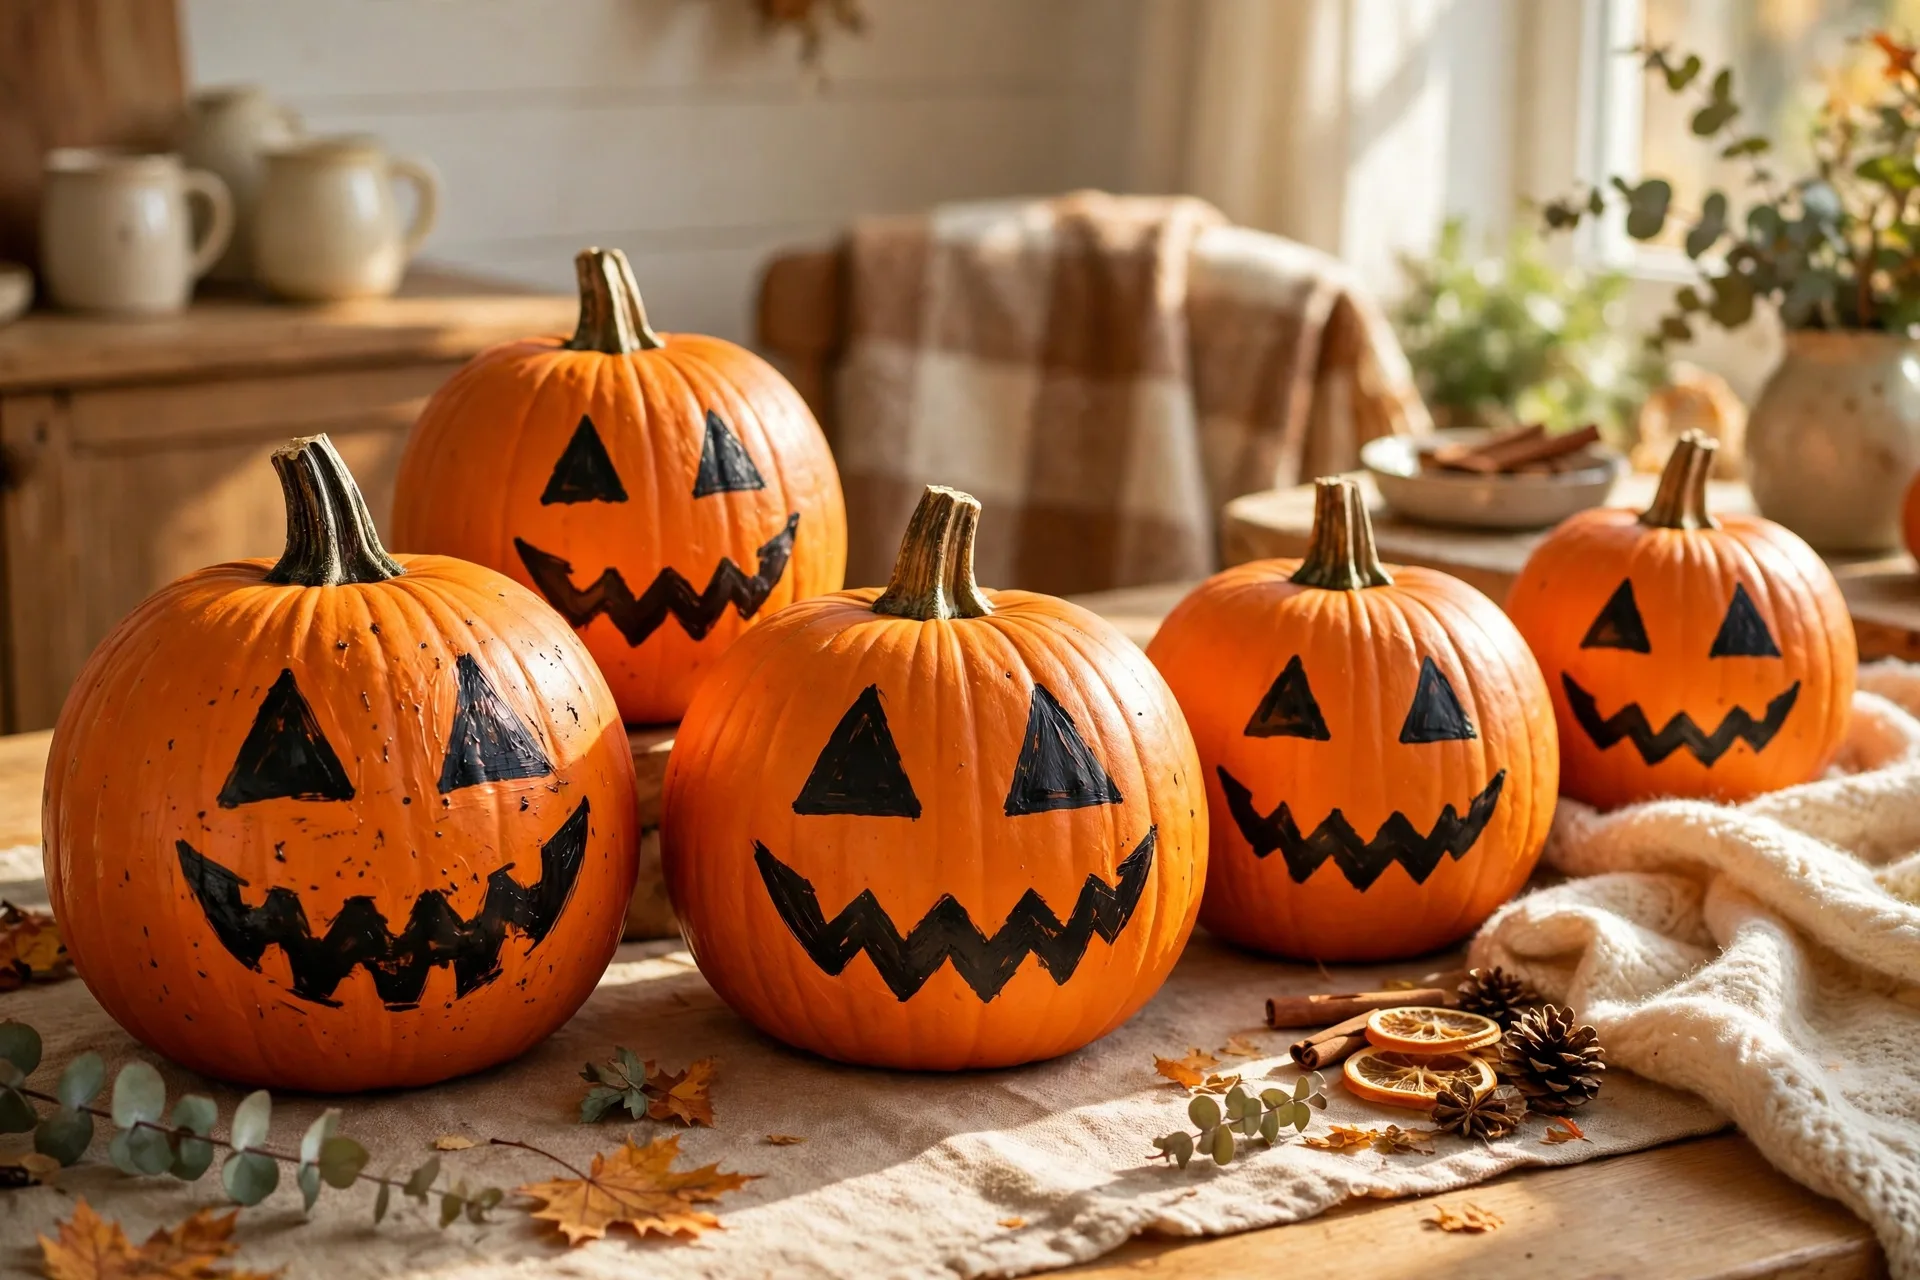
The look: the classic triangle-eyes-and-jagged-smile jack-o’-lantern, minus the knife.
How to make it: Paint the face straight onto the natural orange — black triangle eyes, a triangle nose, a zigzag grin with a brush or grown-up paint pen. “Scary” kids get mismatched eyes and crooked teeth; not-scary kids get round eyes and a smile. Paint a face on each side so it reads from the walkway and the door.
Ages: 3 and up — older kids do the whole face; younger ones paint the mouth while you do the eyes.
3. The Black Cat
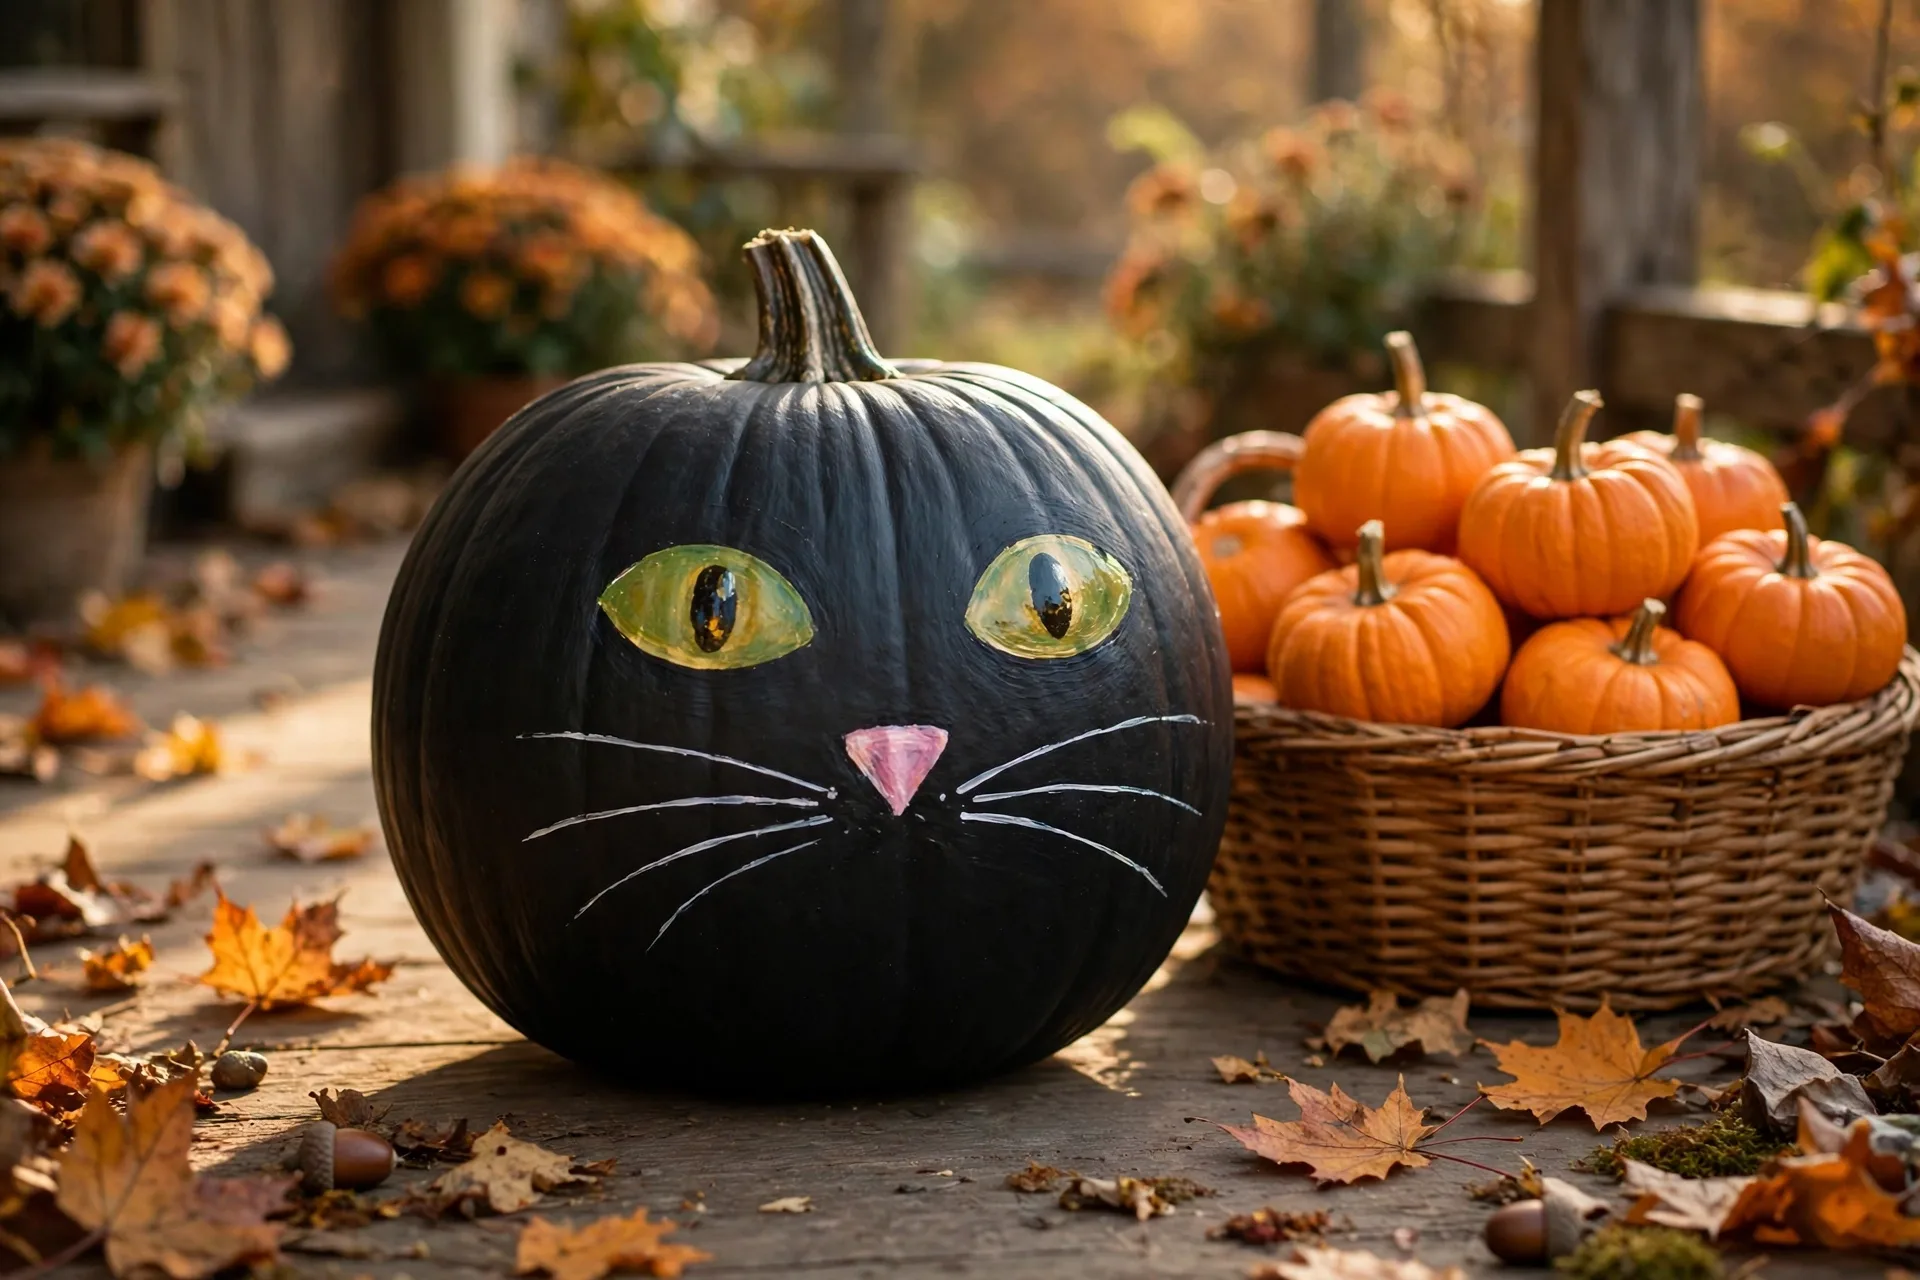
The look: a round black cat face with green-yellow eyes and white whiskers.
How to make it: Paint the whole pumpkin black — two coats. Once dry, the grown-up adds two yellow-green oval eyes, a small pink triangle nose, and six thin white whiskers. Glue two cardstock triangle ears near the stem with a dot of washable school glue. Pick a squat, round pumpkin — shaped like a head, not a football.
Ages: 4 and up — the black base coats are kid work; the face is grown-up work.
Elmer’s Washable School Glue — 4 oz
The glue that holds the black cat’s cardstock ears on (#3) — washable, so little hands and the table rinse clean after. One dot per ear is plenty.
4. Spiderweb + Spider
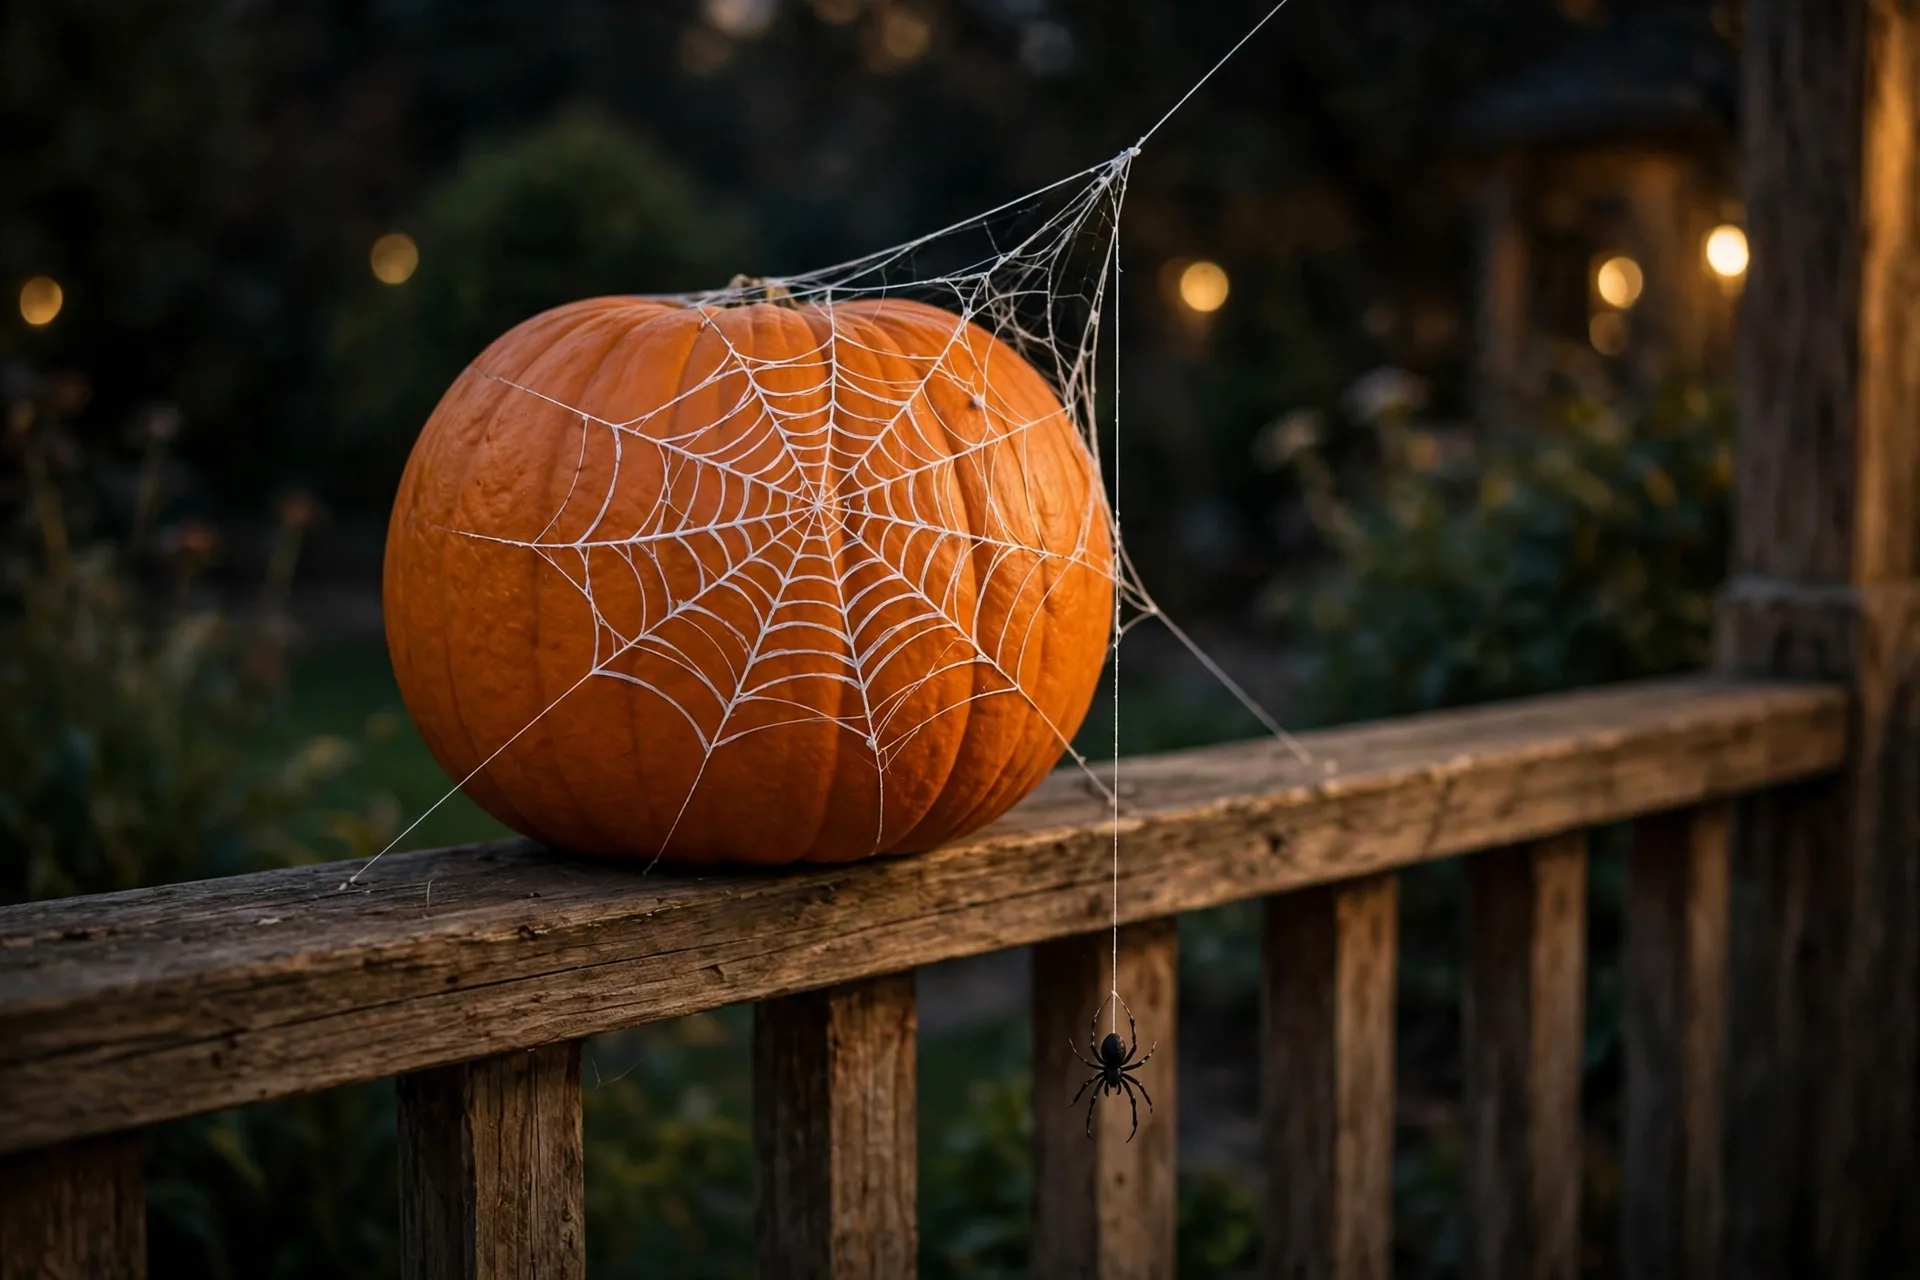
The look: a white web stretched across the pumpkin, one spider dangling in it.
How to make it: Draw several lines radiating from one point, then connect them with curved lines between the spokes. White web on a black pumpkin is dramatic; black web on natural orange is the one-color version. Then paint a small black spider — round body, smaller head, eight bent legs. Webs don’t need to be even; real ones aren’t.
Ages: 5 and up — younger kids paint the spider on a grown-up’s web.
5. Candy Corn Bands
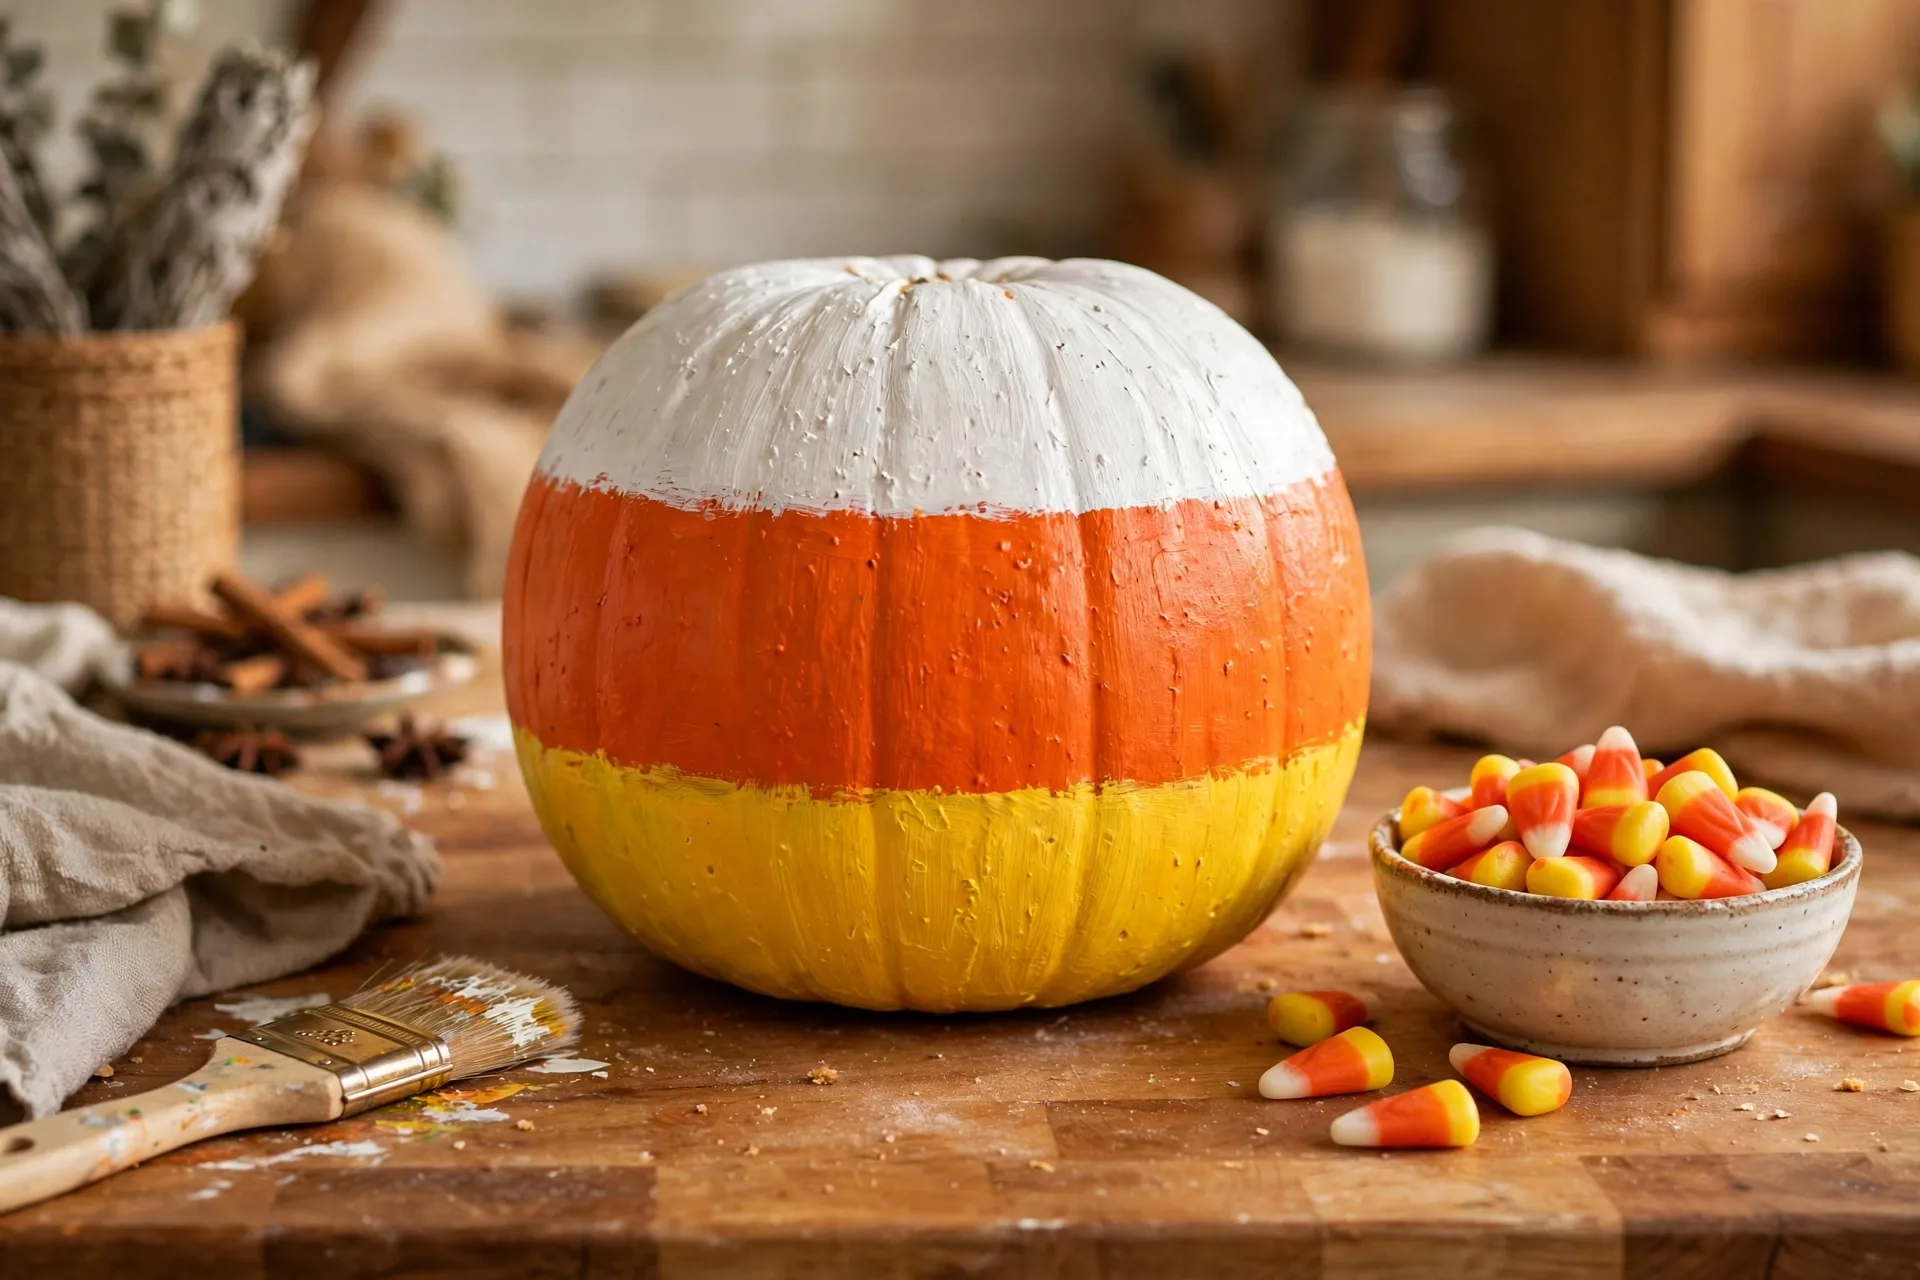
The look: the pumpkin as one giant candy corn — white, orange, yellow.
How to make it: Tape three horizontal bands around the pumpkin (or paint freehand for wobbly lines). Paint the top band white, leave the middle natural orange, paint the bottom yellow. Peel the tape while tacky for clean lines. Halloween colors, zero fright — the friendliest design here.
Ages: 3 and up — band painting is all kid work; tape placement is grown-up work.
Paint notes: The natural orange middle band means only two bands to paint — half the work.
6. Drip & Splatter
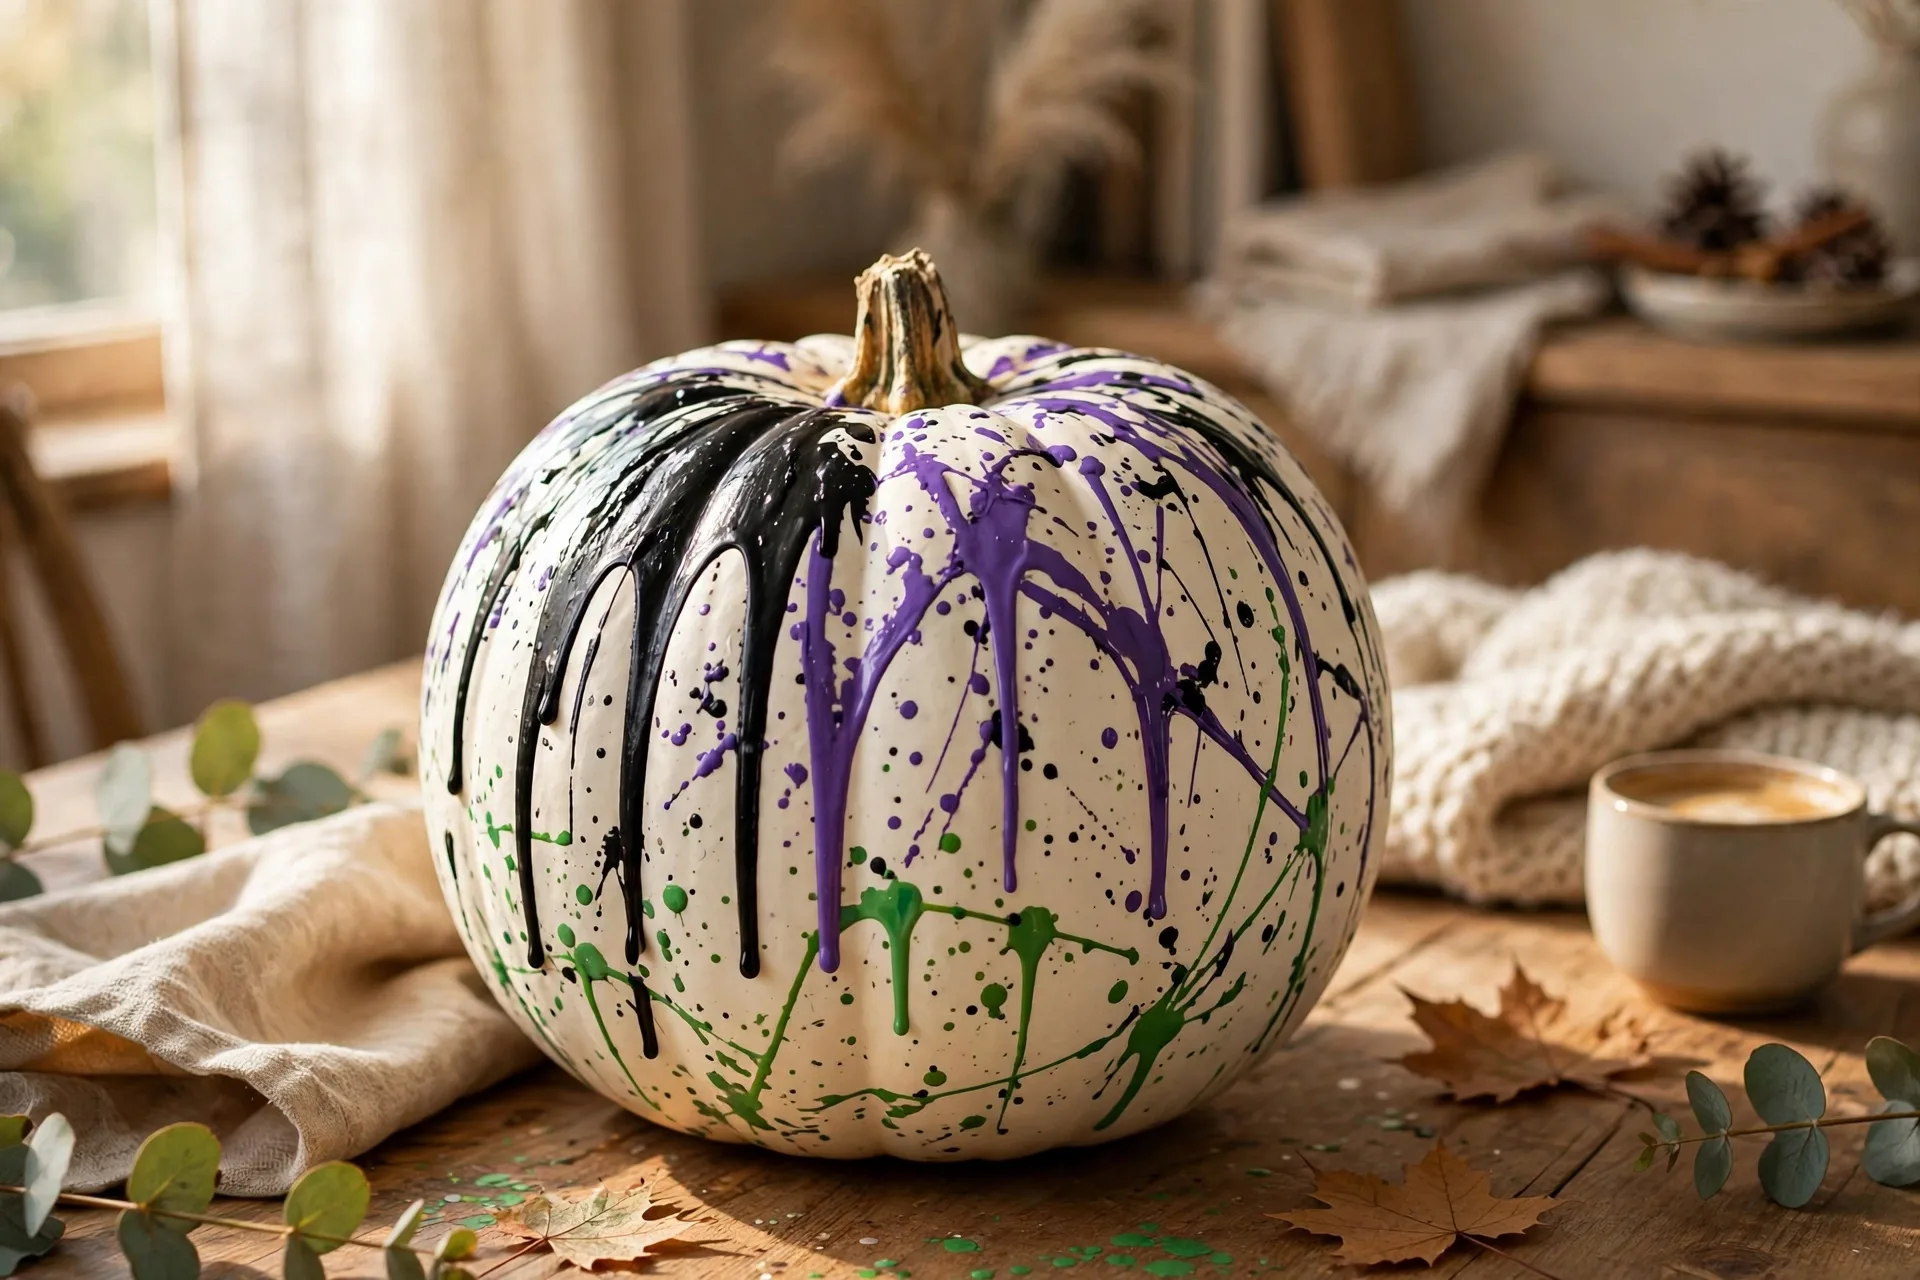
The look: Jackson Pollock meets Halloween — drips and splatters in spooky colors.
How to make it: Set the pumpkin in a big cardboard box, water the paint down slightly, and let kids drip it with a spoon or flick it off a loaded brush. Black, purple, and green on white; orange and white on black. No wrong way to do this — the mess IS the design, so it works for every age.
Ages: 2 and up — outside only; the box catches most, smocks catch the rest.
7. The Friendly Monster
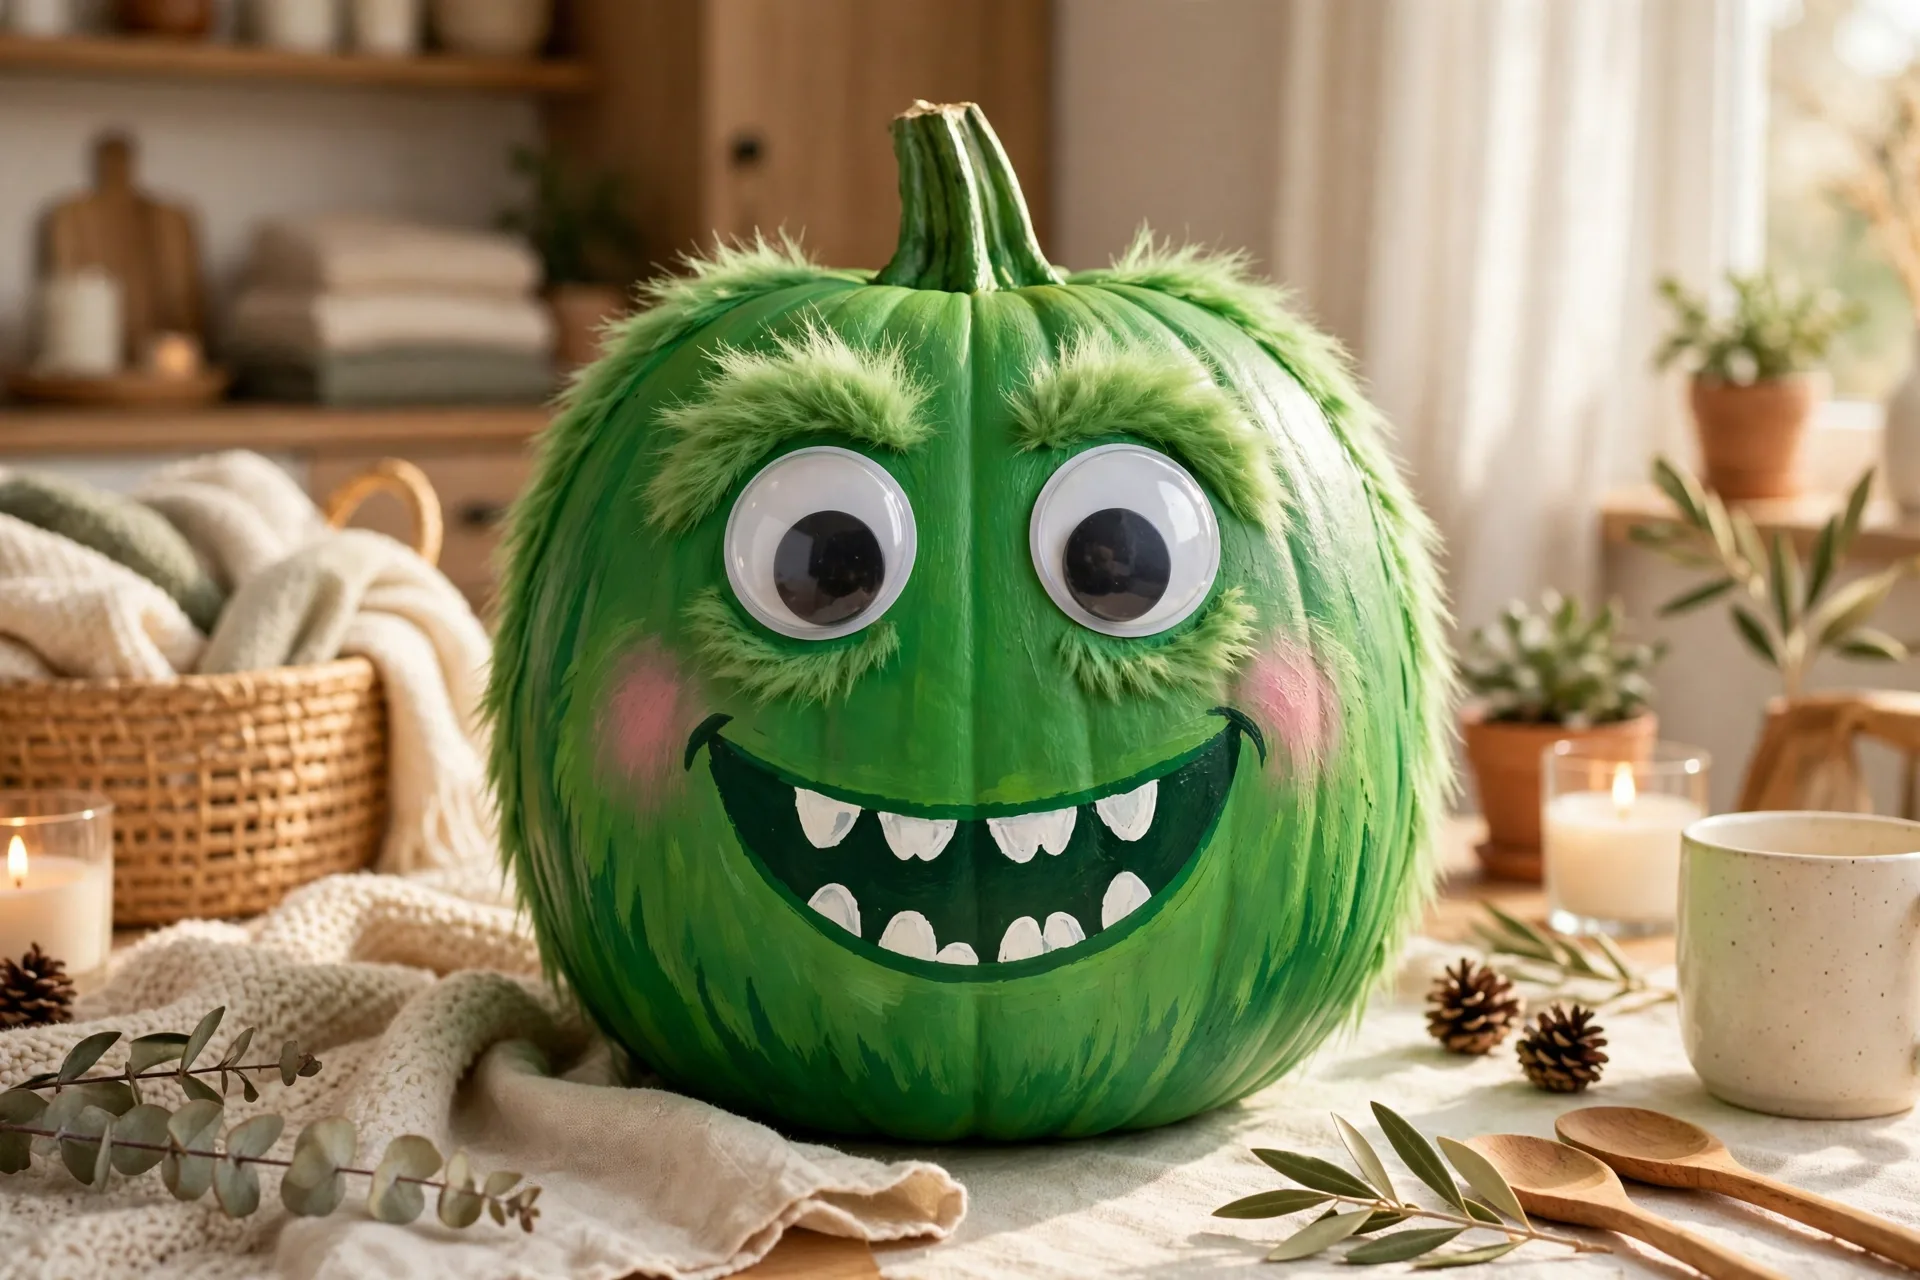
The look: a green or purple creature with googly eyes and a goofy grin.
How to make it: Paint the pumpkin green or purple, then let the kids go wild — mismatched eyes, lopsided mouth, spots, a tongue. Add self-adhesive googly eyes of different sizes once dry (ages 3 and up only — choking hazard rule). The grown-up finishes with a paint pen: teeth, eyebrows, maybe a bolt. Since monsters are supposed to be strange, every “mistake” becomes part of the creature.
Ages: 3 and up — under-3s skip the googly eyes and paint them on instead.
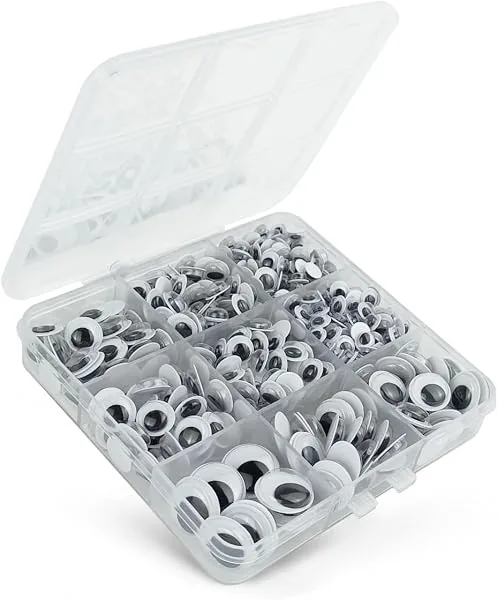
Googly Eyes — 520 Pieces, Self-Adhesive
For the friendly monster’s mismatched eyes (#7). Self-adhesive with washable-glue dots — but the choking-hazard rule stands: ages 3 and up only.
8. Word Pumpkins
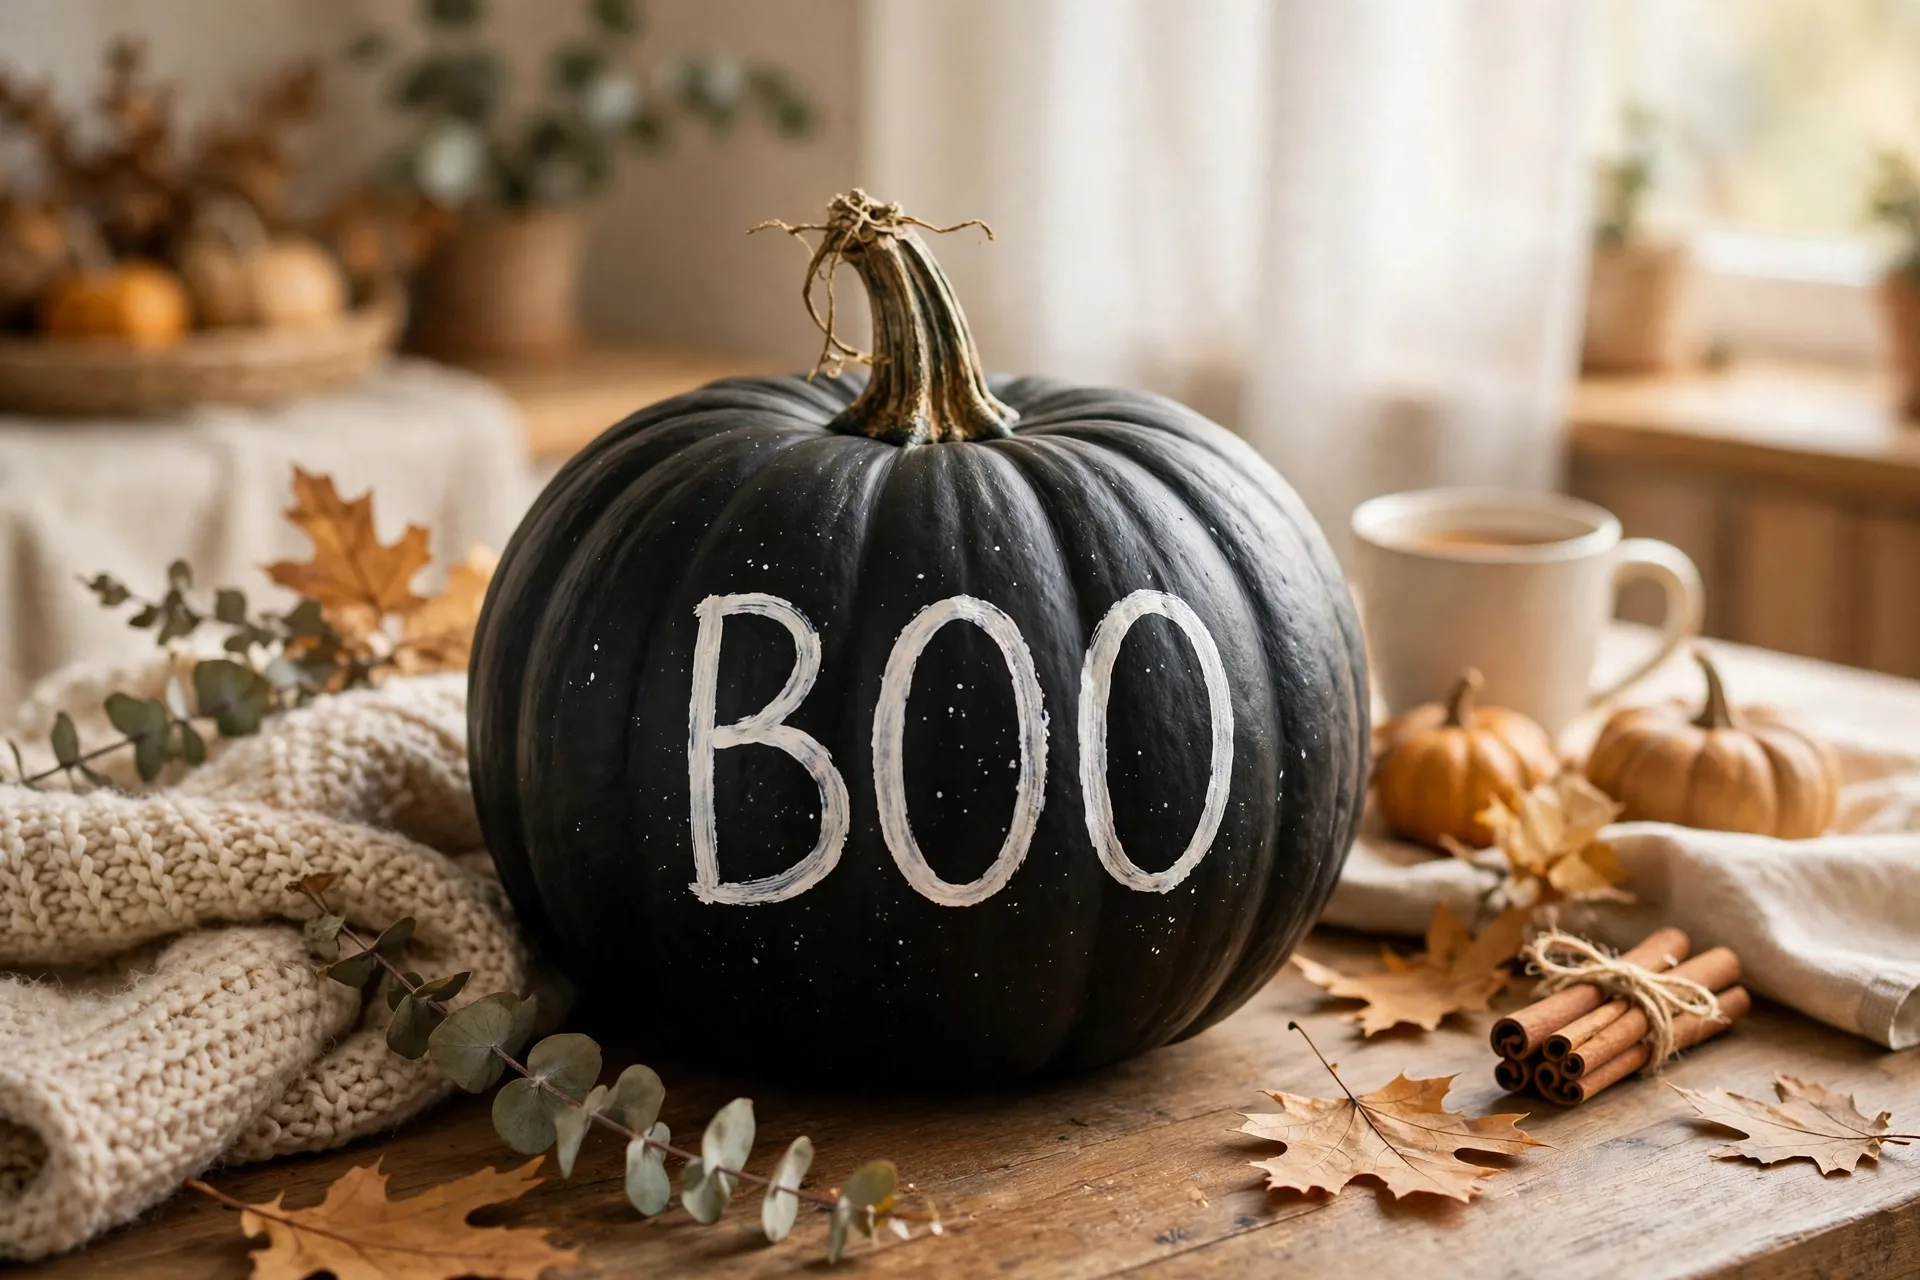
The look: big painted letters — BOO, EEK, SPOOKY, or your family’s name.
How to make it: Paint the pumpkin a solid readable color — black, white, or cream — then letter it with the grown-up’s acrylic paint pens. Short words fit best between the ridges. Older kids write their own names; little ones dictate. A tall, narrow pumpkin holds a whole word top to bottom: the “SPOOKY” pumpkin.
Ages: 4 and up for the base; lettering is grown-up or 6+ work.
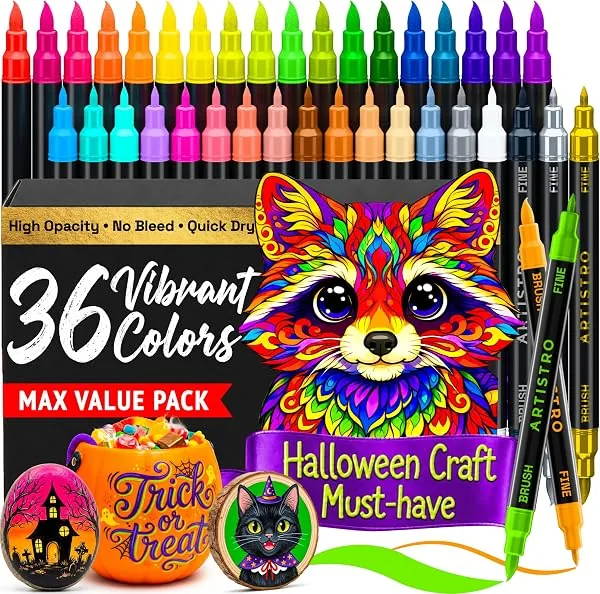
ARTISTRO Acrylic Paint Pens
For the grown-up’s details — faces, webs, lettering, chalk-style designs. ADULT-ONLY for kids under 6: little hands never touch the pens.
9. Dot-Print Polka Dots

The look: a pumpkin covered in cheerful, slightly imperfect polka dots.
How to make it: Dip a pencil eraser, cotton swab, or sponge in paint and stamp dots all over. Black, white, and orange feel immediately Halloween; gold on white looks almost elegant. Toddlers do this entirely alone — stamping is a skill at two, and dots are forgiving. Count the dots together for a sneaky math game.
Ages: 2 and up — the easiest fine-motor win on this list.
10. Metallic Gold & Copper
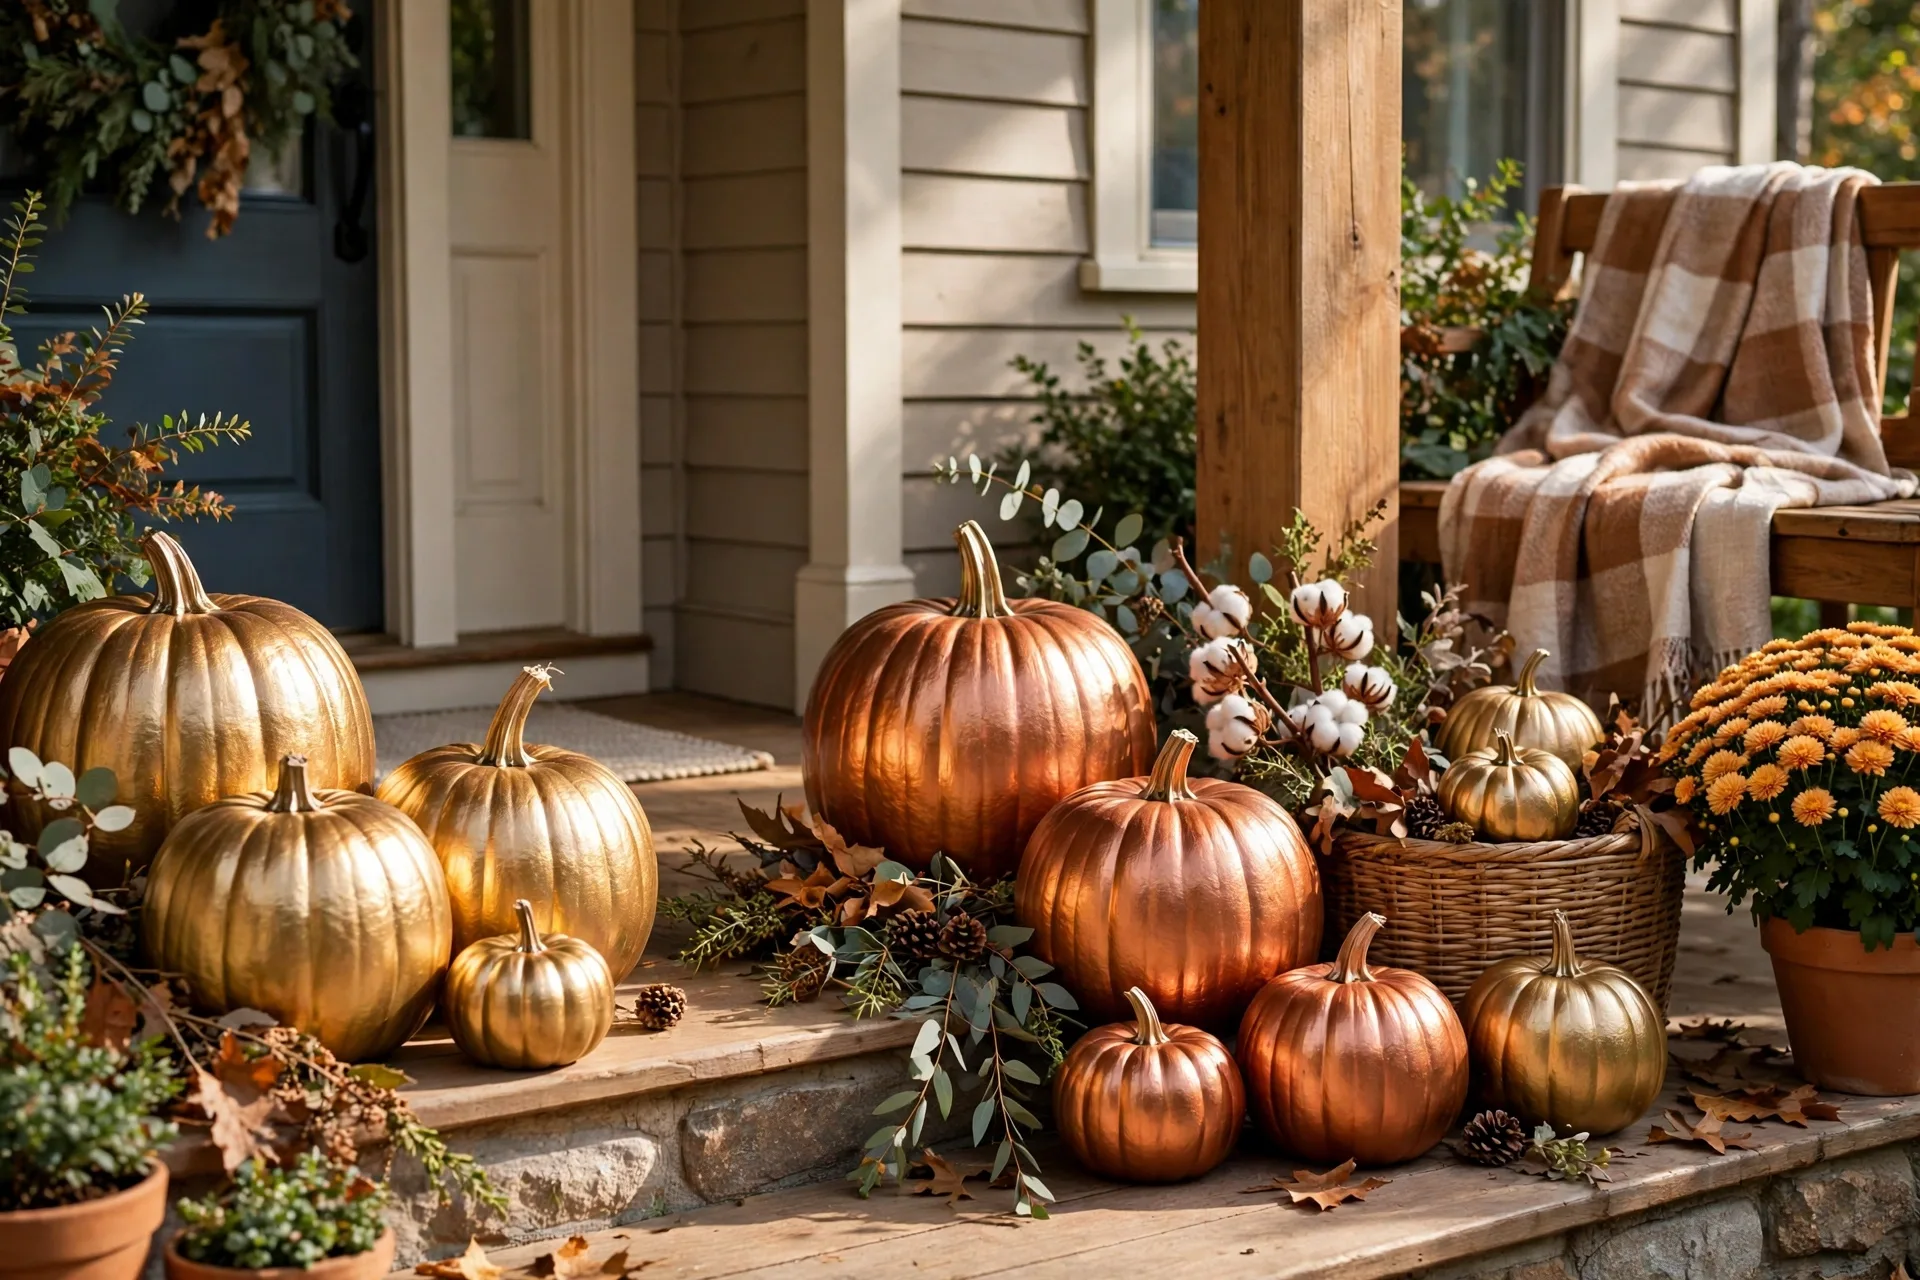
The look: the grown-up-elegant pumpkin — solid metallic gold, or a copper stem on cream.
How to make it: Paint the whole pumpkin in metallic craft paint — gold, copper, or bronze reads autumn, not costume. The five-minute version: paint just the stem copper on a cream pumpkin. Cluster three metallics with a natural orange one — a display that doesn’t scream Halloween and stays up through Thanksgiving.
Ages: 5 and up — metallic full-pumpkins are grown-up territory; older kids can do the copper stem.
Paint notes: Metallics need two coats for full shimmer; brush in one direction to avoid streaks.
11. The Painted Mummy
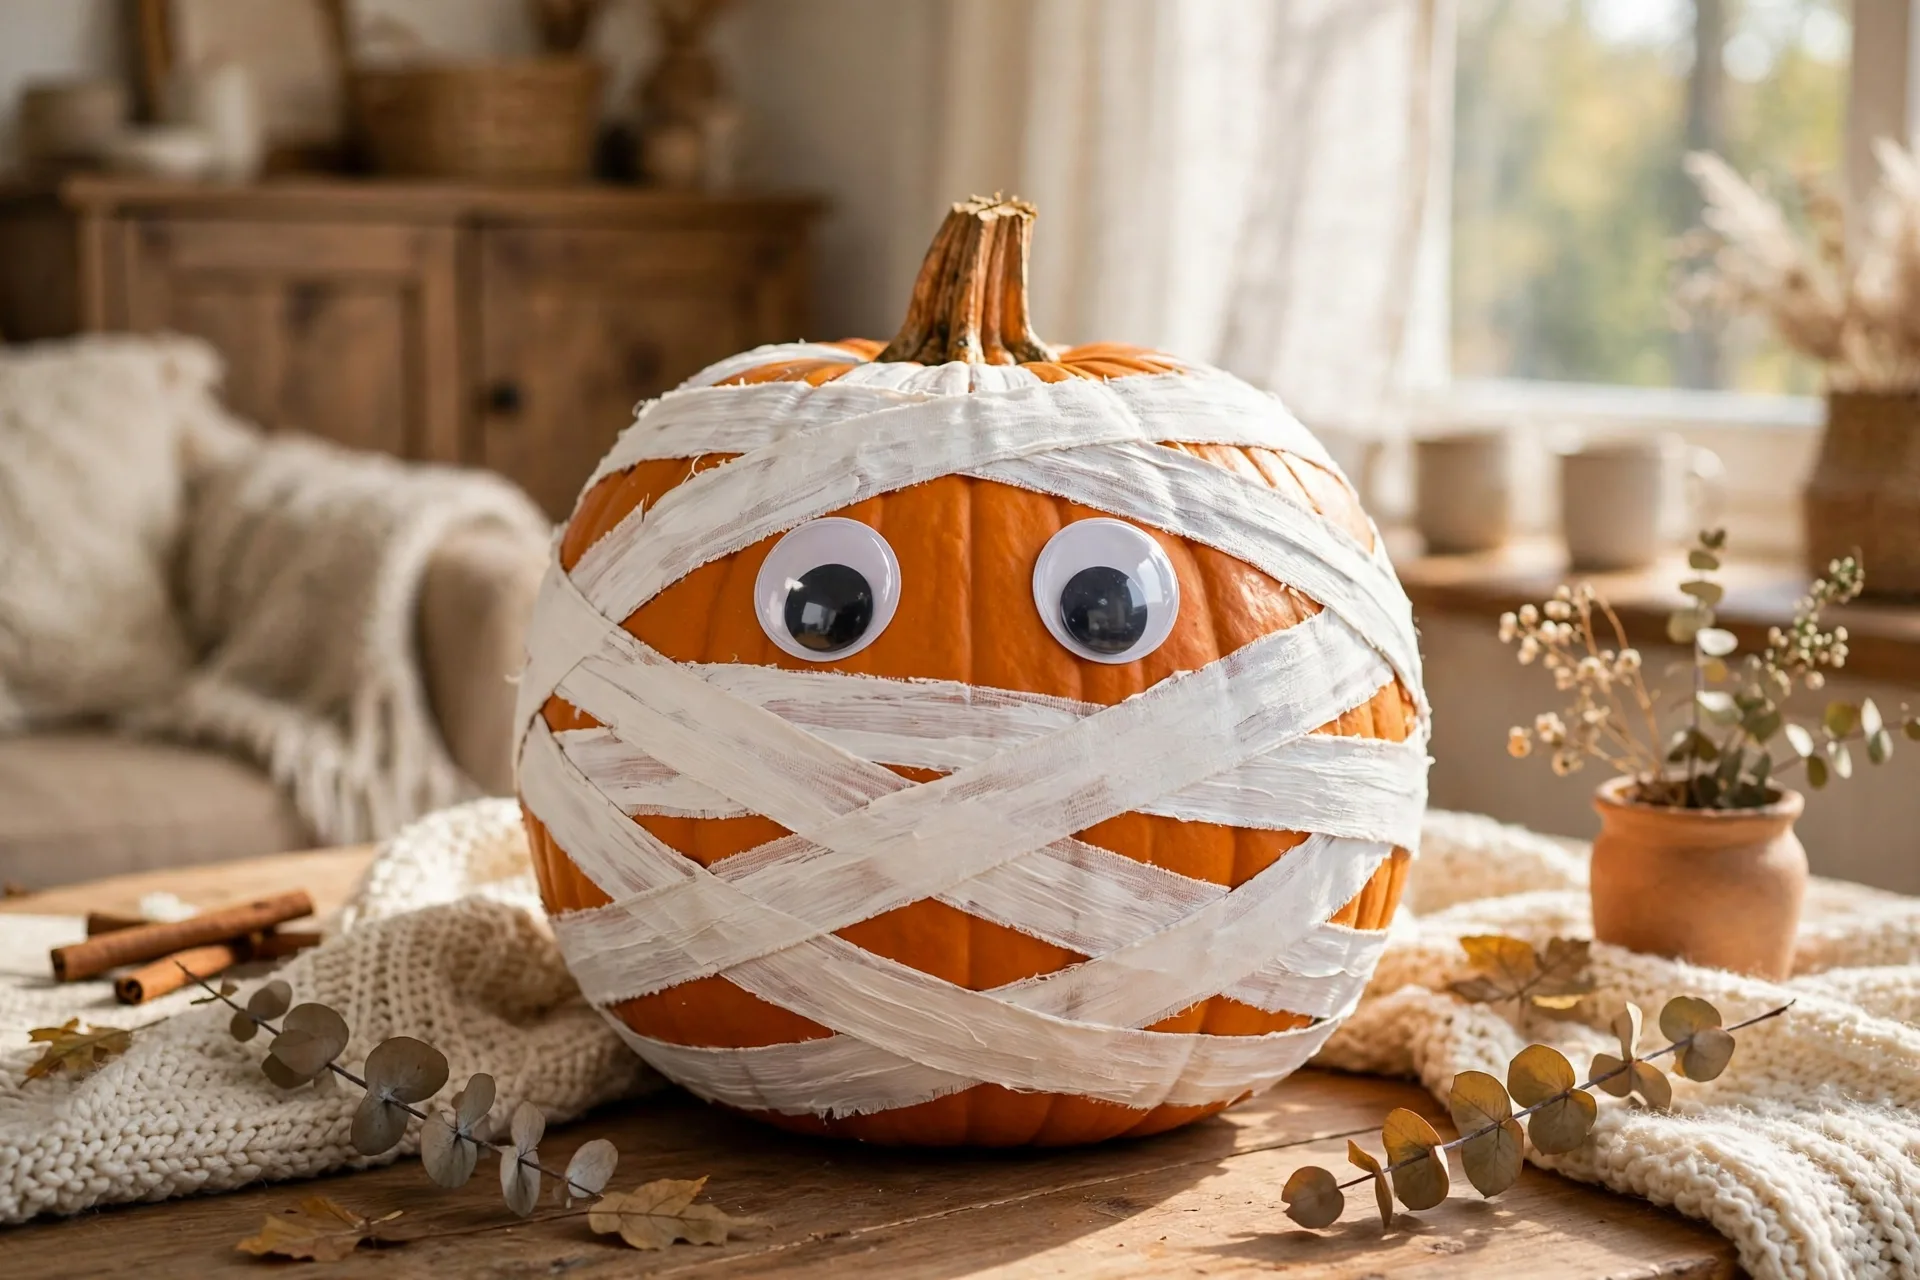
The look: a mummy wrapped in white painted bandages, two eyes peeking out.
How to make it: Leave a small oval near the front for the eyes. Paint white bandage strokes horizontally around the pumpkin, leaving thin orange gaps — the gaps sell the “wrapped” look. Once dry, the grown-up paints two big black eyes in the oval. Every bandage is paint, so it works on bumpy pumpkins where tape won’t stick.
Ages: 3 and up — kids paint the bandages; the grown-up paints the eyes.
12. Rainbow Stripes

The look: cheerful rainbow bands top to bottom — Halloween for the anti-spooky kid.
How to make it: Run tape strips from stem to base, paint each section a different color, peel when dry — or paint freehand curved bands. Tape gives crisp lines; freehand looks handmade. An autumn rainbow (mustard, rust, olive, burgundy) lasts through Thanksgiving; the classic bright one is pure kid joy.
Ages: 3 and up — freehand for toddlers; tape lines for kids who like things neat.
13. The Chalkboard Pumpkin
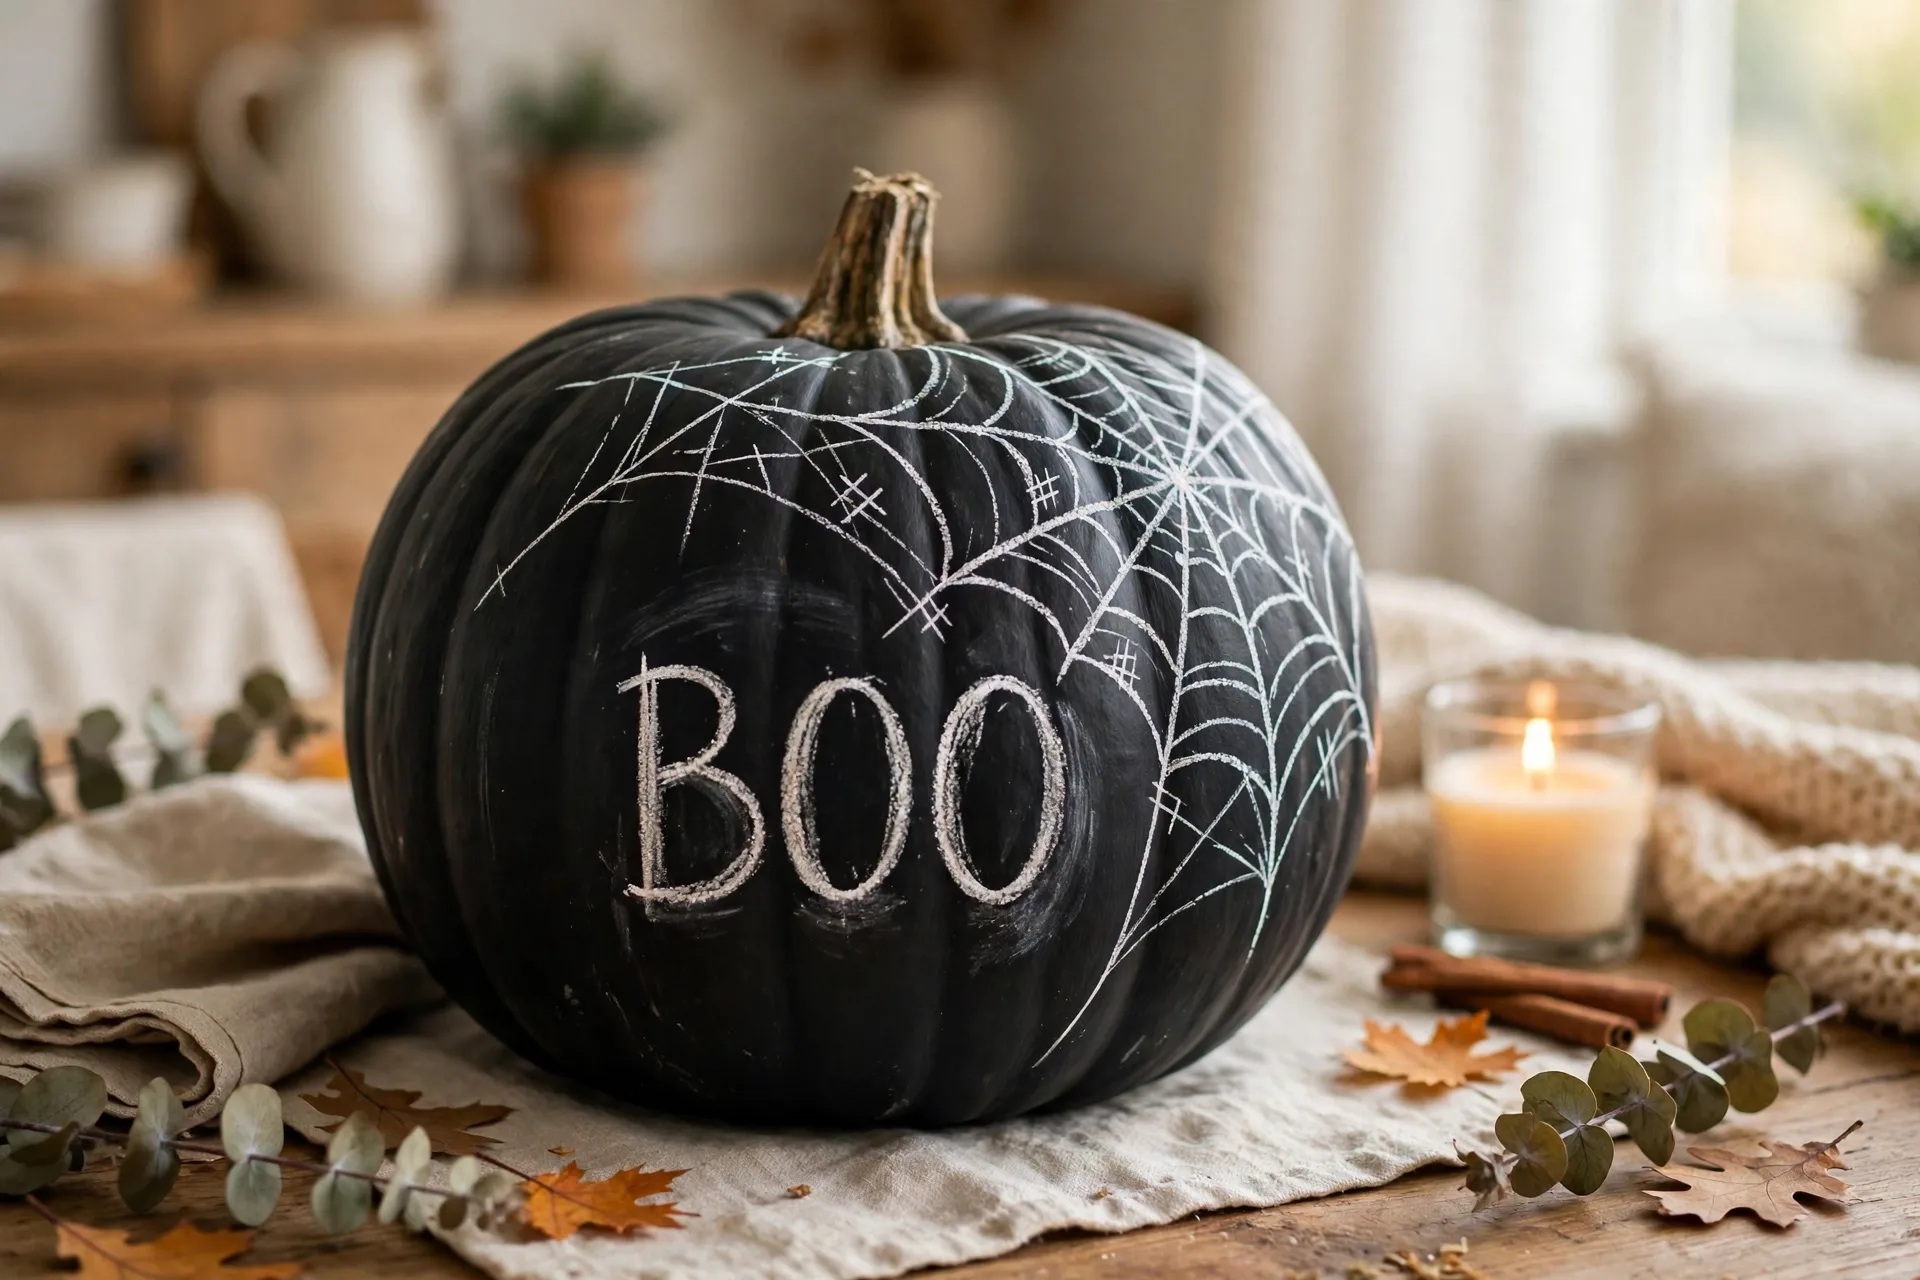
The look: a matte black pumpkin with white “chalk” drawings.
How to make it: Paint the pumpkin matte black and let it dry fully. With the grown-up’s white paint pen, draw chalk-style designs — a spiderweb, “BOO” in loopy letters, tiny bats, a haunted house outline. Kids pick the design. Real chalk won’t erase off acrylic, so call it chalk-STYLE and keep expectations honest.
Ages: 5 and up — younger kids pick what the grown-up draws.
14. The Witch Face
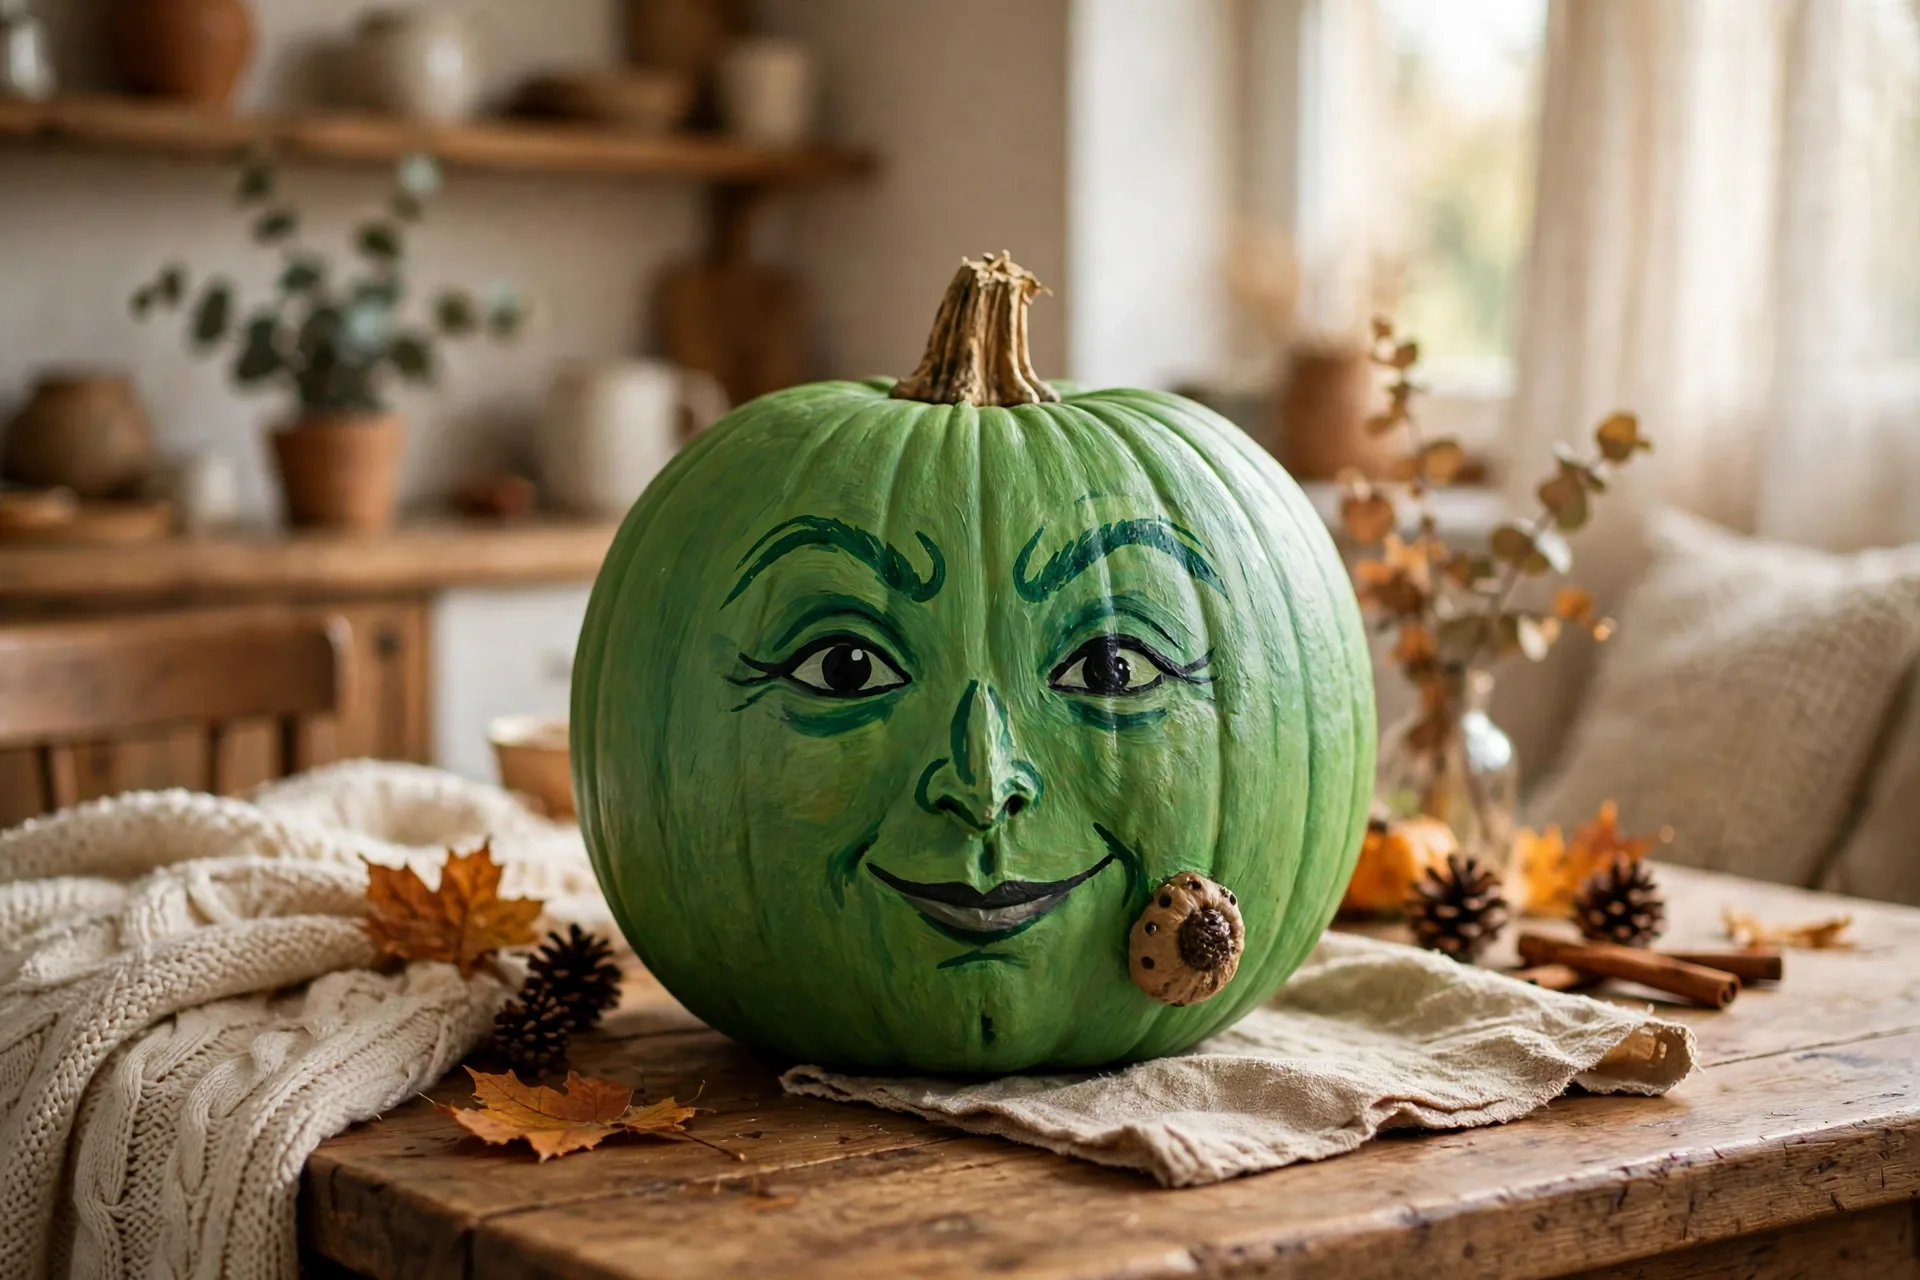
The look: a green witch face with dramatic eyebrows and a wart.
How to make it: Paint the pumpkin green — two coats. The grown-up draws the face: arched angry eyebrows, a crooked smile, and one small wart (a dot with a ring — the detail kids always ask for). Paint the stem black. My four-year-old requests this every October and insists the wart is non-negotiable.
Ages: 4 and up — kids paint the green; the grown-up paints the face.
15. The Thankful Pumpkin
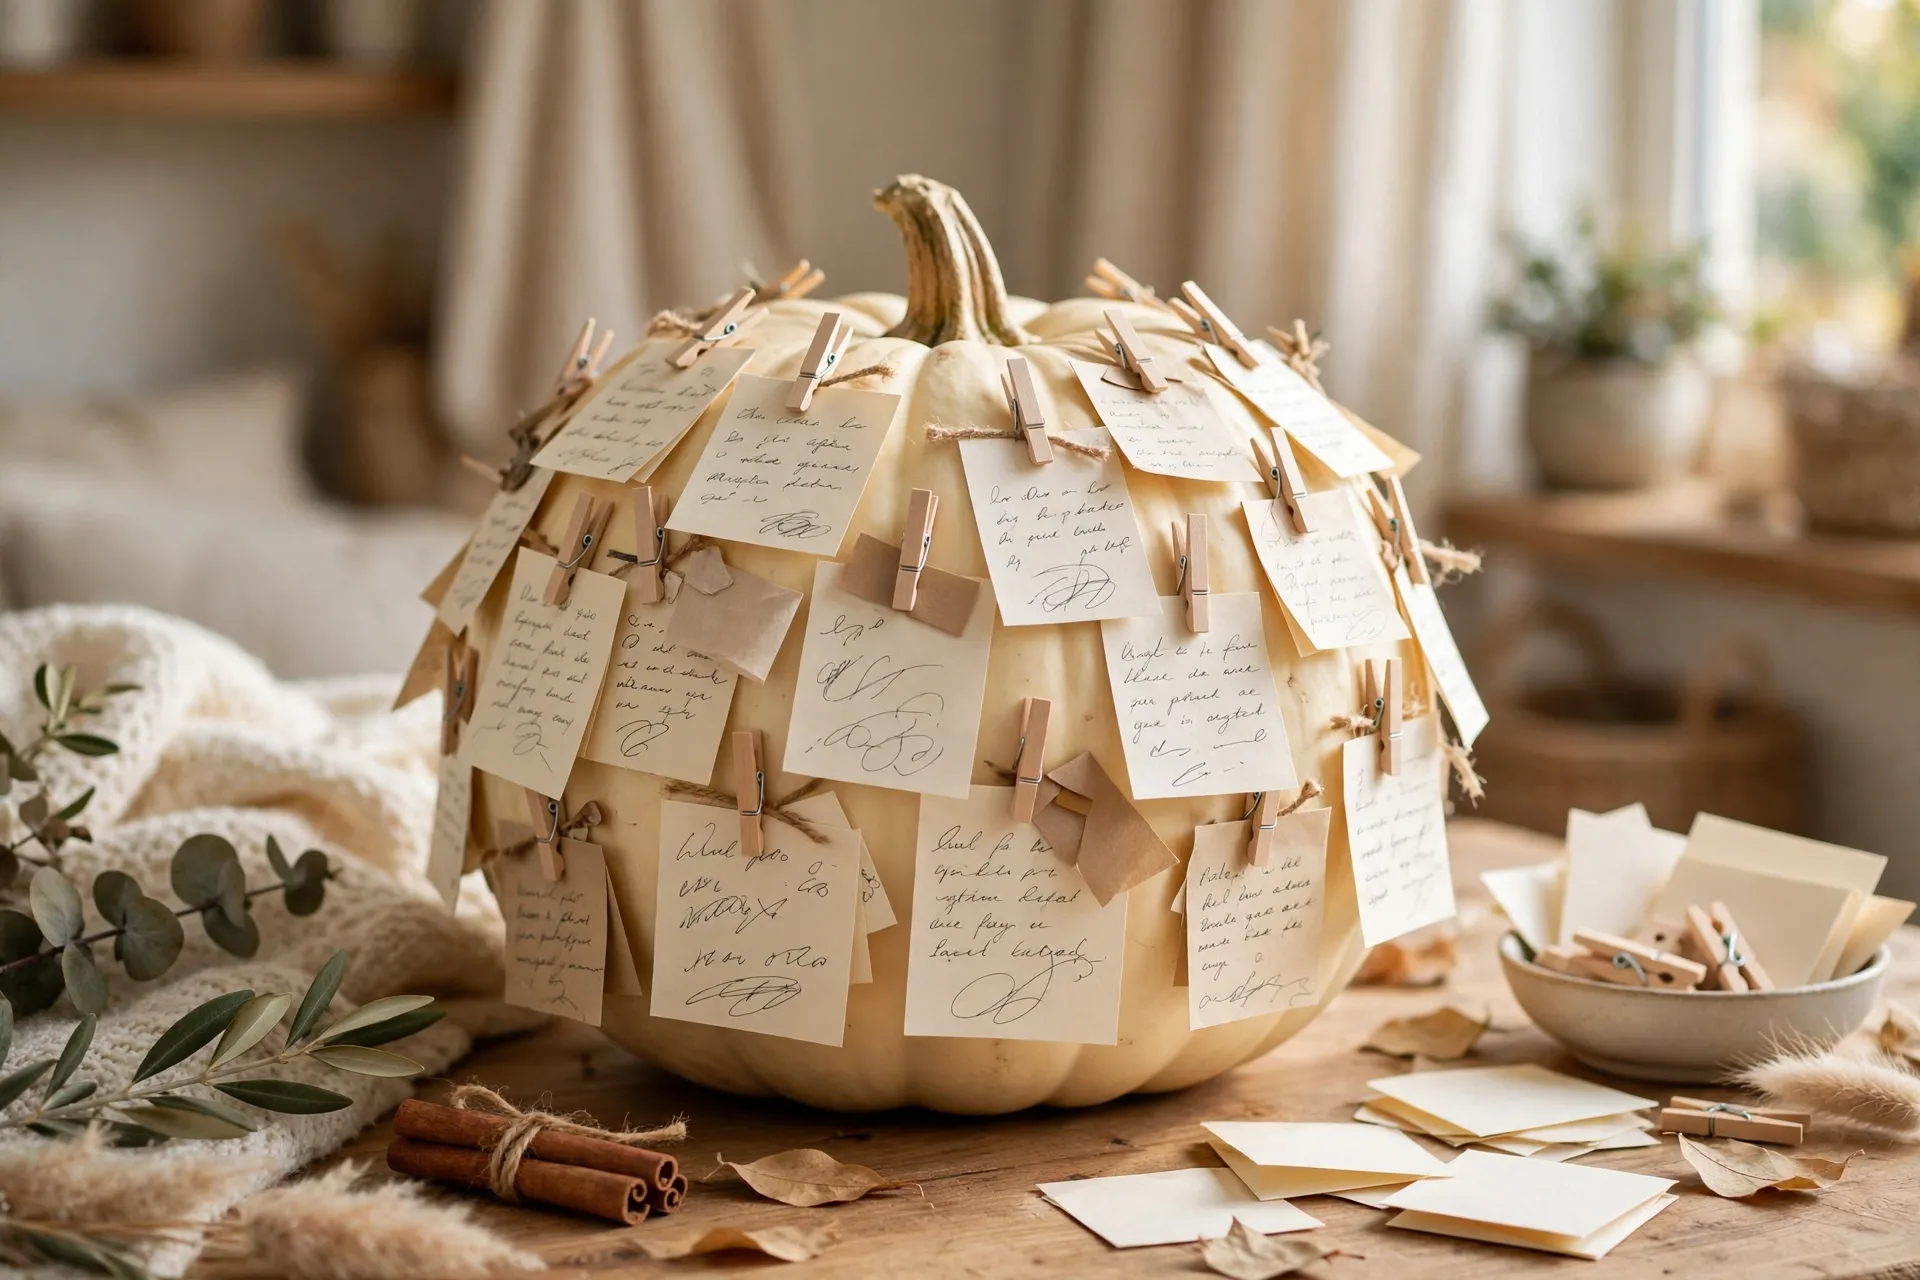
The look: a soft-colored pumpkin covered in everyone’s handwriting.
How to make it: Paint the pumpkin cream, sage, or dusty blue — colors that carry through November. Everyone writes one thing they’re thankful for with the grown-up’s paint pens; little ones dictate. Add to it all month, read it out on Thanksgiving, date the bottom with the year.
Ages: 3 and up — the thankful game works for any age that can answer the question.
Paint notes: Light colors keep dark pen writing readable. Let each entry dry before adding the next.
More Spooky Faces
16. The Vampire Face
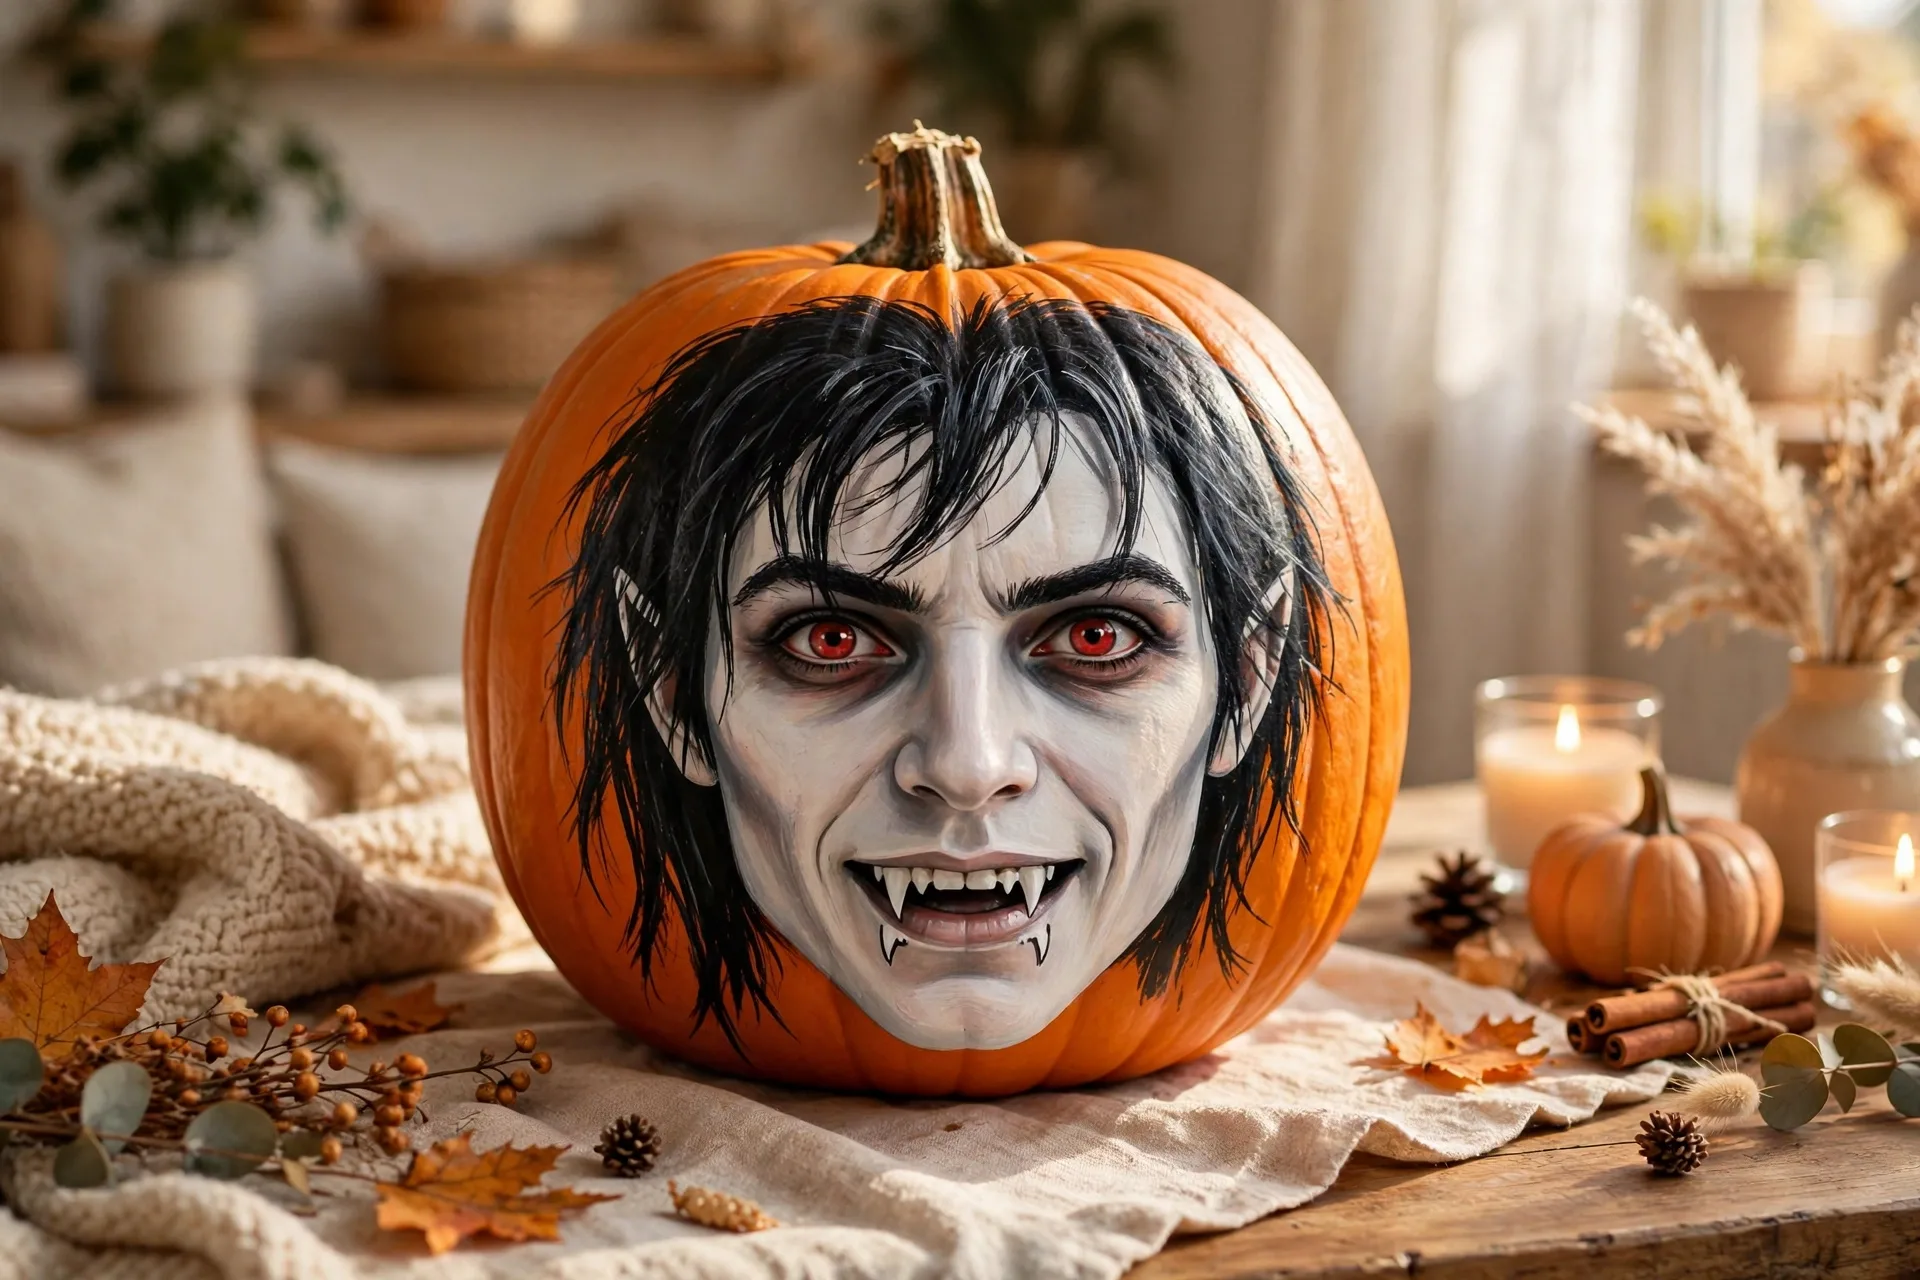
The look: a pale vampire face with slicked-back black hair, red eyes, and two white fangs.
How to make it: Paint the pumpkin pale cream or white. The grown-up paints black hair sweeping back from the stem, two red oval eyes, and a wide dark mouth with two pointed white fangs. Add a black cape collar by painting a wide black band around the bottom third. A drop of red paint at one fang sells the whole joke and makes the four-year-olds shriek with delight.
Ages: 5 and up. Younger kids paint the pale base; the grown-up paints the face.
17. The Skeleton Grin
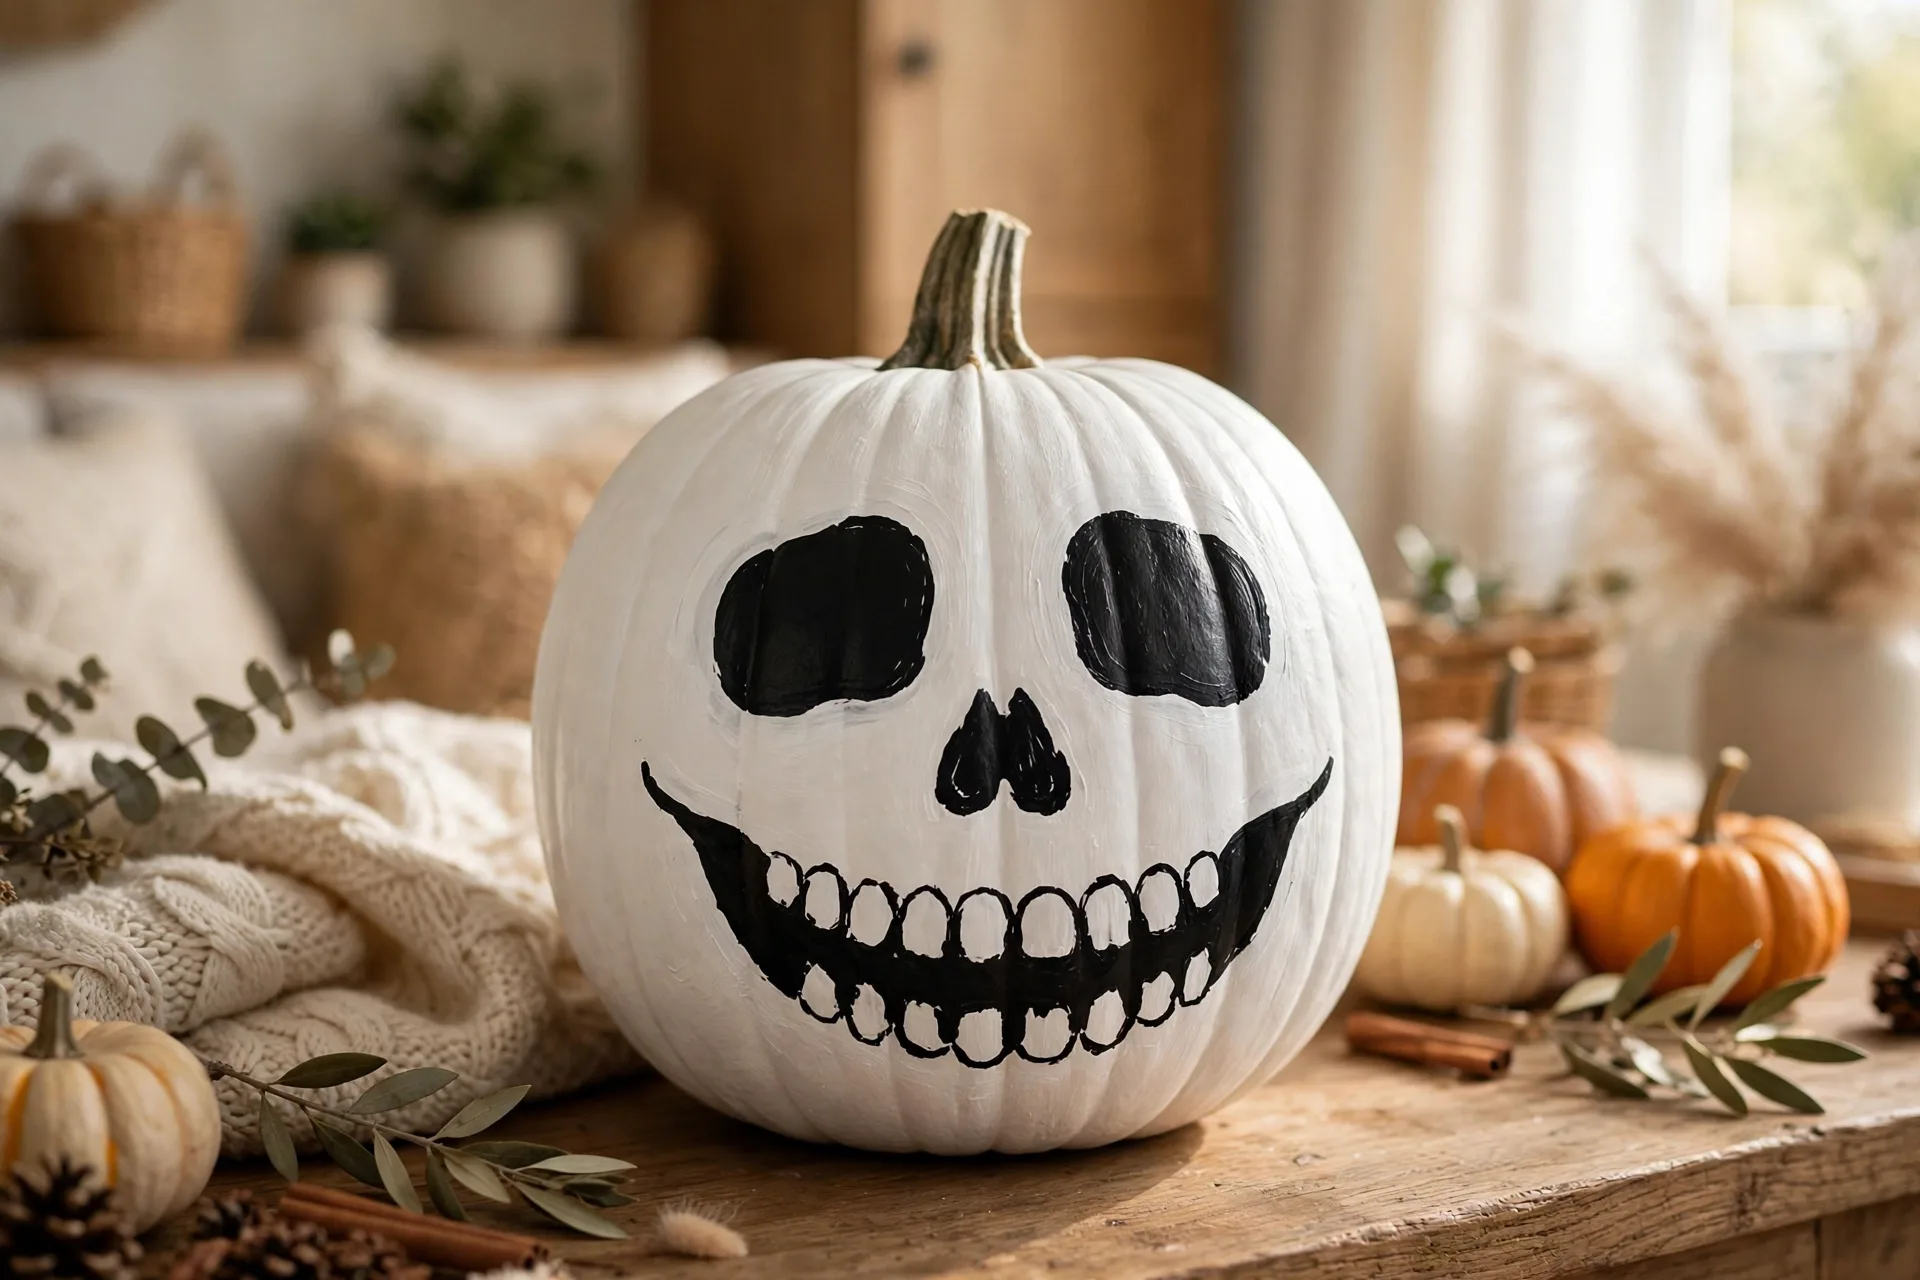
The look: a white skull face with black eye sockets and a toothy grin.
How to make it: Paint the pumpkin white, two thin coats. The grown-up paints two big black oval eye sockets, a small black triangle nose, and a wide black grin with thin white teeth lines drawn across it. Keep the teeth uneven on purpose. Real skulls are not symmetrical, and a crooked grin is scarier anyway.
Ages: 5 and up. Kids paint the white base; the grown-up paints the skull face.
18. The Friendly Zombie
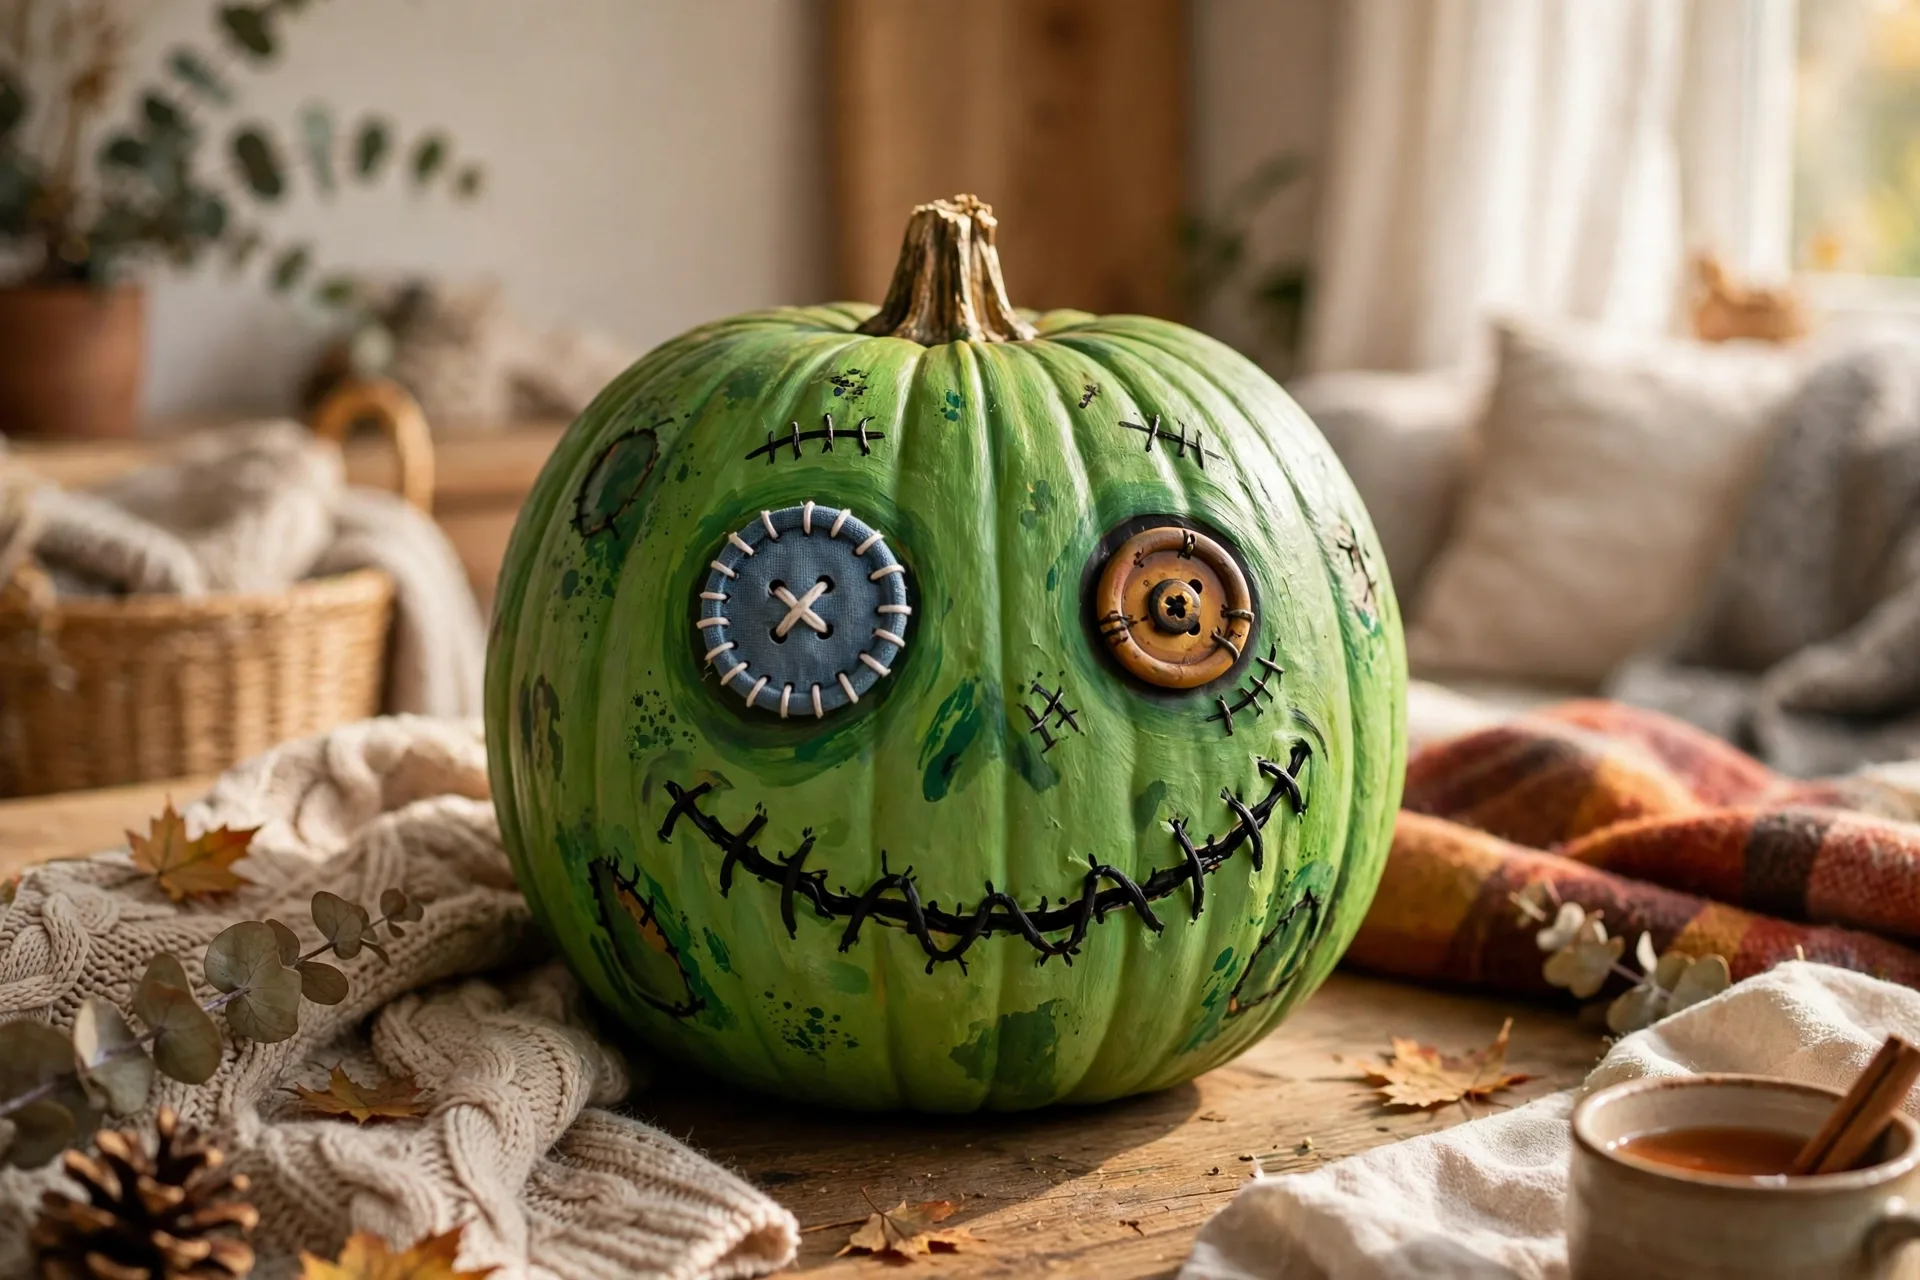
The look: a green-grey creature with a stitched mouth and one eye bigger than the other.
How to make it: Paint the pumpkin sage green or grey-green. Add one big googly eye and one painted eye so they do not match. The grown-up paints a stitched mouth with a paint pen, a few grey patches, and one eyebrow raised high. Zombies are supposed to look lopsided, so every wobble in the paint becomes part of the character.
Ages: 4 and up. Googly eyes are ages 3 and up only; younger kids paint the eyes on.
19. The Werewolf
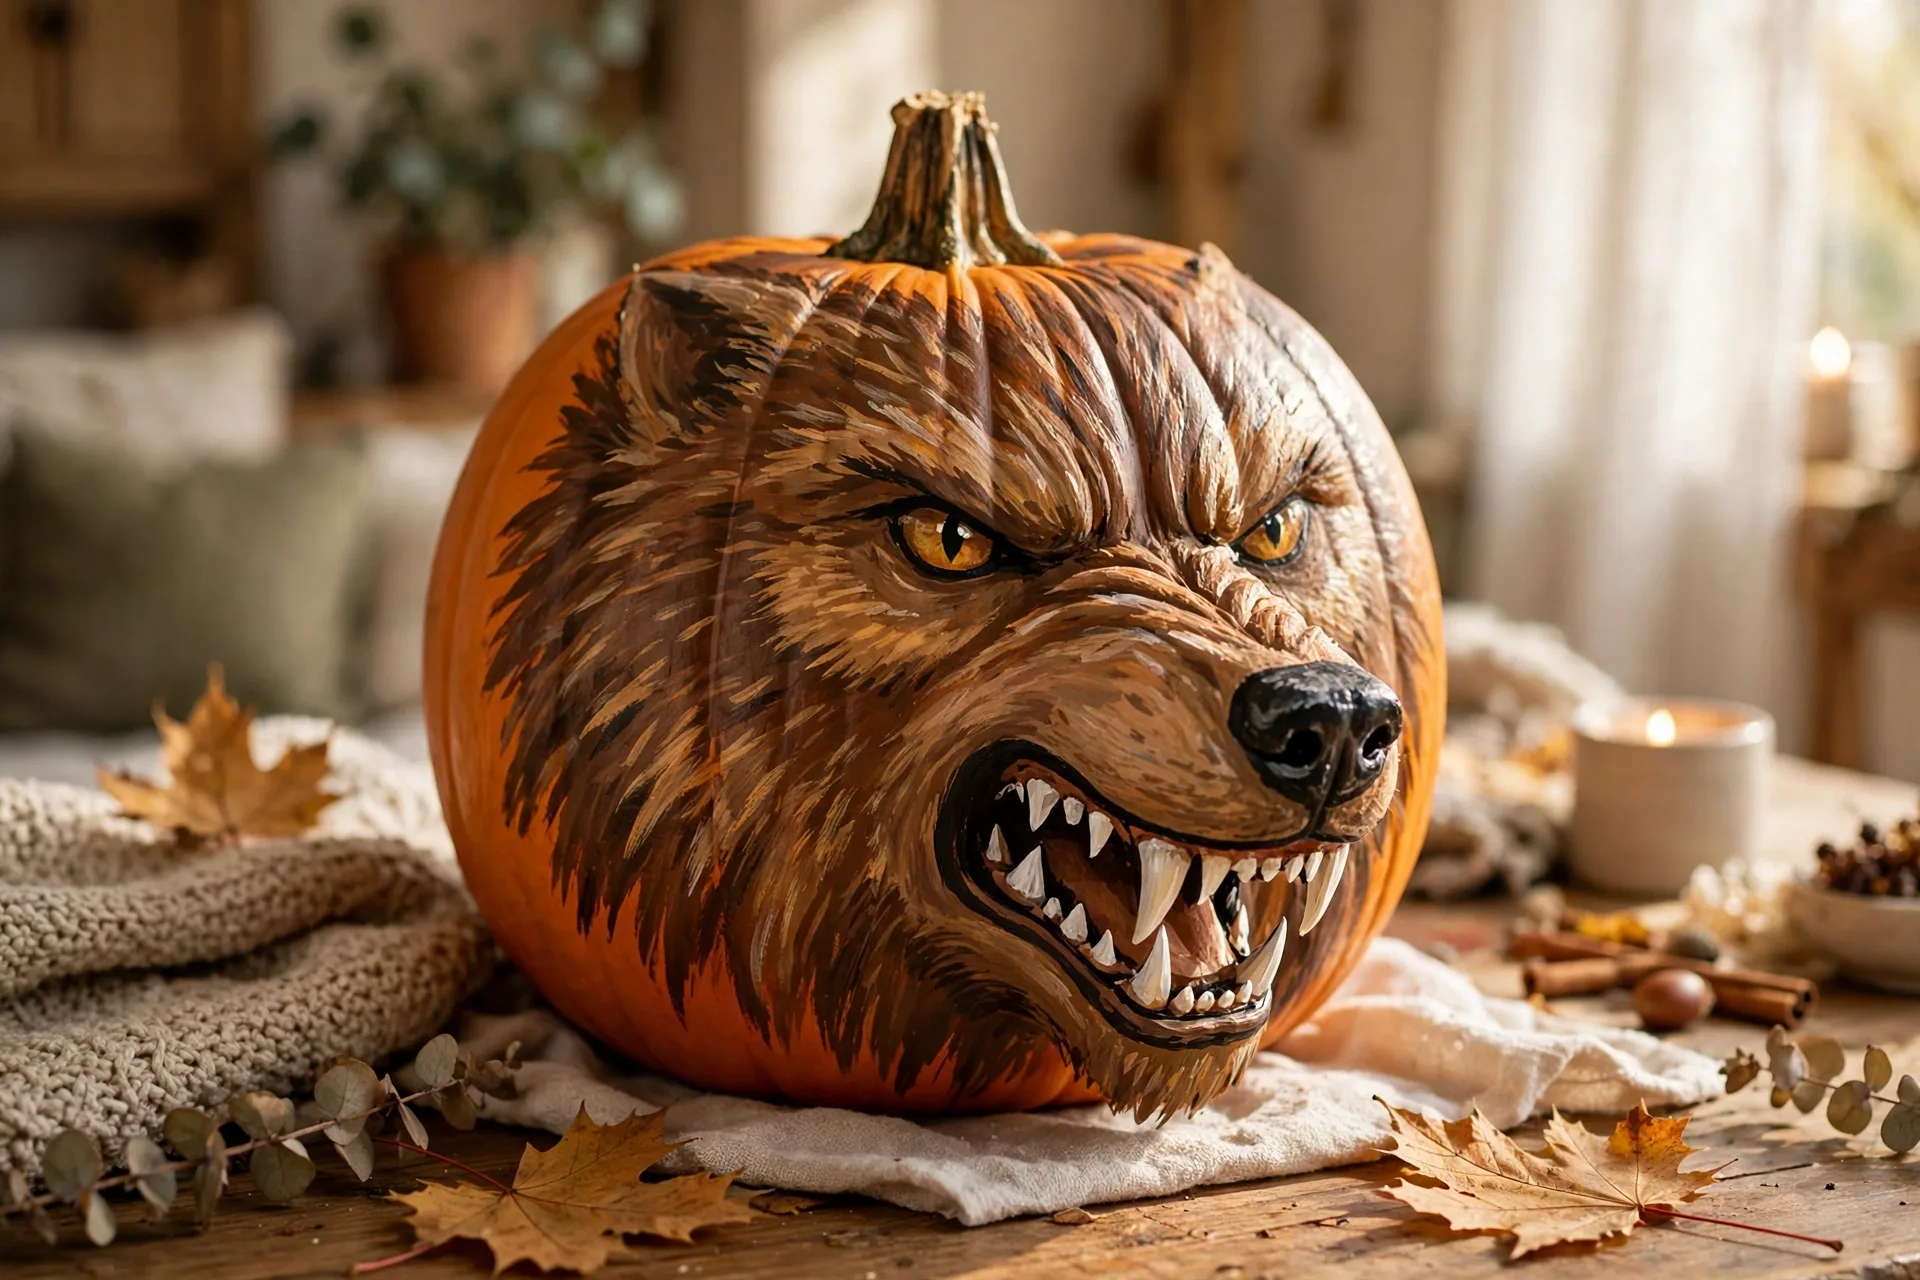
The look: a shaggy brown wolf face with a snout, pointed ears, and fangs.
How to make it: Paint the pumpkin brown and add short dark strokes all over for fur. The grown-up paints a lighter tan snout, a black nose, two fangs, and two cardstock triangle ears glued near the stem. Paint the eyes yellow with narrow black pupils. The fur strokes are the fun part, so let the kids make them wild and uneven.
Ages: 5 and up. Kids paint the brown base and fur strokes; the grown-up paints the snout.
20. The Frankenstein
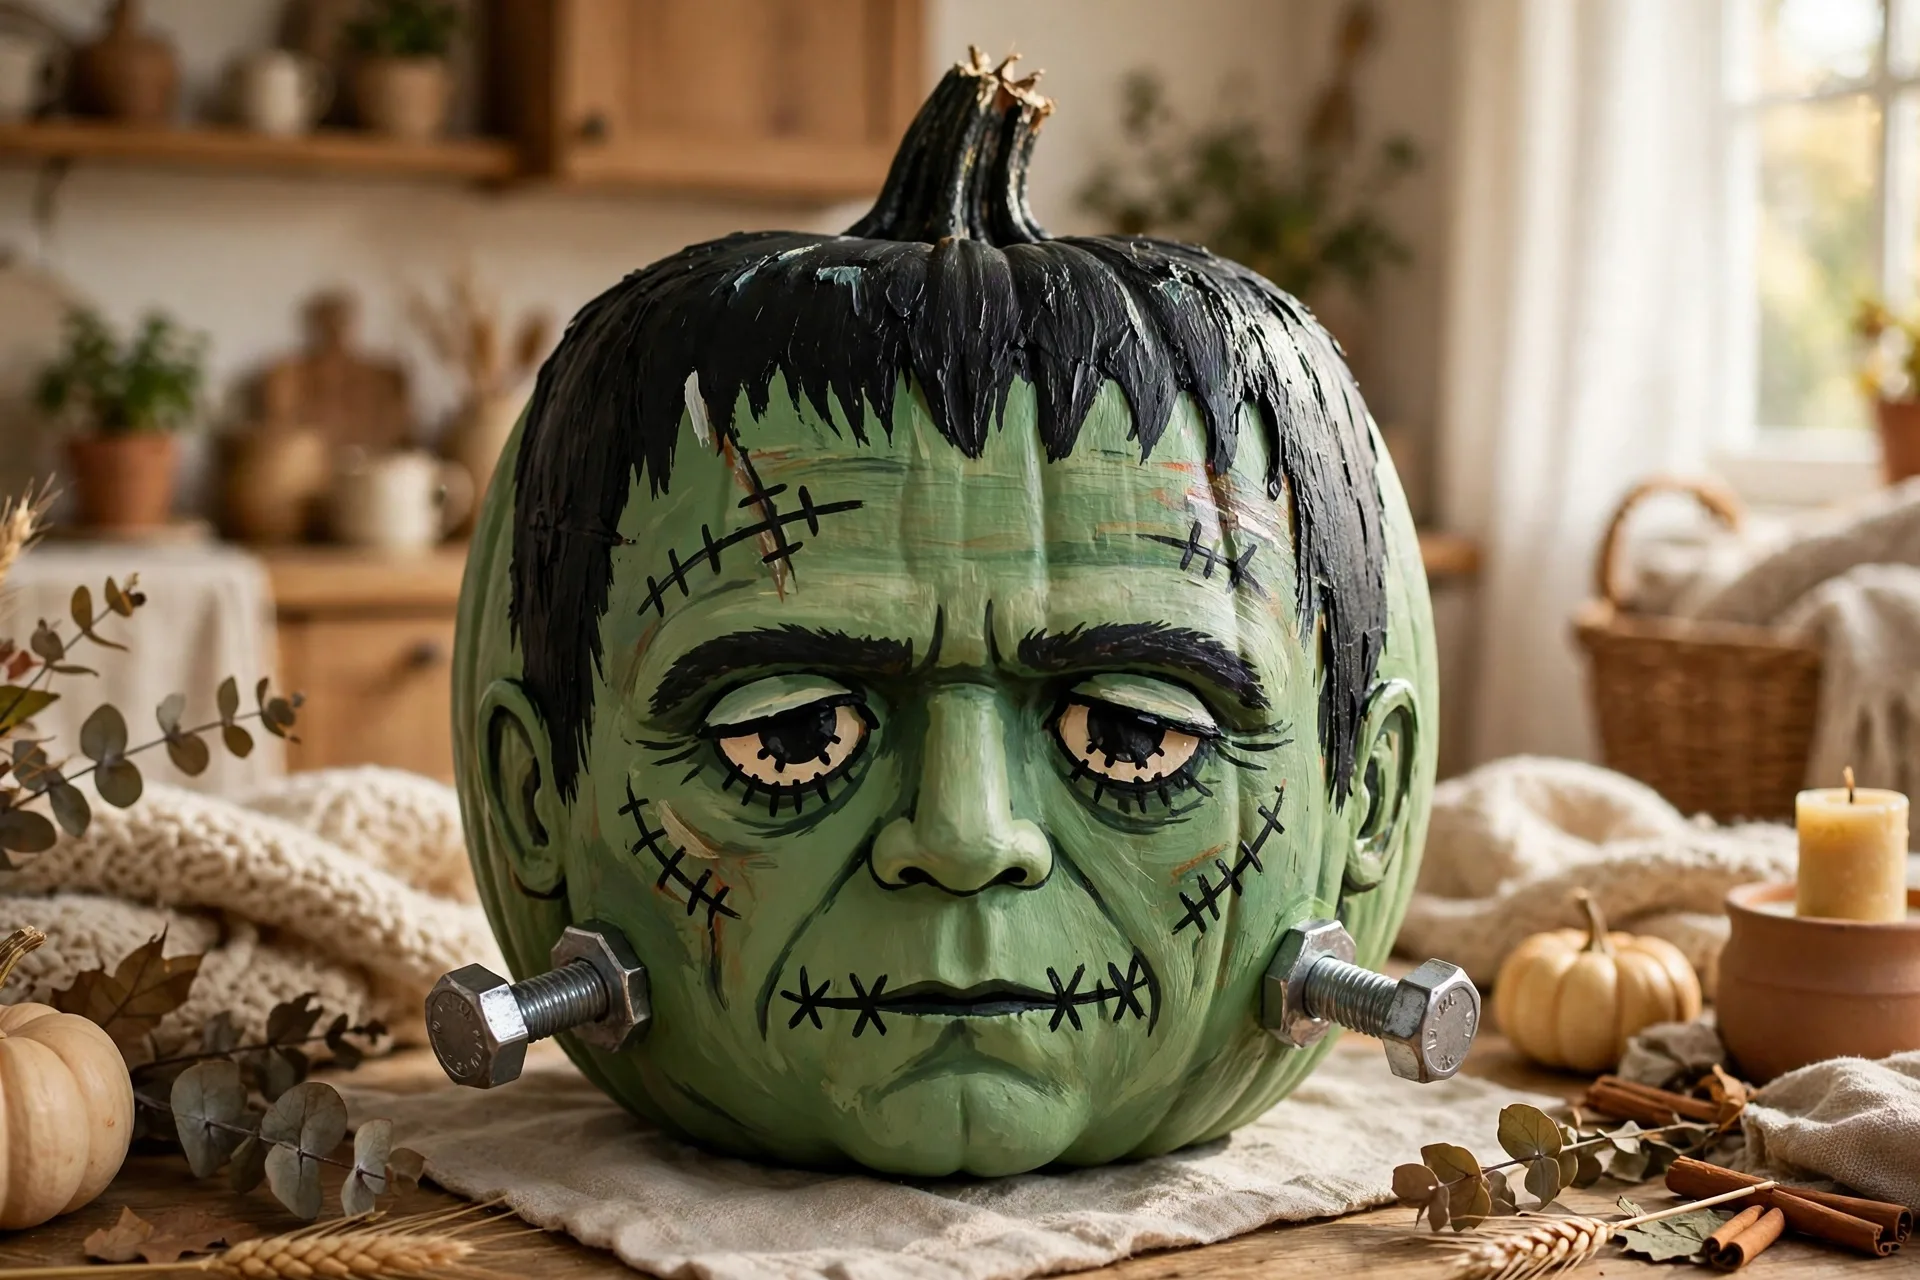
The look: a green flat-top monster with a stitched forehead and two bolts.
How to make it: Paint the pumpkin green and paint the top third black for flat hair. The grown-up paints a stitched scar across the forehead, two heavy-lidded eyes, and two grey bolts on the sides using small painted rectangles with a dot in the middle. A small crooked smile finishes it. This is the monster every kid recognizes instantly.
Ages: 4 and up. Kids paint the green base and black hair; the grown-up paints the scar and bolts.
21. The Grim Reaper
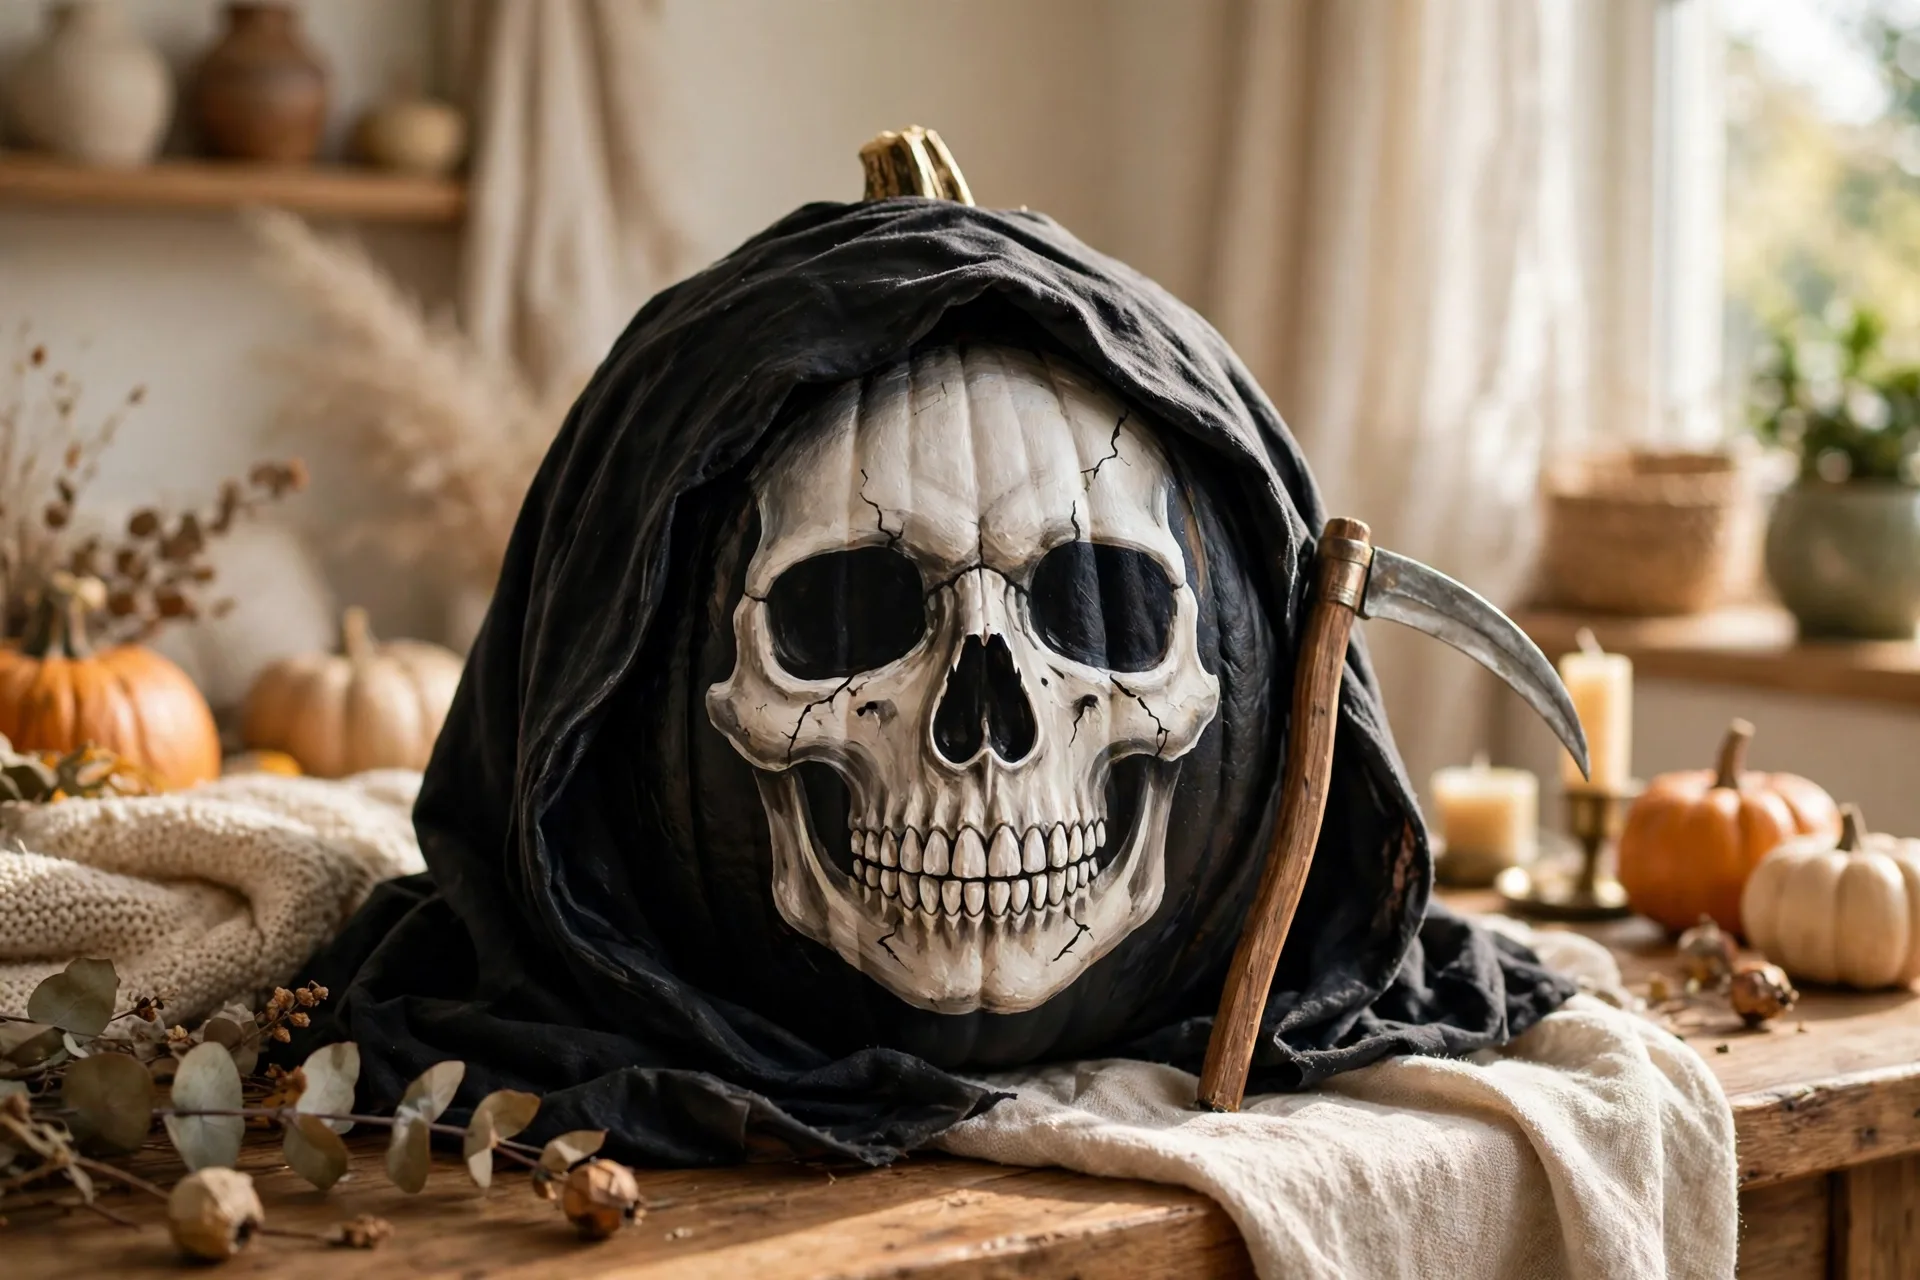
The look: a black-hooded figure with a white skull face and a scythe painted down the side.
How to make it: Paint the pumpkin matte black. The grown-up paints a white oval face in the center with two black eye sockets and a small nose, then a long grey scythe curving down one side with a wooden-brown handle. Keep the face small so the black hood reads. This one is for the older kids who want a genuinely spooky pumpkin.
Ages: 6 and up. Younger kids skip this one; the black-on-black needs a steady hand.
22. The Demon Eyes
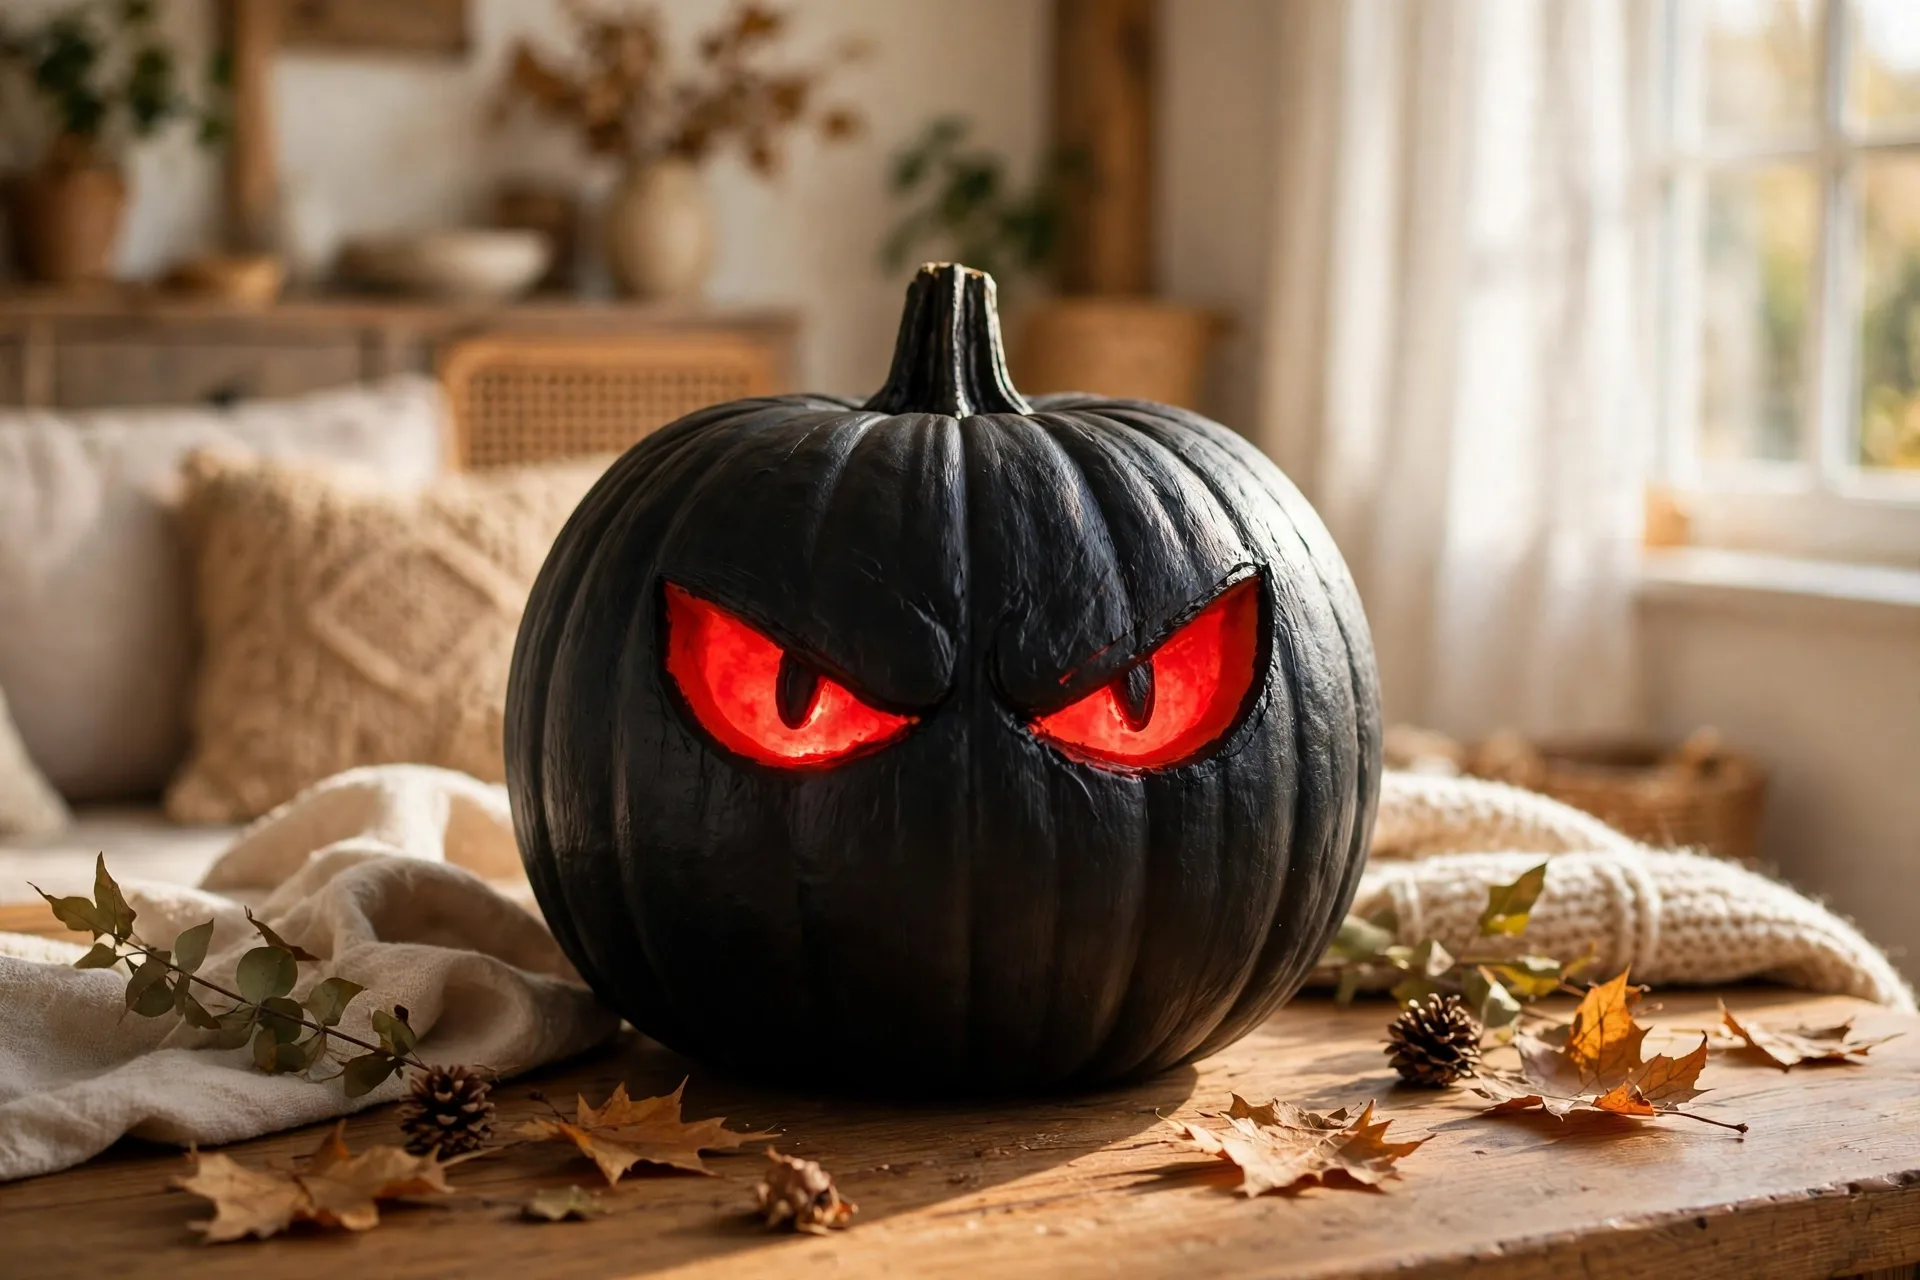
The look: two glowing red eyes peeking out of a solid black pumpkin.
How to make it: Paint the pumpkin black, two coats for full coverage. The grown-up paints two slanted red eyes with yellow centers and thin black pupils. That is the whole design, and that is why it works. At night, set flameless tea lights in front of it and the red eyes seem to glow. Simple, fast, and the spookiest pumpkin per minute of work on this list.
Ages: 5 and up. Kids paint the black base; the grown-up paints the eyes.
23. The Haunted House Face

The look: a haunted house silhouette with glowing yellow windows across the pumpkin.
How to make it: Paint the pumpkin deep purple or midnight blue. The grown-up paints a black house silhouette with a crooked roof, a crooked chimney, and four or five small yellow windows. Add a tiny black bat above the roof and a bare tree branch on the side. The yellow windows are the detail that makes it feel lit from inside.
Ages: 5 and up. Kids paint the night-sky base; the grown-up paints the house.
24. The Bat Face
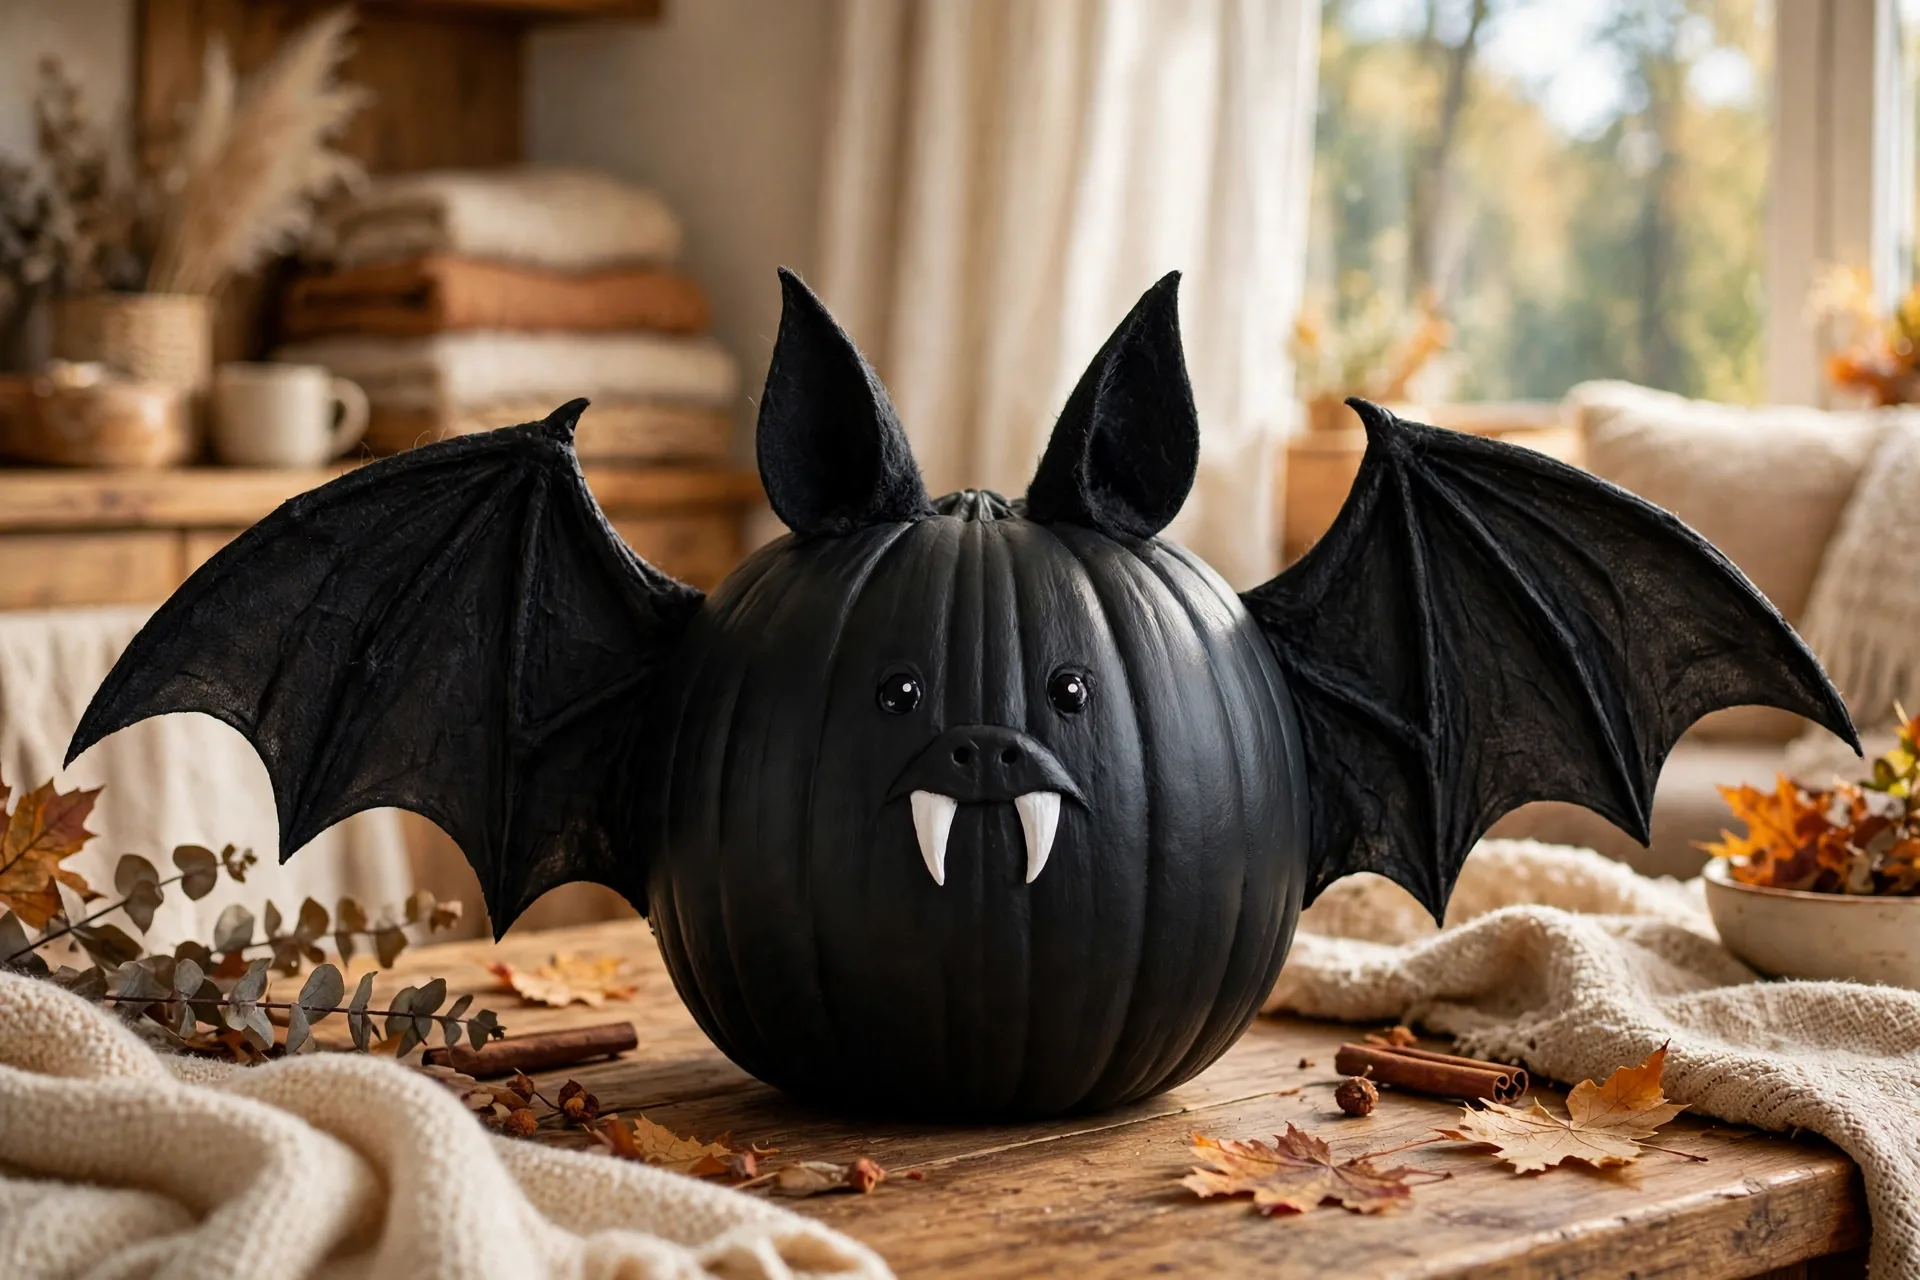
The look: a black bat with spread wings, pointy ears, and two white fangs.
How to make it: Paint the pumpkin black. The grown-up paints two big wings spreading across the front in dark grey with scalloped edges, two pointed ears near the stem, two white fangs, and two red eyes. The wings do the work here, so make them wide enough to reach around the sides of the pumpkin. Kids love checking that the bat looks the same from every angle.
Ages: 5 and up. Kids paint the black base; the grown-up paints the wings and face.
25. The Creepy Clown
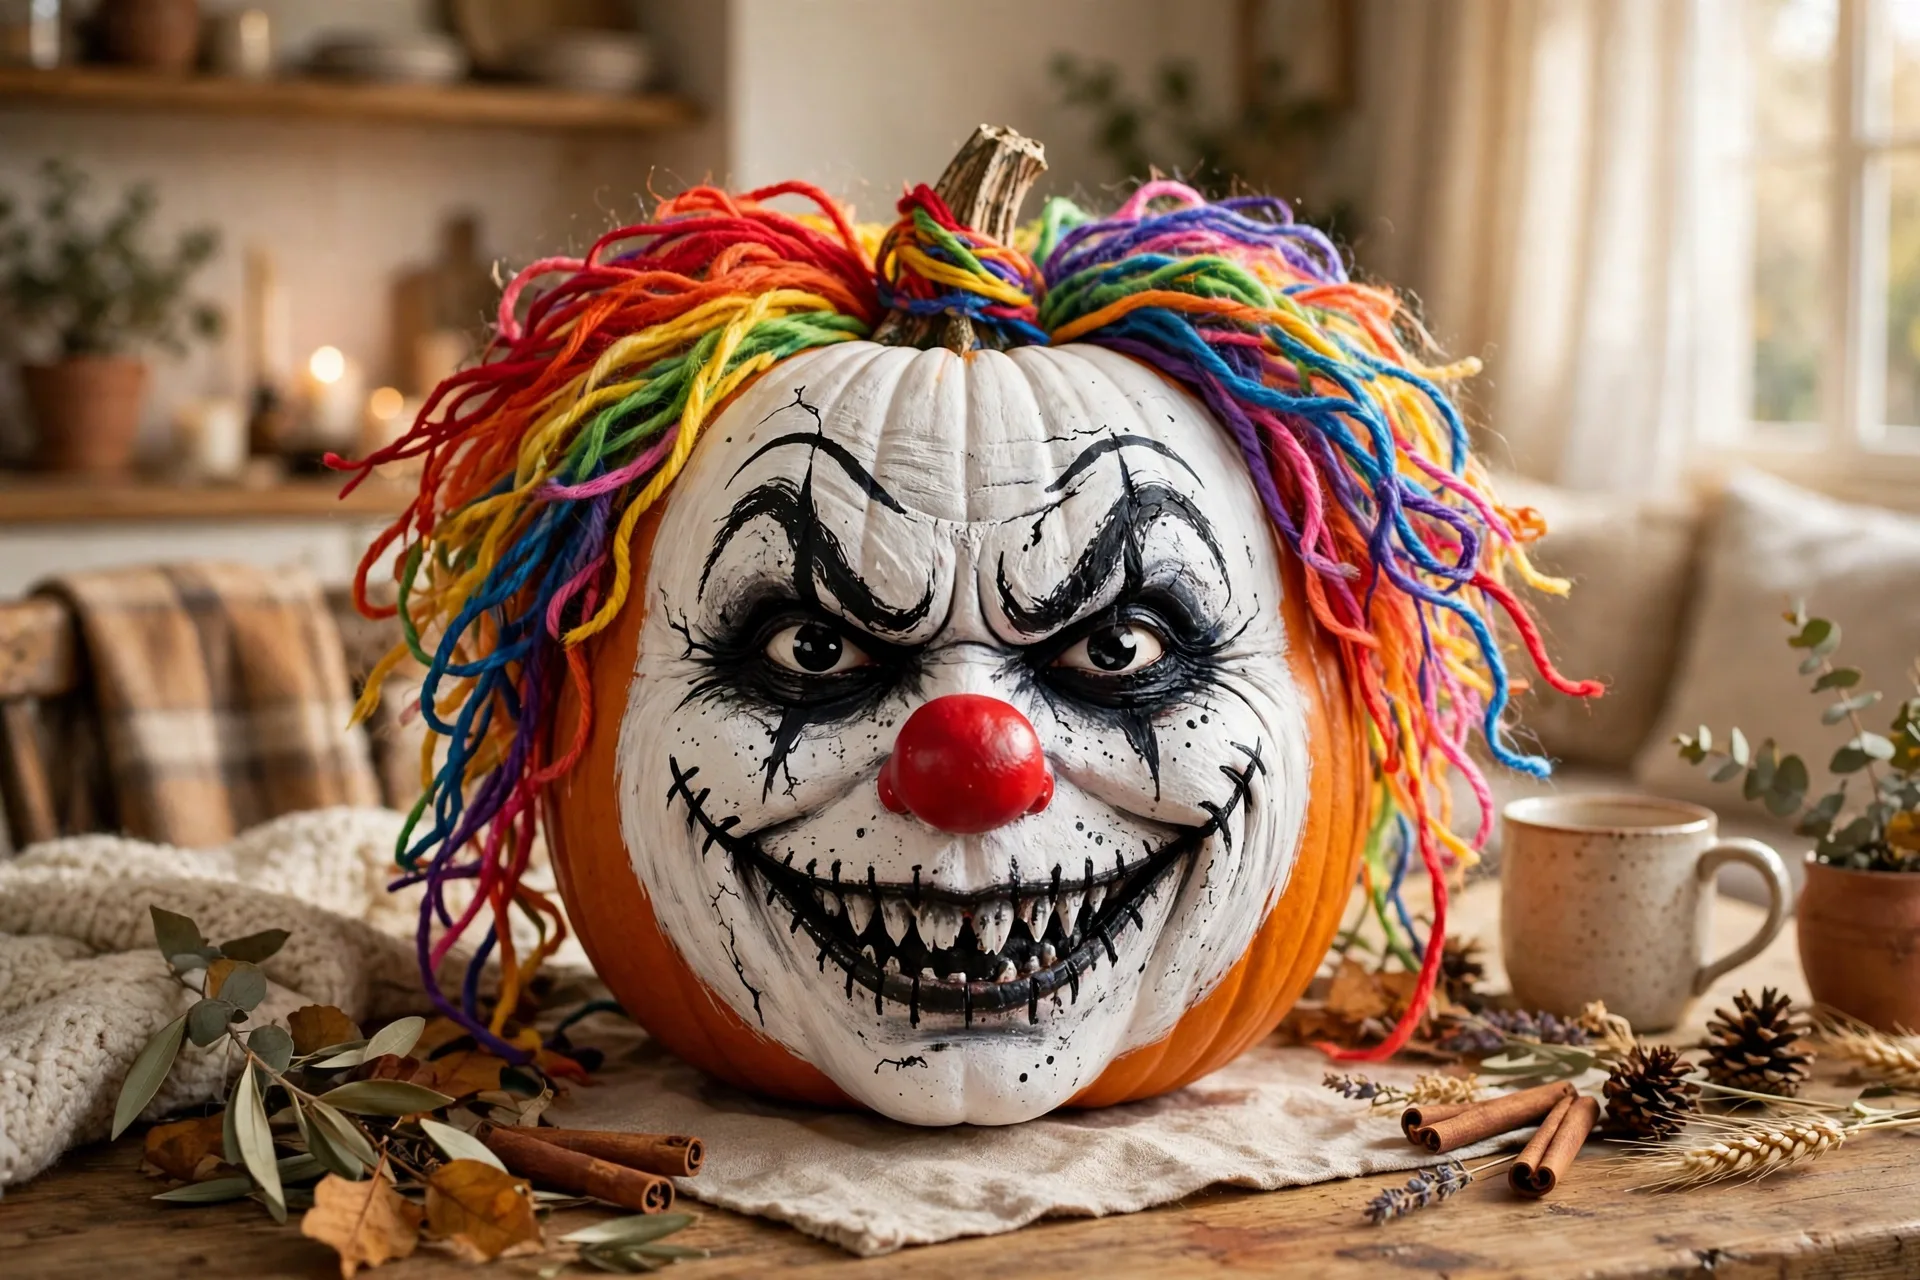
The look: a white clown face with rainbow hair, a red nose, and a too-wide smile.
How to make it: Paint the pumpkin white. The grown-up paints rainbow arcs of hair around the top, a big red round nose, blue triangle eyes, and a wide red smile that stretches too far on both sides. A tiny painted bow tie under the smile finishes it. This one splits the room: half the kids love it, half find it the scariest pumpkin here, which is exactly the point.
Ages: 6 and up. Clown faces need a steady hand and a grown-up in charge of the smile.
More Cute and Friendly
26. The Sleepy Ghost
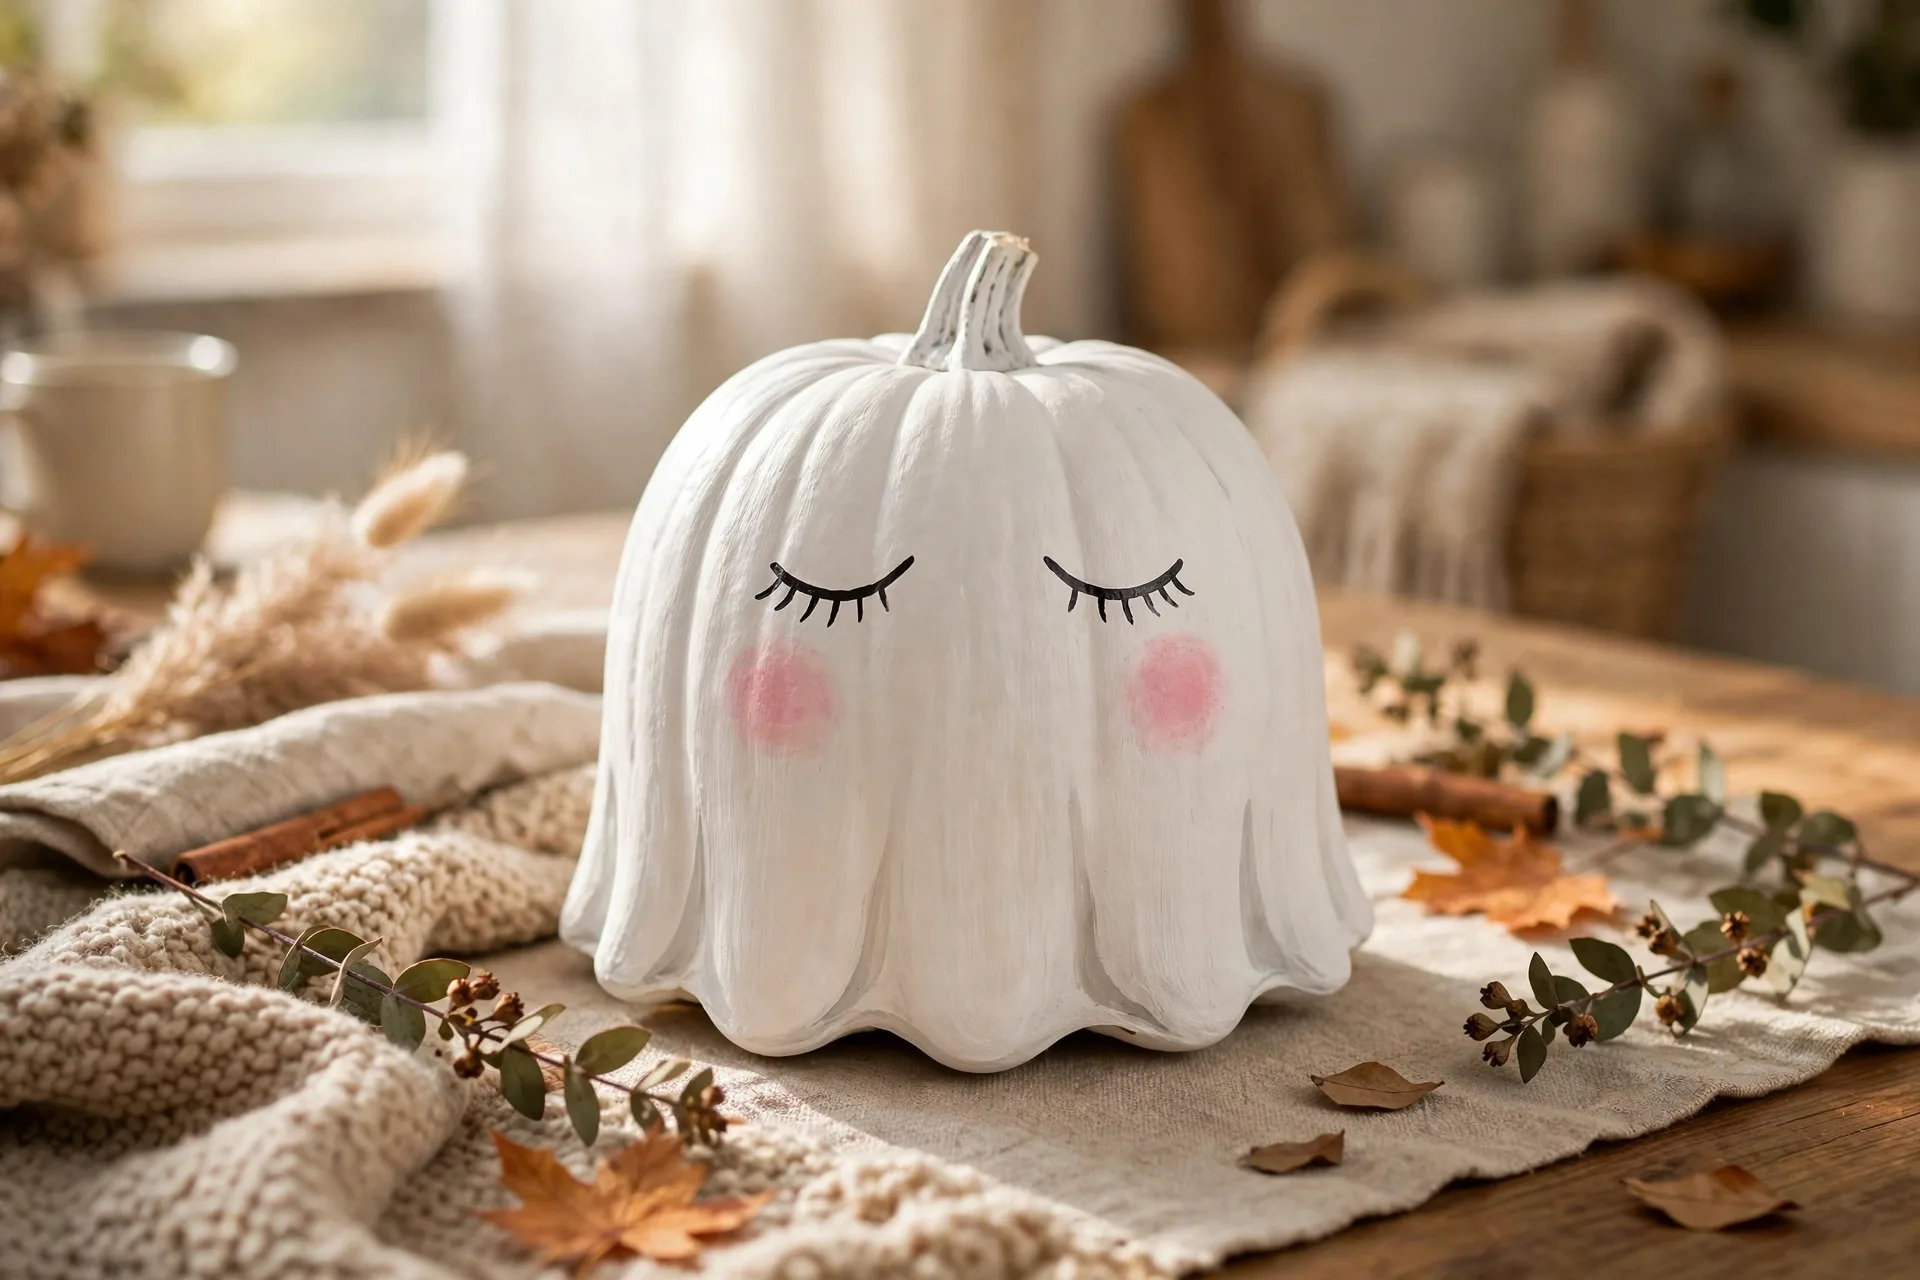
The look: a drowsy little ghost with closed eyes, rosy cheeks, and a tiny yawn.
How to make it: Paint the pumpkin white, two thin coats. The grown-up paints two curved closed eyes, two pink cheek dots, and a small round open mouth like a yawn. Add a tiny painted nightcap in soft blue on one side. This is the ghost for the kid who finds the regular ghost too loud: same five minutes, half the energy, twice the cute.
Ages: 2 and up. The easiest face on the list; toddlers can paint the whole base.
27. The Pumpkin Pie Slice
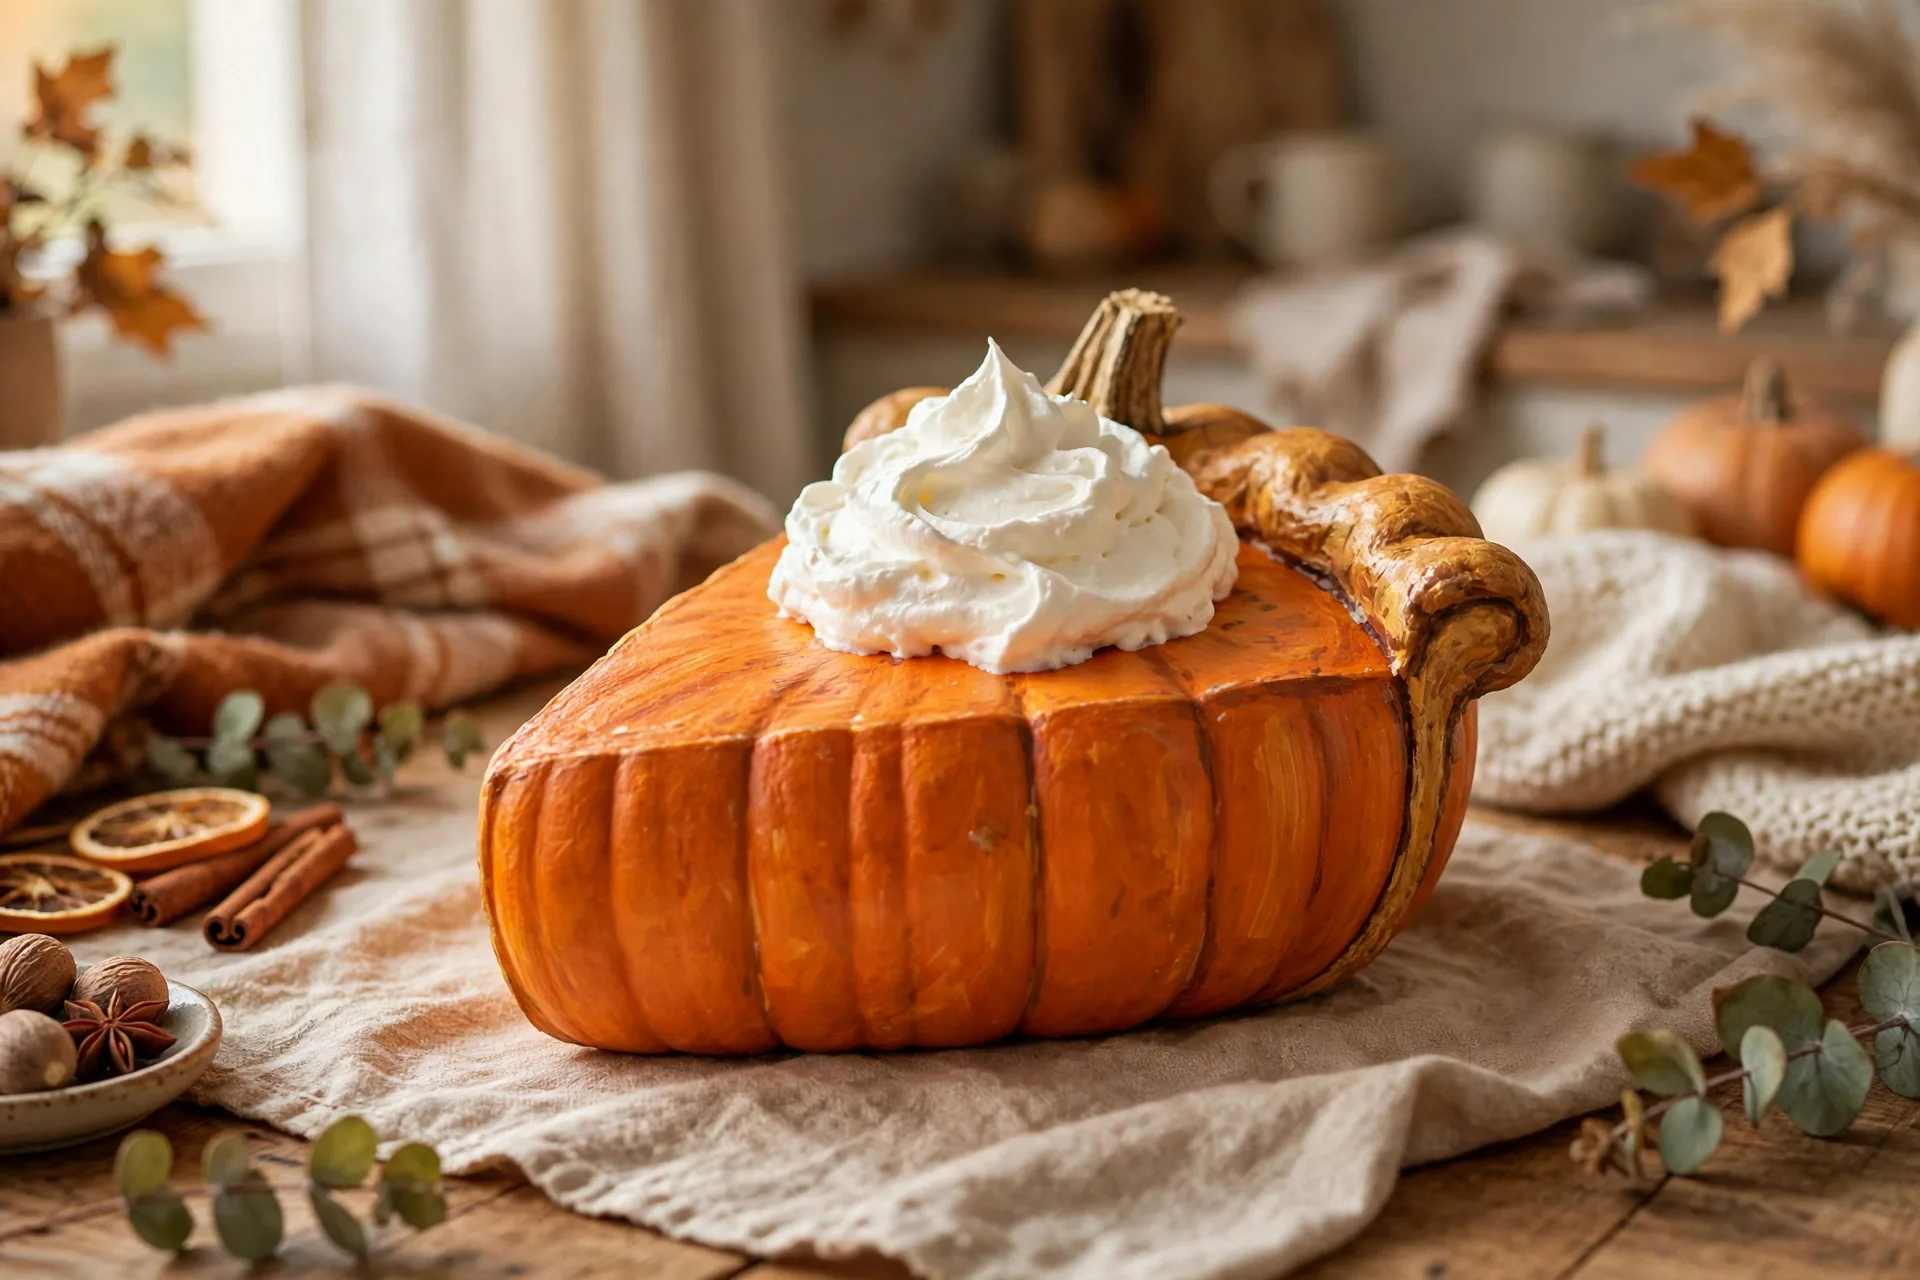
The look: a pumpkin dressed as a slice of pumpkin pie, complete with a whipped-cream top.
How to make it: Paint the top third white for whipped cream, the middle orange-brown for filling, and the bottom tan for crust. The grown-up paints a wavy line between the cream and the filling and adds a tiny brown cinnamon sprinkle dot on top. It is a pumpkin dressed as pie, which is the kind of joke a four-year-old will explain to every visitor.
Ages: 3 and up. Band painting is all kid work; the wavy cream line is grown-up work.
28. The Candy Apple
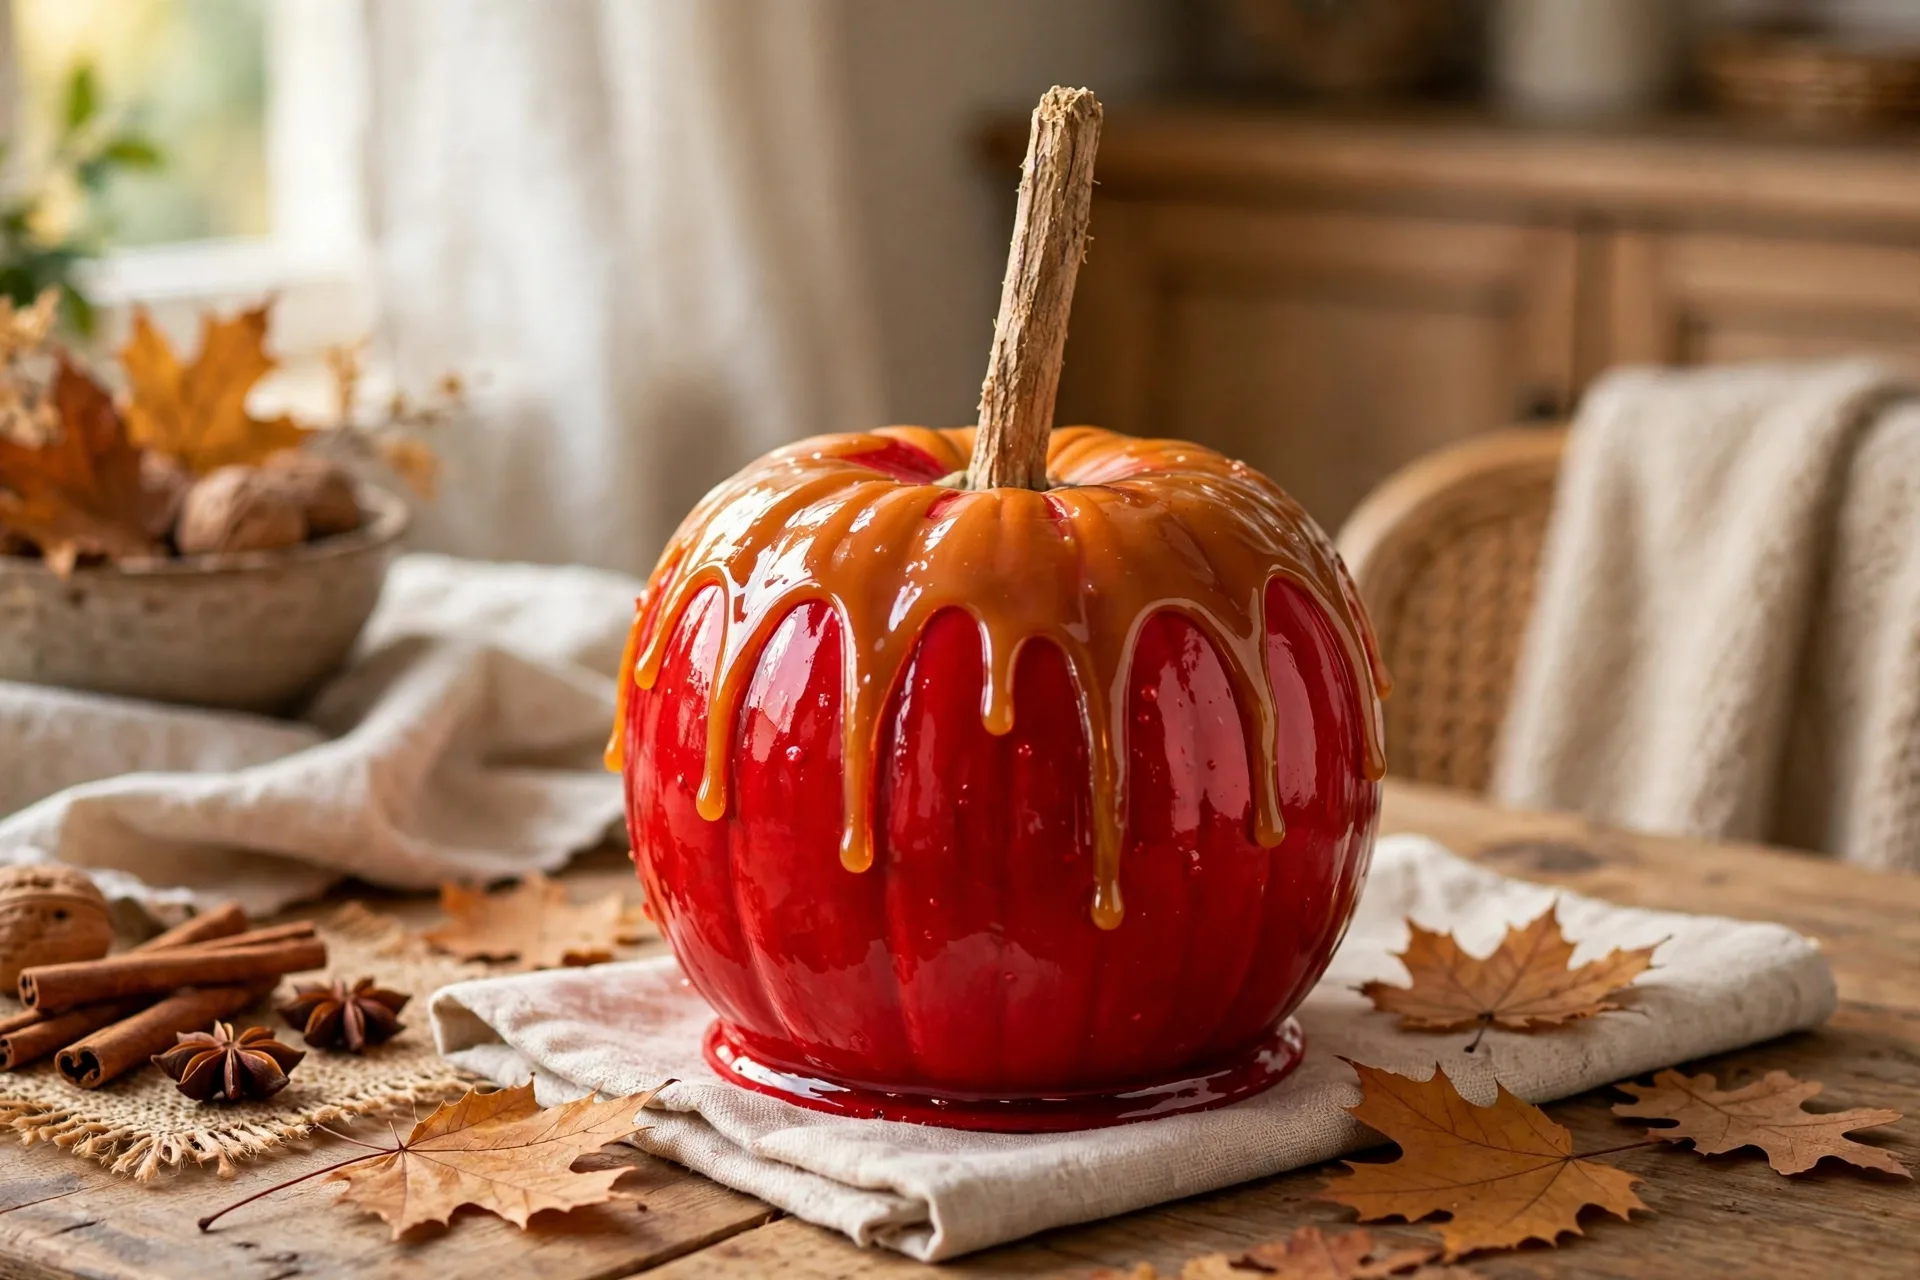
The look: a shiny red apple pumpkin with a caramel drip and a stick stem.
How to make it: Paint the pumpkin glossy red, two coats. Once dry, the grown-up paints a golden caramel drip running down from the top and paints the stem brown like a stick. Add a few white shine dots on one side so the red looks wet and glossy. This is the pumpkin that makes everyone hungry, so keep it away from the real candy bowl.
Ages: 4 and up. Kids paint the red base; the grown-up paints the caramel drip.
29. The Little Owl
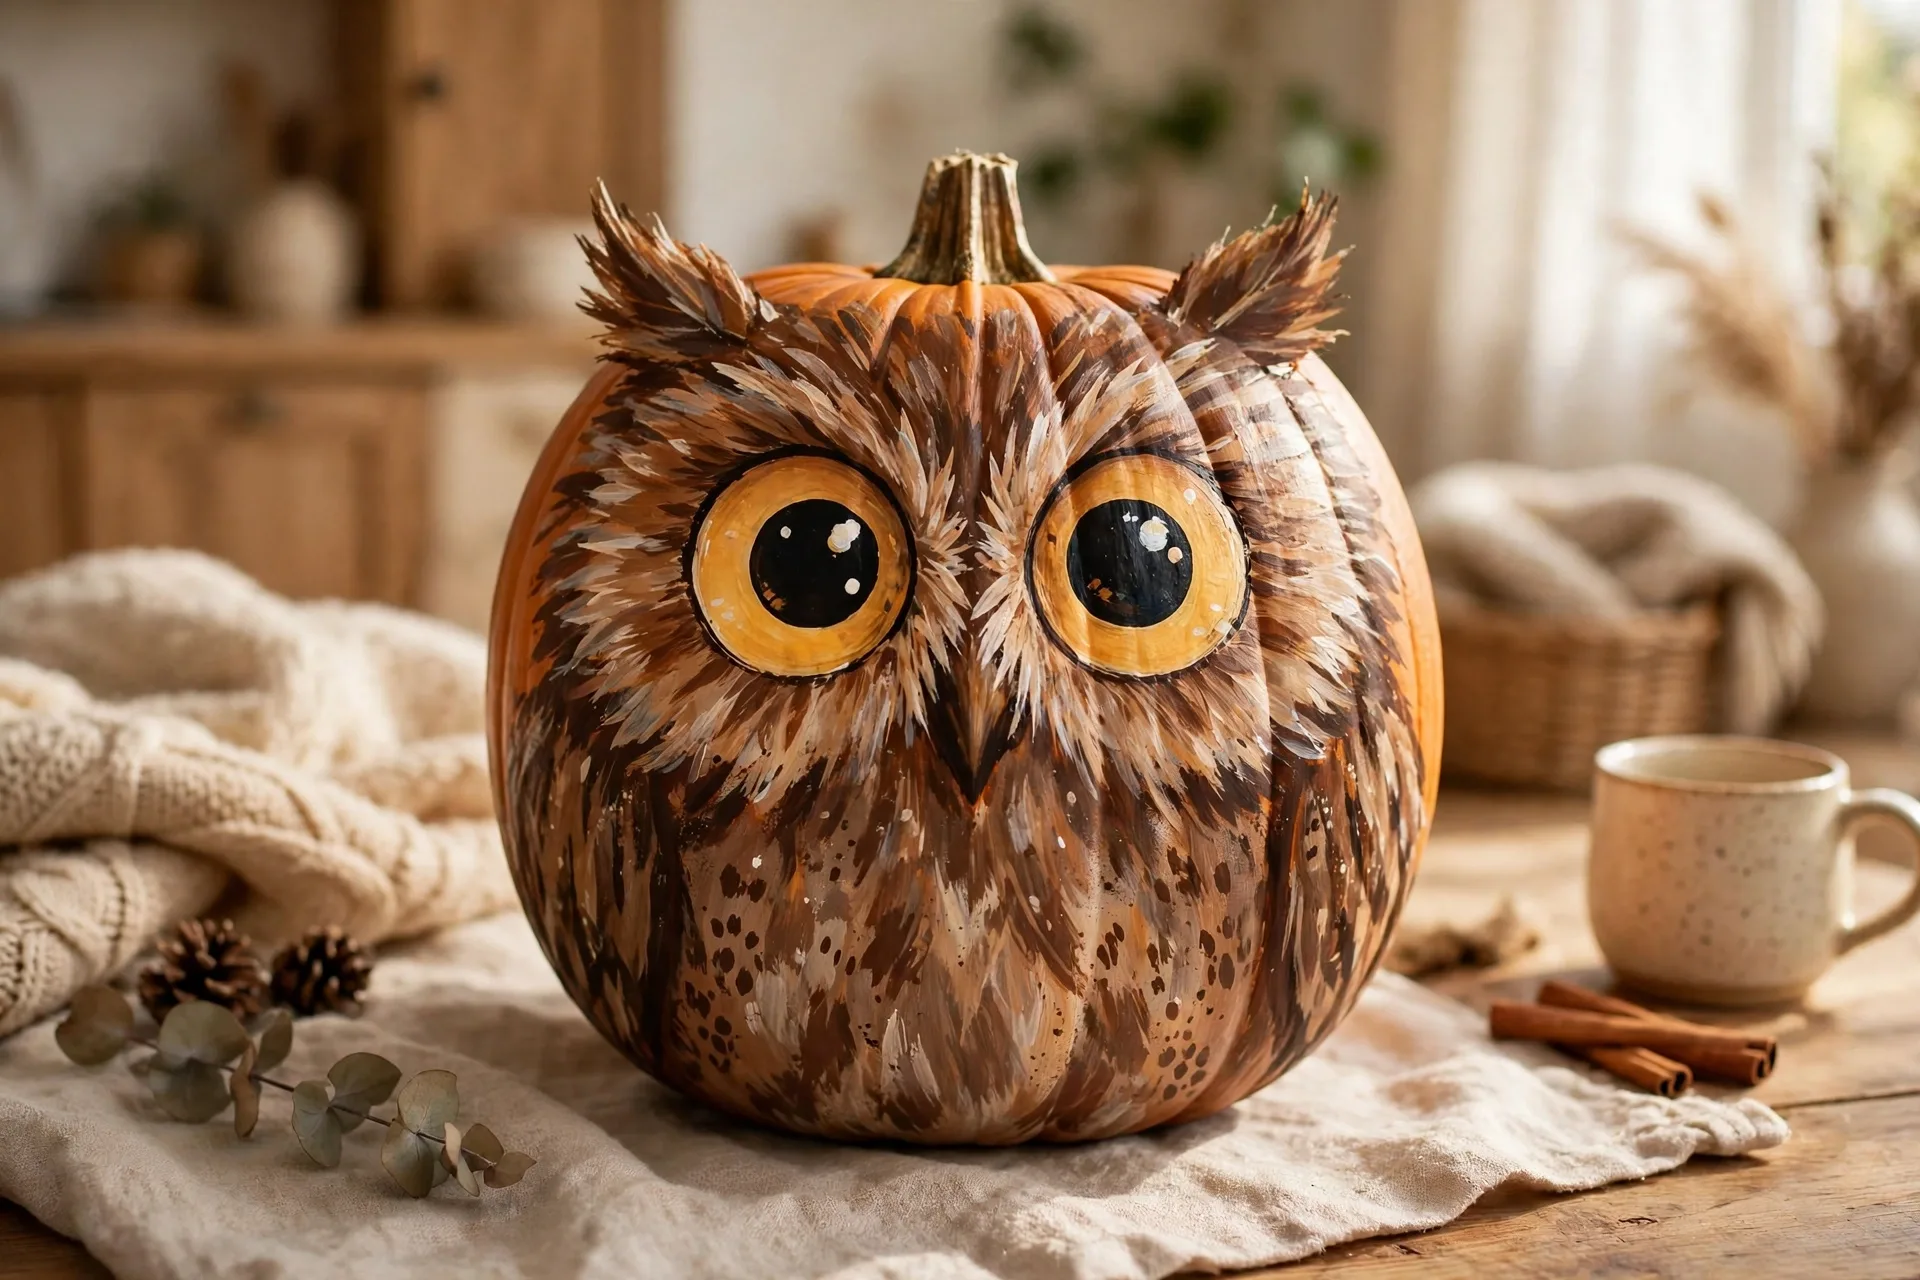
The look: a brown owl with two enormous round eyes and soft feather strokes.
How to make it: Paint the pumpkin warm brown. The grown-up paints two big white eye circles with dark pupils, a small orange triangle beak, and soft feather strokes in a lighter brown around the belly. Two tiny ear tufts near the stem finish it. Owls are the rare Halloween design that works just as well in November, so this one stays out the longest.
Ages: 3 and up. Kids paint the brown base; the grown-up paints the eyes and beak.
30. The Friendly Witch
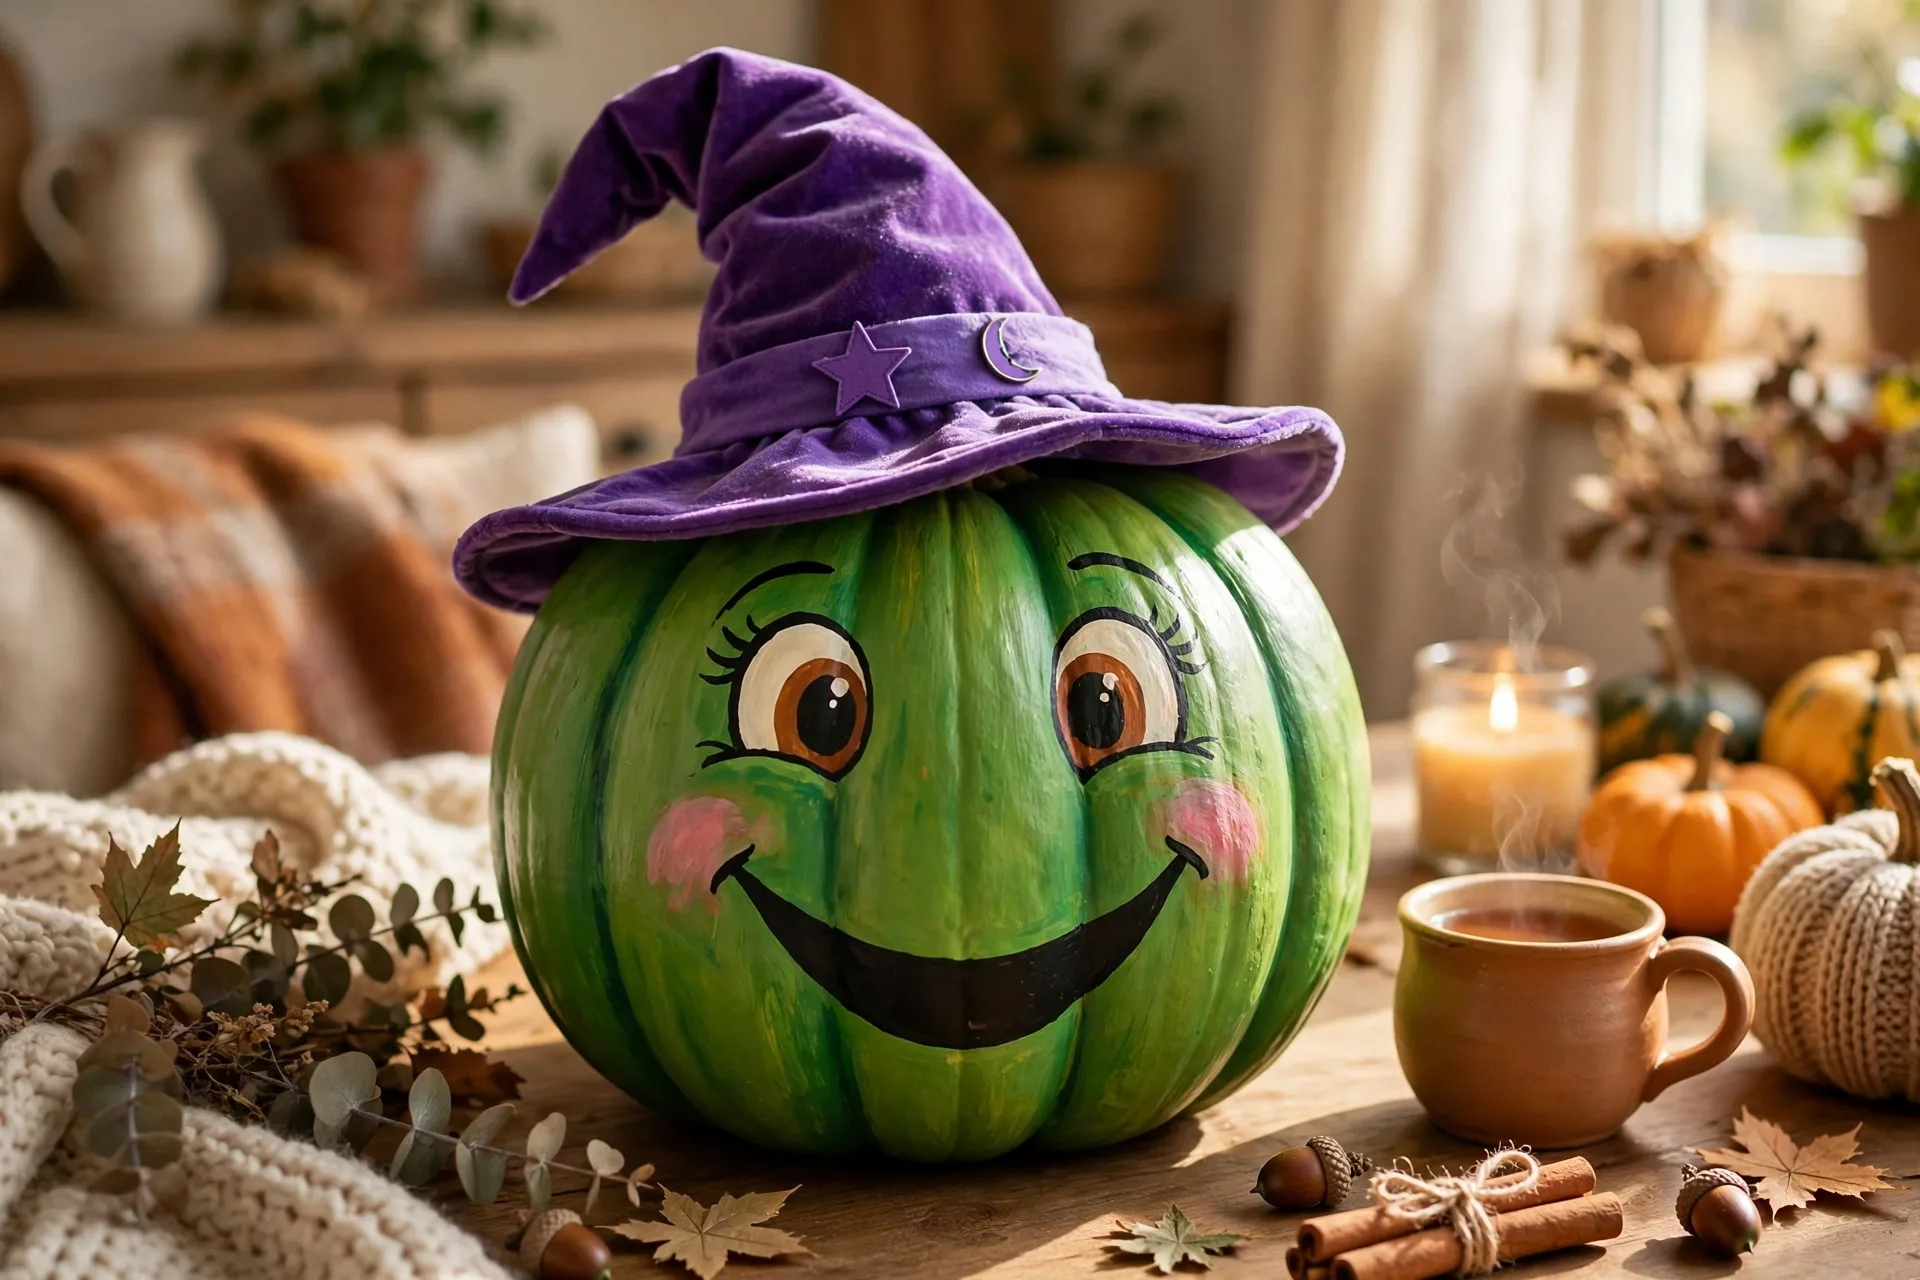
The look: a smiling green witch with a purple hat and a wart she is proud of.
How to make it: Paint the pumpkin green, two coats. The grown-up paints a purple witch hat that wraps around the stem, two friendly round eyes, a big smile, and one small wart with a ring around it. Paint the hat brim wide so it reads from across the porch. My four-year-old insists the wart is the best part, and she is not wrong.
Ages: 4 and up. Kids paint the green base; the grown-up paints the hat and face.
31. The Baby Boo
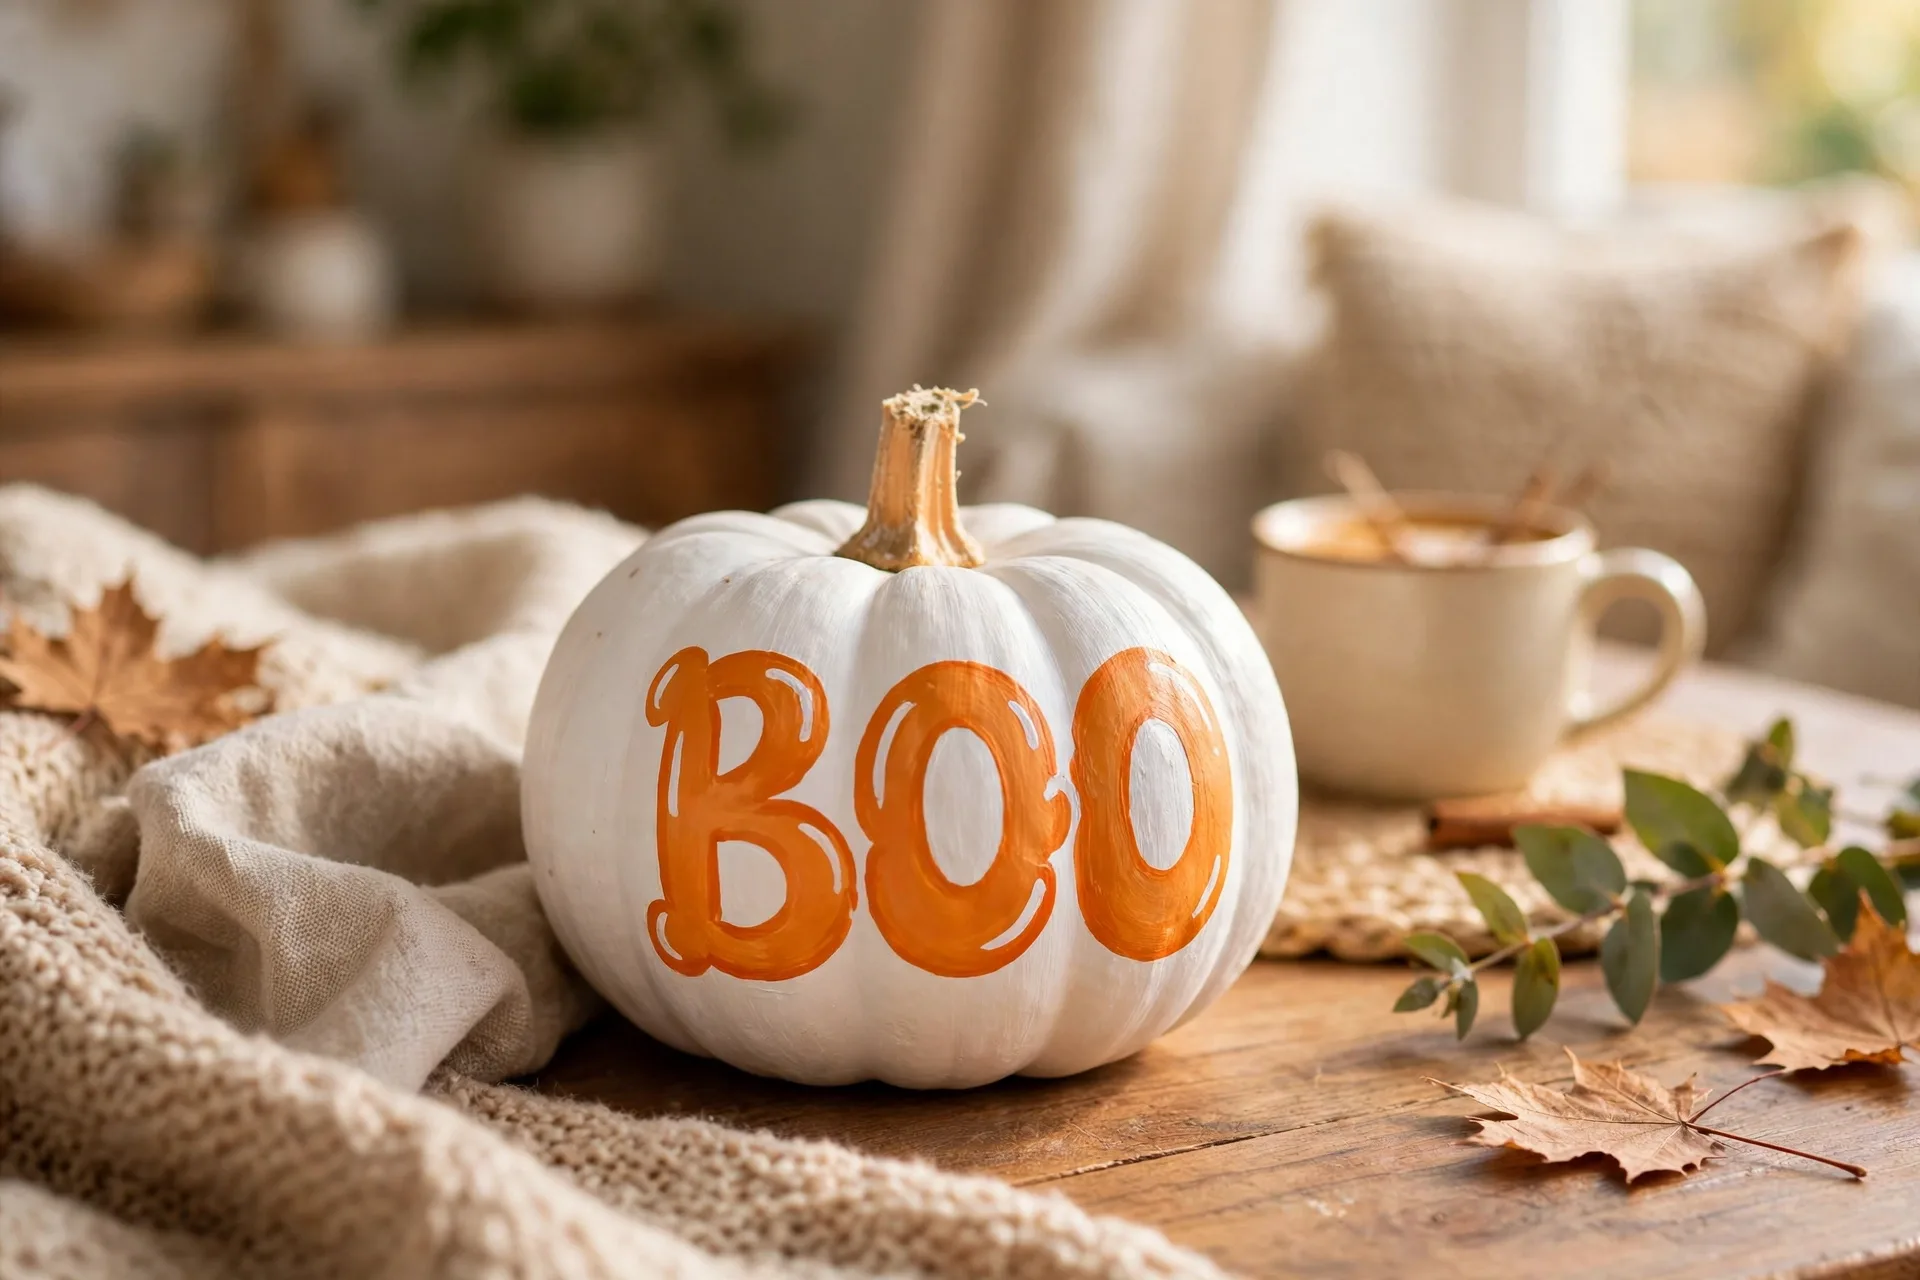
The look: a tiny pumpkin with the word BOO in big bubble letters.
How to make it: Pick the smallest pumpkin you can find and paint it soft lavender or pale yellow. The grown-up letters B-O-O in big round bubble letters across the front in white or dark purple. Add two tiny dot eyes above the letters. It is the smallest pumpkin on the porch and the one every visitor picks up first.
Ages: 3 and up. Lettering is grown-up work; little ones pick the color.
32. The Pumpkin King
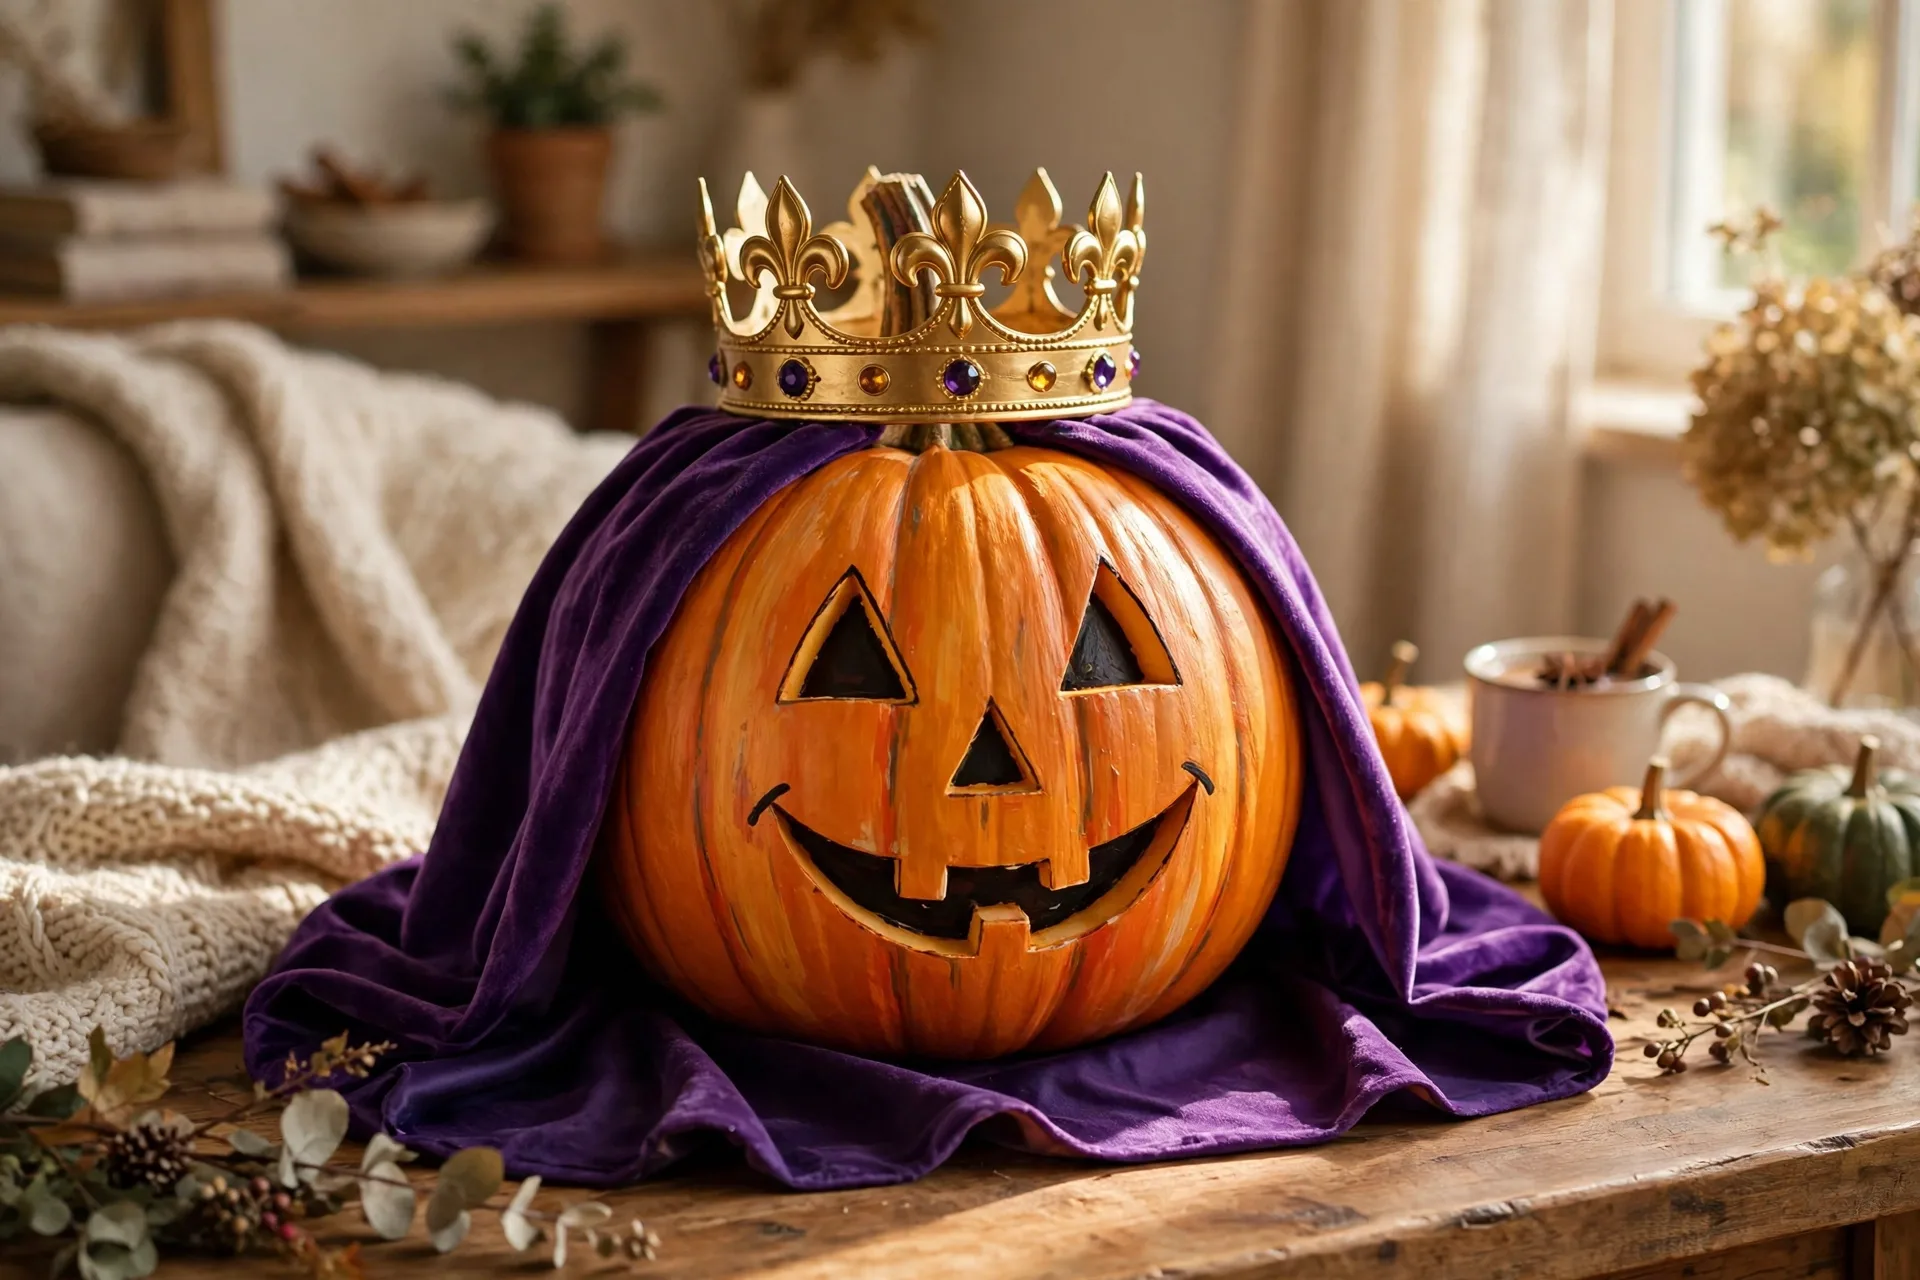
The look: a jack-o-lantern wearing a painted gold crown and a royal purple cape.
How to make it: Paint the classic jack face straight onto the natural orange: triangle eyes, a zigzag grin, a triangle nose. Then the grown-up paints a gold crown around the stem with three points and a purple cape band around the bottom third. The crown is the whole joke: the same jack face every kid knows, suddenly in charge of the porch. My four-year-old bows to it every time she walks past.
Ages: 4 and up. Kids paint the jack face; the grown-up paints the crown and cape.
33. The Unicorn Pumpkin
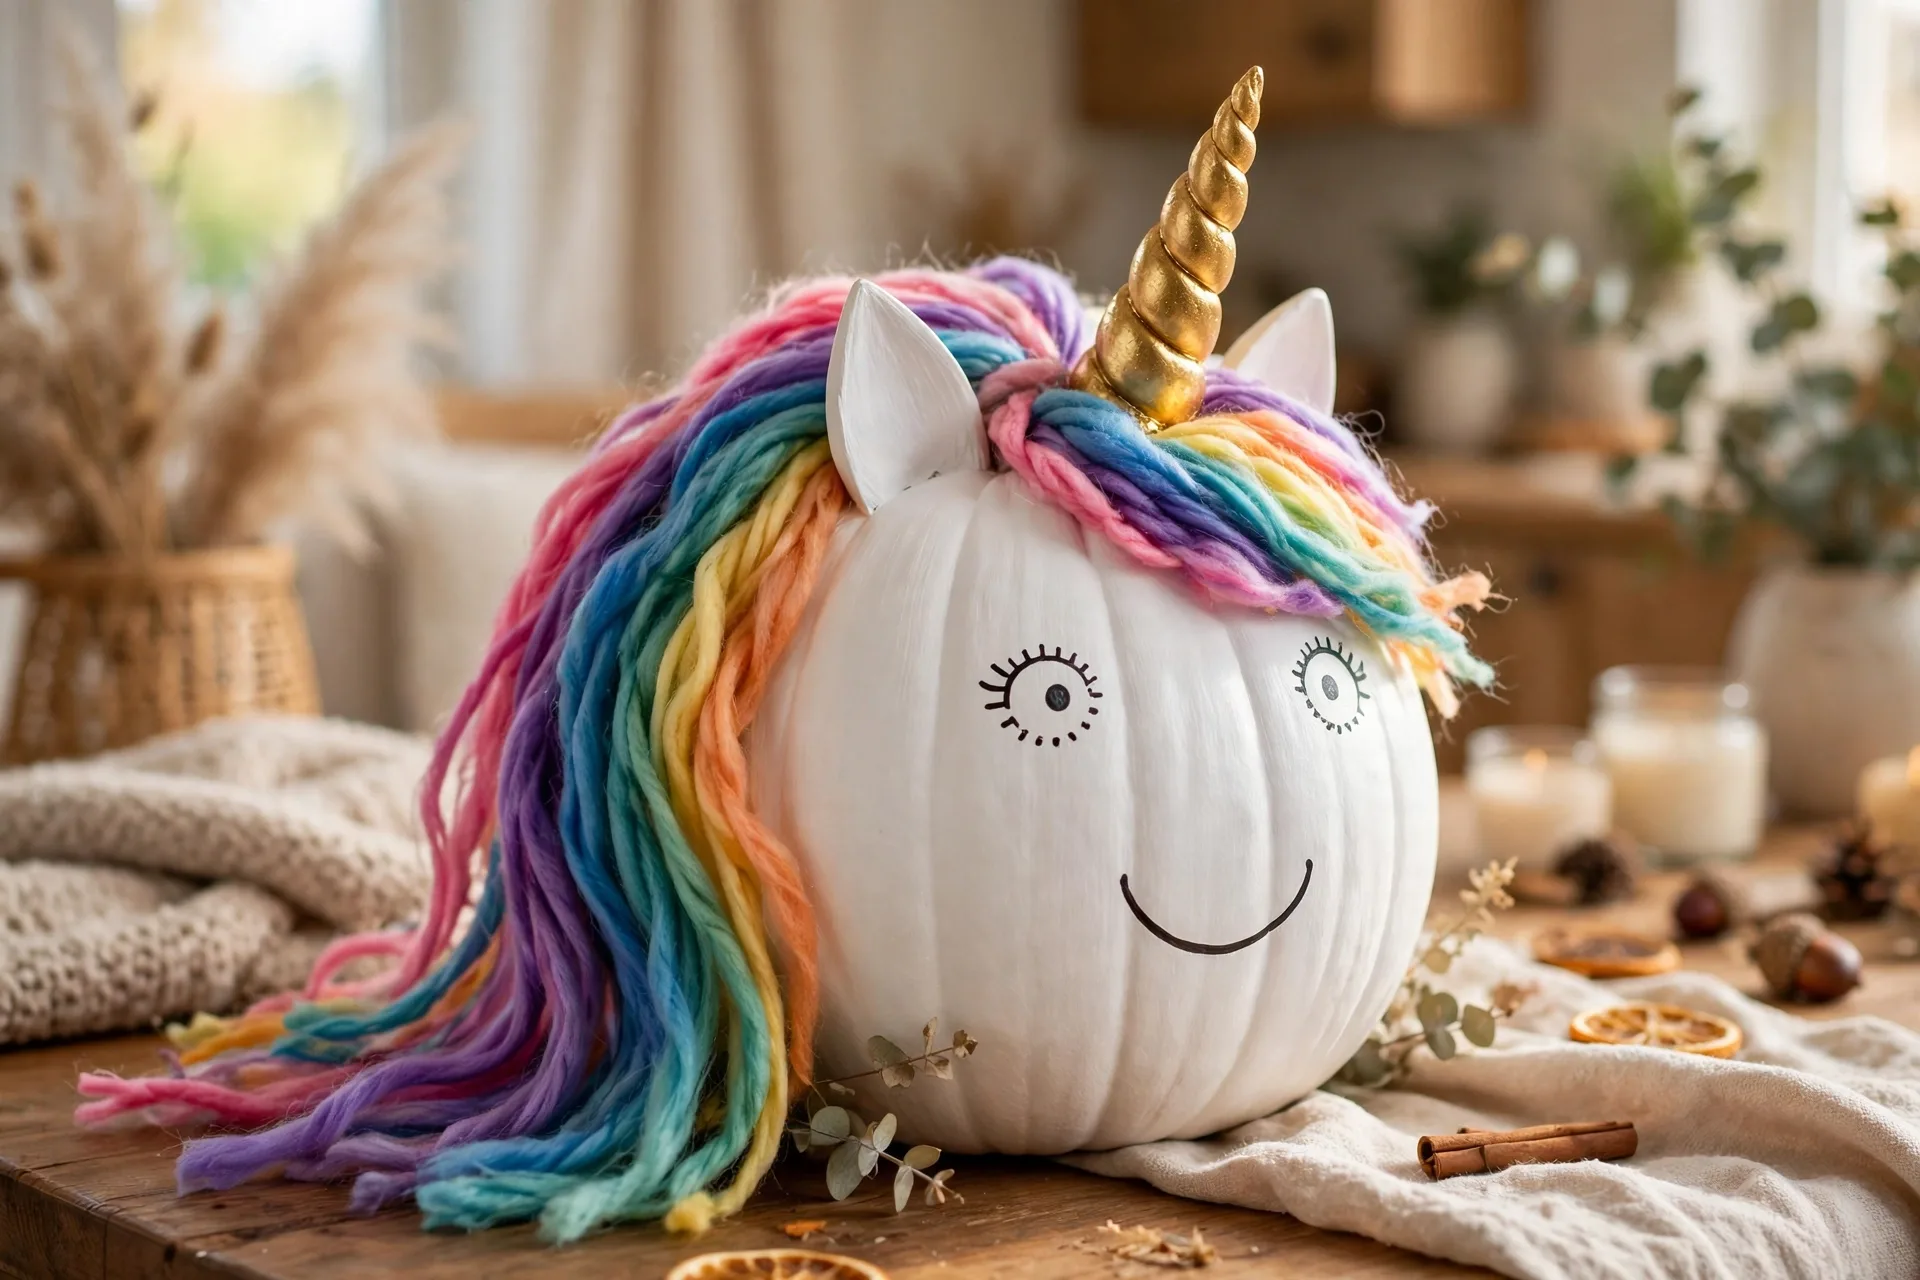
The look: a white pumpkin with a rainbow mane, a gold horn, and sleepy happy eyes.
How to make it: Paint the pumpkin white. The grown-up paints a rainbow mane sweeping down one side, a gold triangle horn at the stem, two closed happy eyes with long lashes, and a tiny smile. A few gold star dots finish it. It is not a Halloween pumpkin so much as a magic pumpkin that happens to live on a Halloween porch, and the kids will fight over who owns it.
Ages: 4 and up. Kids paint the white base; the grown-up paints the mane and horn.
34. The Ladybug
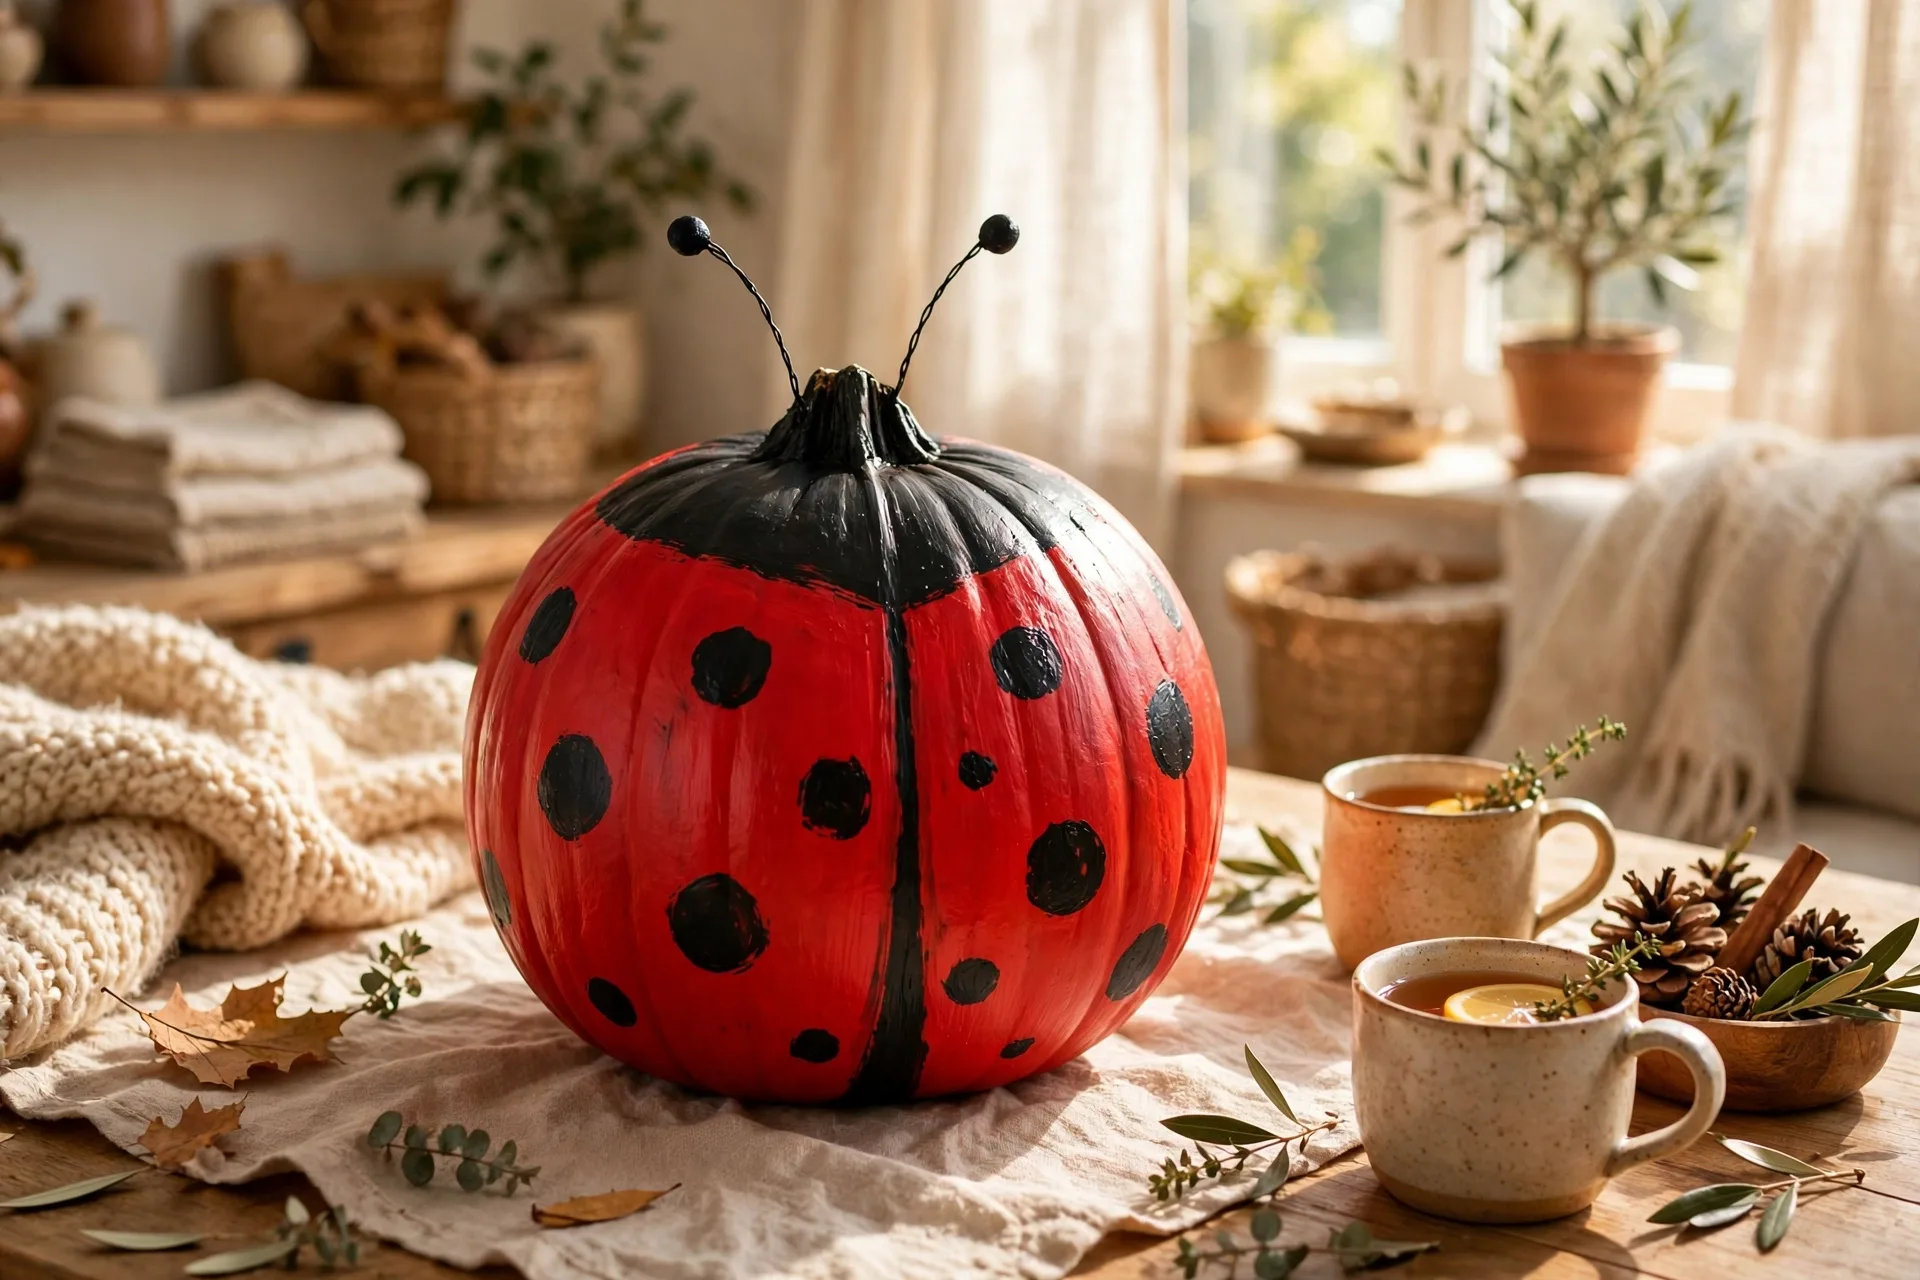
The look: a red pumpkin with black dots, a black head, and tiny painted wings.
How to make it: Paint the pumpkin red and the top third near the stem black for the head. Add black dots of different sizes all over the red, and two tiny white wing lines on the back. A small smile under the head makes it friendly instead of buggy. It is a spring design that wandered into October, and nobody minds.
Ages: 3 and up. Dots are the easiest painting job there is; toddlers own this one.
35. The Bumblebee
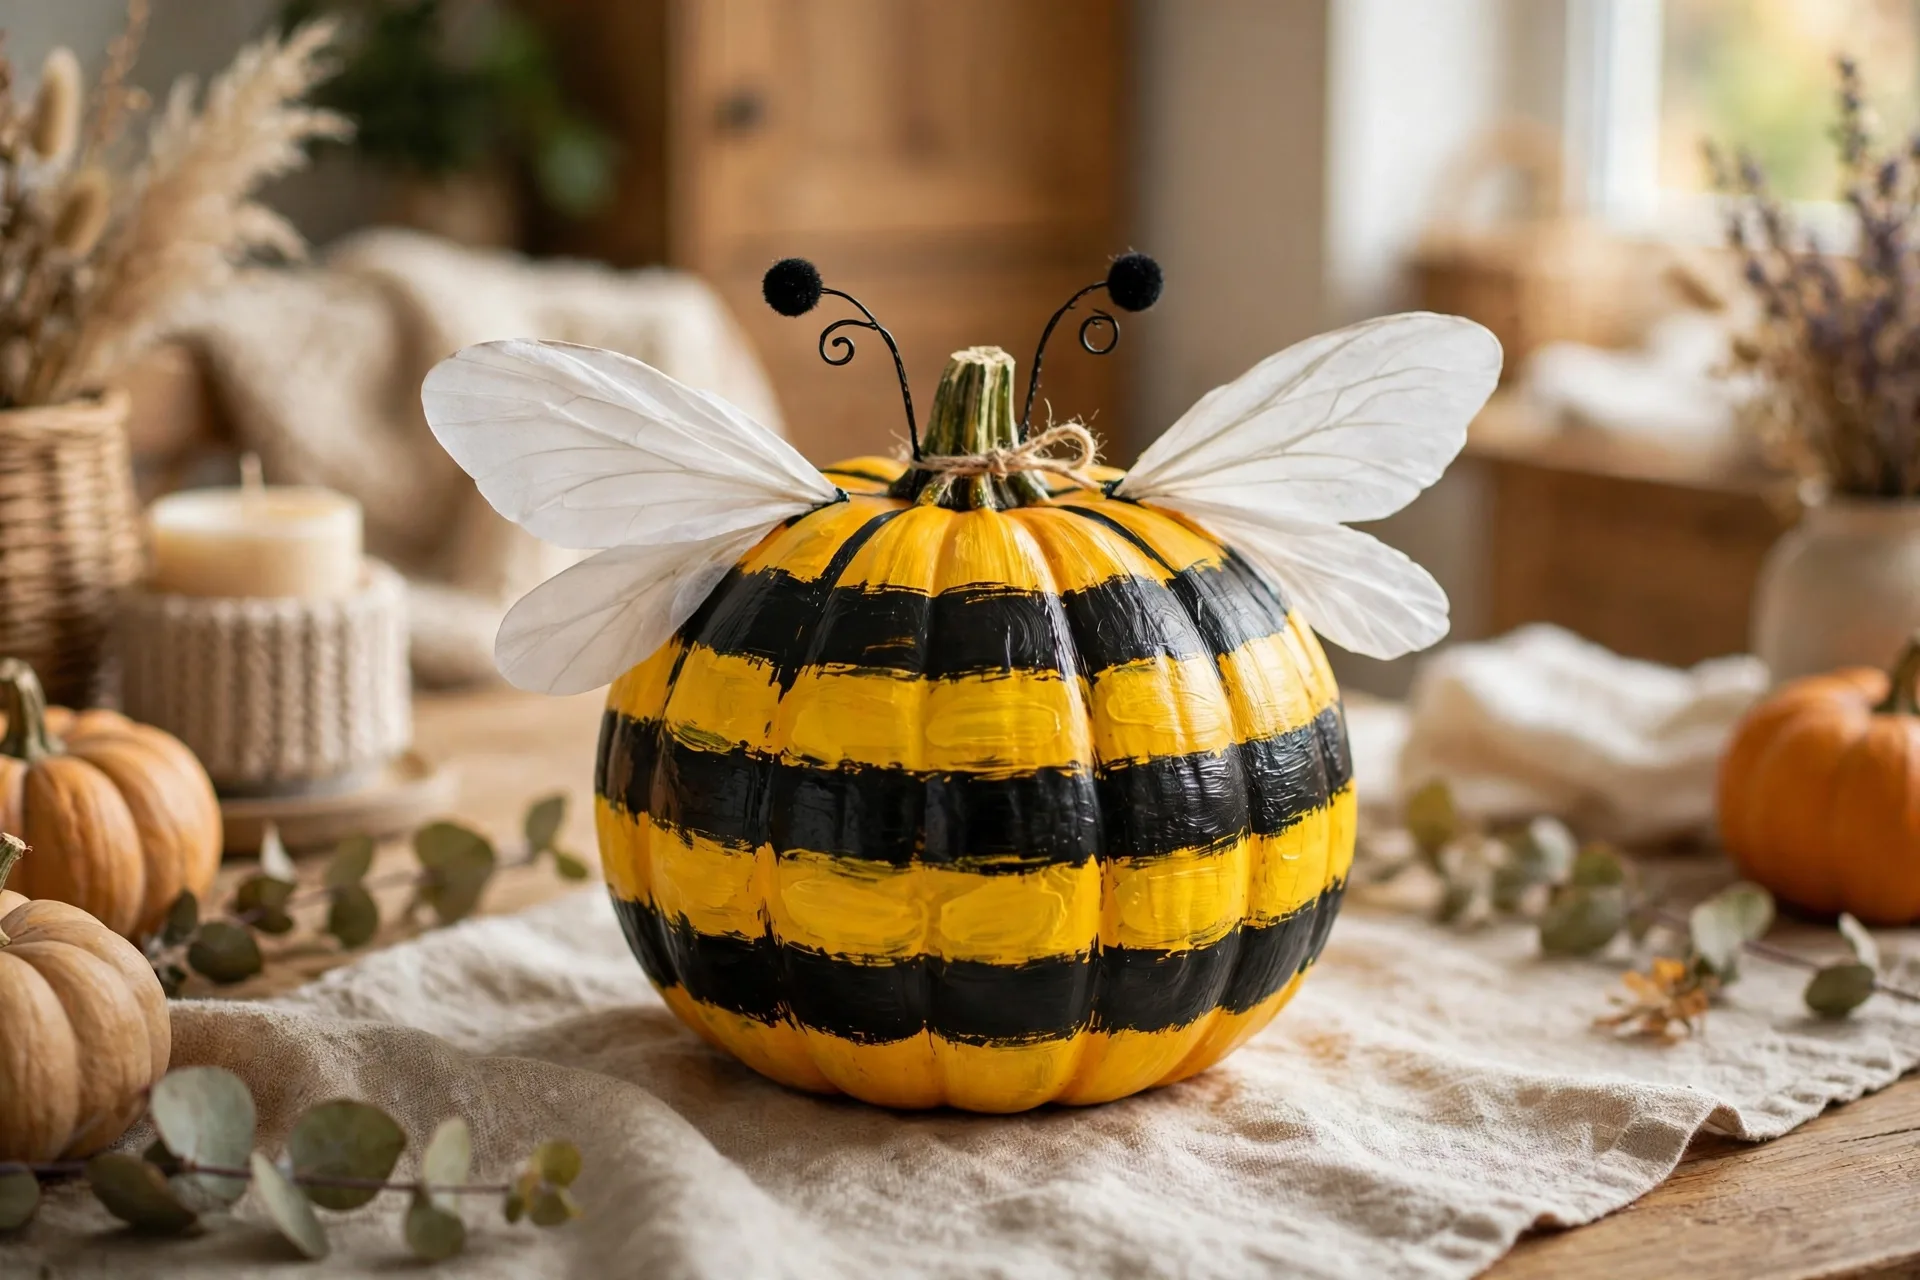
The look: a yellow pumpkin with black stripes, two wings, and a very busy expression.
How to make it: Paint the pumpkin yellow and add three thick black stripes around the middle. The grown-up paints two white oval wings on the sides and a small face with two big eyes and a smile. The stripes are the whole trick: keep them even and the bee reads instantly, even from the sidewalk.
Ages: 3 and up. Stripes are kid work with tape guides; the face is grown-up work.
More Patterns and Texture
36. Chevron Stripes
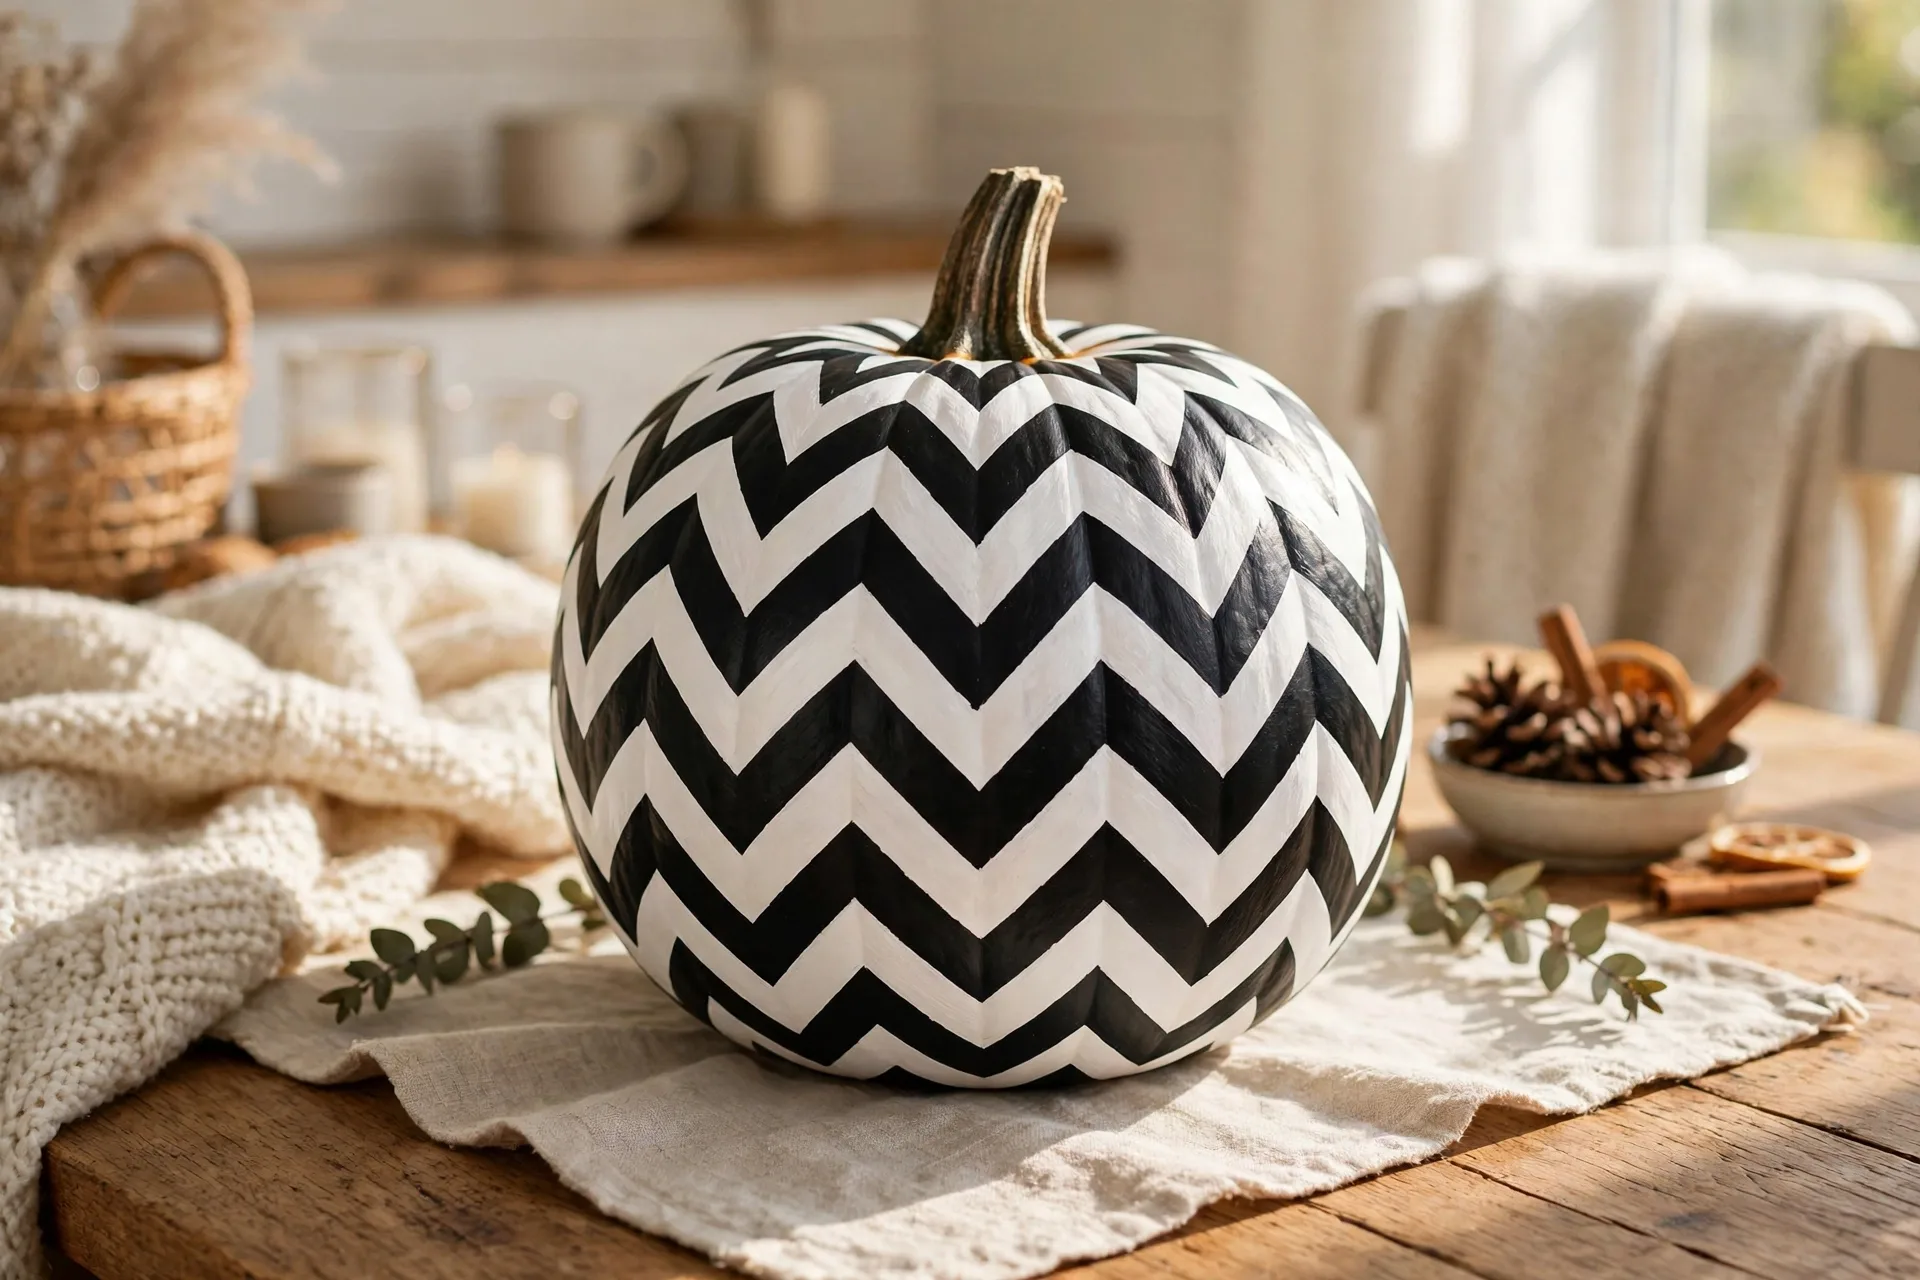
The look: bold zigzag chevron stripes in black and white across the whole pumpkin.
How to make it: Tape zigzag lines around the pumpkin with painter tape, then paint alternating stripes black and white. Peel the tape while the paint is tacky for crisp edges. The pattern looks complicated and takes ten minutes, which is the best kind of craft math. A chevron pumpkin next to a plain orange one makes the whole porch look designed.
Ages: 5 and up. Tape placement is grown-up work; stripe painting is kid work.
37. Polka Dot Rainbow
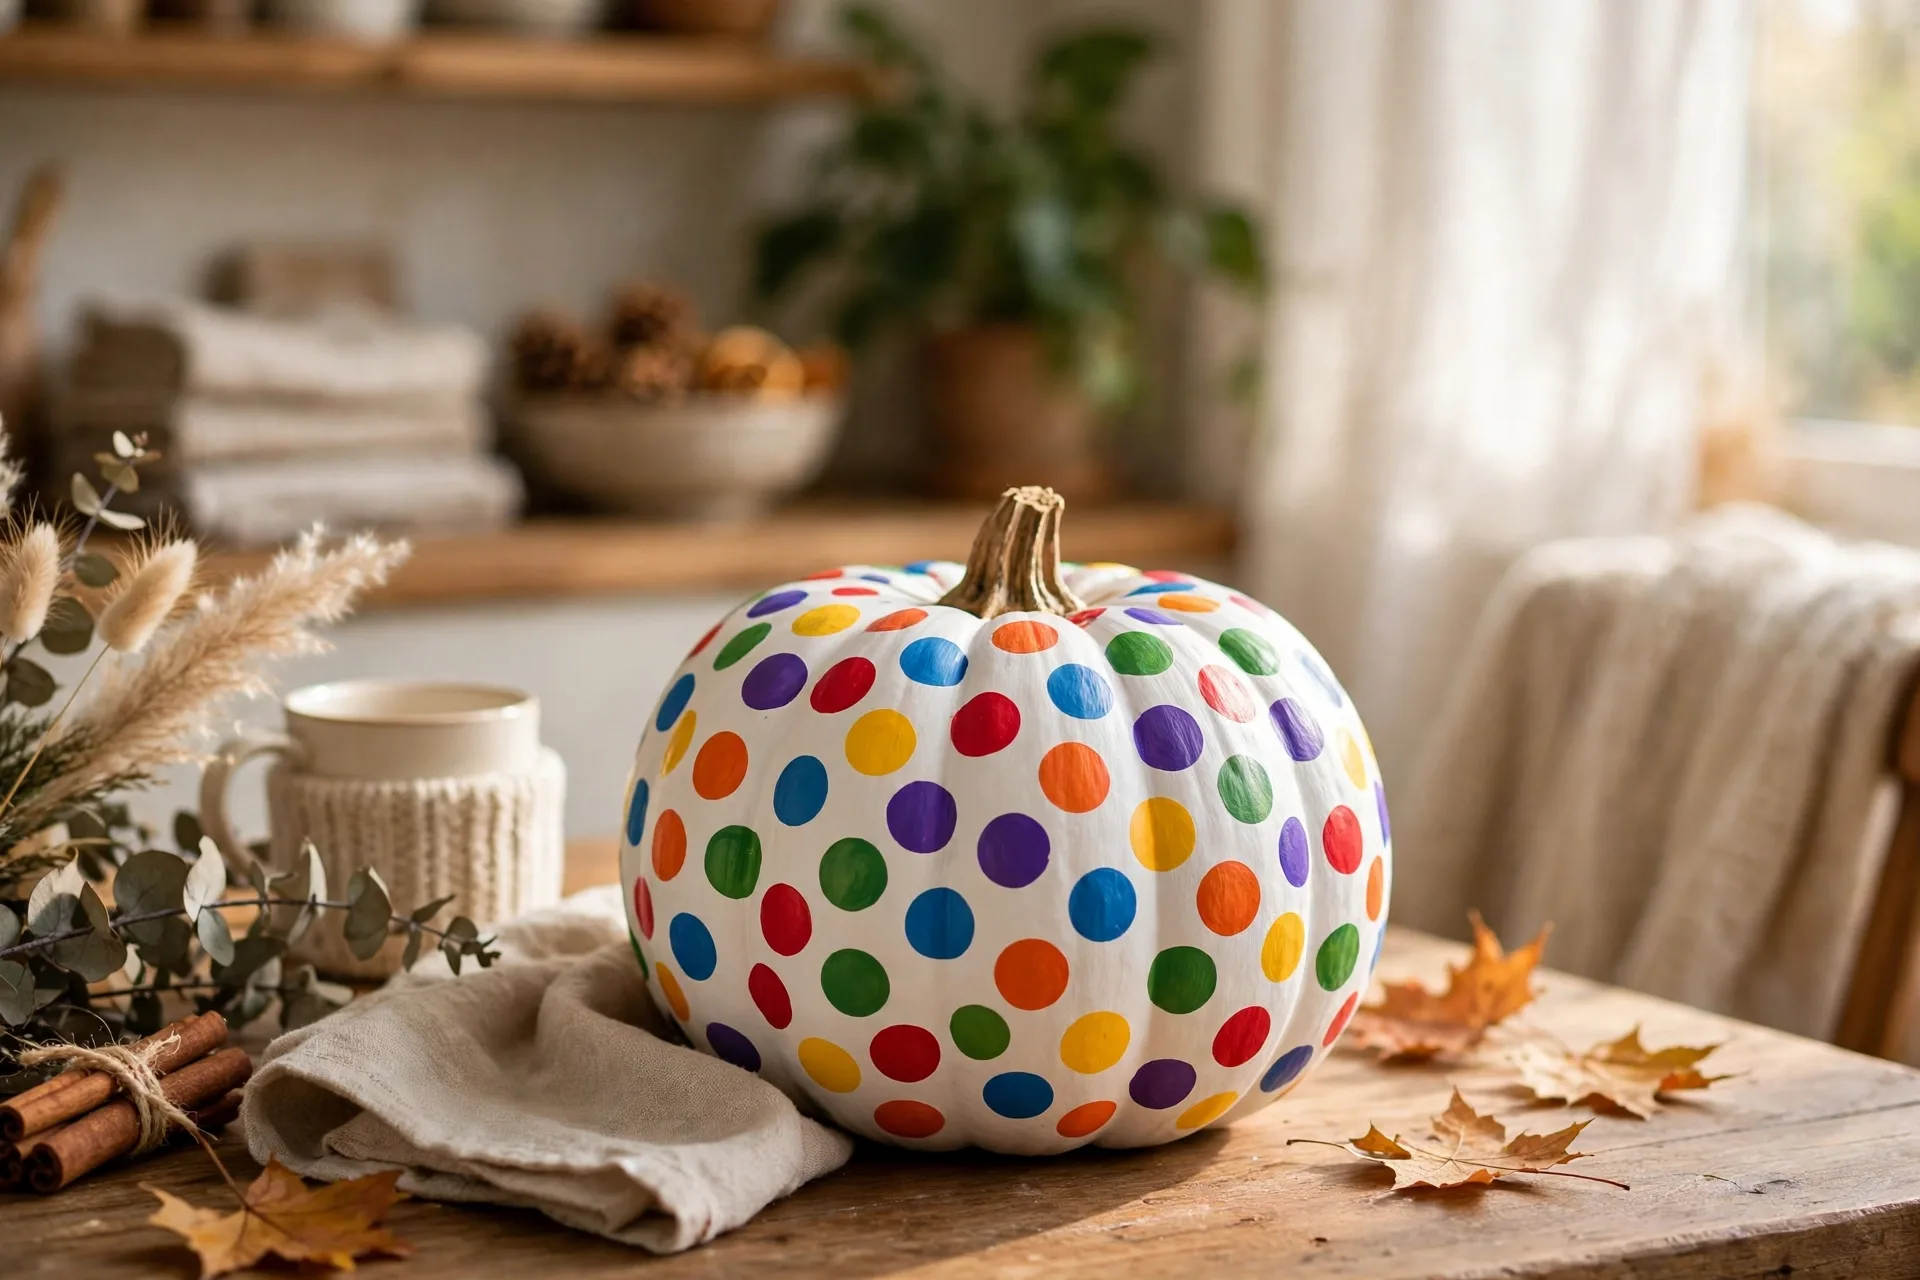
The look: a white pumpkin covered in rainbow polka dots of every size.
How to make it: Paint the pumpkin white and let it dry fully. Then stamp dots with pencil erasers, cotton swabs, and fingertips in every color you own: red, orange, yellow, green, blue, purple. Big dots, tiny dots, overlapping dots. There is no wrong dot, which is why toddlers finish this one first and proudest.
Ages: 2 and up. The easiest pattern on the list; stamping is a skill at two.
38. Checkerboard
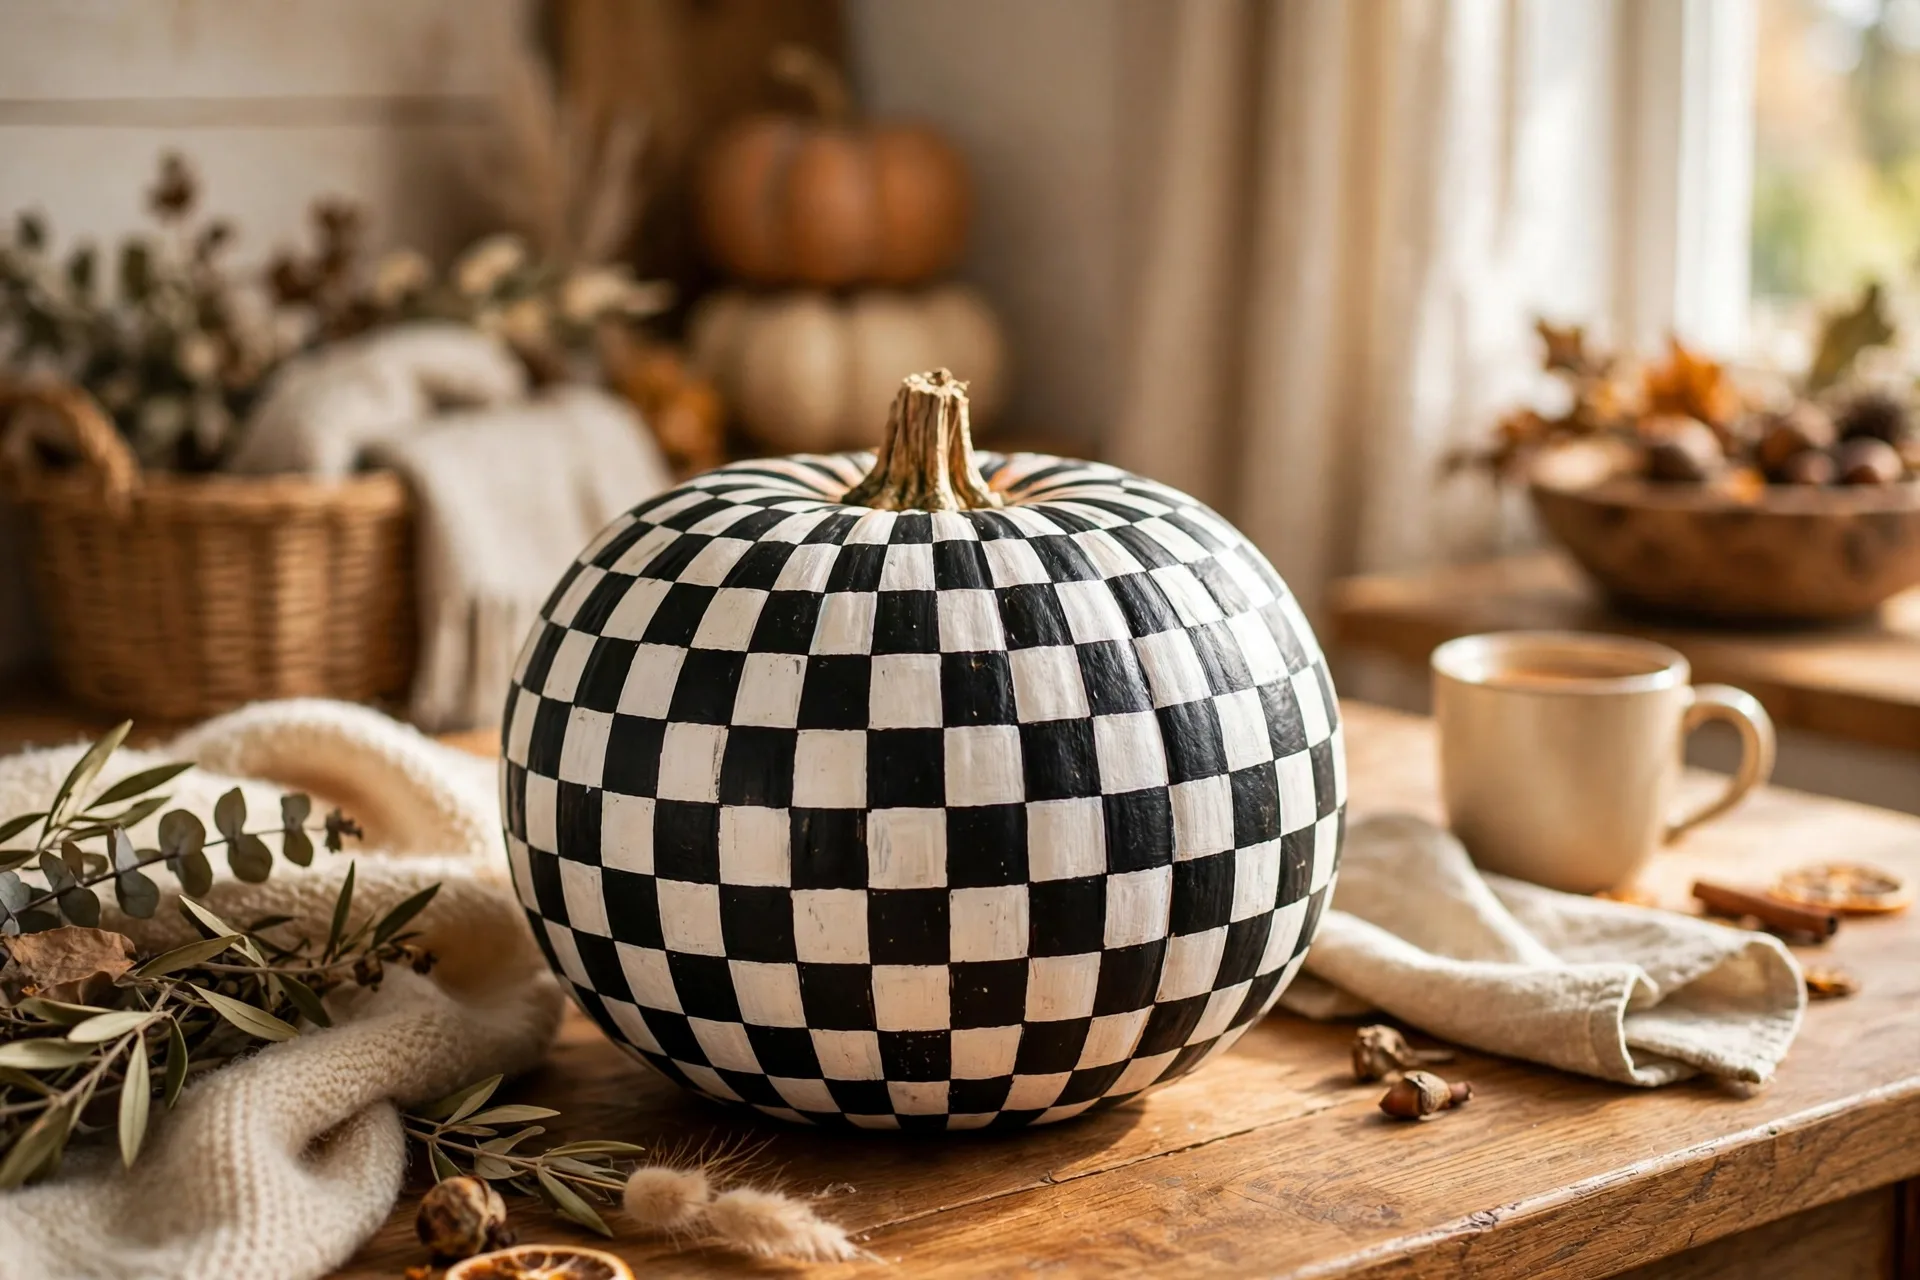
The look: a classic black-and-white checkerboard wrapped around the pumpkin.
How to make it: Paint the pumpkin white. The grown-up tapes a grid of squares and paints alternating squares black, then peels the tape for a crisp board. A small painted chess piece or a black cat silhouette on one square turns it from pattern into a picture. It is the pumpkin for the family that plays board games at the kitchen table.
Ages: 6 and up. The grid needs patience and a grown-up with the tape.
39. Harlequin Diamonds
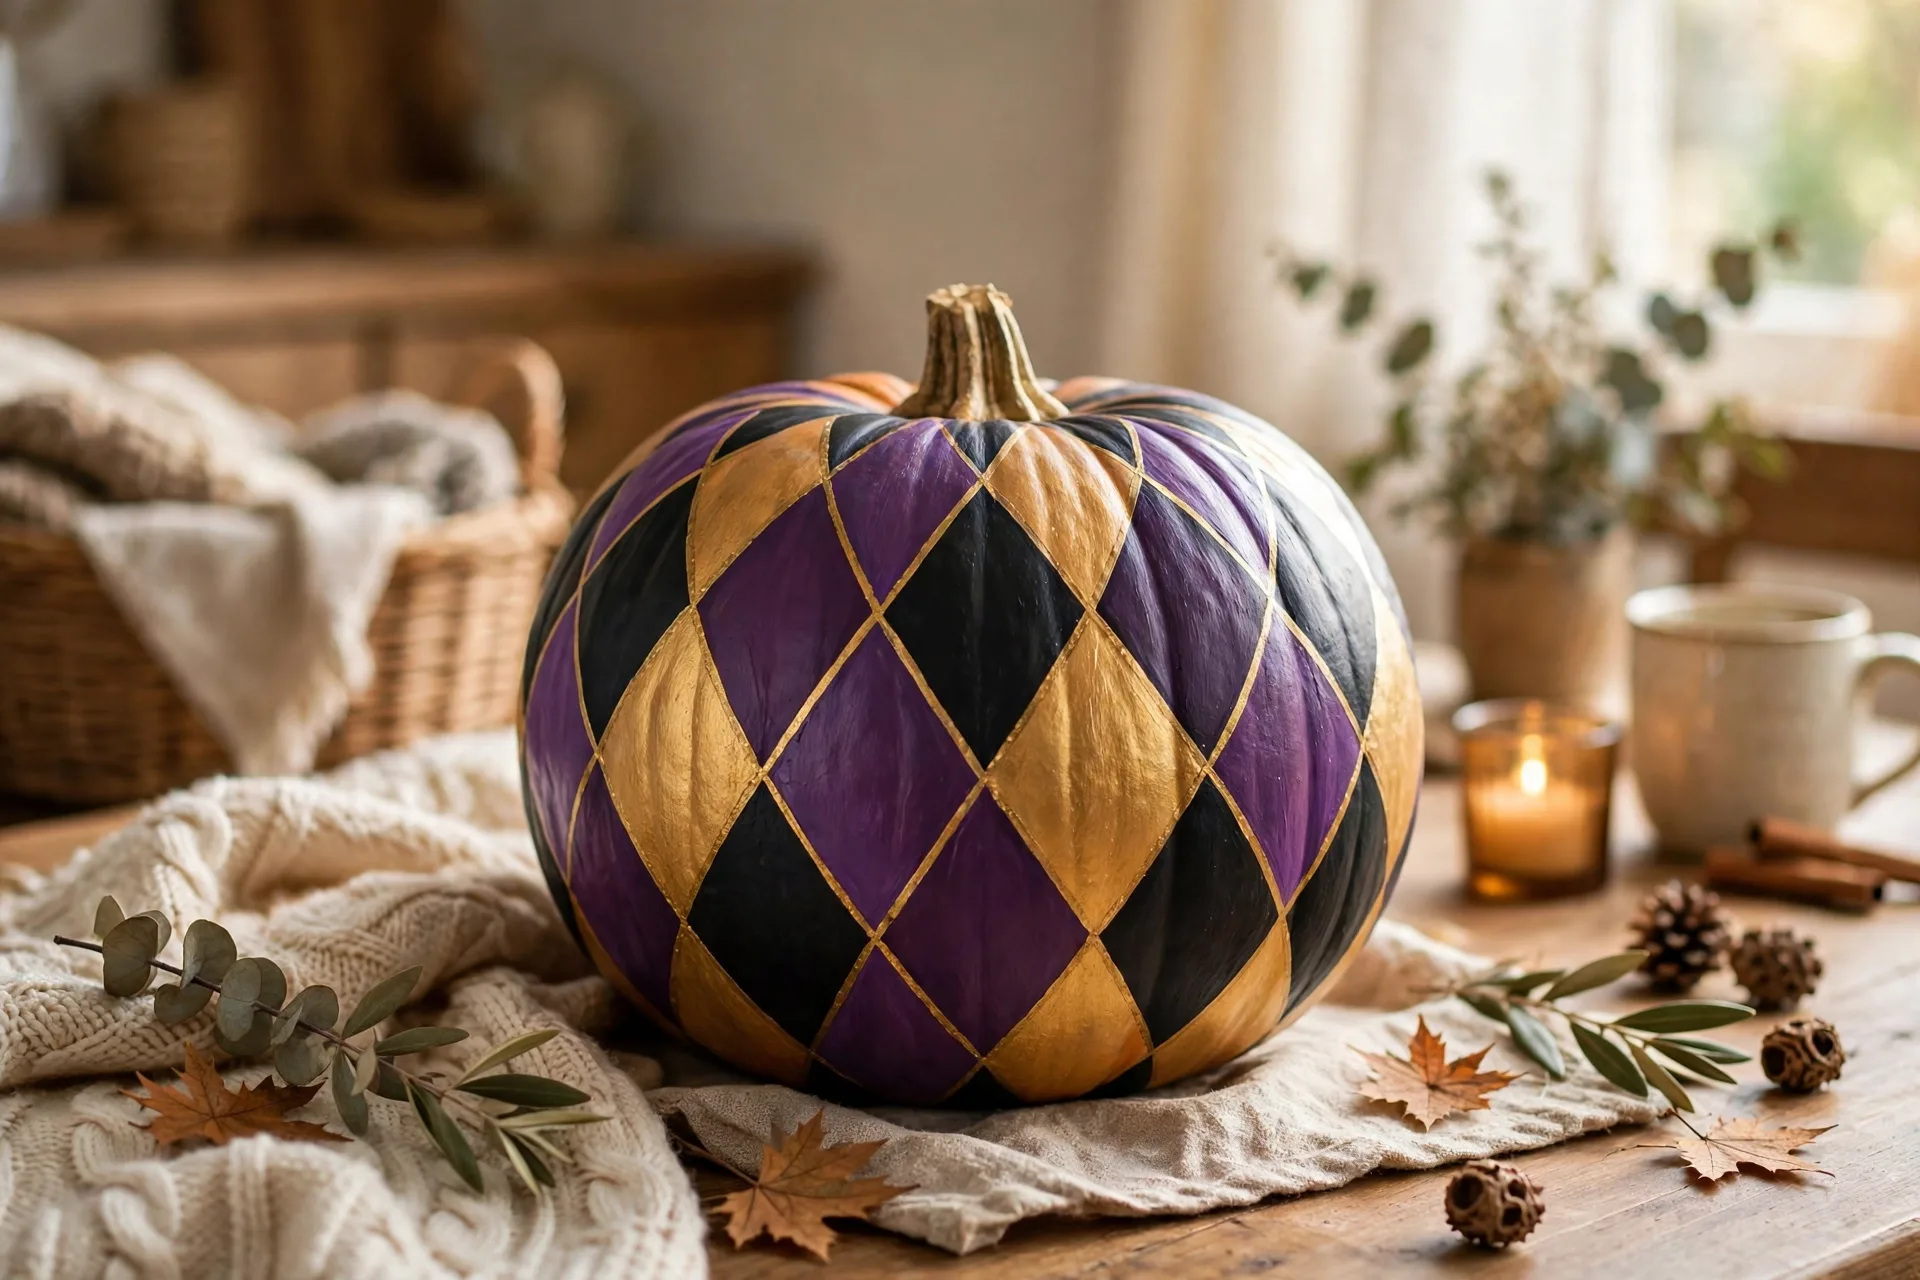
The look: overlapping diamond shapes in purple, black, and gold.
How to make it: Paint the pumpkin cream. The grown-up tapes diamond outlines and paints them in alternating purple, black, and gold, letting the diamonds overlap slightly at the edges. Peel the tape while tacky. The result looks like a circus tent or a fancy ballroom, depending on the colors you pick, and it photographs beautifully.
Ages: 6 and up. Diamond taping is grown-up work; filling them in is kid work.
40. Confetti Burst
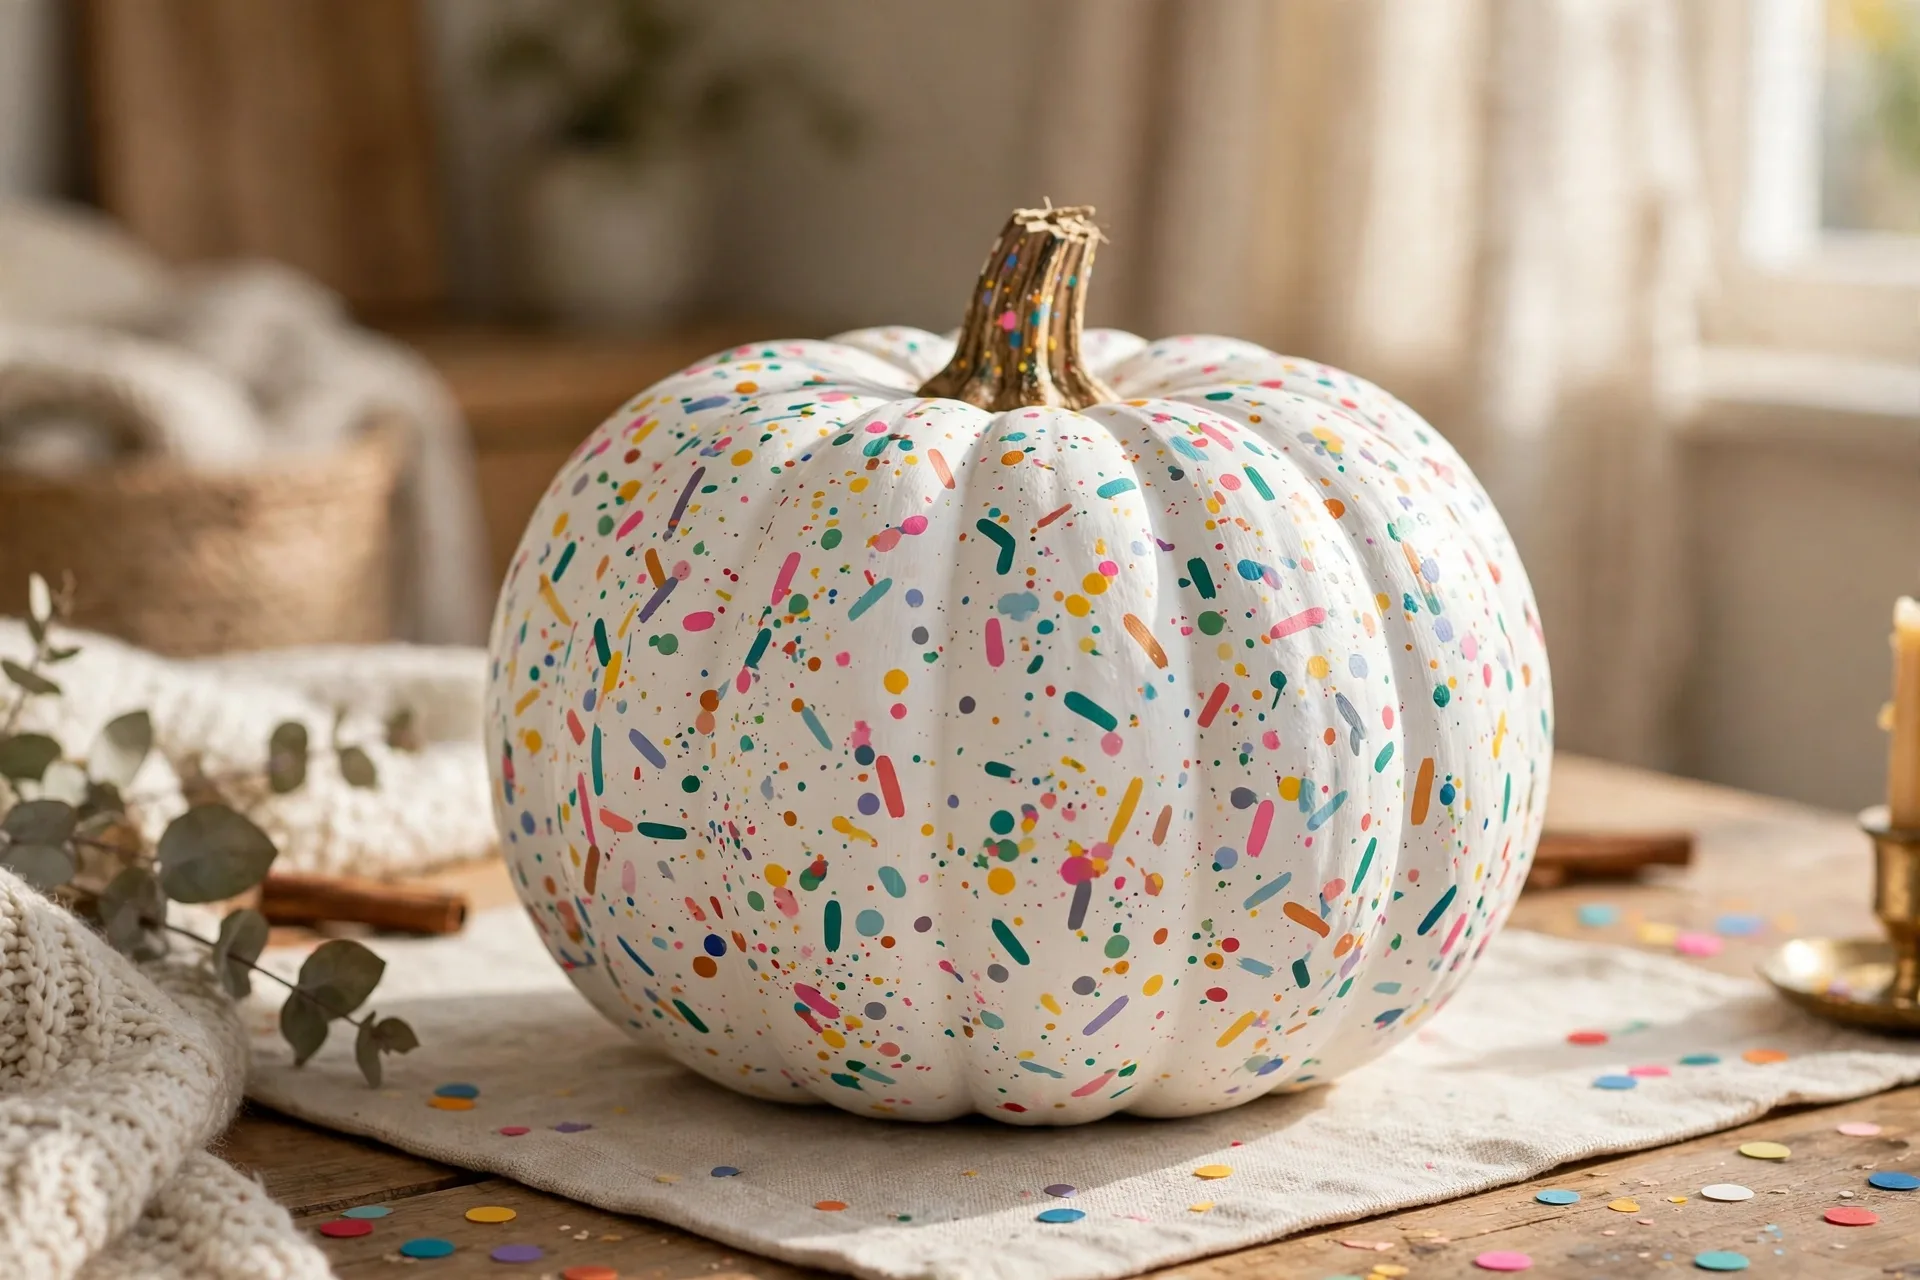
The look: a white pumpkin exploding with tiny painted confetti dashes in every color.
How to make it: Paint the pumpkin white. Then flick tiny dashes, dots, and short lines in bright colors all over it using the tip of a brush or a cotton swab. No pattern, no plan, just confetti everywhere. It is the drip-and-splatter idea with better manners, and it is the fastest way to use up the last drops in ten paint bottles.
Ages: 2 and up. Outside only; confetti flicking travels further than you think.
41. Ombre Sunset
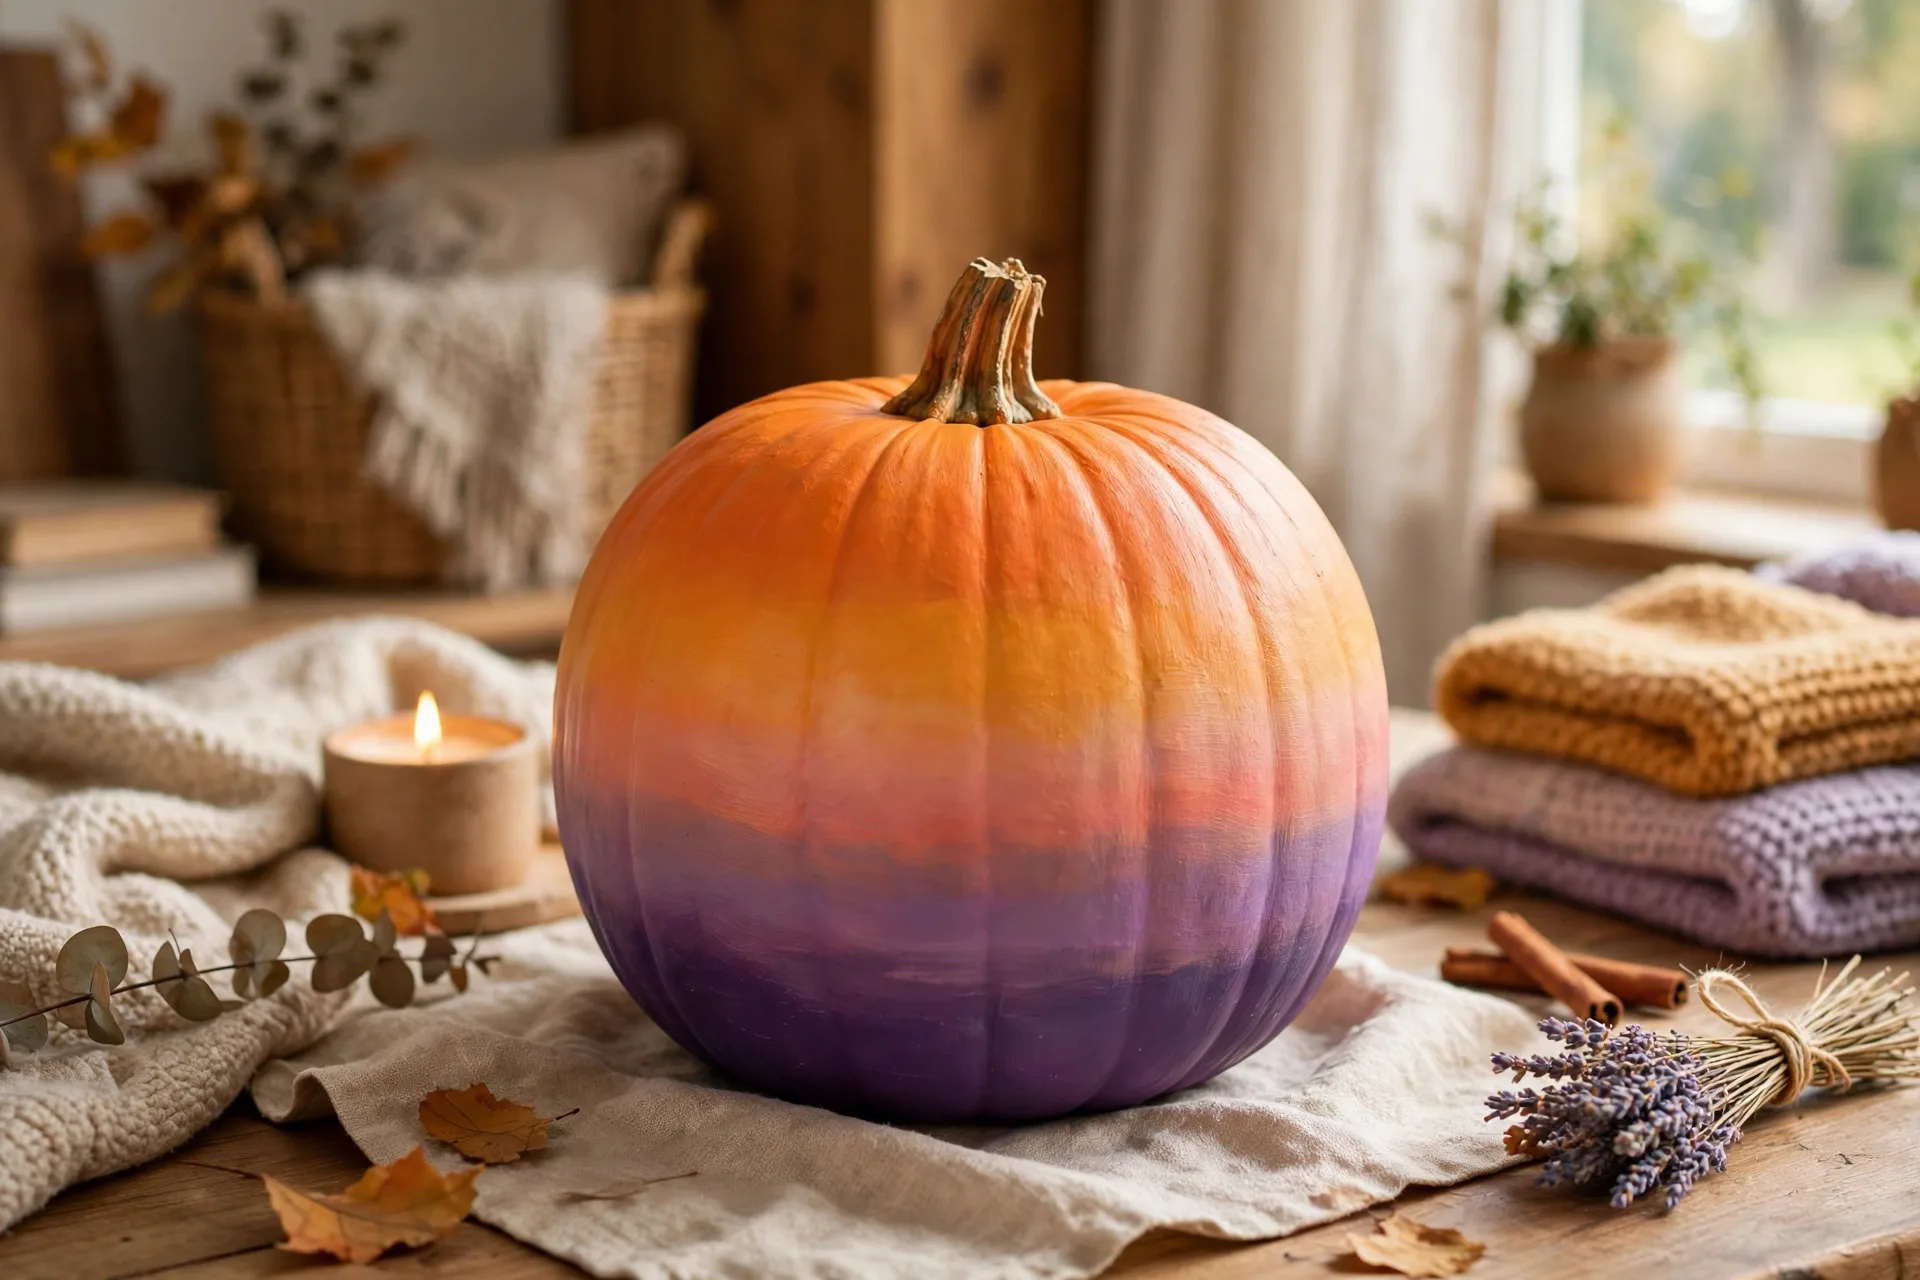
The look: a smooth fade from deep orange at the bottom to soft purple at the top.
How to make it: Paint the bottom third deep orange, the middle coral, and the top soft purple, blending each band into the next while the paint is still wet. Work fast and use a damp sponge to soften the lines between colors. The fade is forgiving: wobbly blends look like a sunset, which is the whole point.
Ages: 5 and up. Blending needs a quick hand; younger kids paint one band each.
42. Marble Swirl
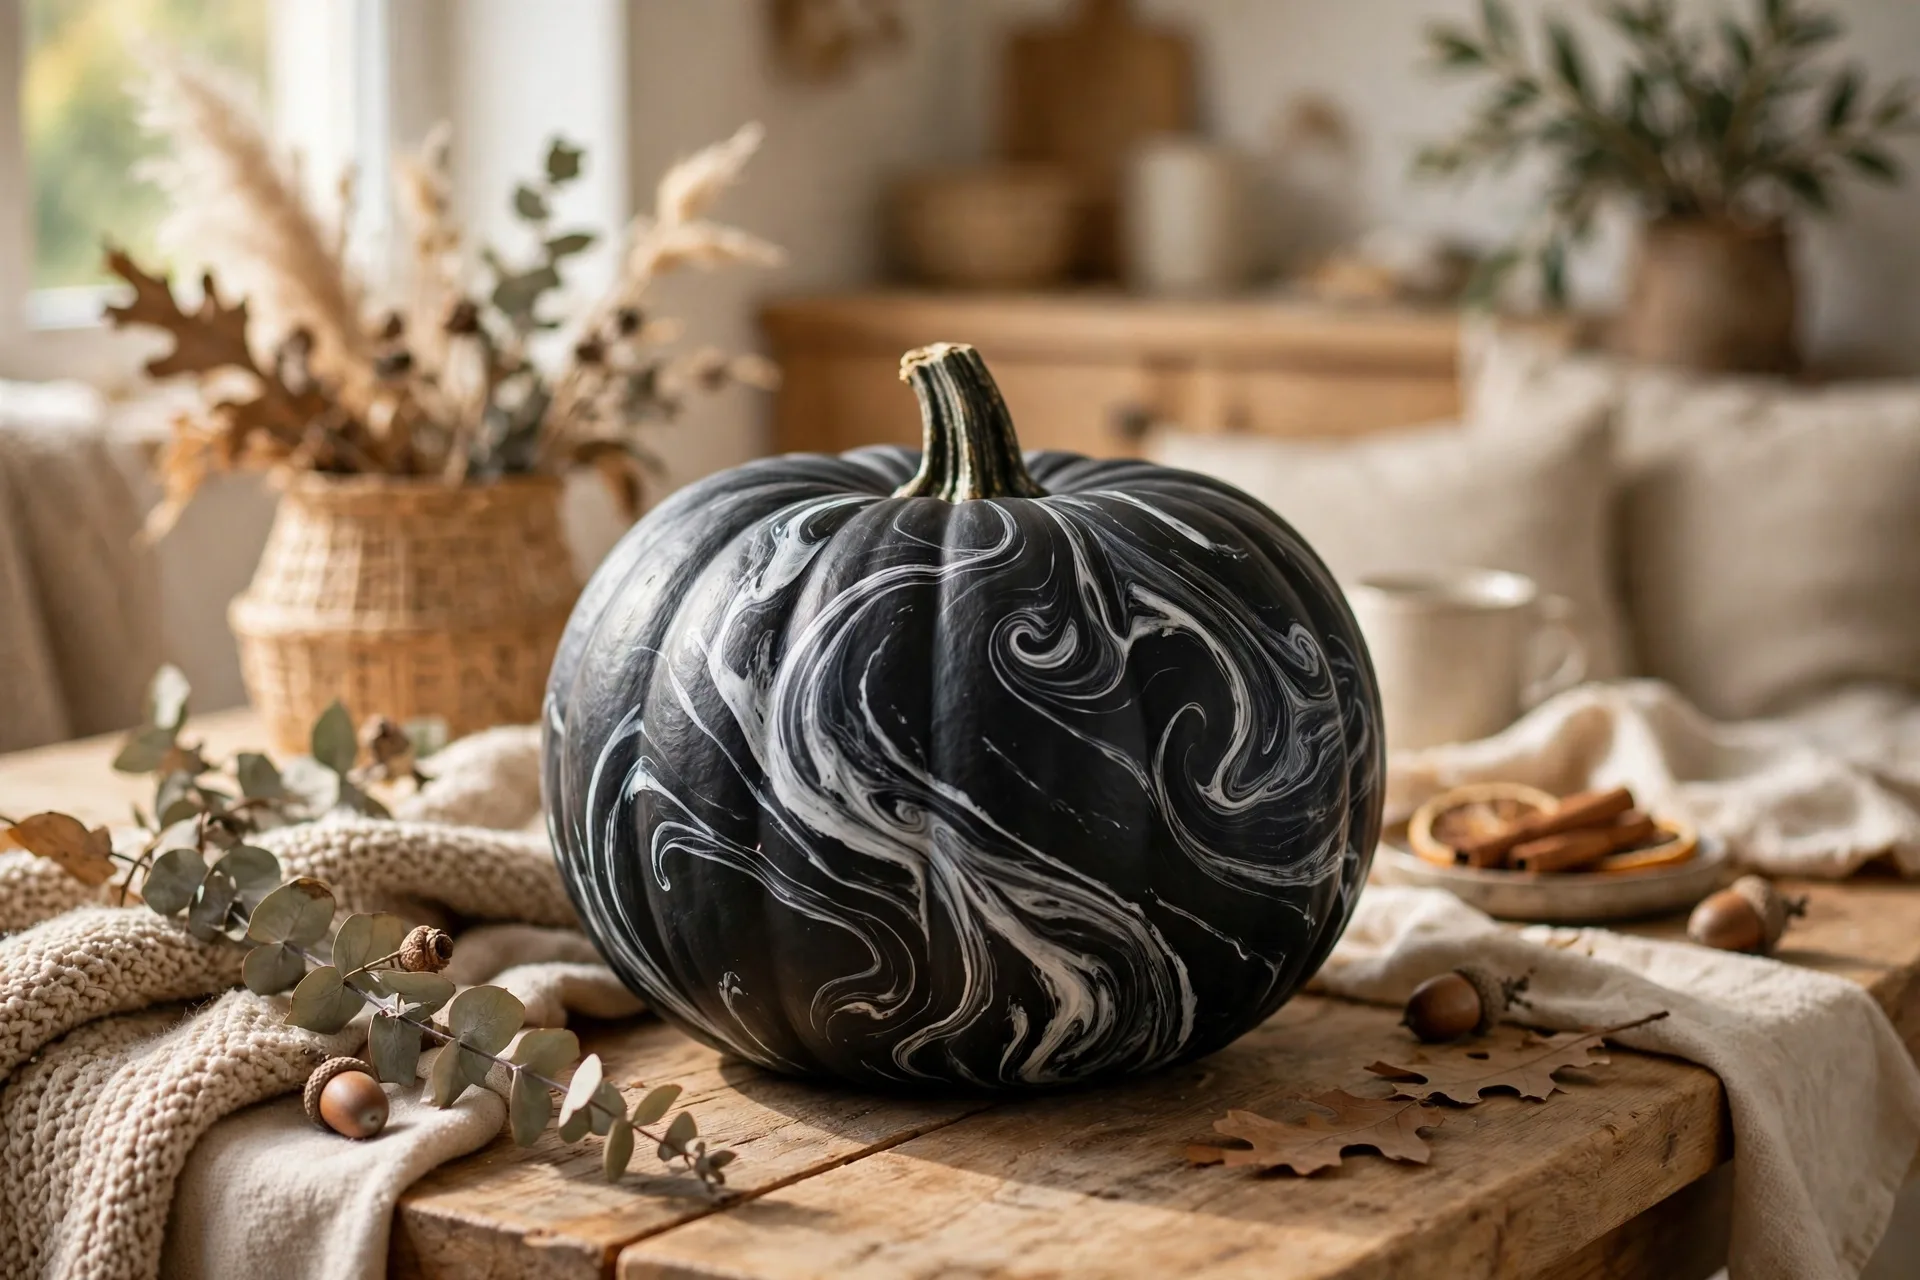
The look: swirling veins of white and grey marble across a dark pumpkin.
How to make it: Paint the pumpkin dark grey or black. While the base is still slightly tacky, drag thin white and light grey lines across it with a dry brush, letting them wobble and branch like real marble veins. A few gold veins mixed in make it look expensive. No two marbled pumpkins ever match, which is why a pair of them looks like a set.
Ages: 5 and up. Kids paint the dark base; the grown-up drags the veins.
43. Glitter Galaxy
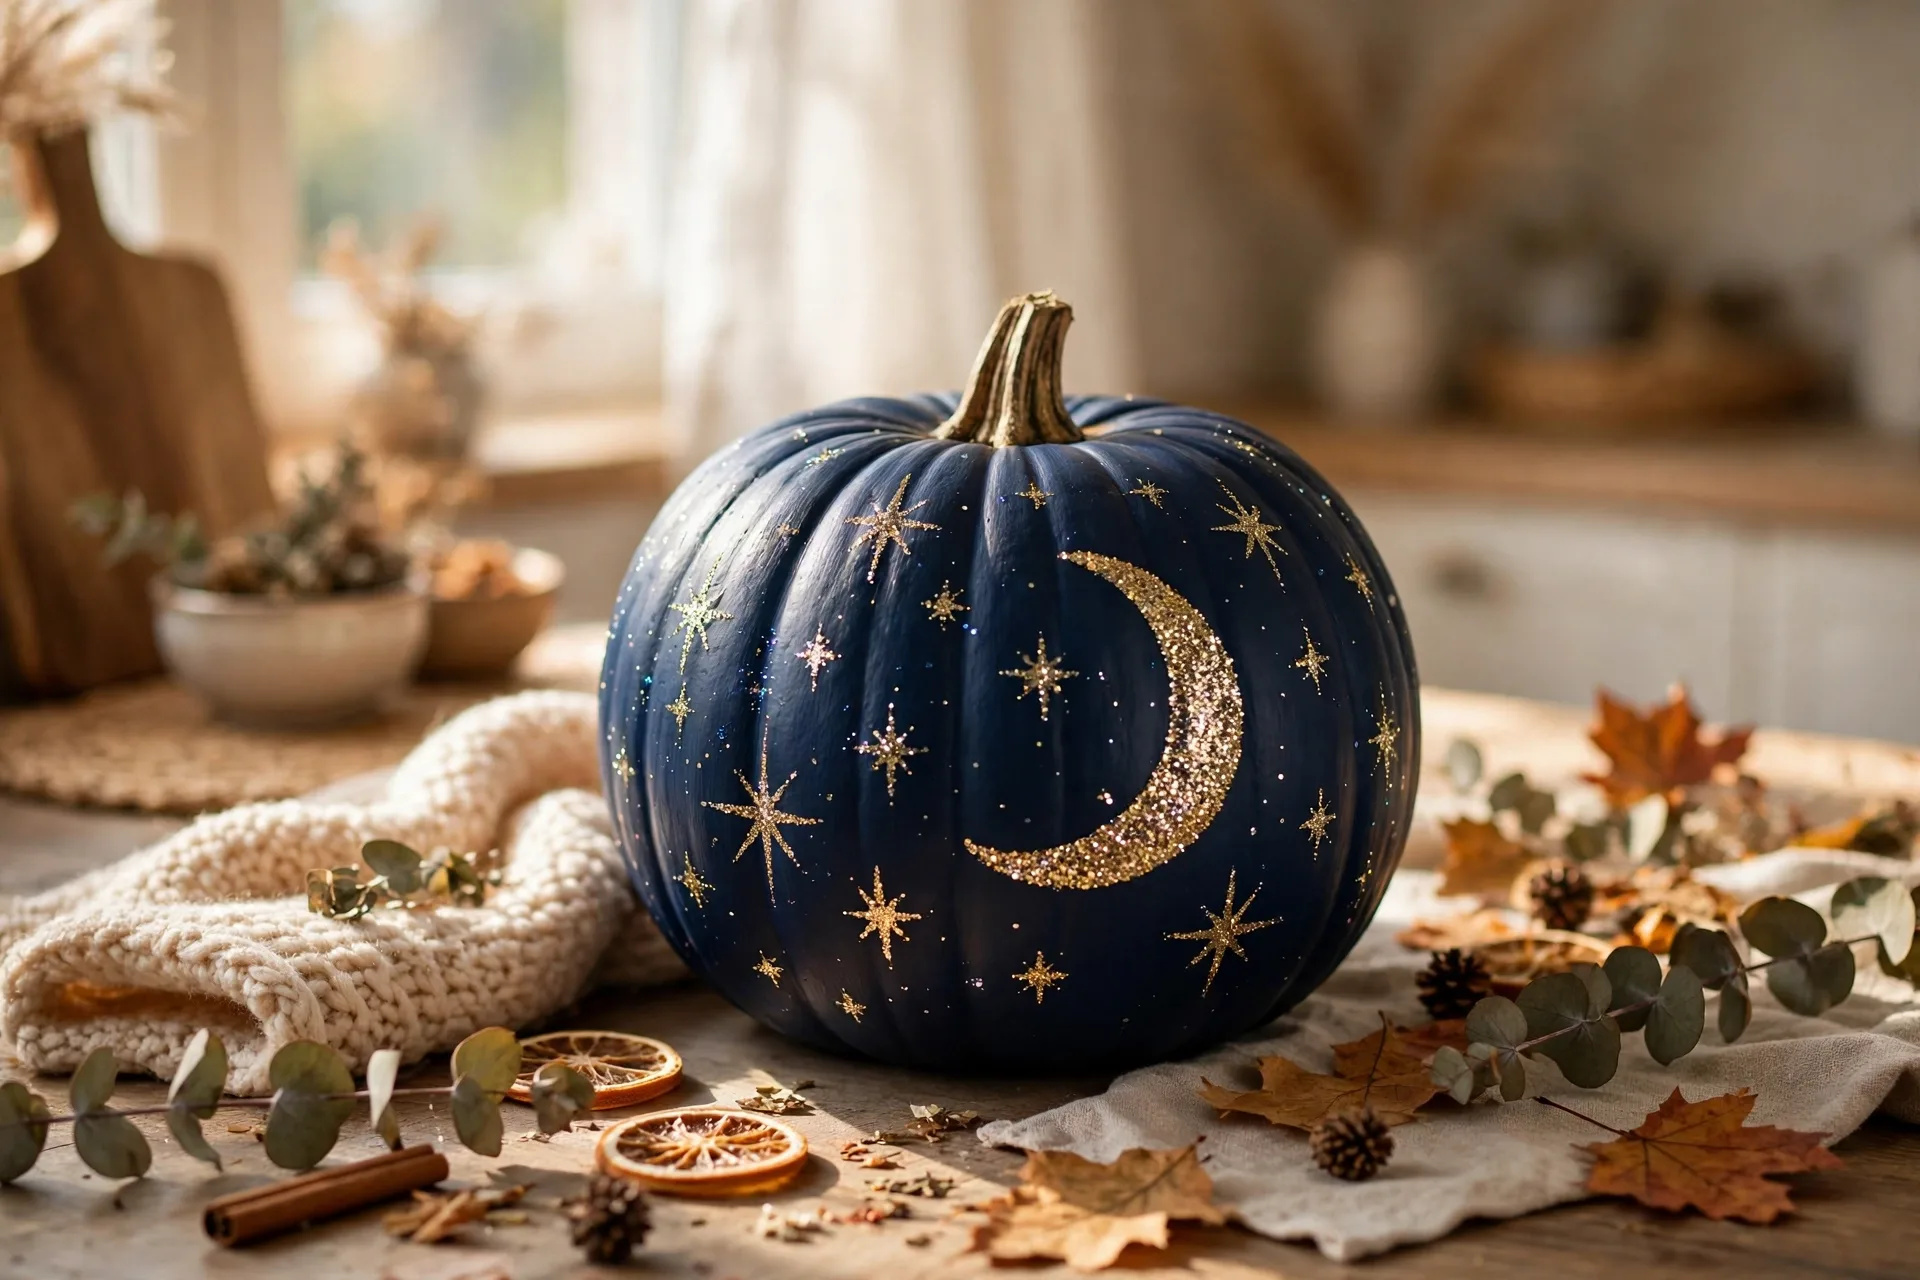
The look: a midnight-blue pumpkin scattered with glitter stars and a painted moon.
How to make it: Paint the pumpkin midnight blue, two coats. The grown-up paints a pale crescent moon and a scatter of tiny stars, then adds glitter paint dots while the base is tacky so they stick. Keep the glitter paint on the pumpkin, not on the table, and seal it if it goes outside. It is the pumpkin that catches every porch light.
Ages: 5 and up. Glitter paint is grown-up supervised; it gets everywhere fast.
44. Brushstroke Plaid
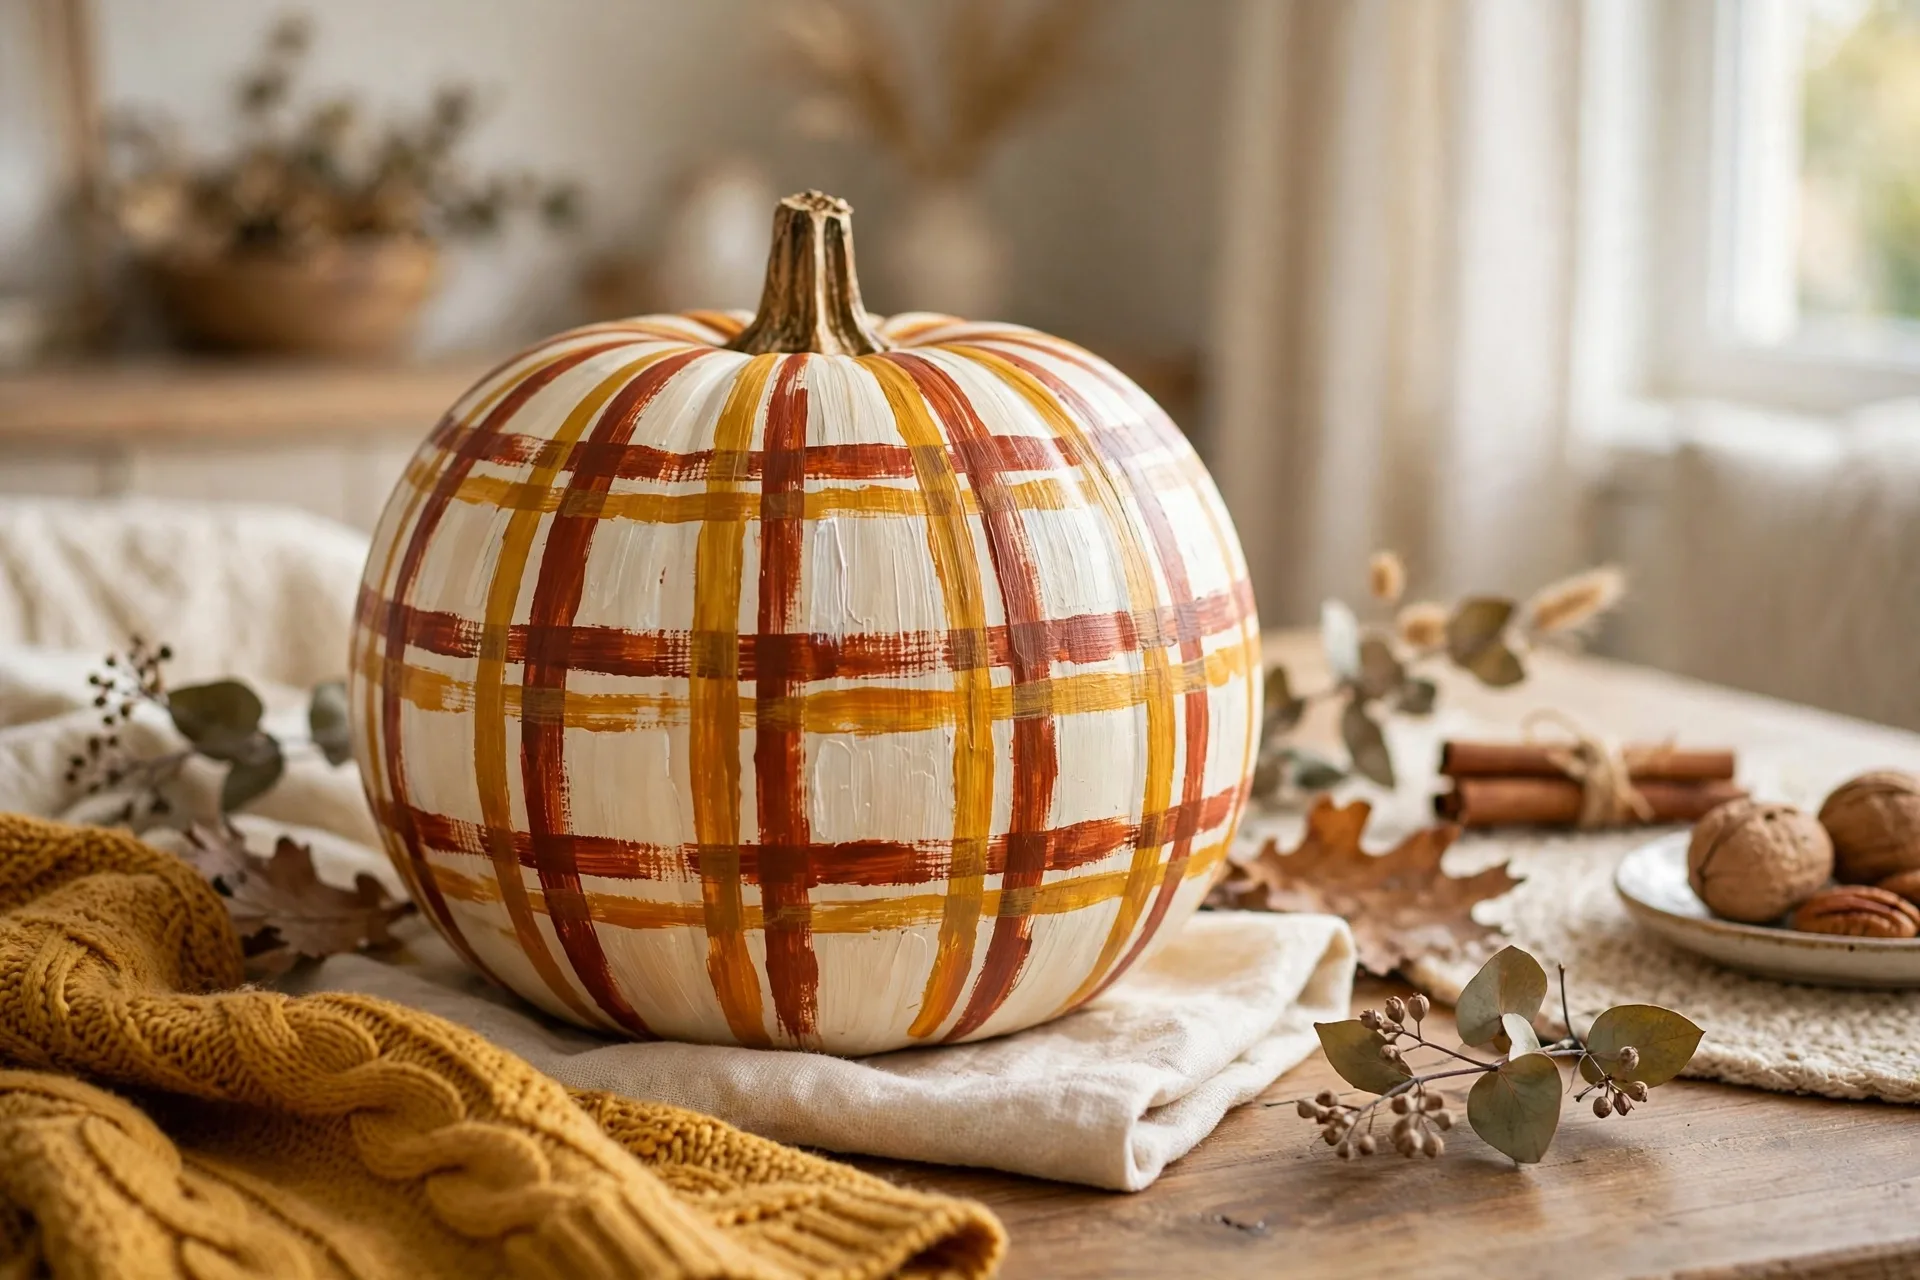
The look: loose painted plaid in rust, mustard, and cream, like a flannel shirt.
How to make it: Paint the pumpkin cream. Then paint wide vertical stripes in rust and mustard, then wide horizontal stripes over them in the same colors, letting the overlaps darken where they cross. Keep the brushstrokes visible on purpose: the handmade look is the charm. It is the pumpkin that matches every flannel shirt in the house.
Ages: 4 and up. Wide stripes are easy kid work; the overlaps can wobble freely.
45. Fingerprint Dots
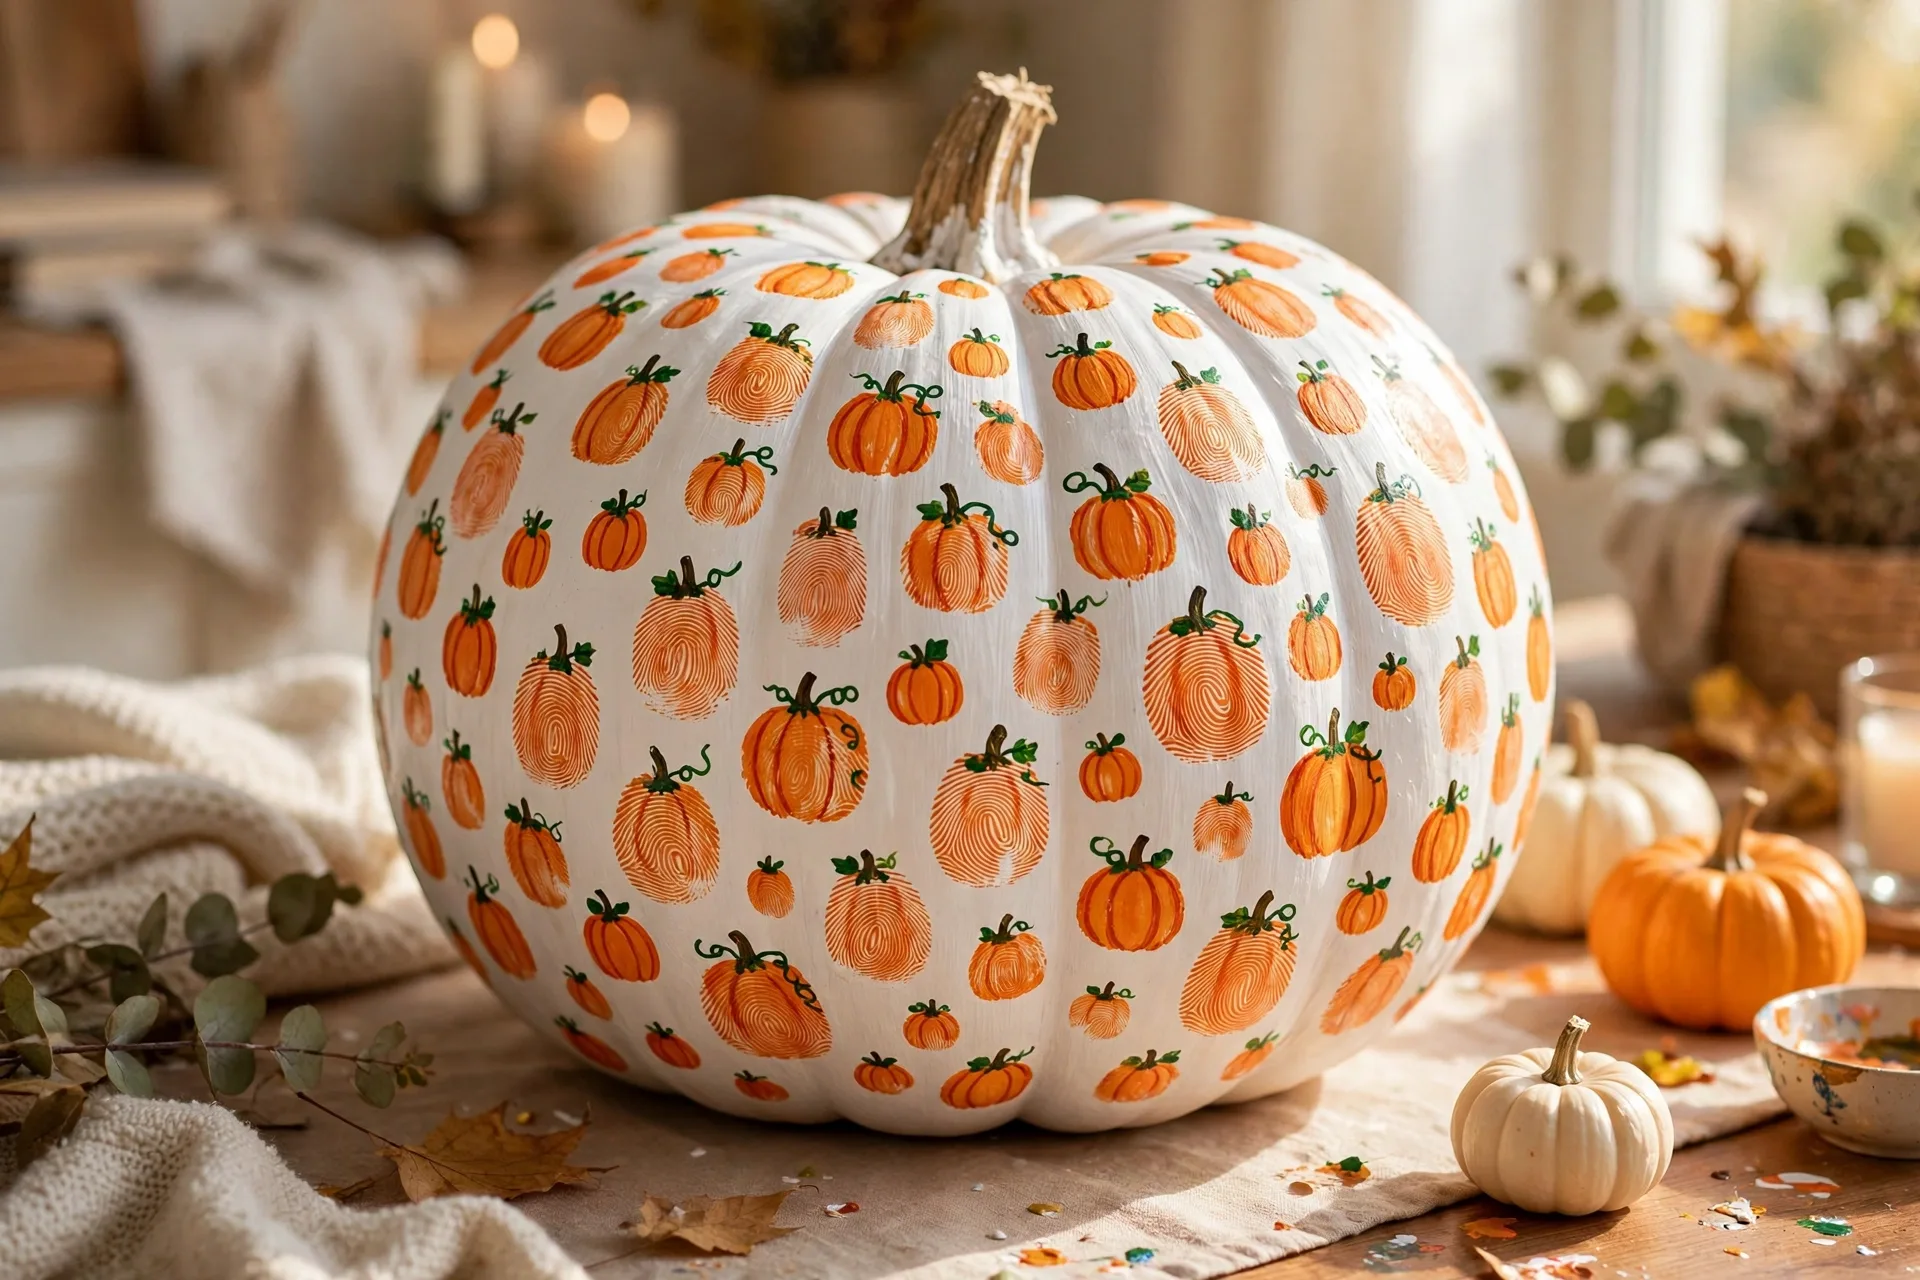
The look: a pumpkin covered in the whole family fingerprint dots, each one a tiny pumpkin.
How to make it: Paint the pumpkin white or pale yellow. Each person dips a fingertip in orange, green, or purple paint and stamps dots all over it. The grown-up adds a tiny stem and face to a few of the dots, turning fingerprints into mini pumpkins. Date the bottom with the year. It is a keepsake disguised as a craft.
Ages: 2 and up. Fingerprint stamping is the first painting skill a toddler learns.
More Porch Showpieces
46. The Porch Greeter
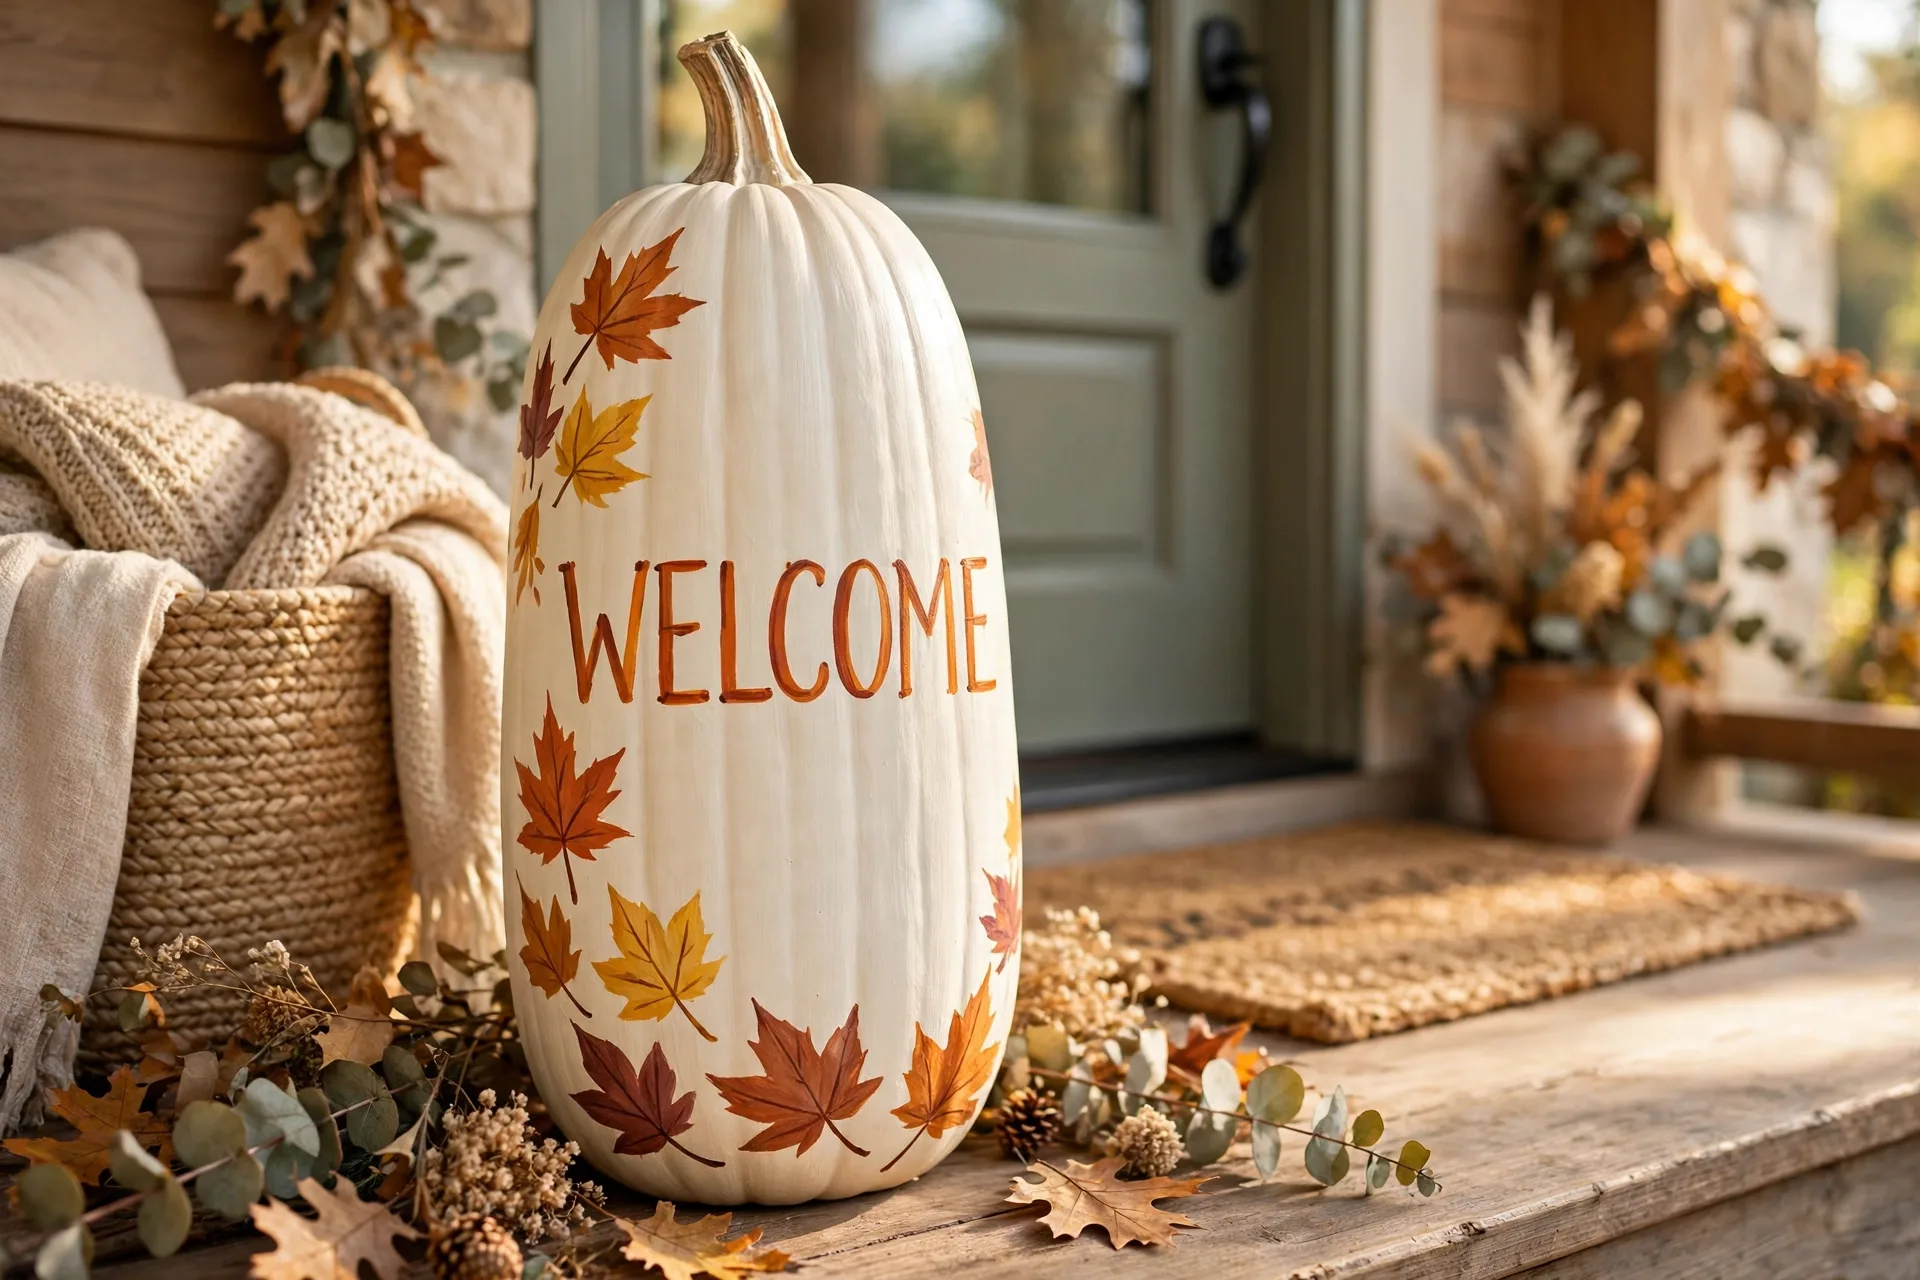
The look: a tall pumpkin lettered with WELCOME and ringed with painted fall leaves.
How to make it: Pick the tallest pumpkin you can find and paint it cream. The grown-up letters WELCOME down the front in dark brown or black, then paints small fall leaves in rust, gold, and burgundy around the letters. Set it by the front door with a doormat and it does the greeting for you. It is the first pumpkin visitors see and the last one they forget.
Ages: 5 and up. Lettering is grown-up work; kids paint the leaves.
47. The Monogram Pumpkin
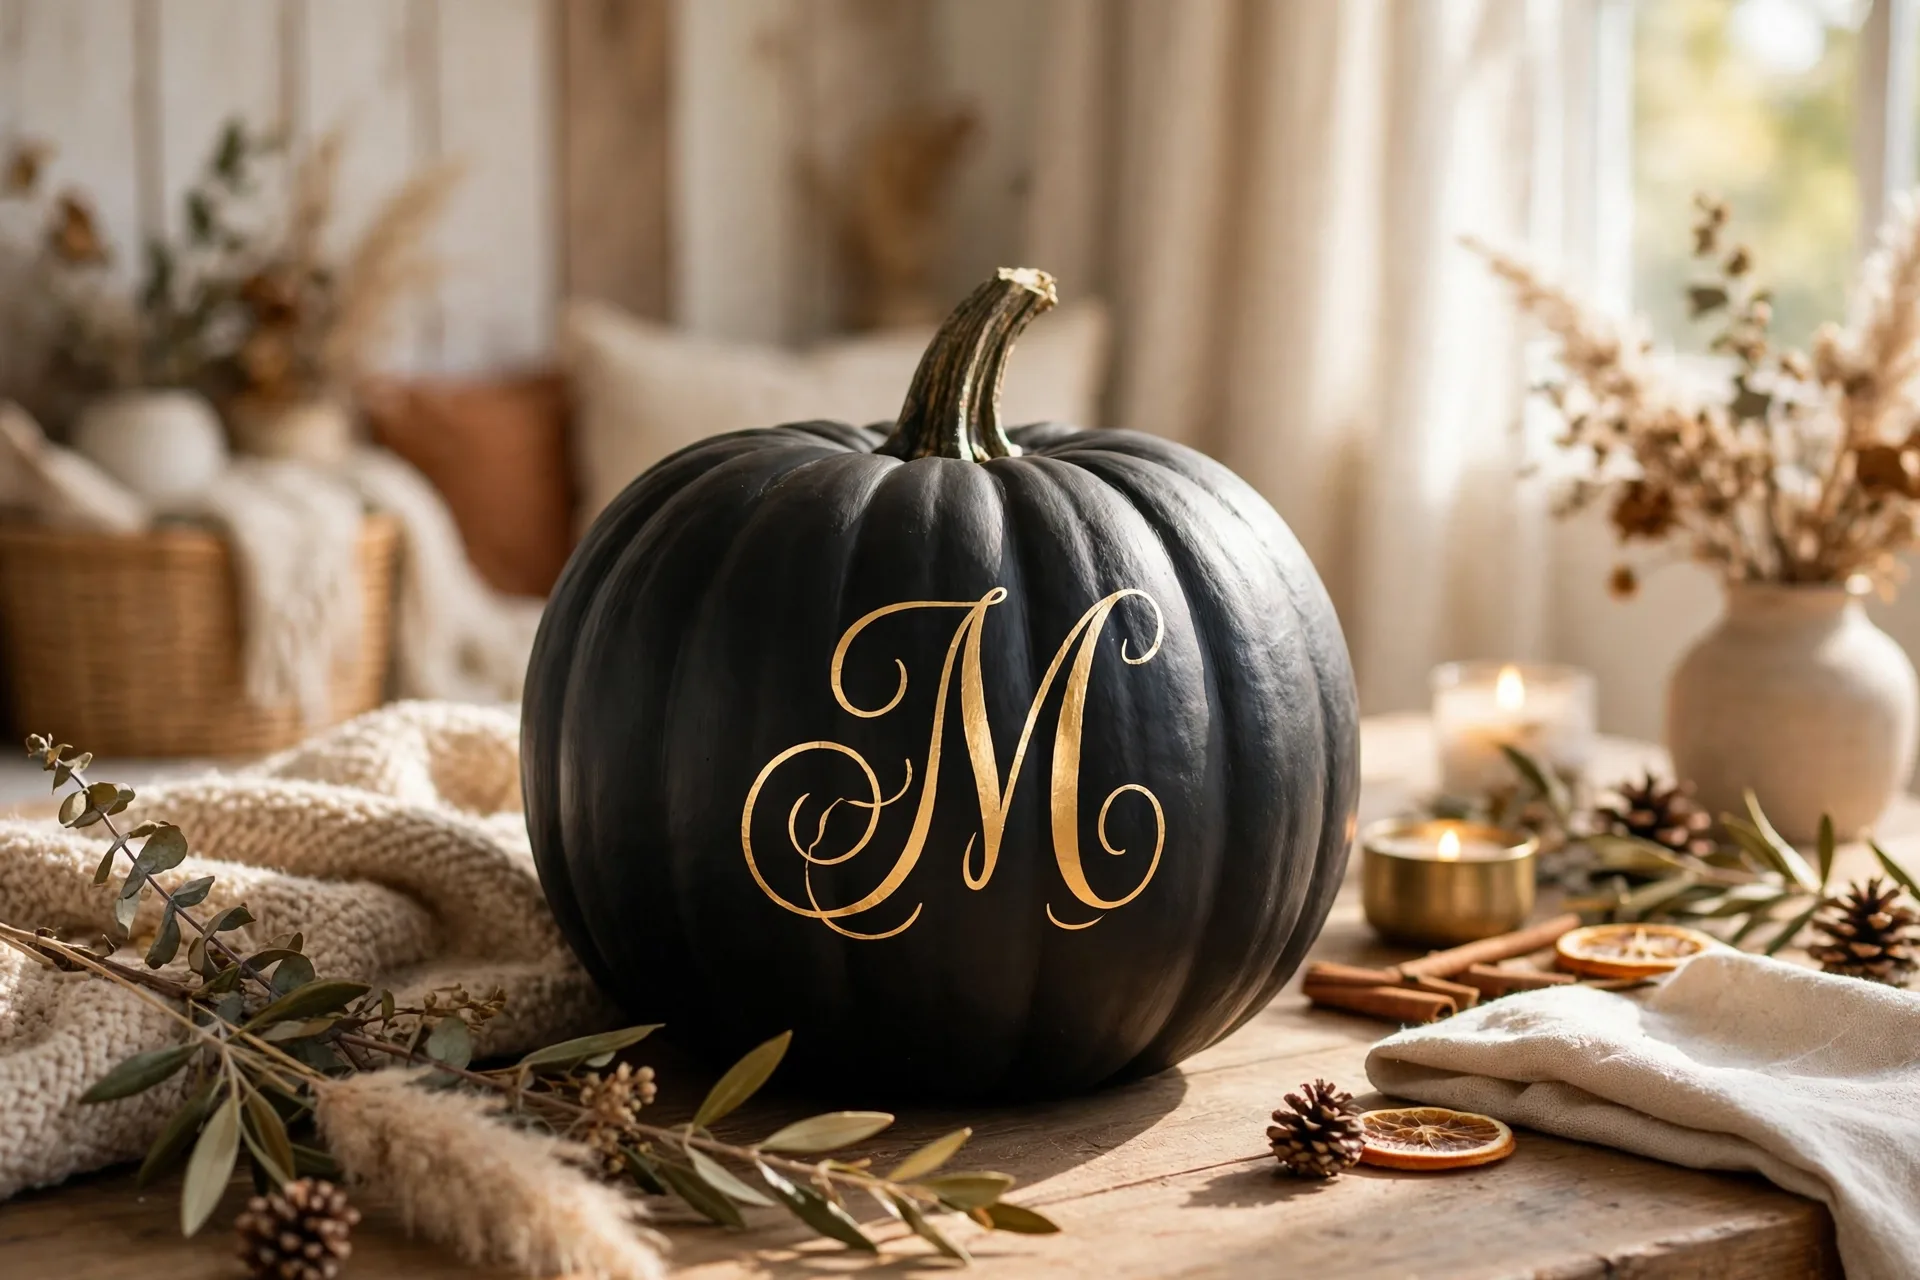
The look: a single elegant family initial in gold on a matte black pumpkin.
How to make it: Paint the pumpkin matte black, two coats. The grown-up paints one big gold letter in the center, your family initial, with a thin gold ring around it. That is the whole design, and it looks like it came from a home store. Pair it with a plain orange pumpkin and the two of them carry the whole porch.
Ages: 6 and up. One big letter needs a steady grown-up hand.
48. The Chalkboard Menu Pumpkin
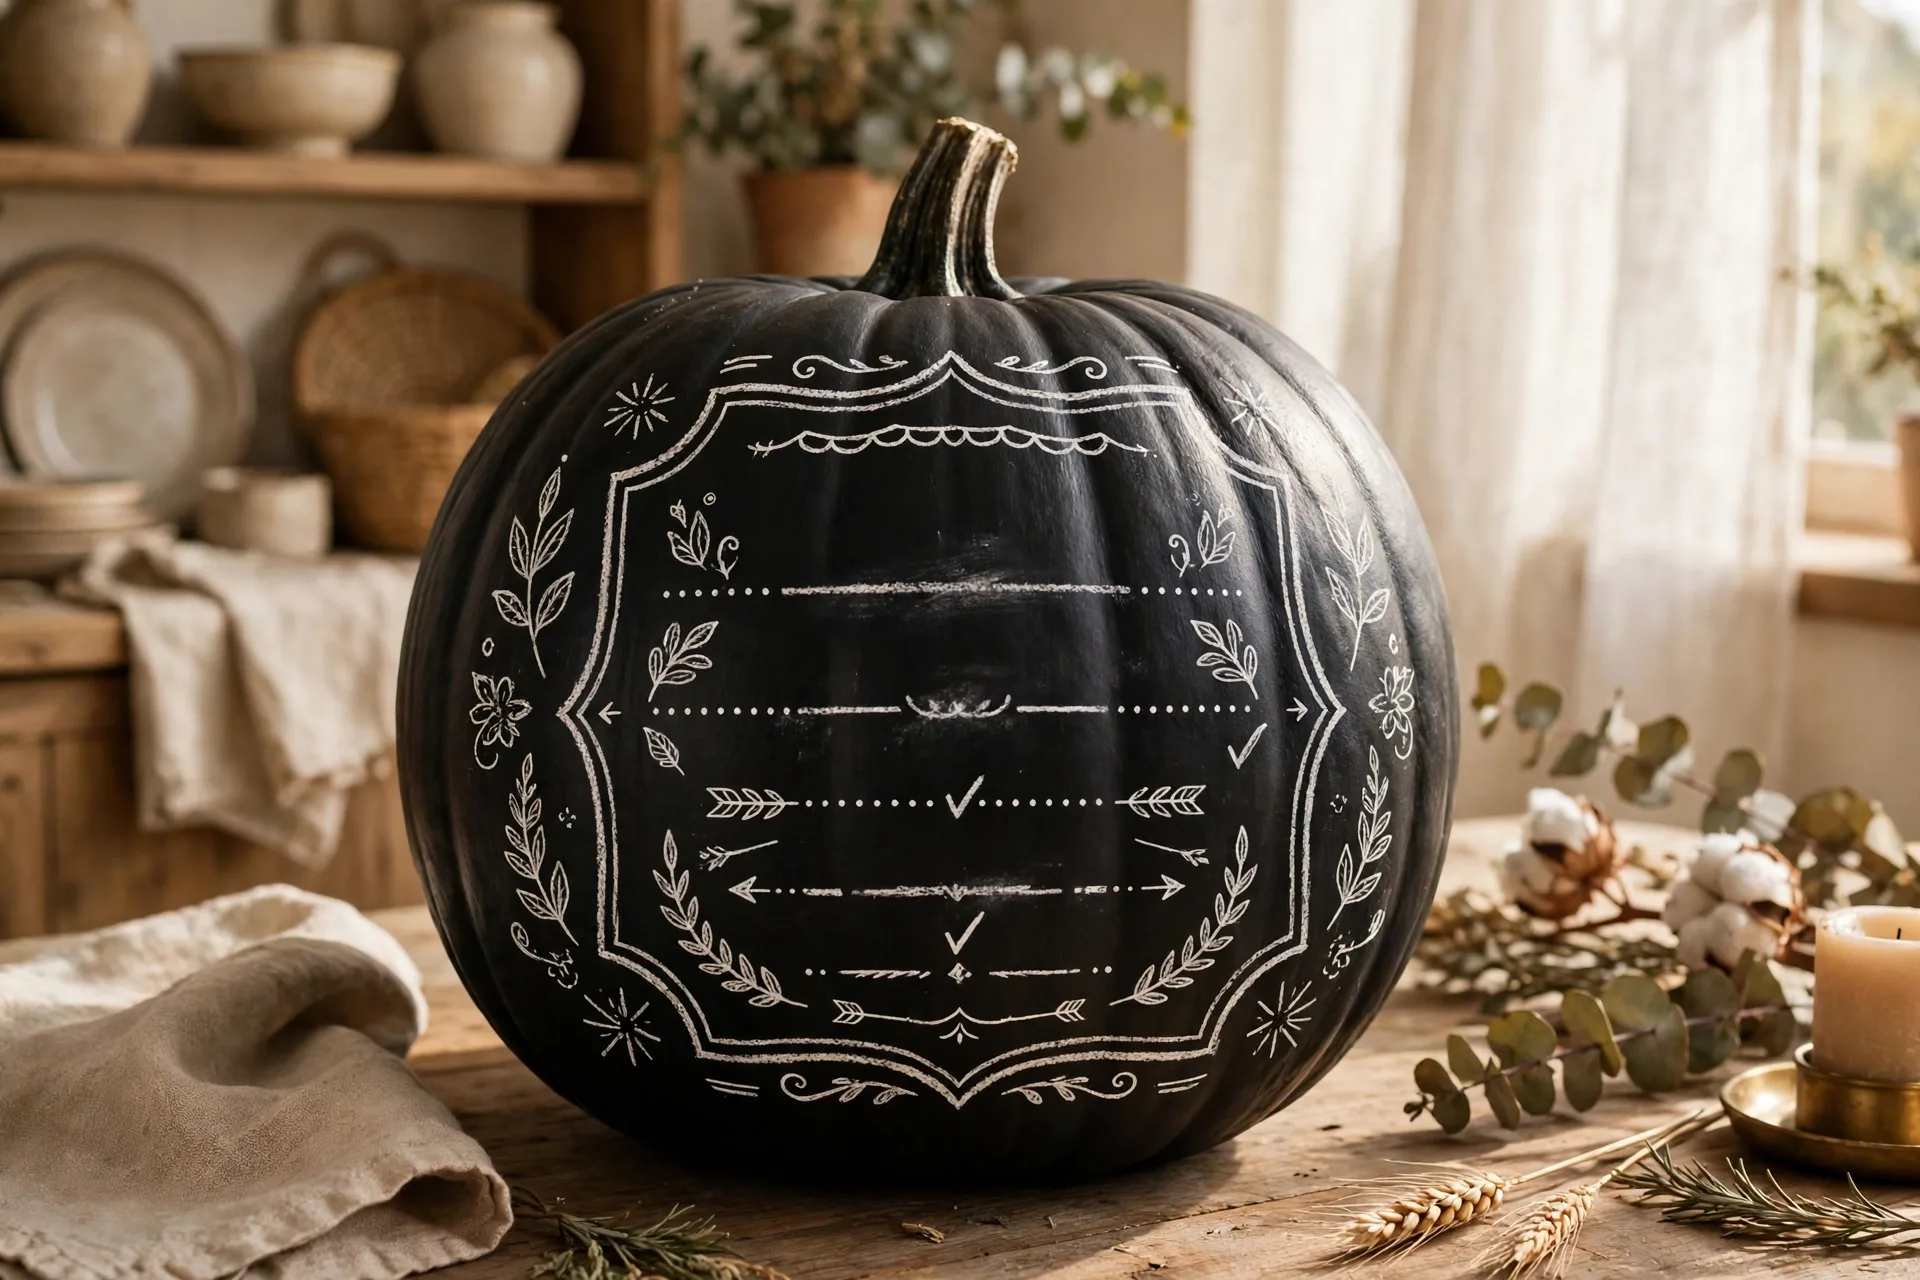
The look: a matte black pumpkin with a chalk-style menu of the night written on it.
How to make it: Paint the pumpkin matte black and let it dry fully. With the grown-up white paint pen, write the night plan in loopy chalk-style letters: trick or treat at six, pumpkin pie at eight, movie at nine. Kids pick what goes on the menu. Real chalk will not erase off acrylic, so call it chalk-style and keep expectations honest.
Ages: 5 and up. Younger kids pick the menu items; the grown-up writes them.
49. The Gilded Stem
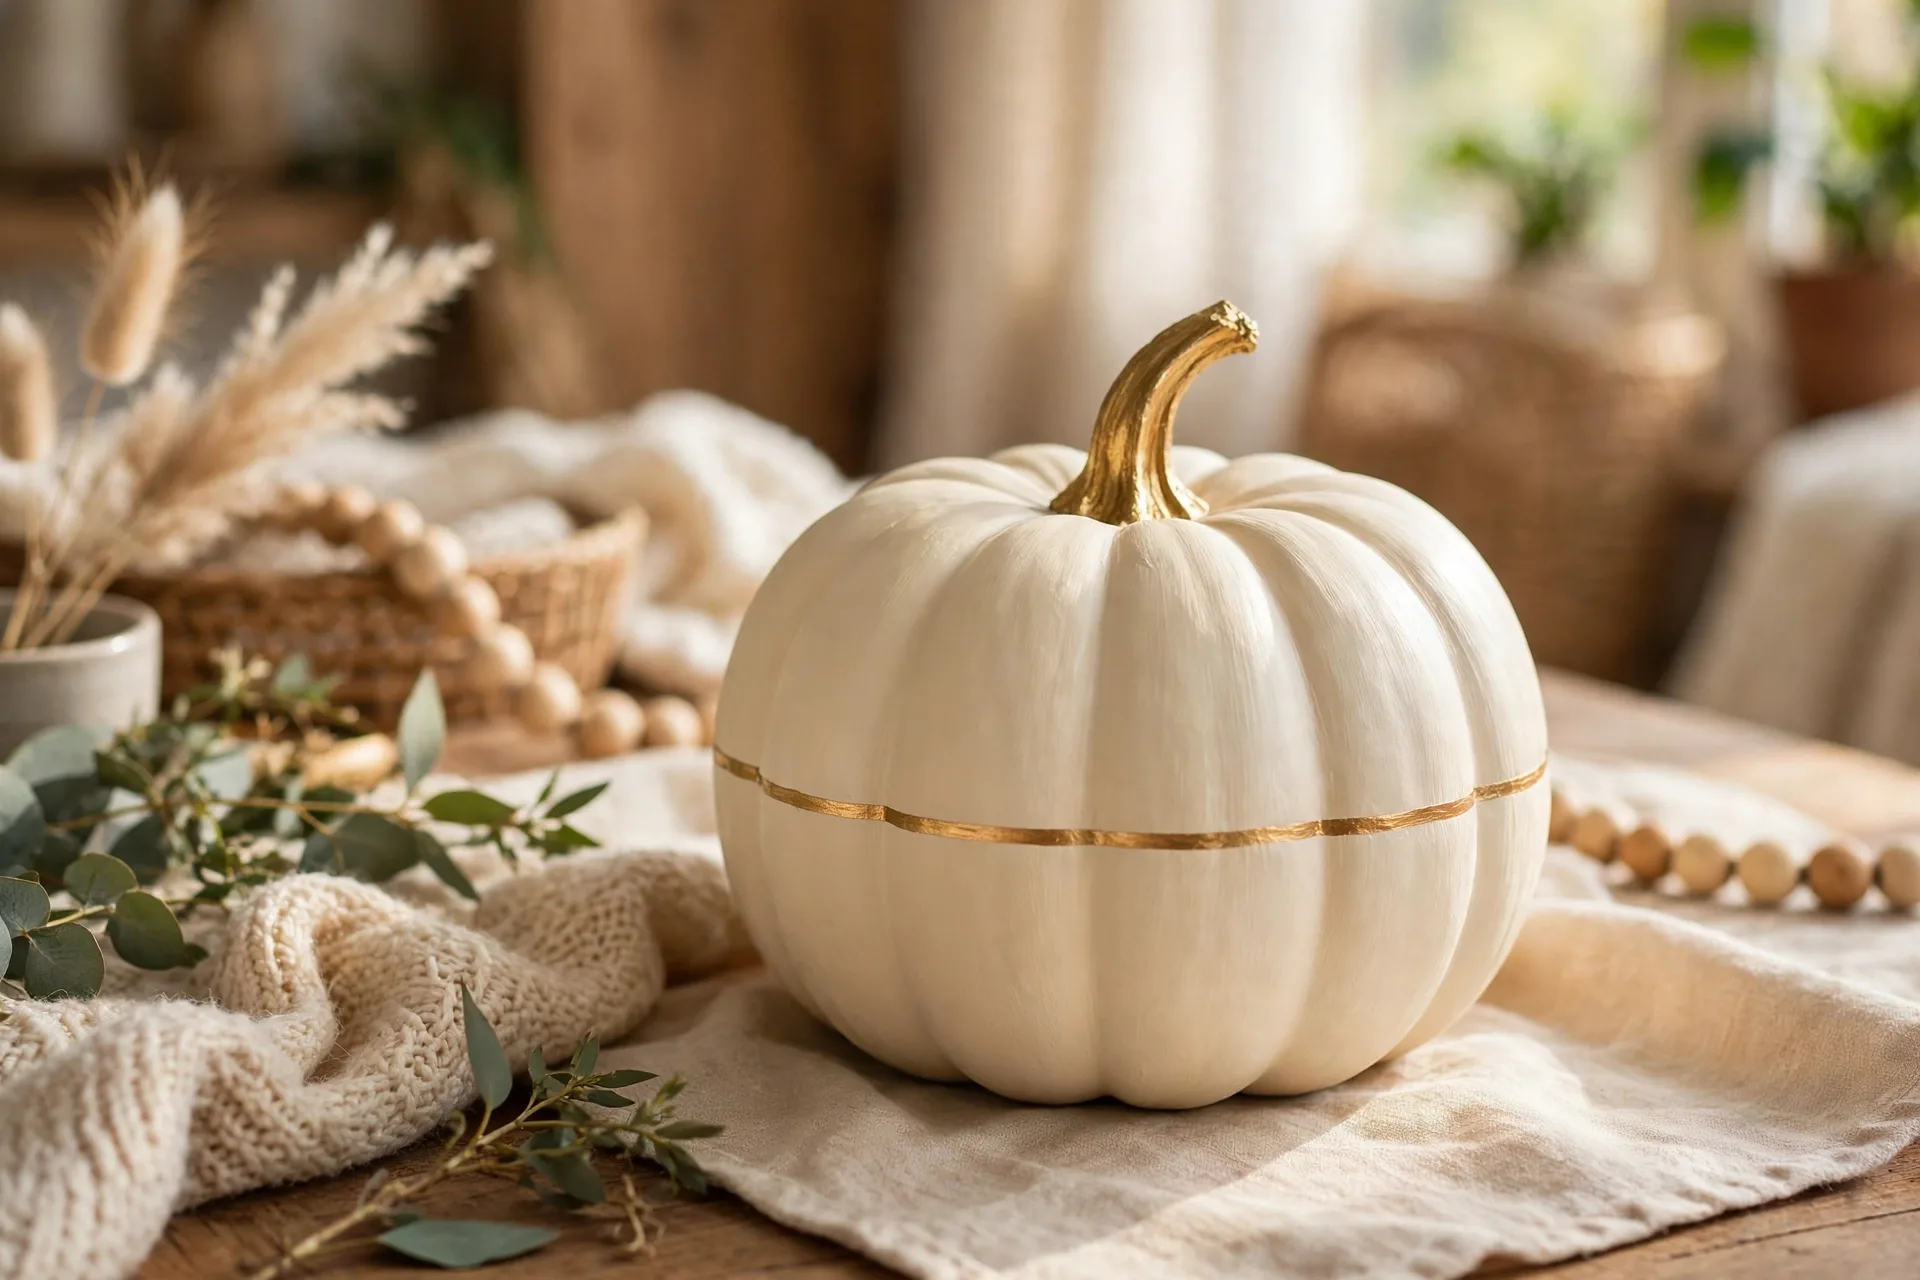
The look: a cream pumpkin with a gold-leaf stem and a single gold band.
How to make it: Paint the pumpkin cream, two thin coats. The grown-up paints the stem gold and adds one thin gold band around the middle. That is all: cream, gold, done. It is the most grown-up pumpkin on this list, the one that stays out through Thanksgiving without anyone calling it Halloween, and it takes fifteen minutes.
Ages: 5 and up. The gold band needs a steady hand and a piece of tape as a guide.
50. The Topiary Stack
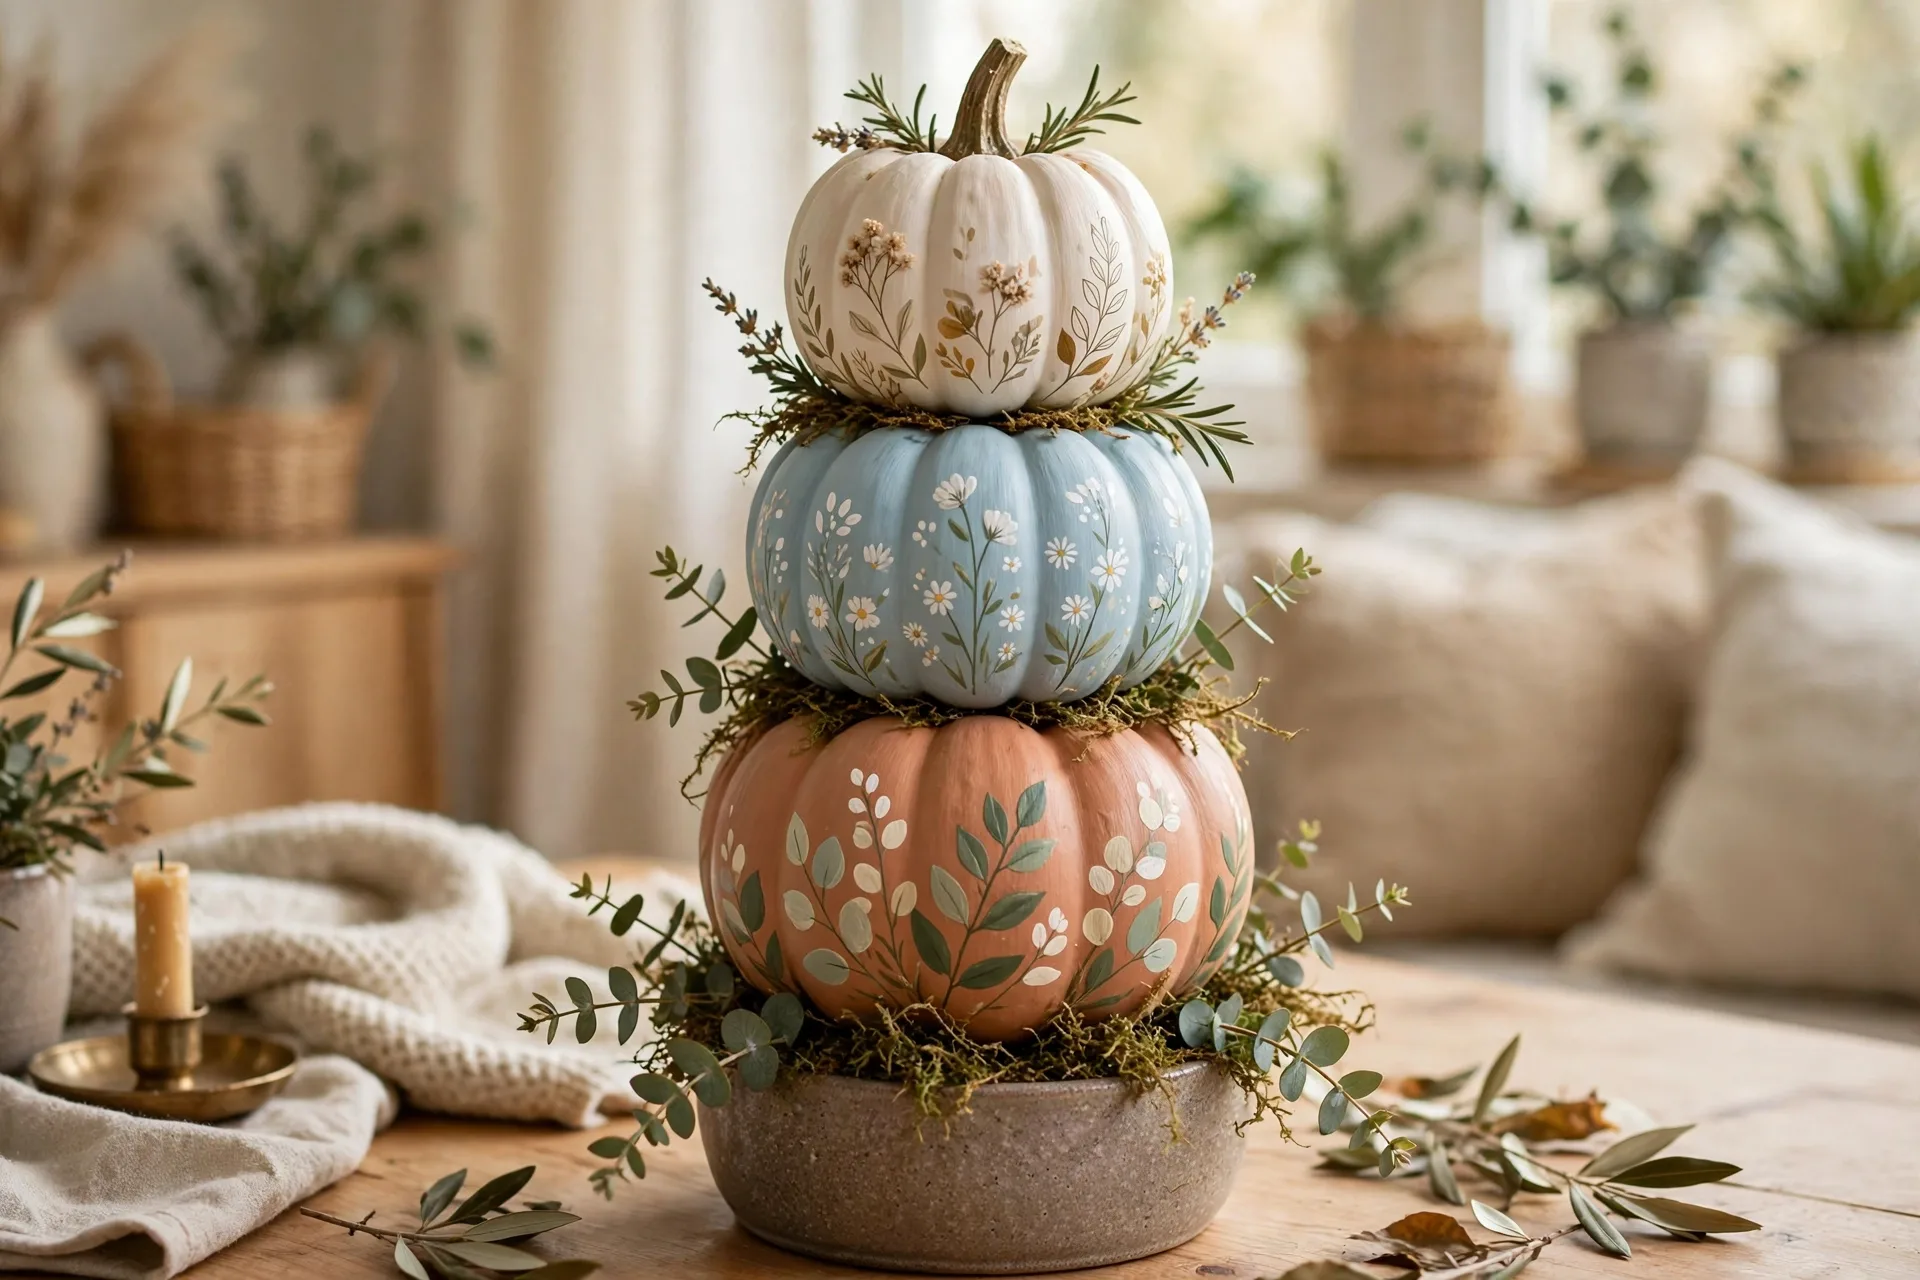
The look: three painted mini pumpkins stacked smallest to largest in one tall tower.
How to make it: Paint three mini pumpkins in three colors: white on top, orange in the middle, black on the bottom. Give each a simple face or pattern, then stack them with a wooden skewer through the centers to hold them steady. It is a topiary made of pumpkins, and it turns a plain porch corner into a display.
Ages: 4 and up. Kids paint the minis; the grown-up handles the skewer.
51. The Window Glow
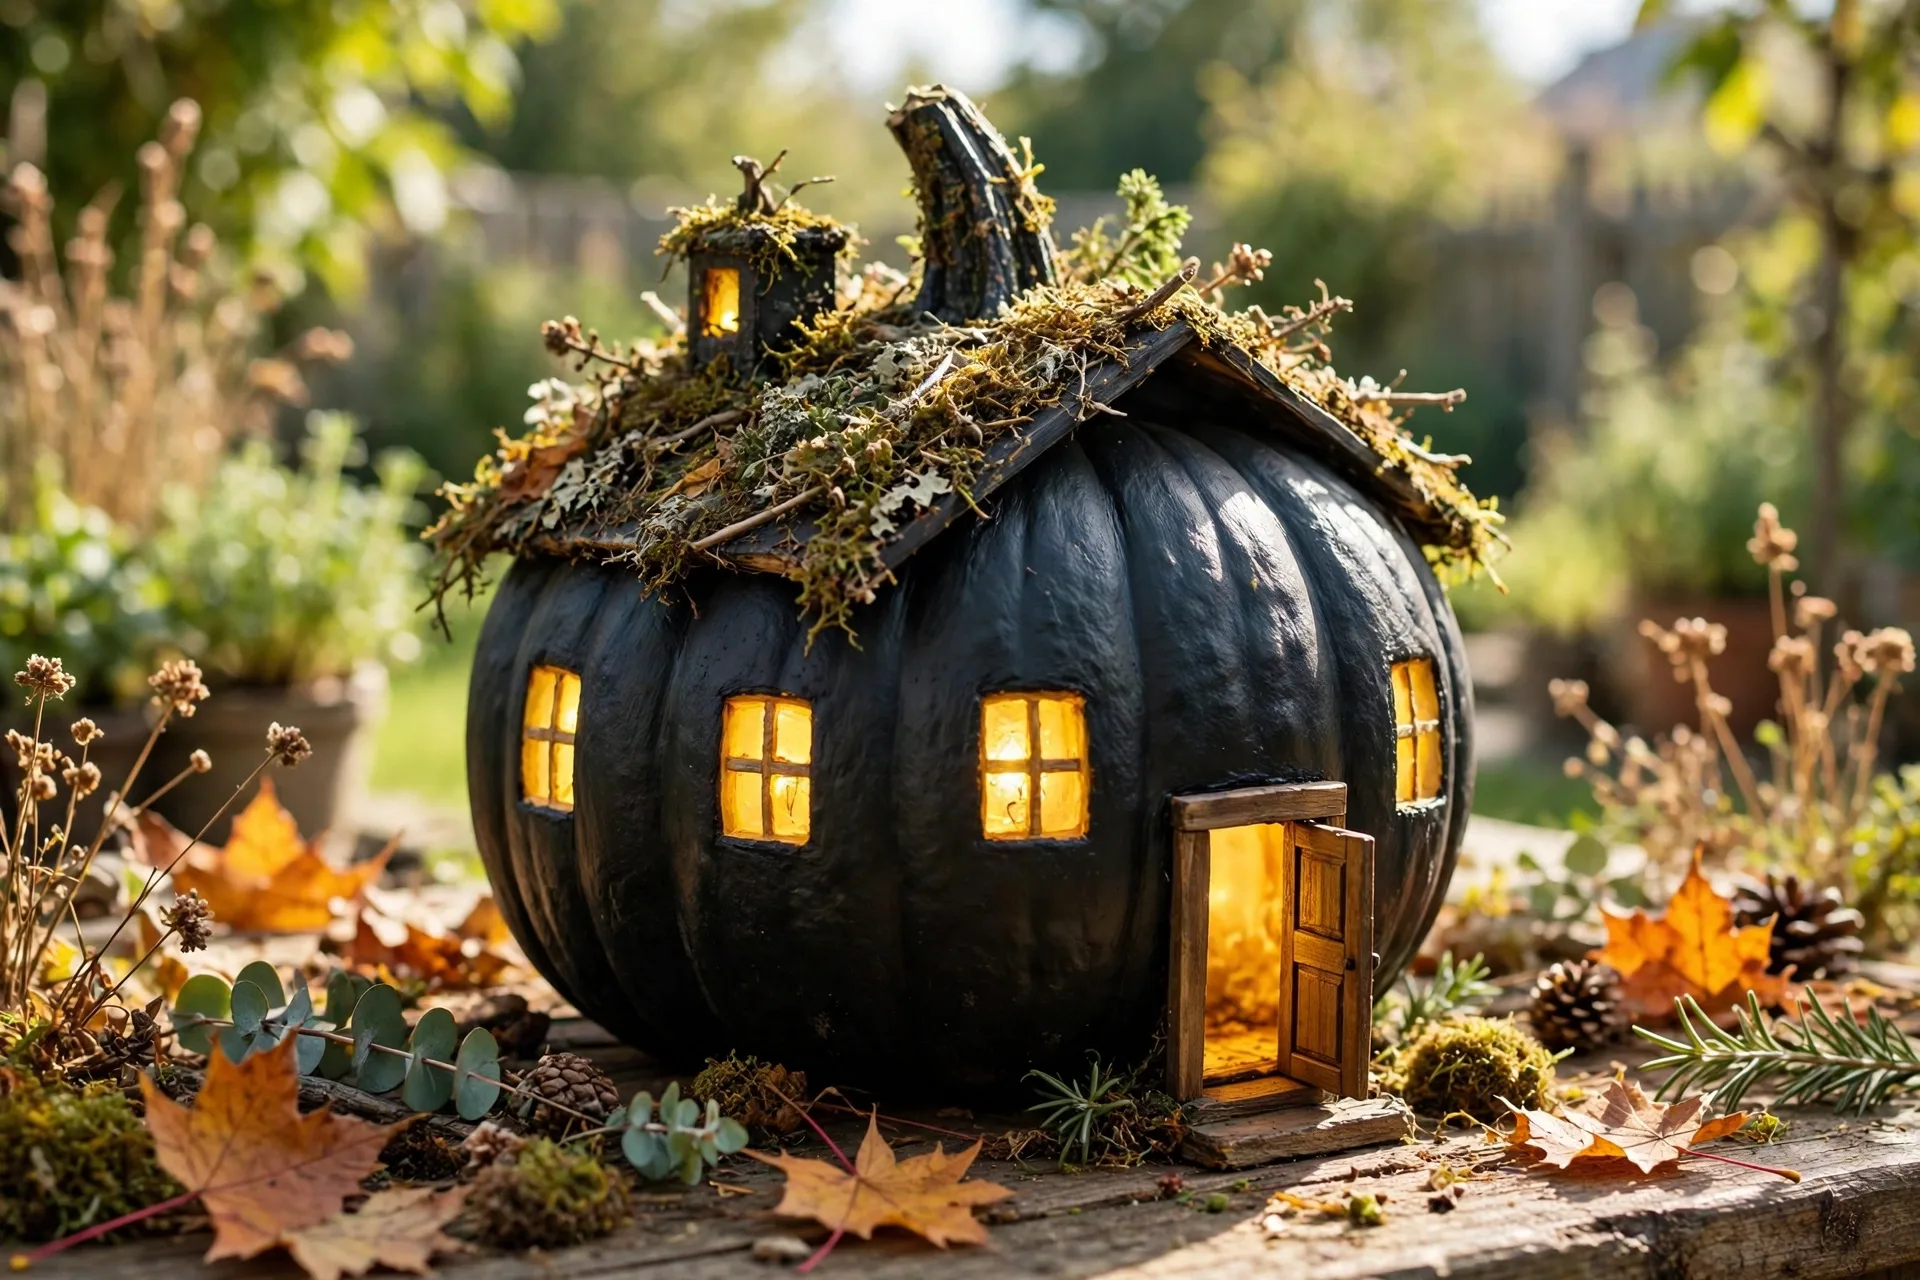
The look: a dark pumpkin painted with glowing yellow windows, like a tiny house at night.
How to make it: Paint the pumpkin deep navy or charcoal. The grown-up paints four or five small yellow windows with tiny cross frames, a small door, and a crescent moon above. At night, set flameless tea lights in front of it and the windows seem to glow. It is the haunted-house idea shrunk down to one cozy cottage.
Ages: 5 and up. Kids paint the night base; the grown-up paints the windows.
52. The Harvest Cornucopia
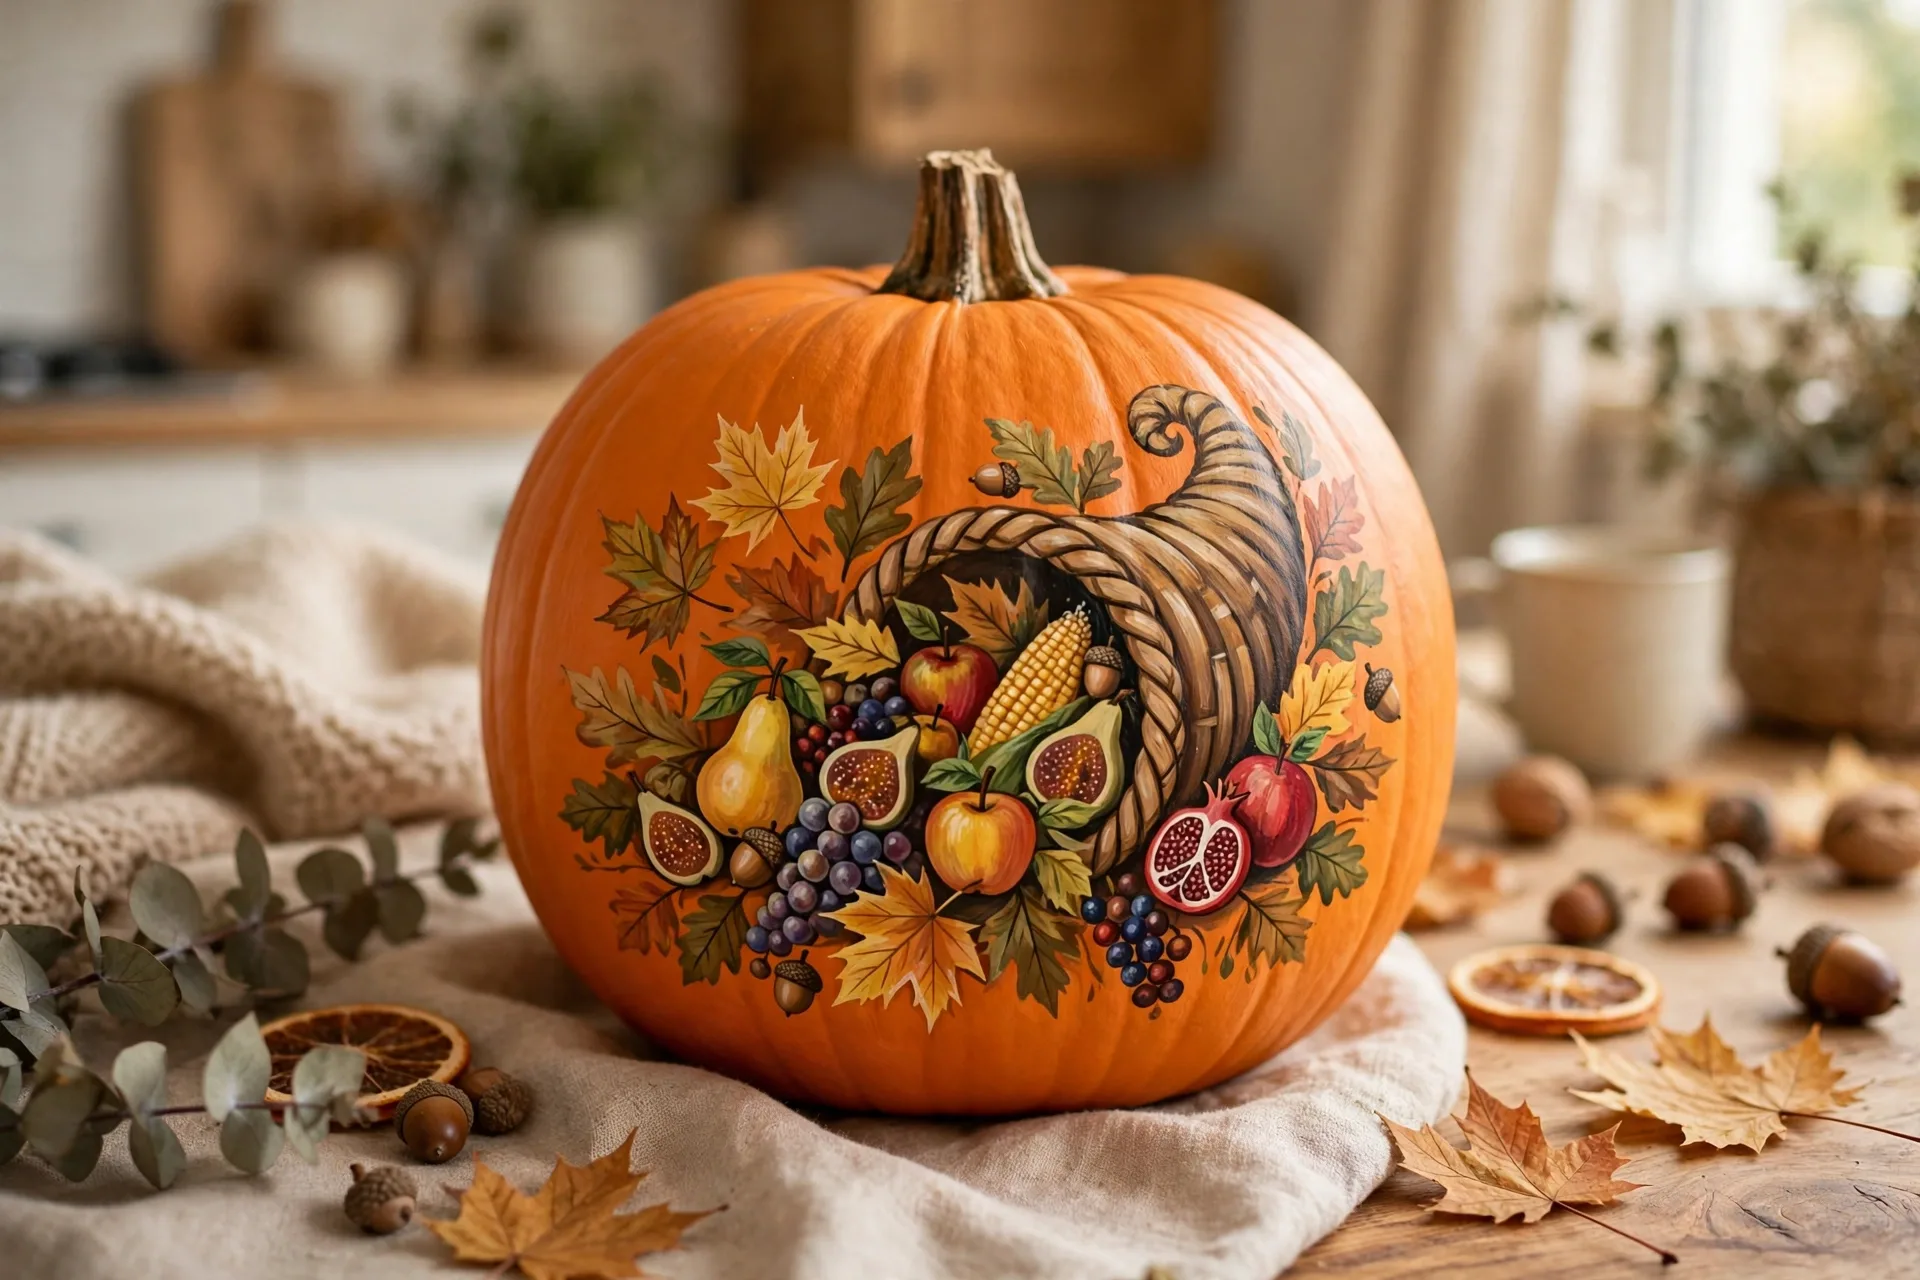
The look: a cornucopia of painted fruit and leaves spilling across the pumpkin.
How to make it: Paint the pumpkin warm orange. The grown-up paints a brown woven cornucopia horn curving across the front, then fills it with painted apples, grapes, leaves, and a small pumpkin inside the pumpkin. It is the most Thanksgiving pumpkin on this list, and it bridges Halloween to November without changing a thing.
Ages: 6 and up. The cornucopia curve needs a grown-up hand; kids paint the fruit.
53. The Autumn Leaf Garland
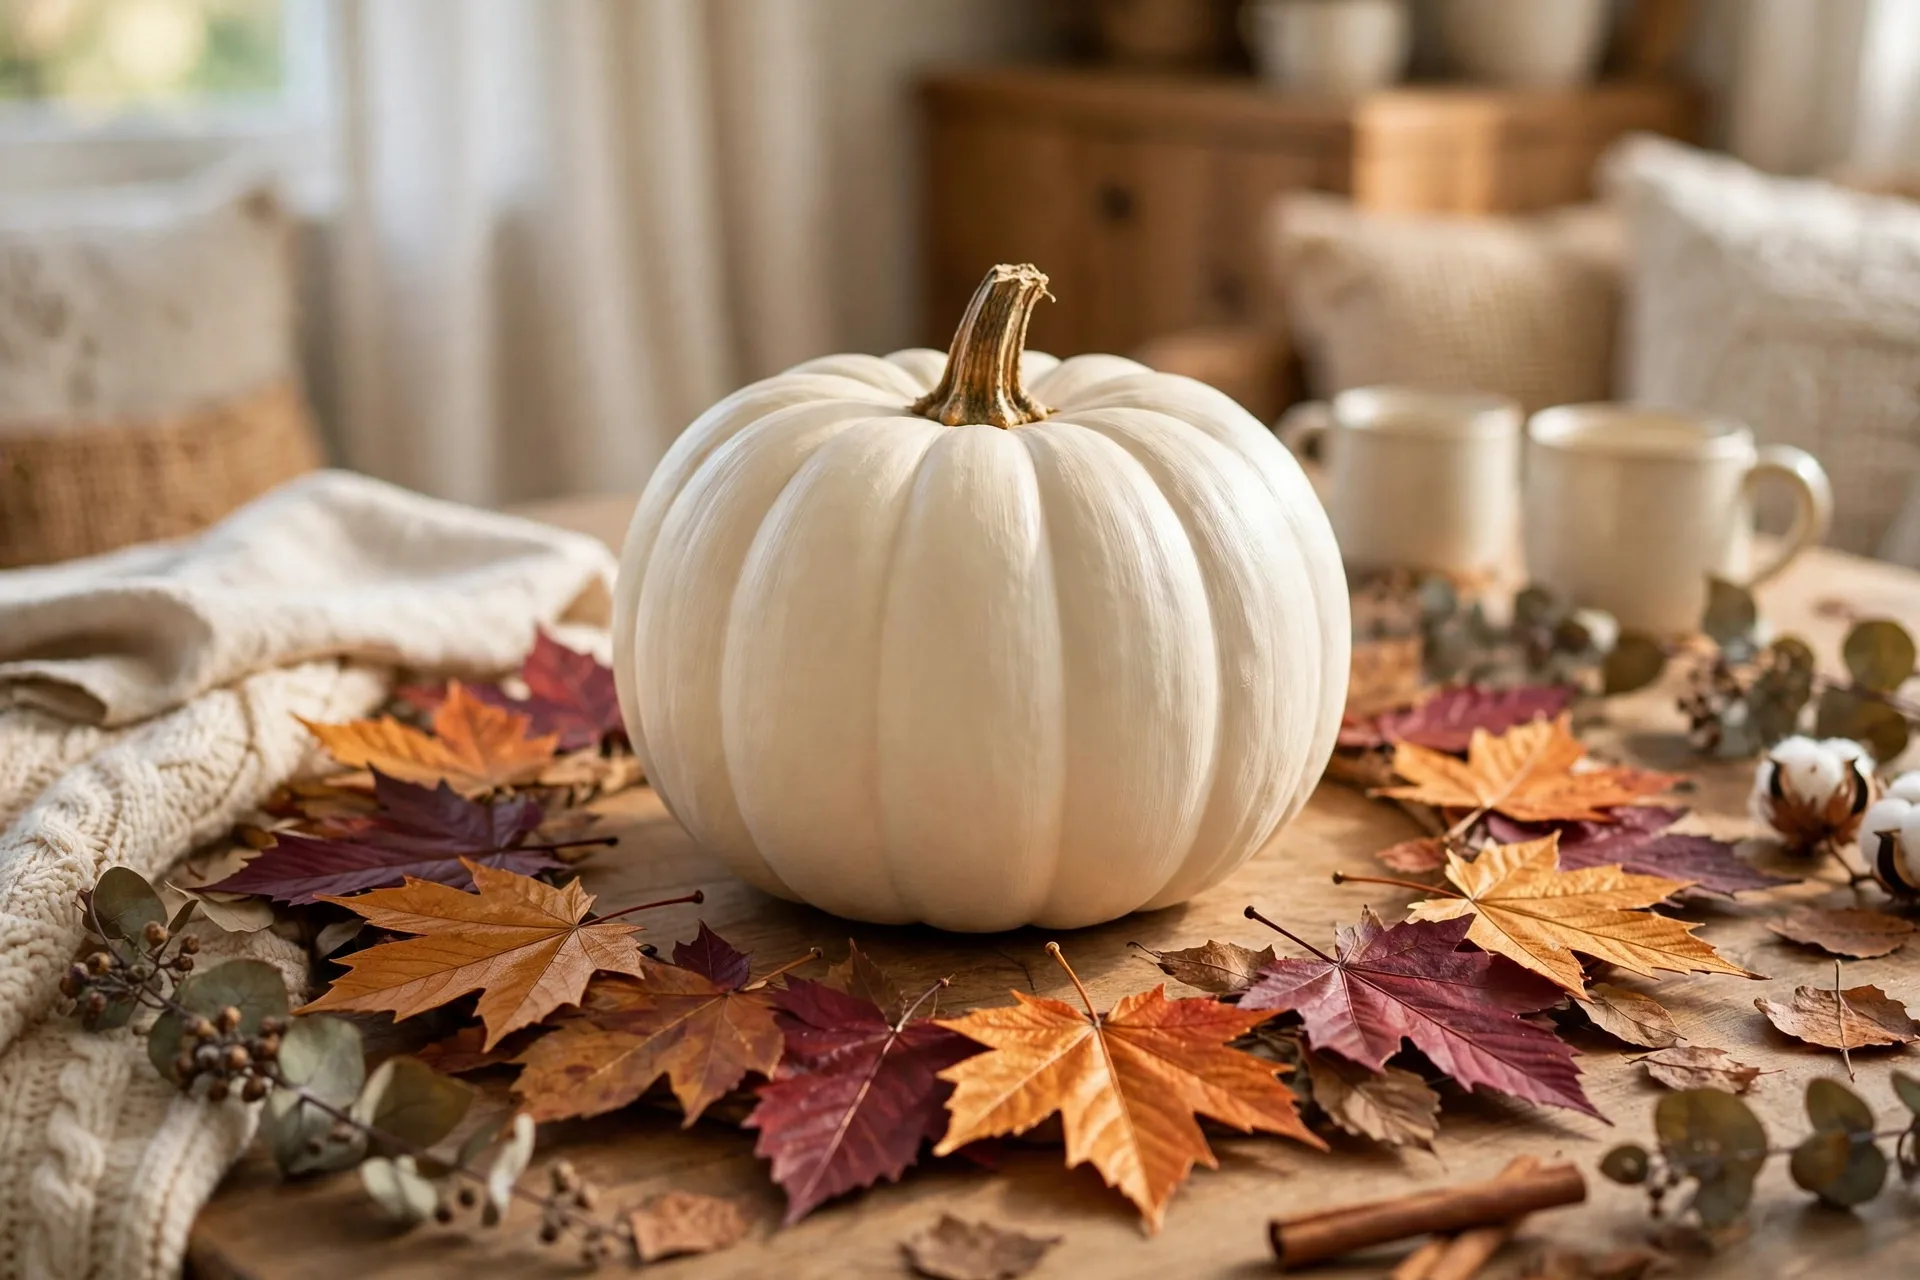
The look: painted autumn leaves circling the pumpkin like a garland.
How to make it: Paint the pumpkin cream or pale yellow. The grown-up paints a ring of leaves around the middle in rust, gold, burgundy, and olive, each leaf a simple oval with a center vein. Add a few painted acorns between the leaves. It is a fall pumpkin, not a Halloween pumpkin, which means it earns its place on the porch for two full months.
Ages: 4 and up. Kids paint the leaves; the grown-up adds the veins.
54. The Midnight Sky
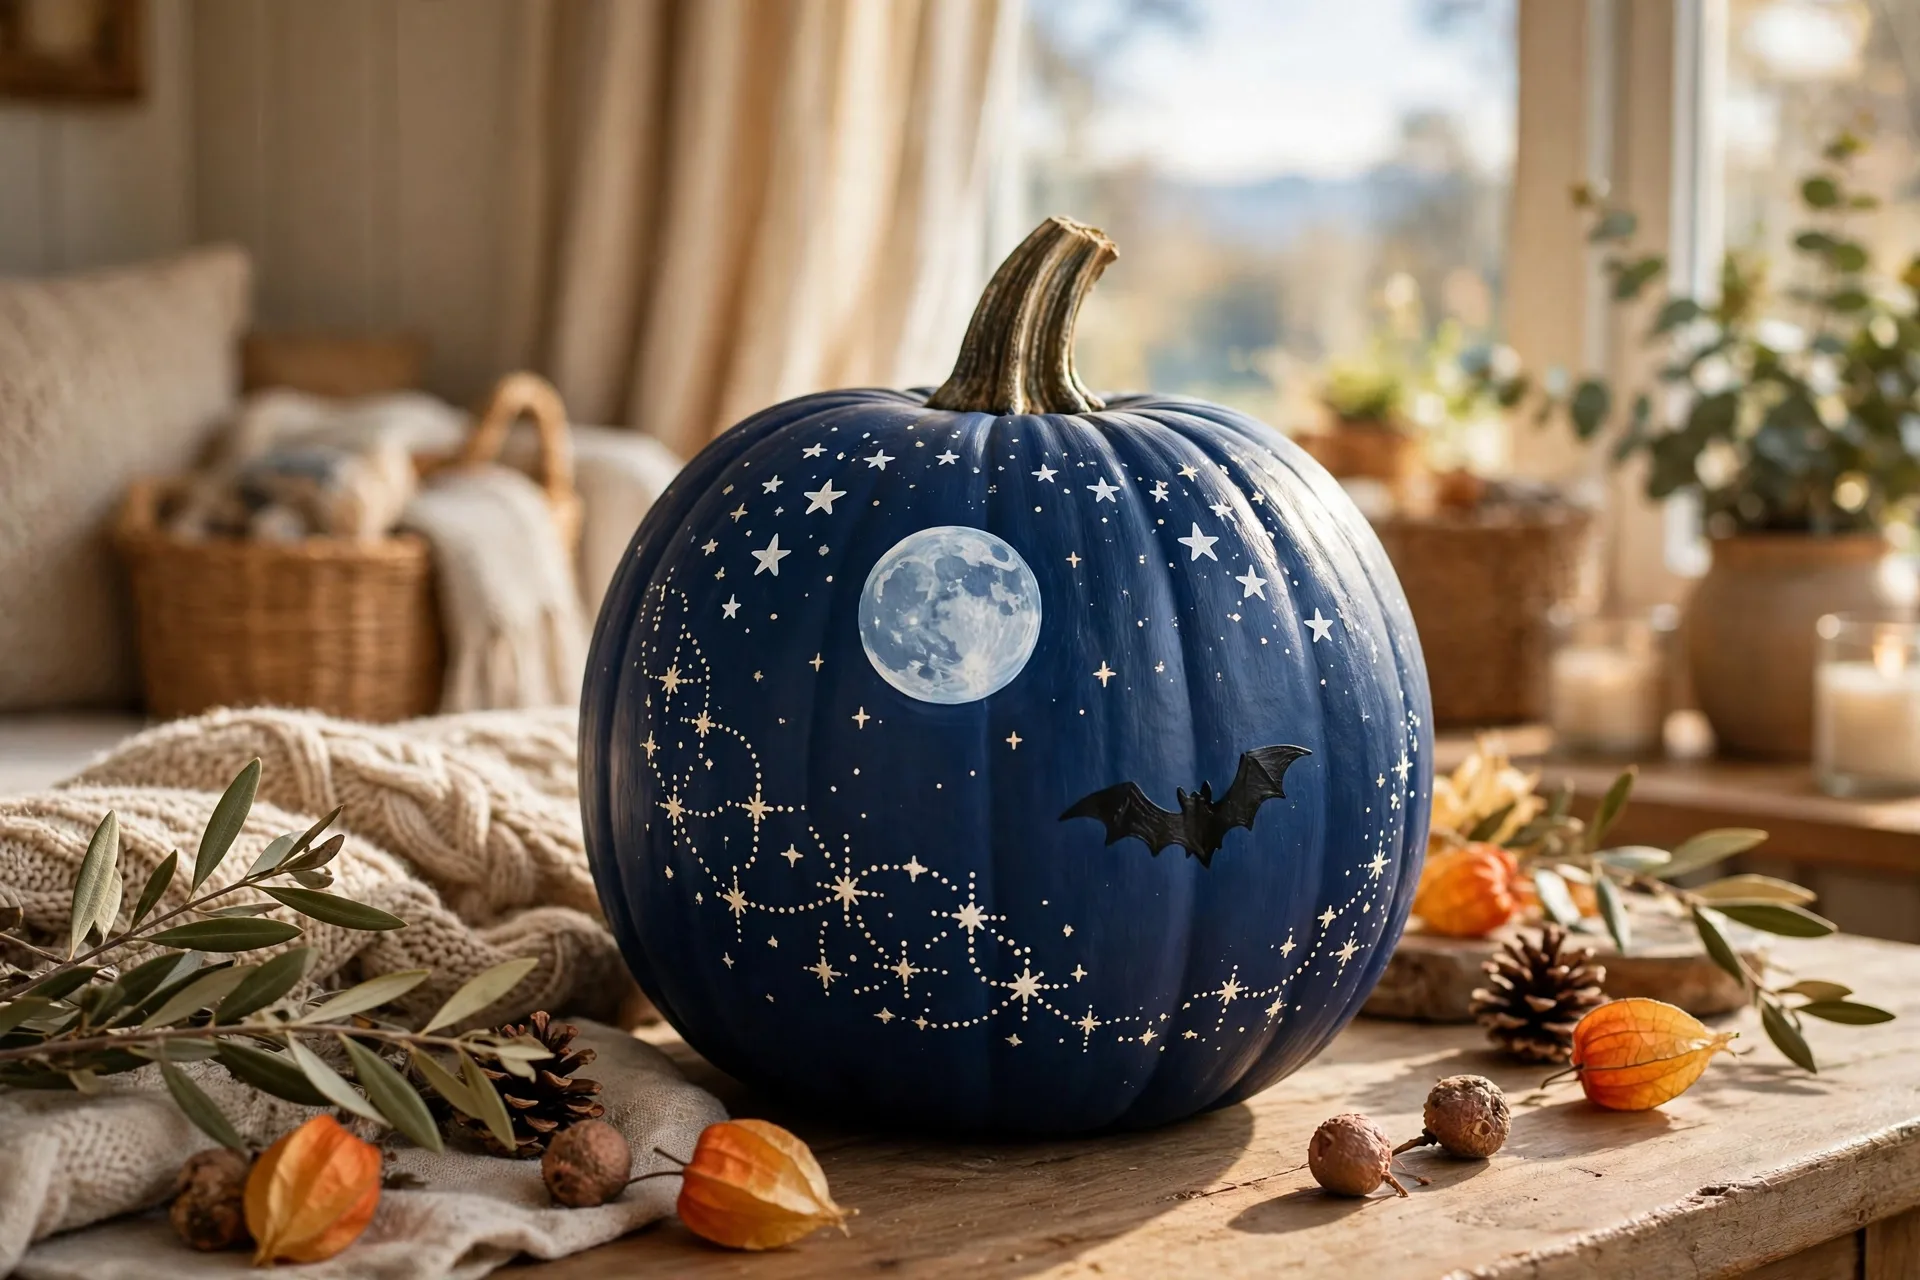
The look: a navy pumpkin with a full moon, stars, and a black bat crossing the moon.
How to make it: Paint the pumpkin deep navy, two coats. The grown-up paints a big pale full moon on one side, a scatter of tiny stars, and one black bat silhouette crossing the moon. Keep the stars small and many; a few big stars look like polka dots. It is the quietest spooky pumpkin here, and the prettiest after dark.
Ages: 5 and up. Kids paint the navy base; the grown-up paints the moon and bat.
55. The Day of the Dead Sugar Skull
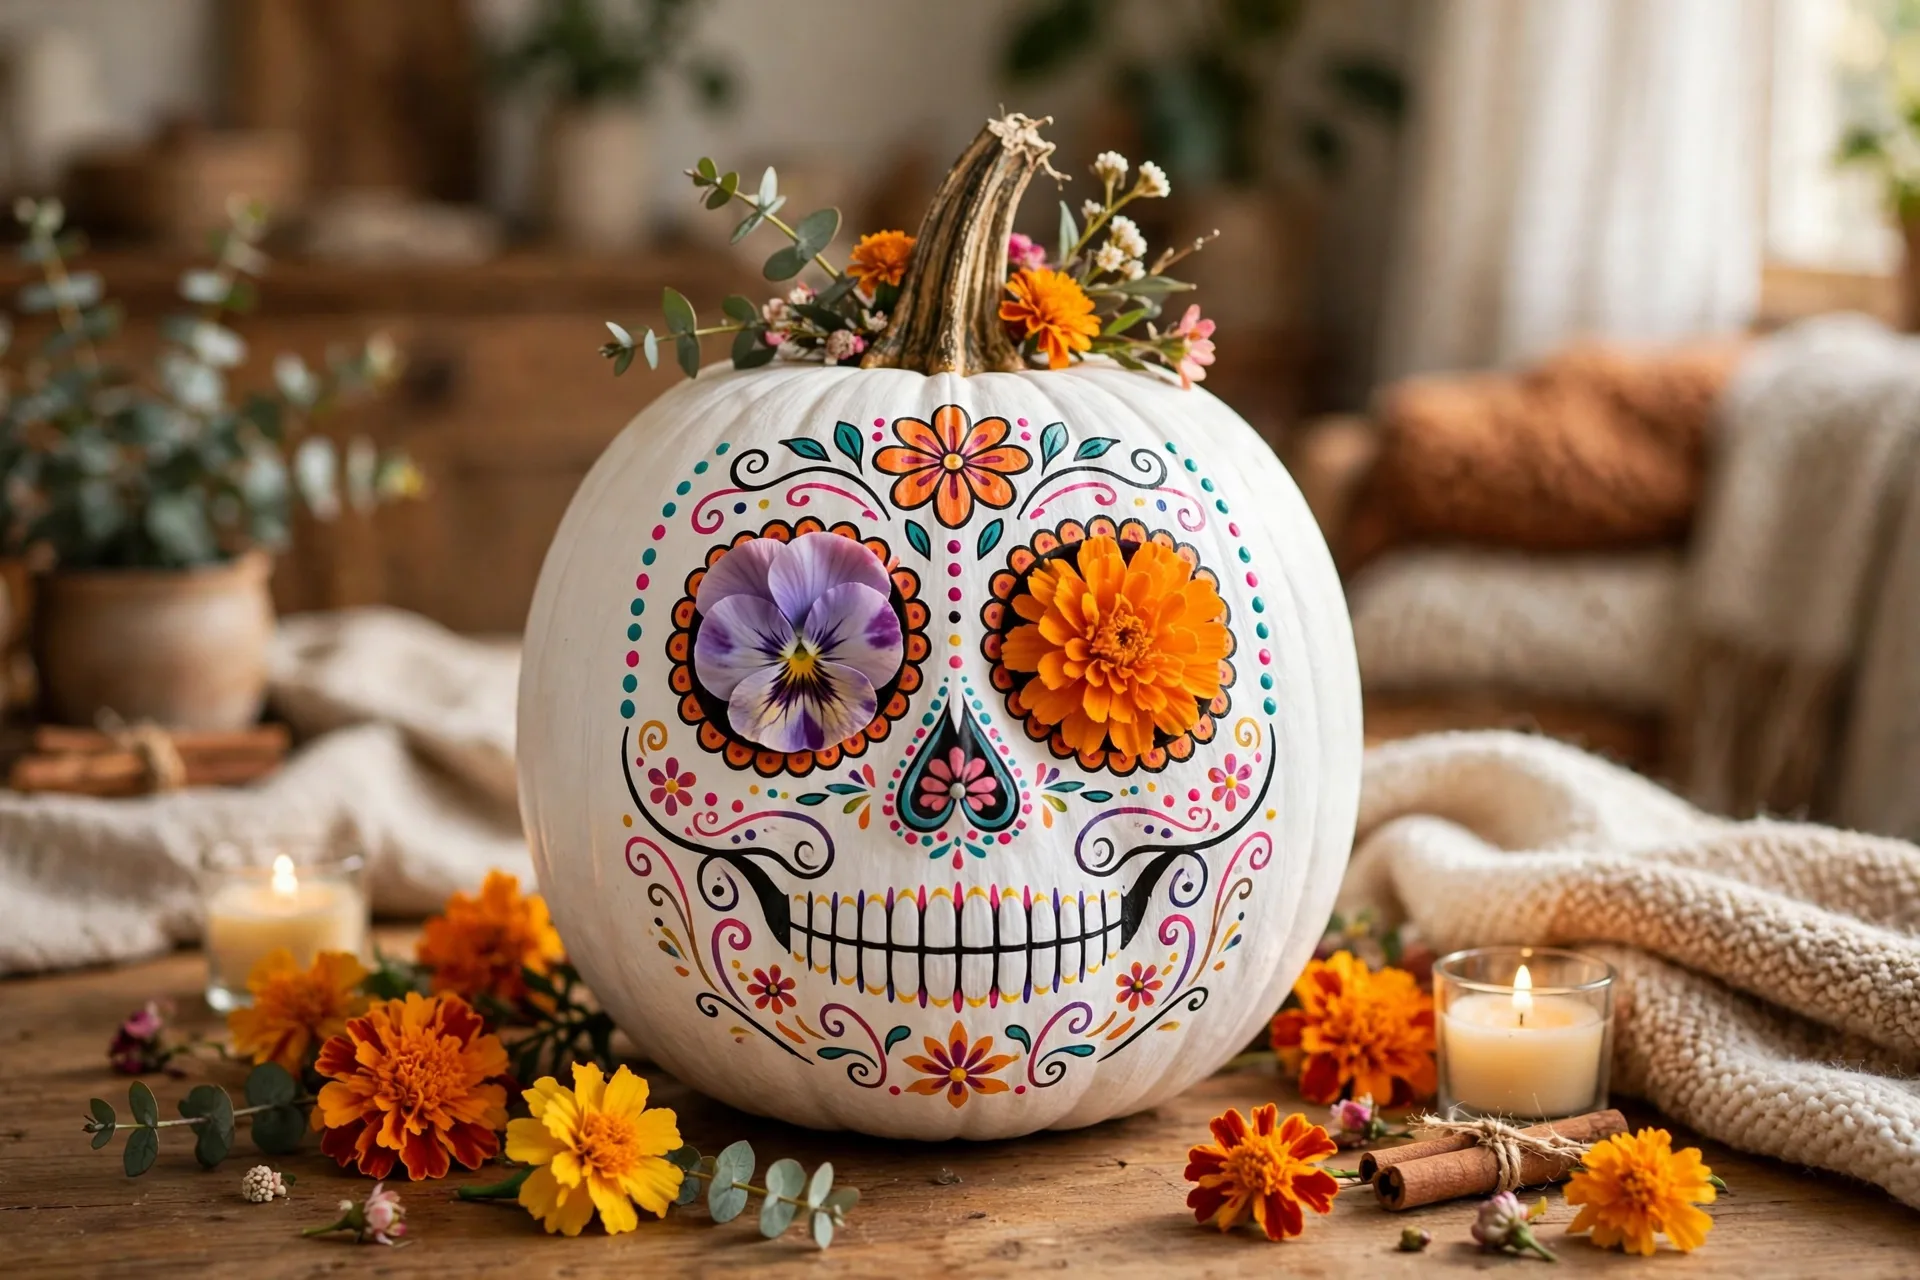
The look: a white pumpkin painted as a colorful sugar skull with flower eyes.
How to make it: Paint the pumpkin white. The grown-up paints two big flower eyes in pink and orange, a stitched smile, a flower on the forehead, and colorful dots and swirls around the cheeks. Keep the colors bright and the lines bold. It is a celebration design, not a scary one, and it teaches kids that Halloween has cousins in other traditions.
Ages: 6 and up. The flower eyes need a steady hand and a grown-up in charge.
More Quick and Toddler-Friendly
56. The One-Coat Wonder
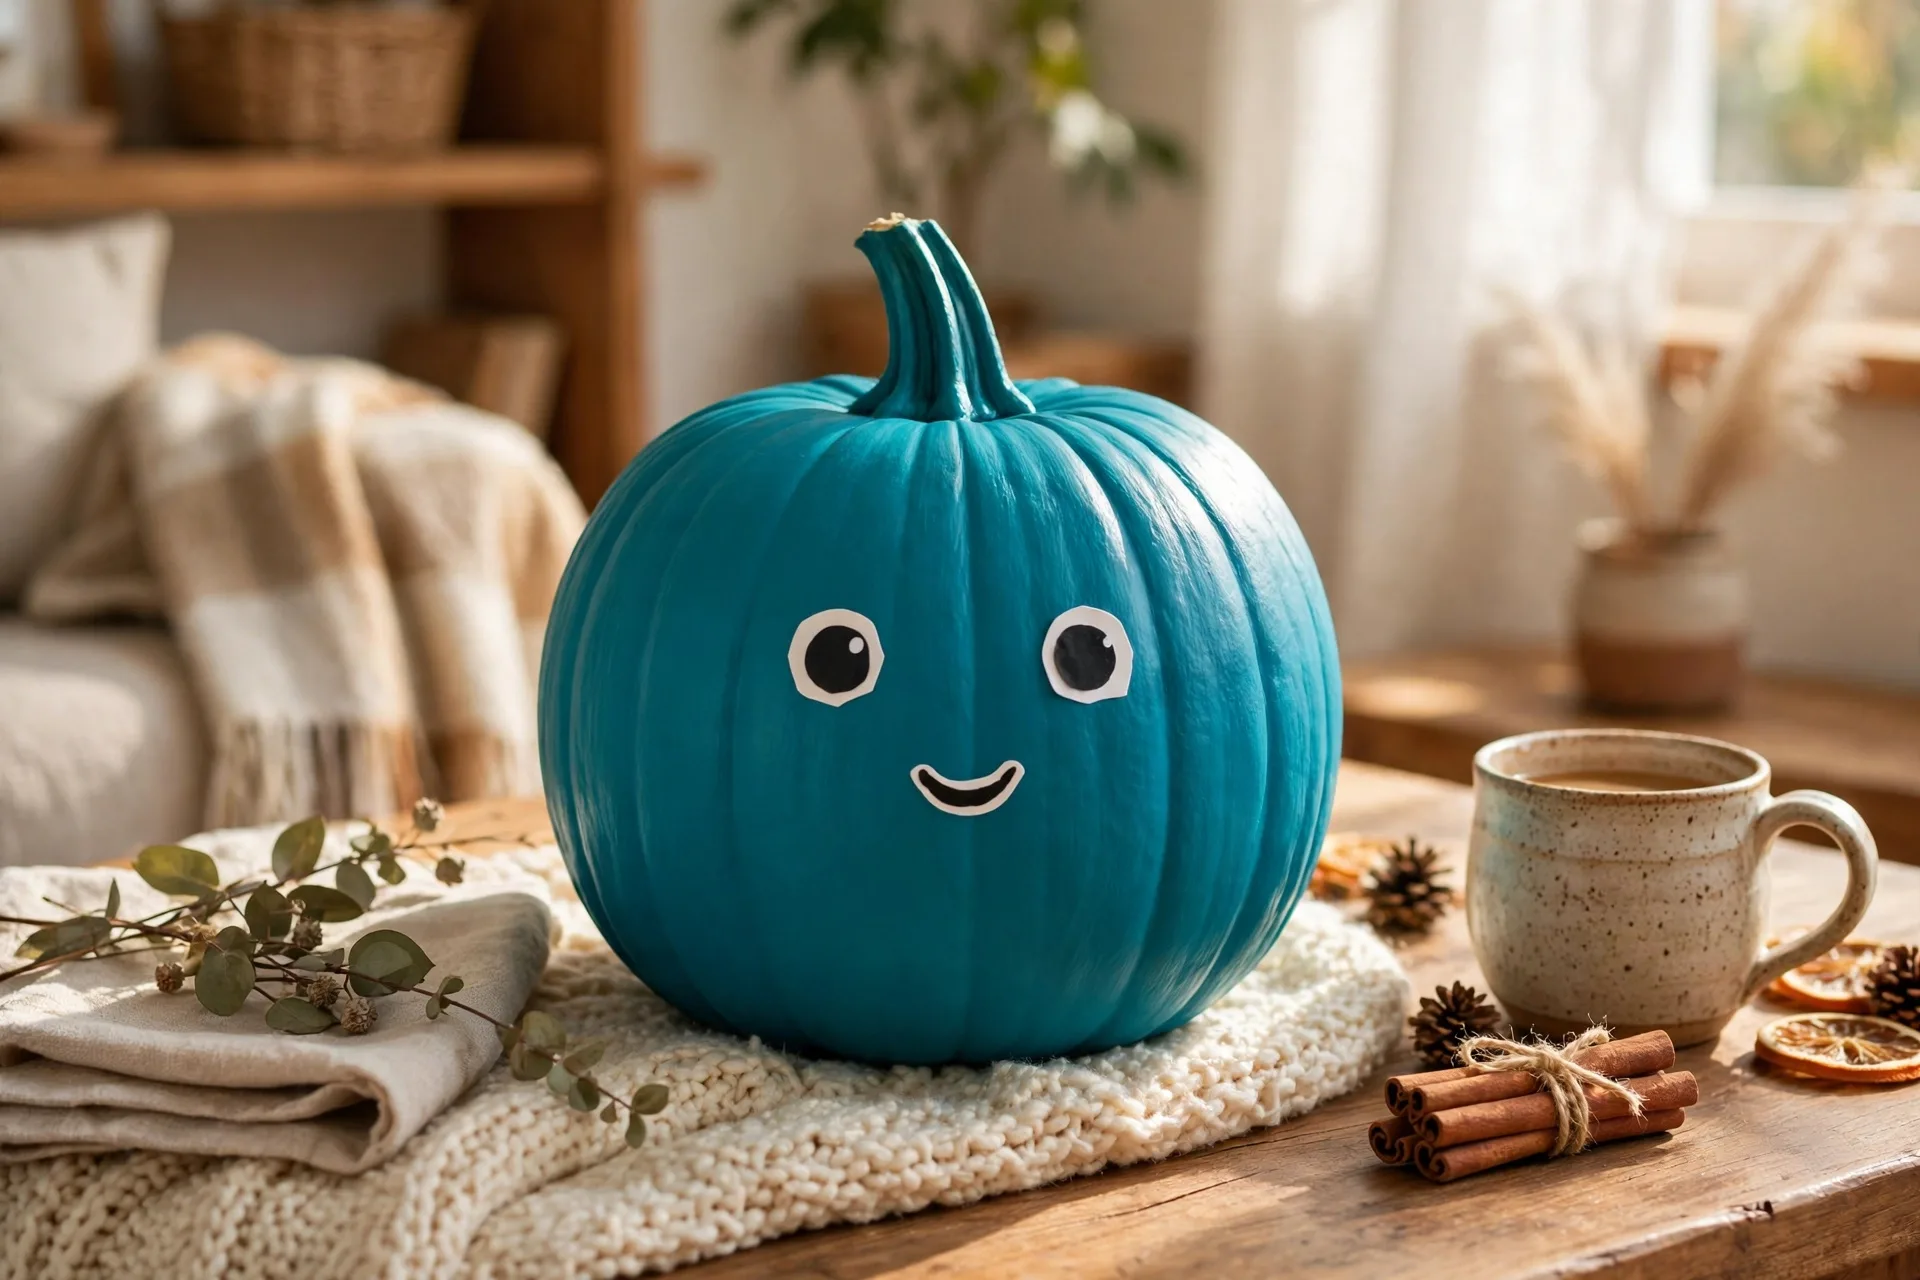
The look: a single bold color, one coat, one sticker face, done before naptime.
How to make it: Pick a pumpkin and paint it one bold color: teal, purple, hot pink, whatever your kid picks. One coat, no second coat, no details. Once dry, stick on a foam face or sticker eyes and a smile. It is the fastest pumpkin on this list and the proof that a painted pumpkin does not need to be a project to count.
Ages: 2 and up. One coat is the perfect first painting job for a toddler.
57. The Handprint Pumpkin
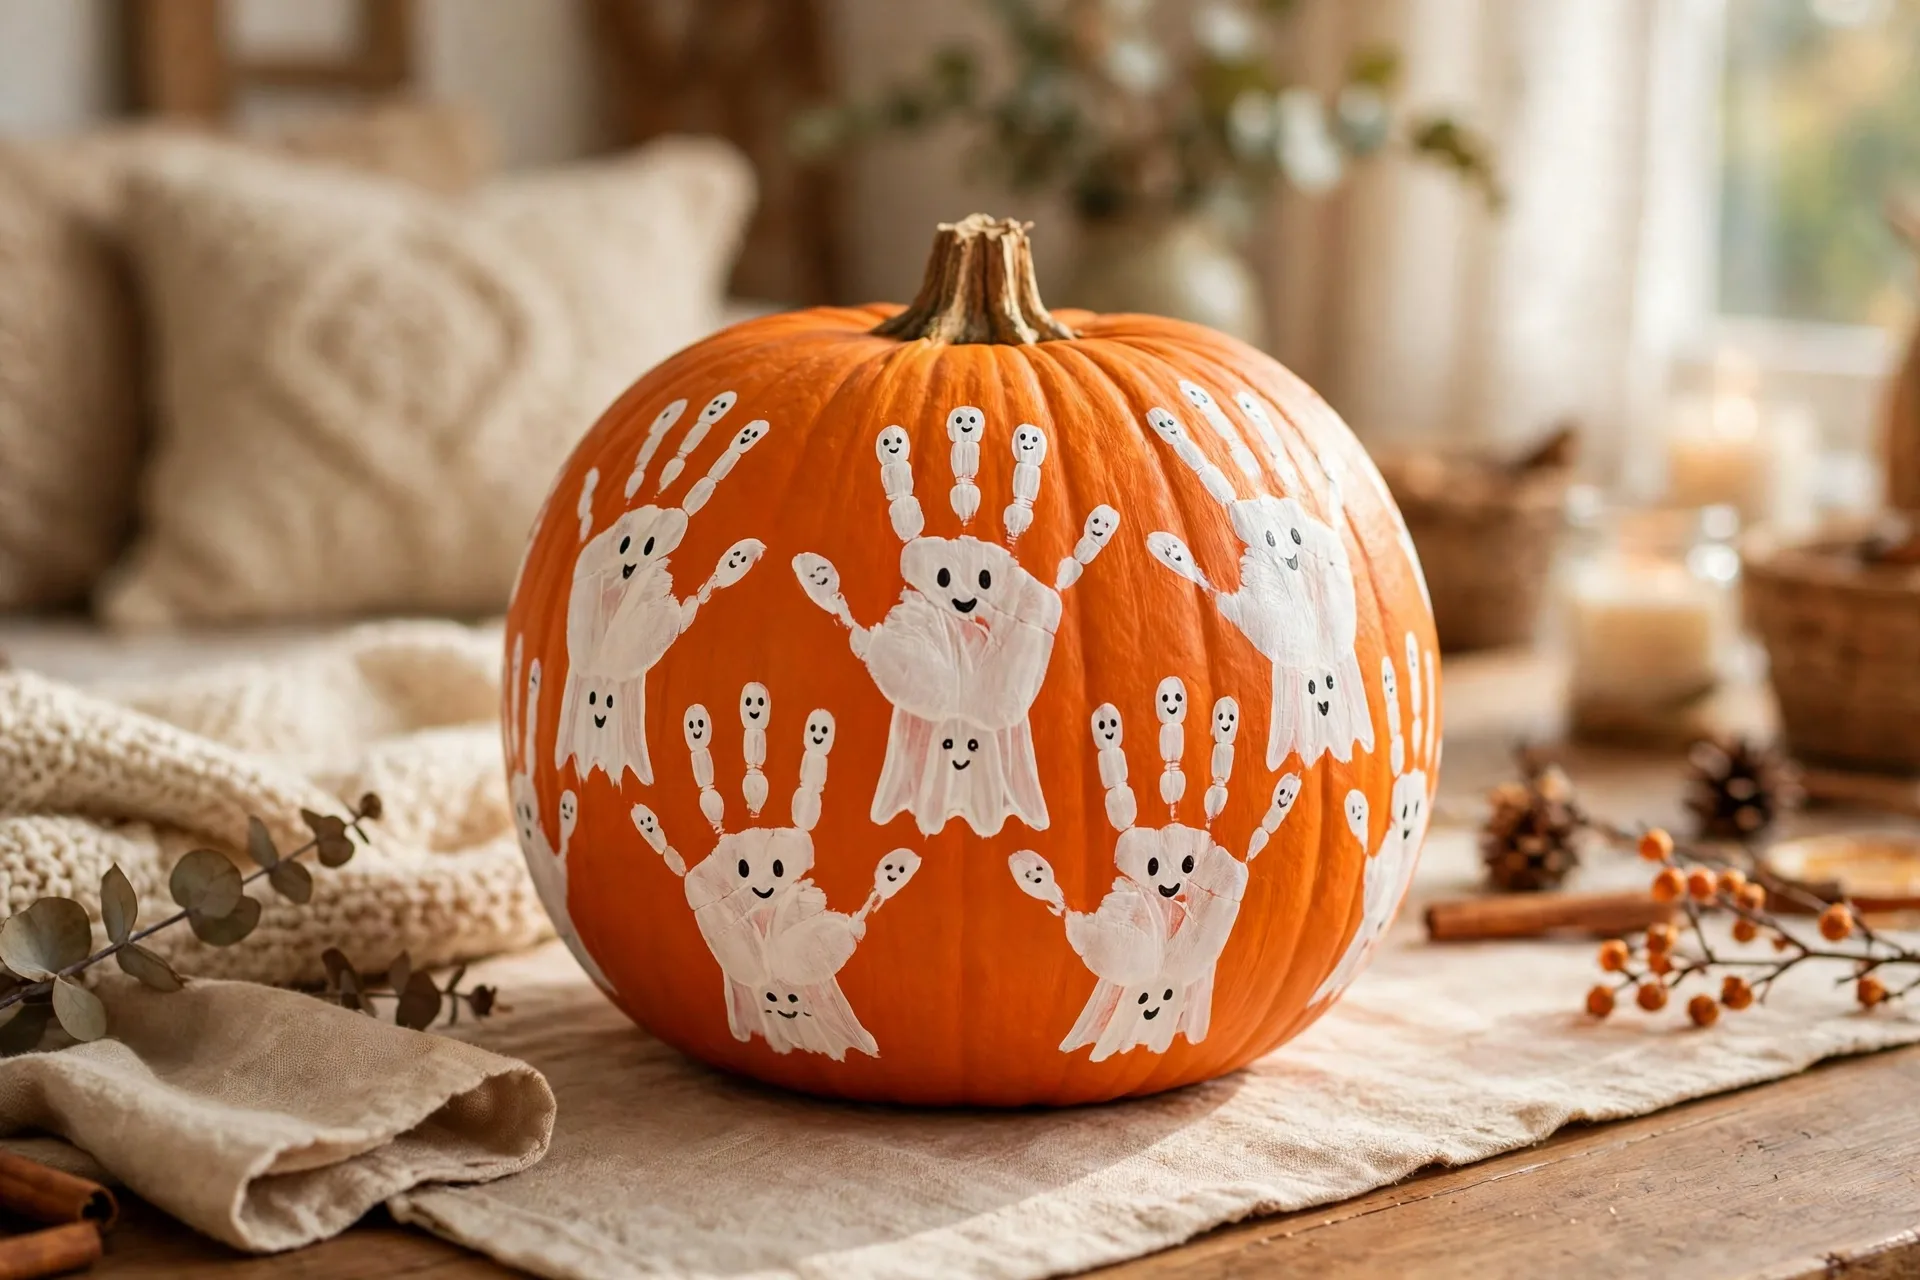
The look: a pumpkin covered in your kids handprints, each one turned into a little ghost.
How to make it: Paint the pumpkin orange. Each kid presses a white-painted hand onto it, fingers down, and the grown-up adds two dot eyes to each handprint so every hand becomes a ghost. Date the bottom with the year. It is the keepsake pumpkin: the hands get bigger every October, and the old ones stay small forever.
Ages: 2 and up. Handprint painting is messy, joyful, and exactly right for toddlers.
58. The Sticker Face
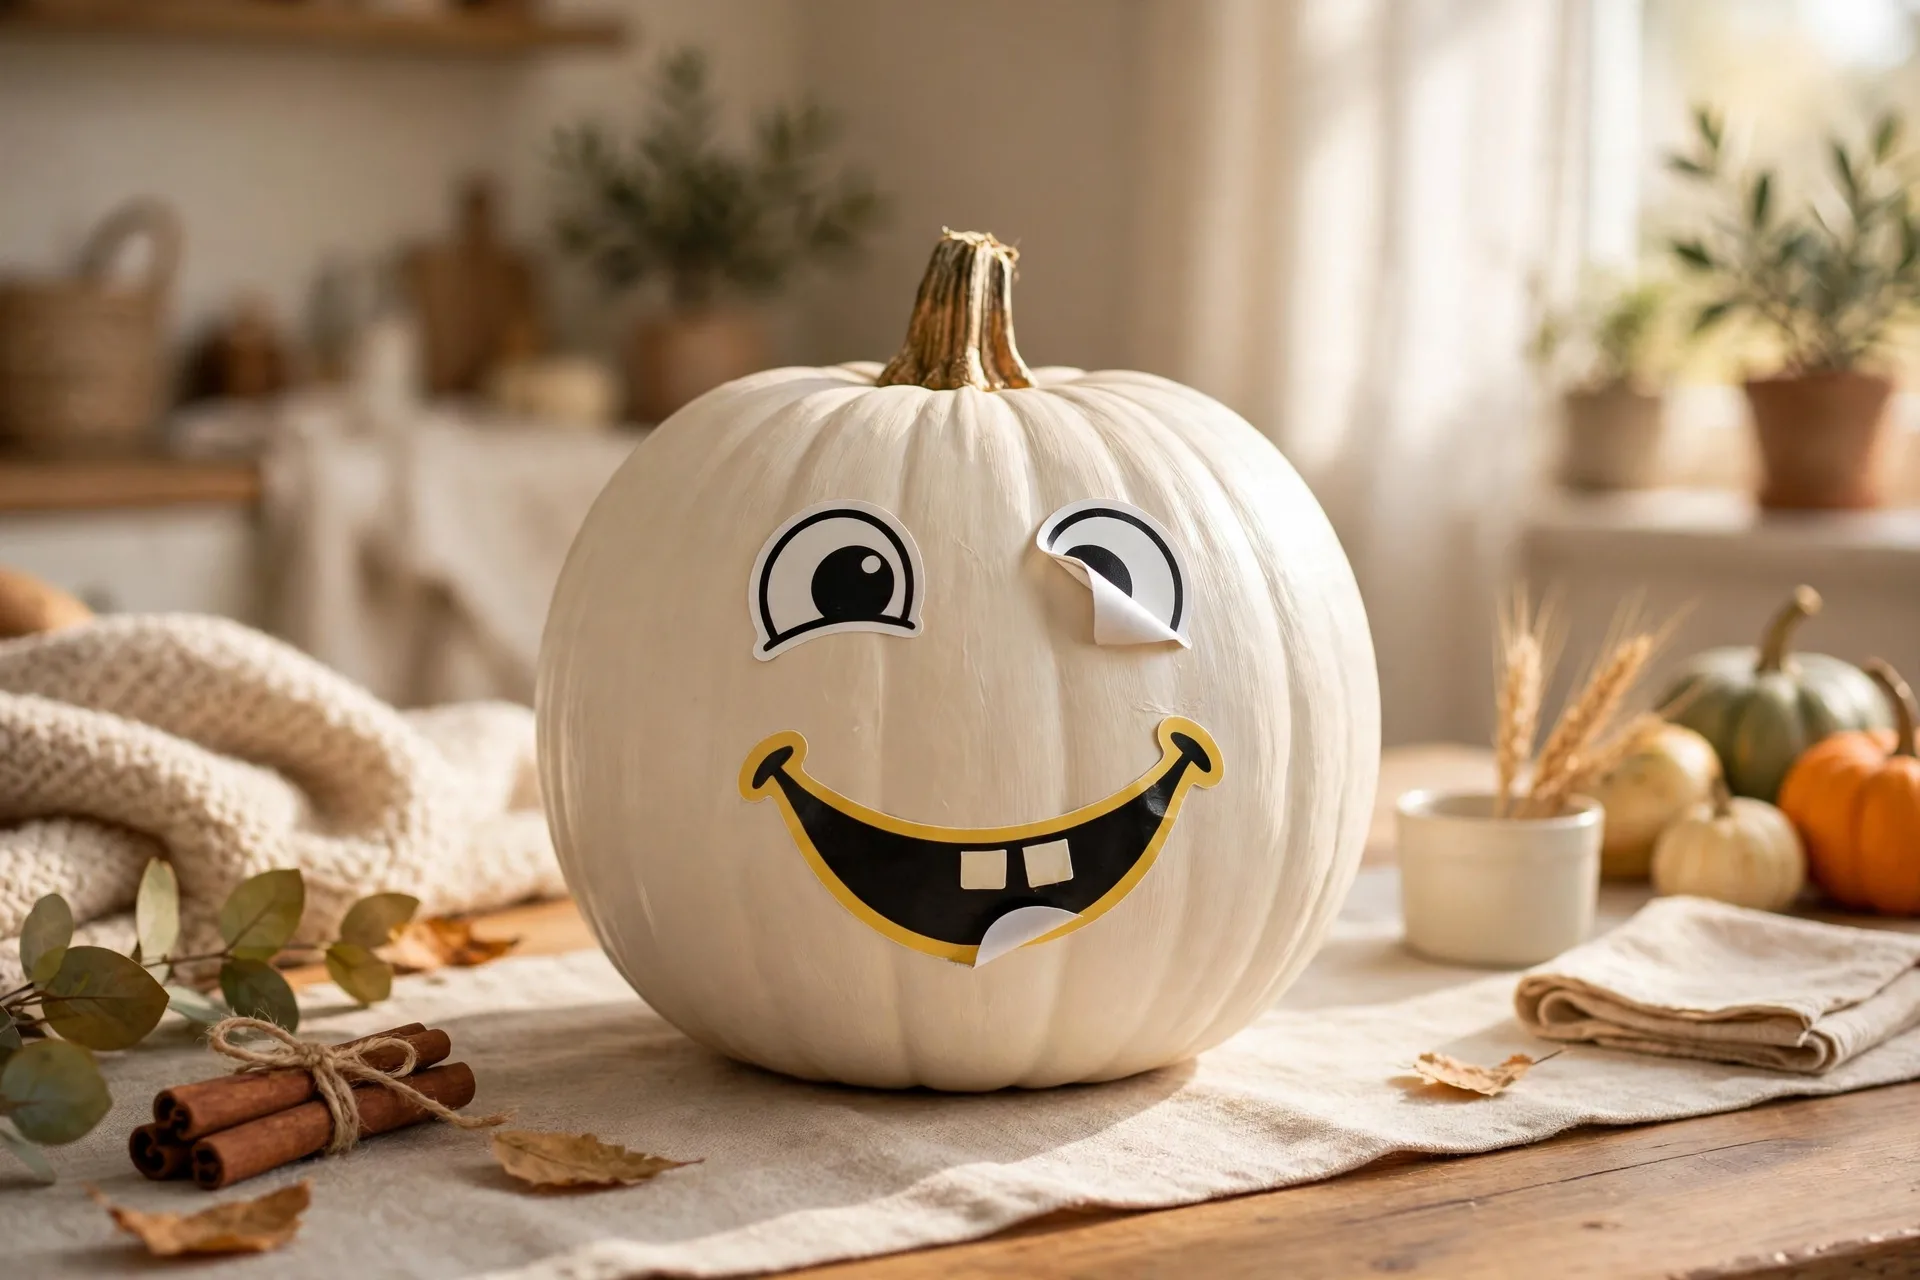
The look: a painted base with a peel-and-stick face, for the kid who wants it done now.
How to make it: Paint the pumpkin any solid color and let it dry fully. Then hand the kids a sheet of face stickers: eyes, mouths, noses, eyebrows, mix and match. Peel, stick, done. It is the pumpkin for the last-minute party, the tired parent, and the kid who changes their mind three times before lunch.
Ages: 2 and up. Peeling stickers is fine-motor practice disguised as a craft.
59. The Two-Color Dip
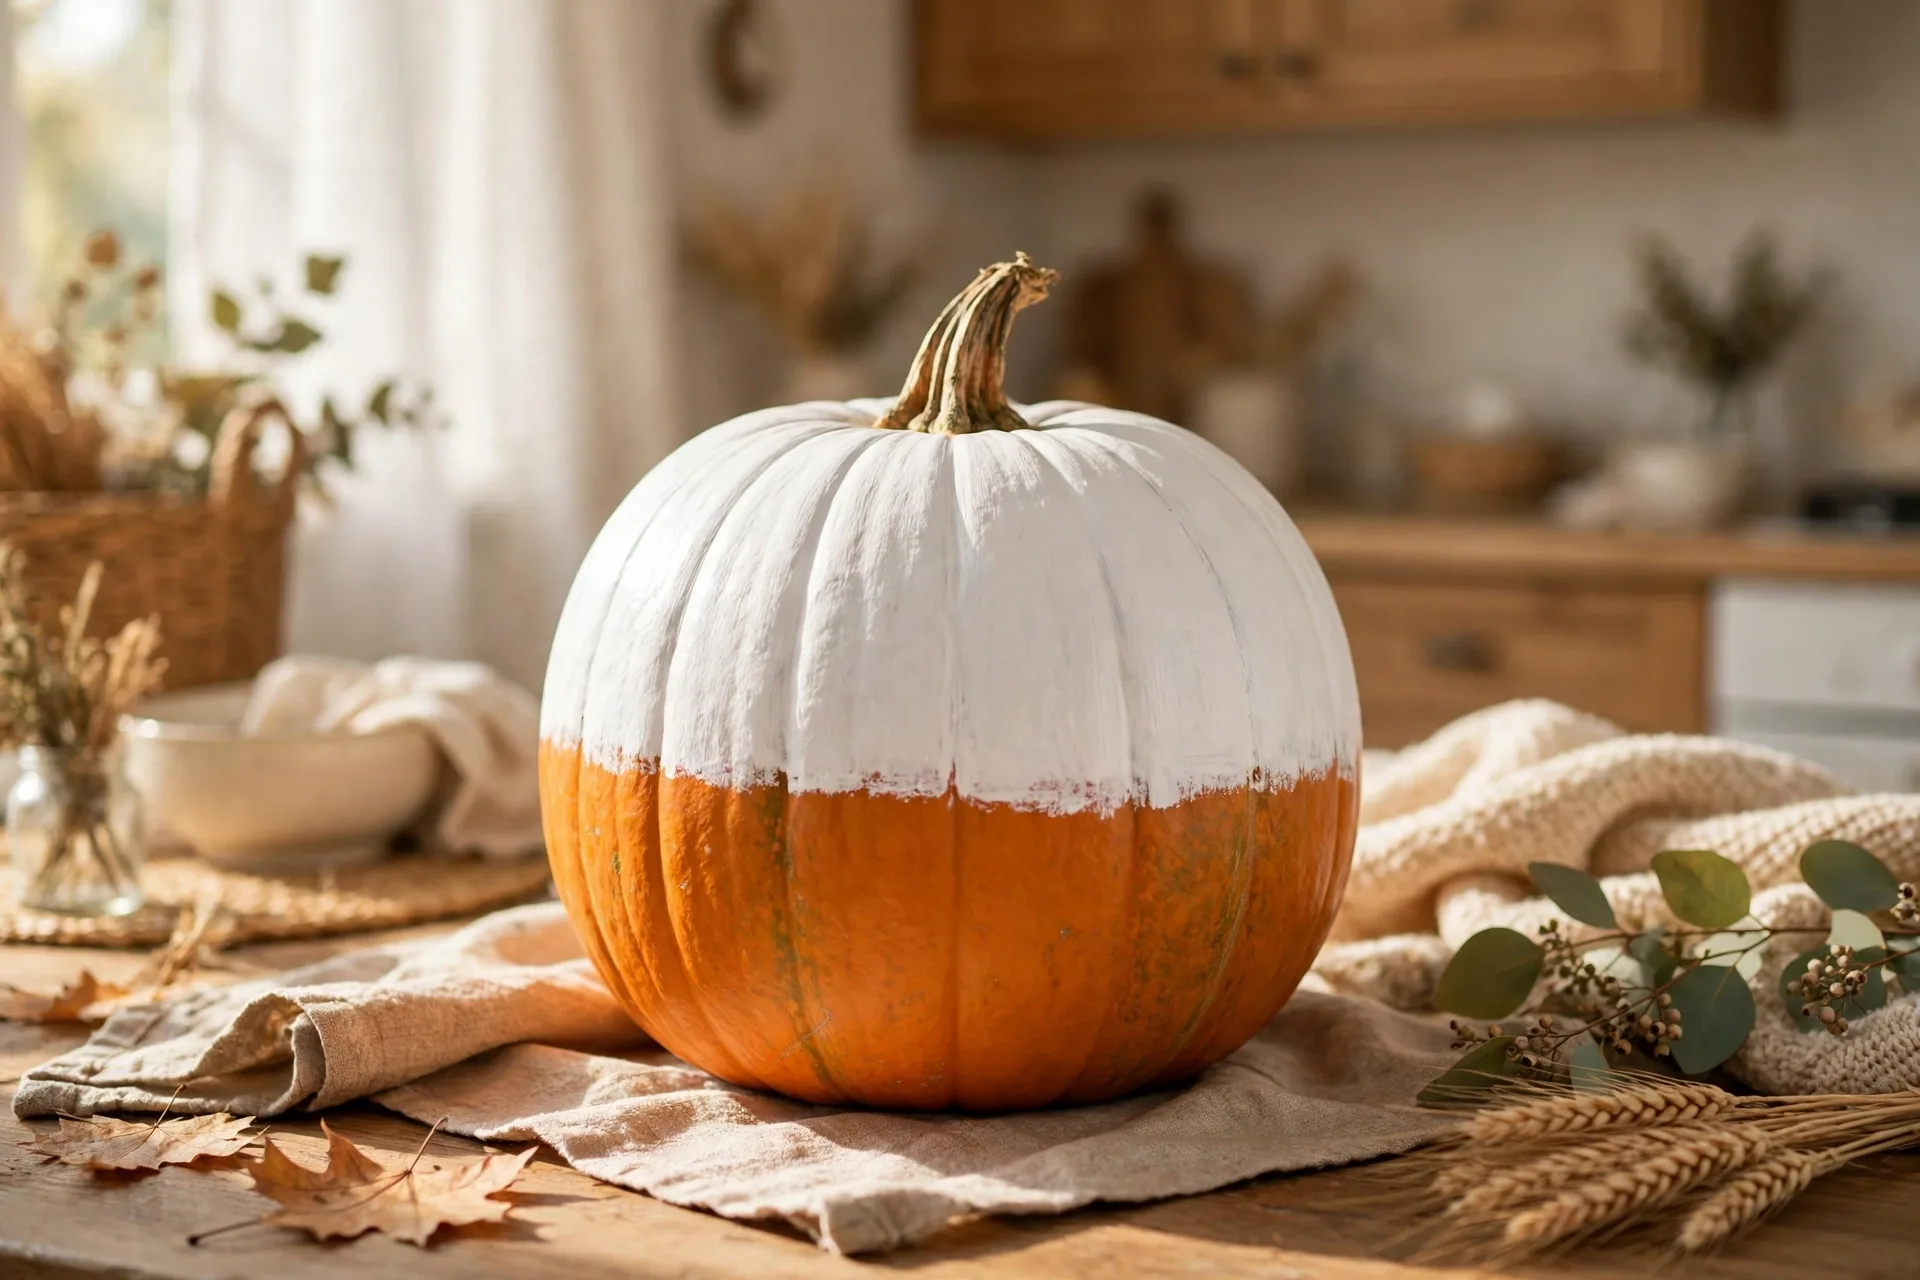
The look: a pumpkin dipped halfway in paint, with a clean line where the colors meet.
How to make it: Hold the pumpkin upside down and dip the bottom half into a shallow tray of paint, then set it on newspaper to dry. The line where the paint stops is the design. White on orange, black on cream, gold on black: any two colors work. It is the laziest elegant pumpkin on the list and it looks intentional every time.
Ages: 3 and up. Dipping needs a grown-up holding the stem; kids pick the colors.
60. The Sponge Stamp
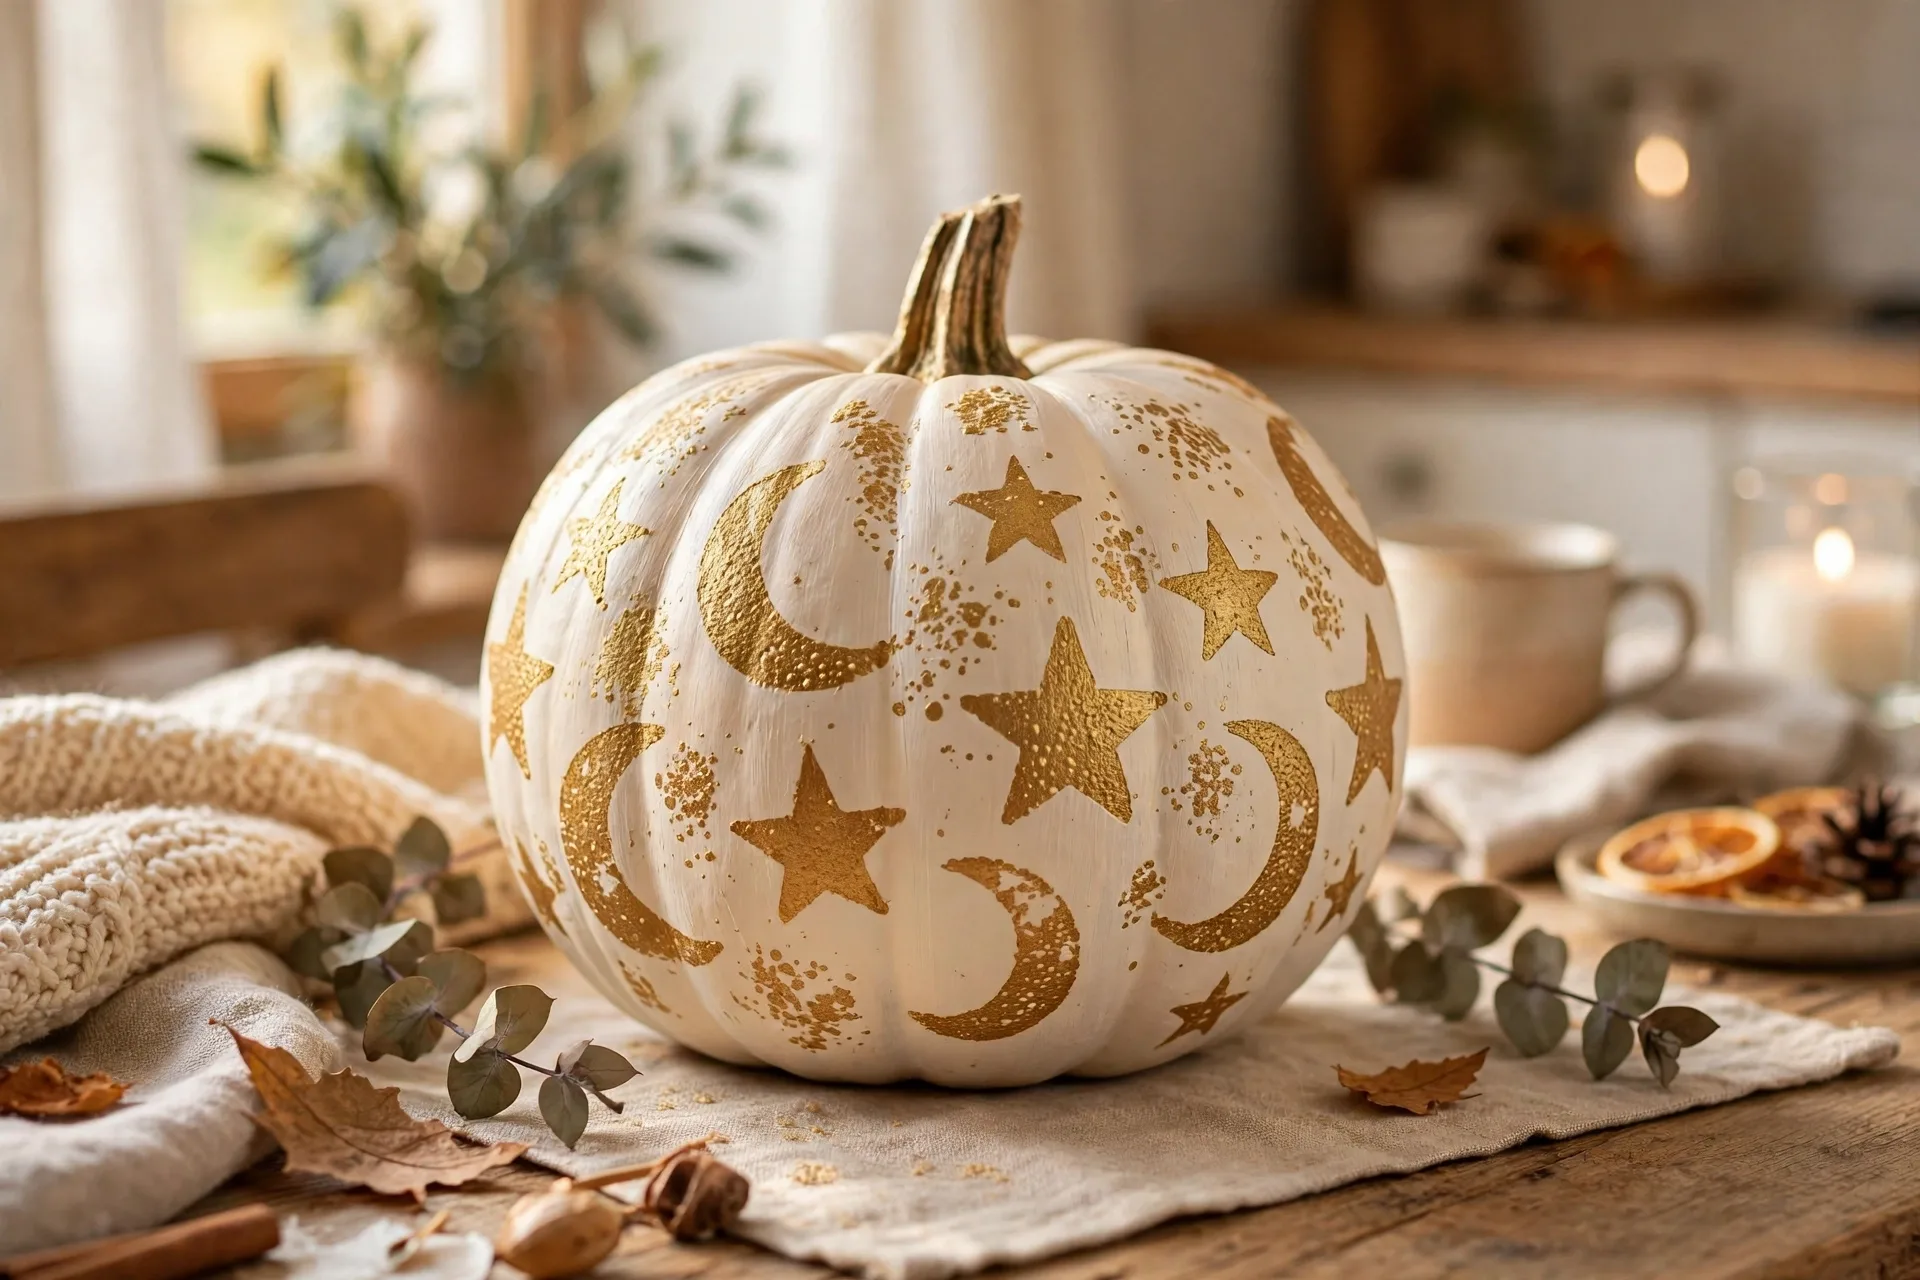
The look: a pumpkin stamped all over with sponge shapes: stars, moons, and bats.
How to make it: Cut simple shapes from a kitchen sponge, dip them in paint, and stamp them all over the pumpkin. Stars in gold, moons in cream, bats in black. Sponge stamps are forgiving and fast, and the slightly rough edges look handmade in the best way. It is the pumpkin for a group craft: every kid gets a sponge and a side.
Ages: 2 and up. Sponge stamping is a toddler skill and a group-craft hero.
61. The Thumbprint Bats
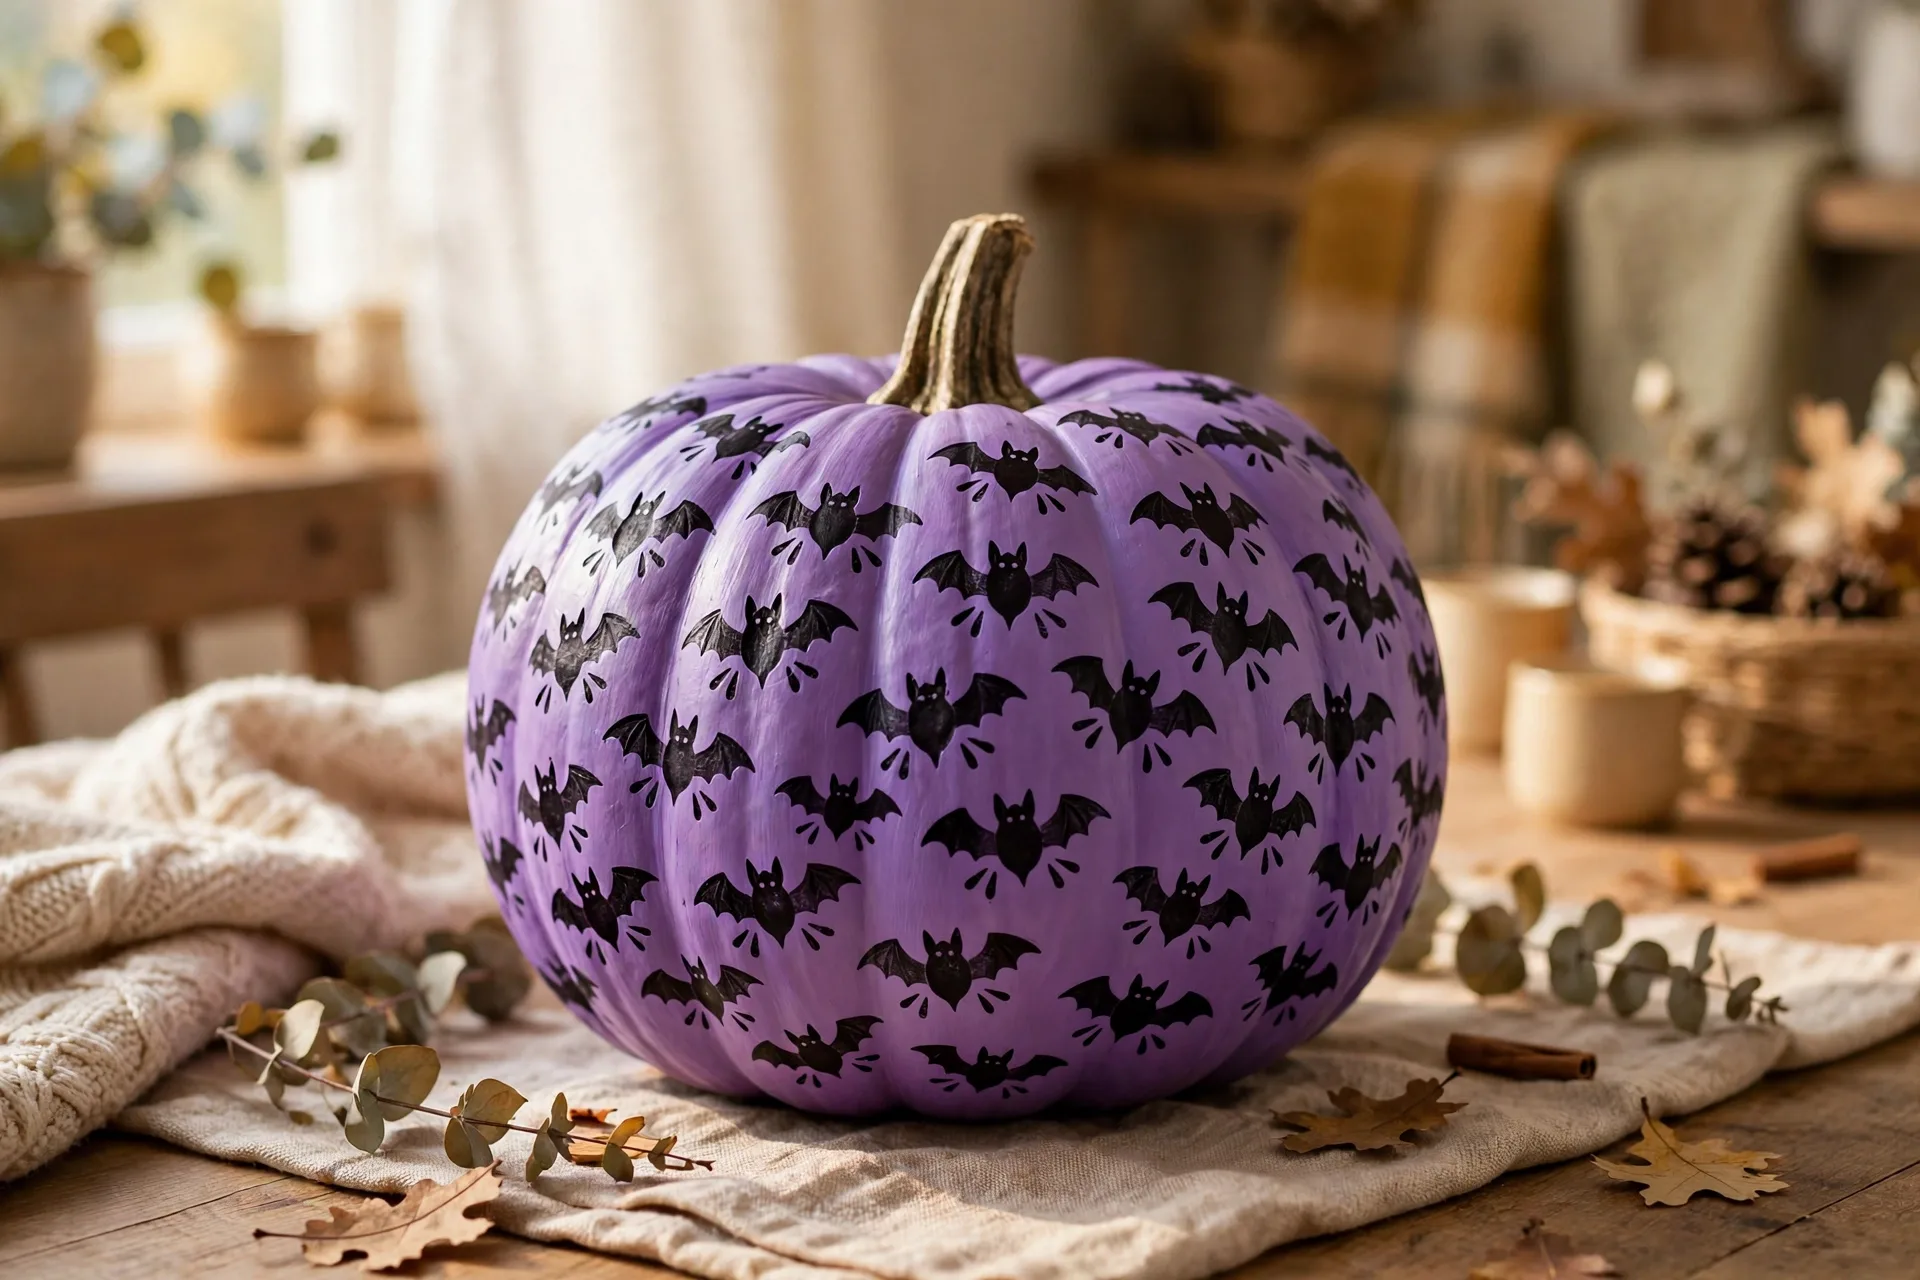
The look: a pumpkin covered in tiny thumbprint bats flying across a purple sky.
How to make it: Paint the pumpkin purple. Each kid presses a black-painted thumb onto it, then the grown-up adds two tiny wing triangles and two dot eyes to every thumbprint. Suddenly the pumpkin is full of bats. It is the smallest-scale design here and the one that makes kids lean in close to look at every single bat.
Ages: 3 and up. Thumbprints are easy; the wings are grown-up work.
62. The Q-Tip Dot Garden
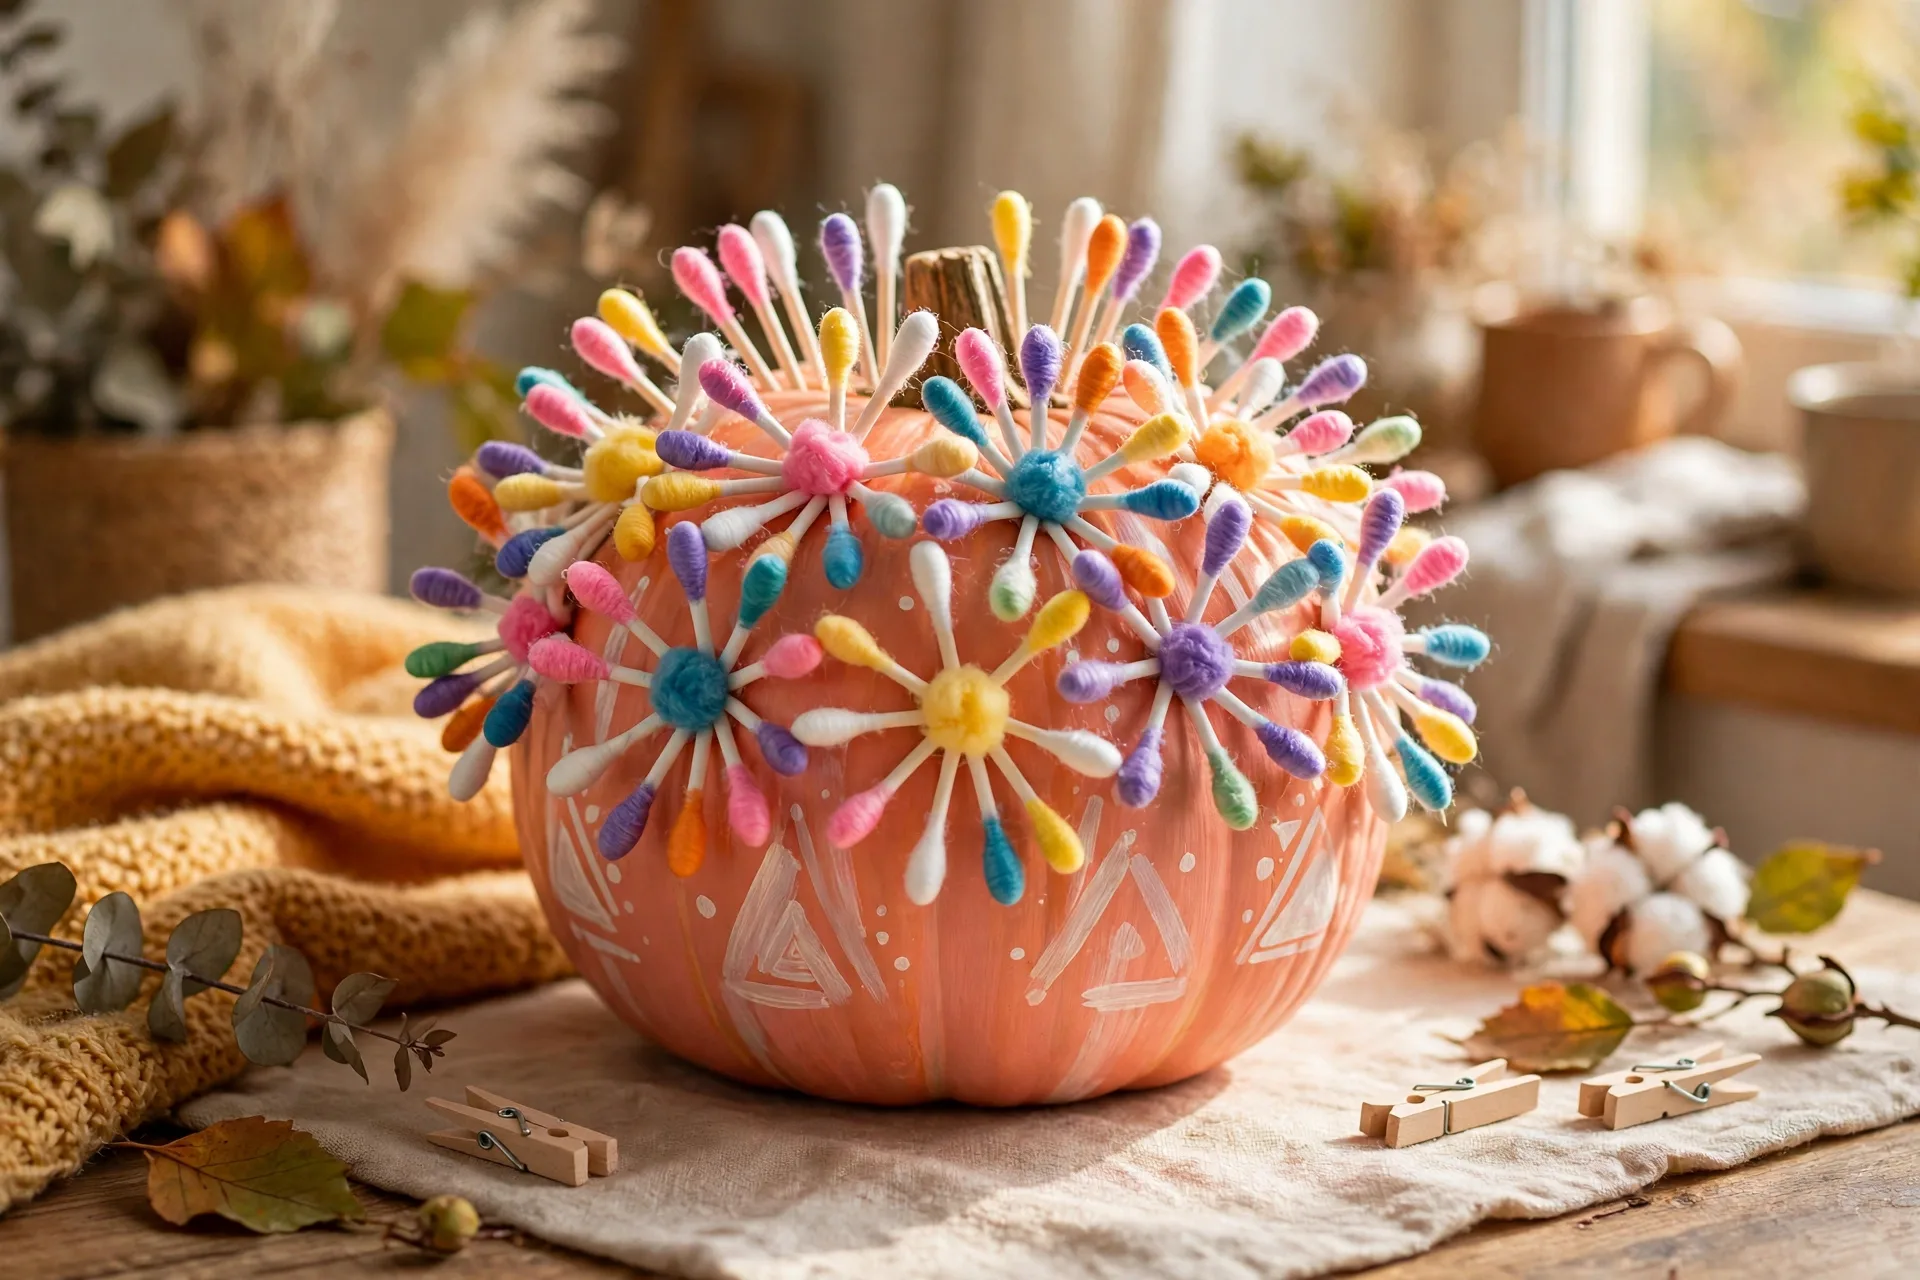
The look: a pumpkin dotted with cotton-swab flowers in every color.
How to make it: Paint the pumpkin pale green or cream. Kids dip cotton swabs in paint and stamp flower dots: five dots in a circle for petals, one yellow dot in the middle. Repeat until the pumpkin is a garden. It is quiet, focused work, which makes it the calm-down craft for the afternoon before the party.
Ages: 2 and up. Cotton-swab dotting is slow, soothing, and perfect for little hands.
63. The Ribbon Wrap
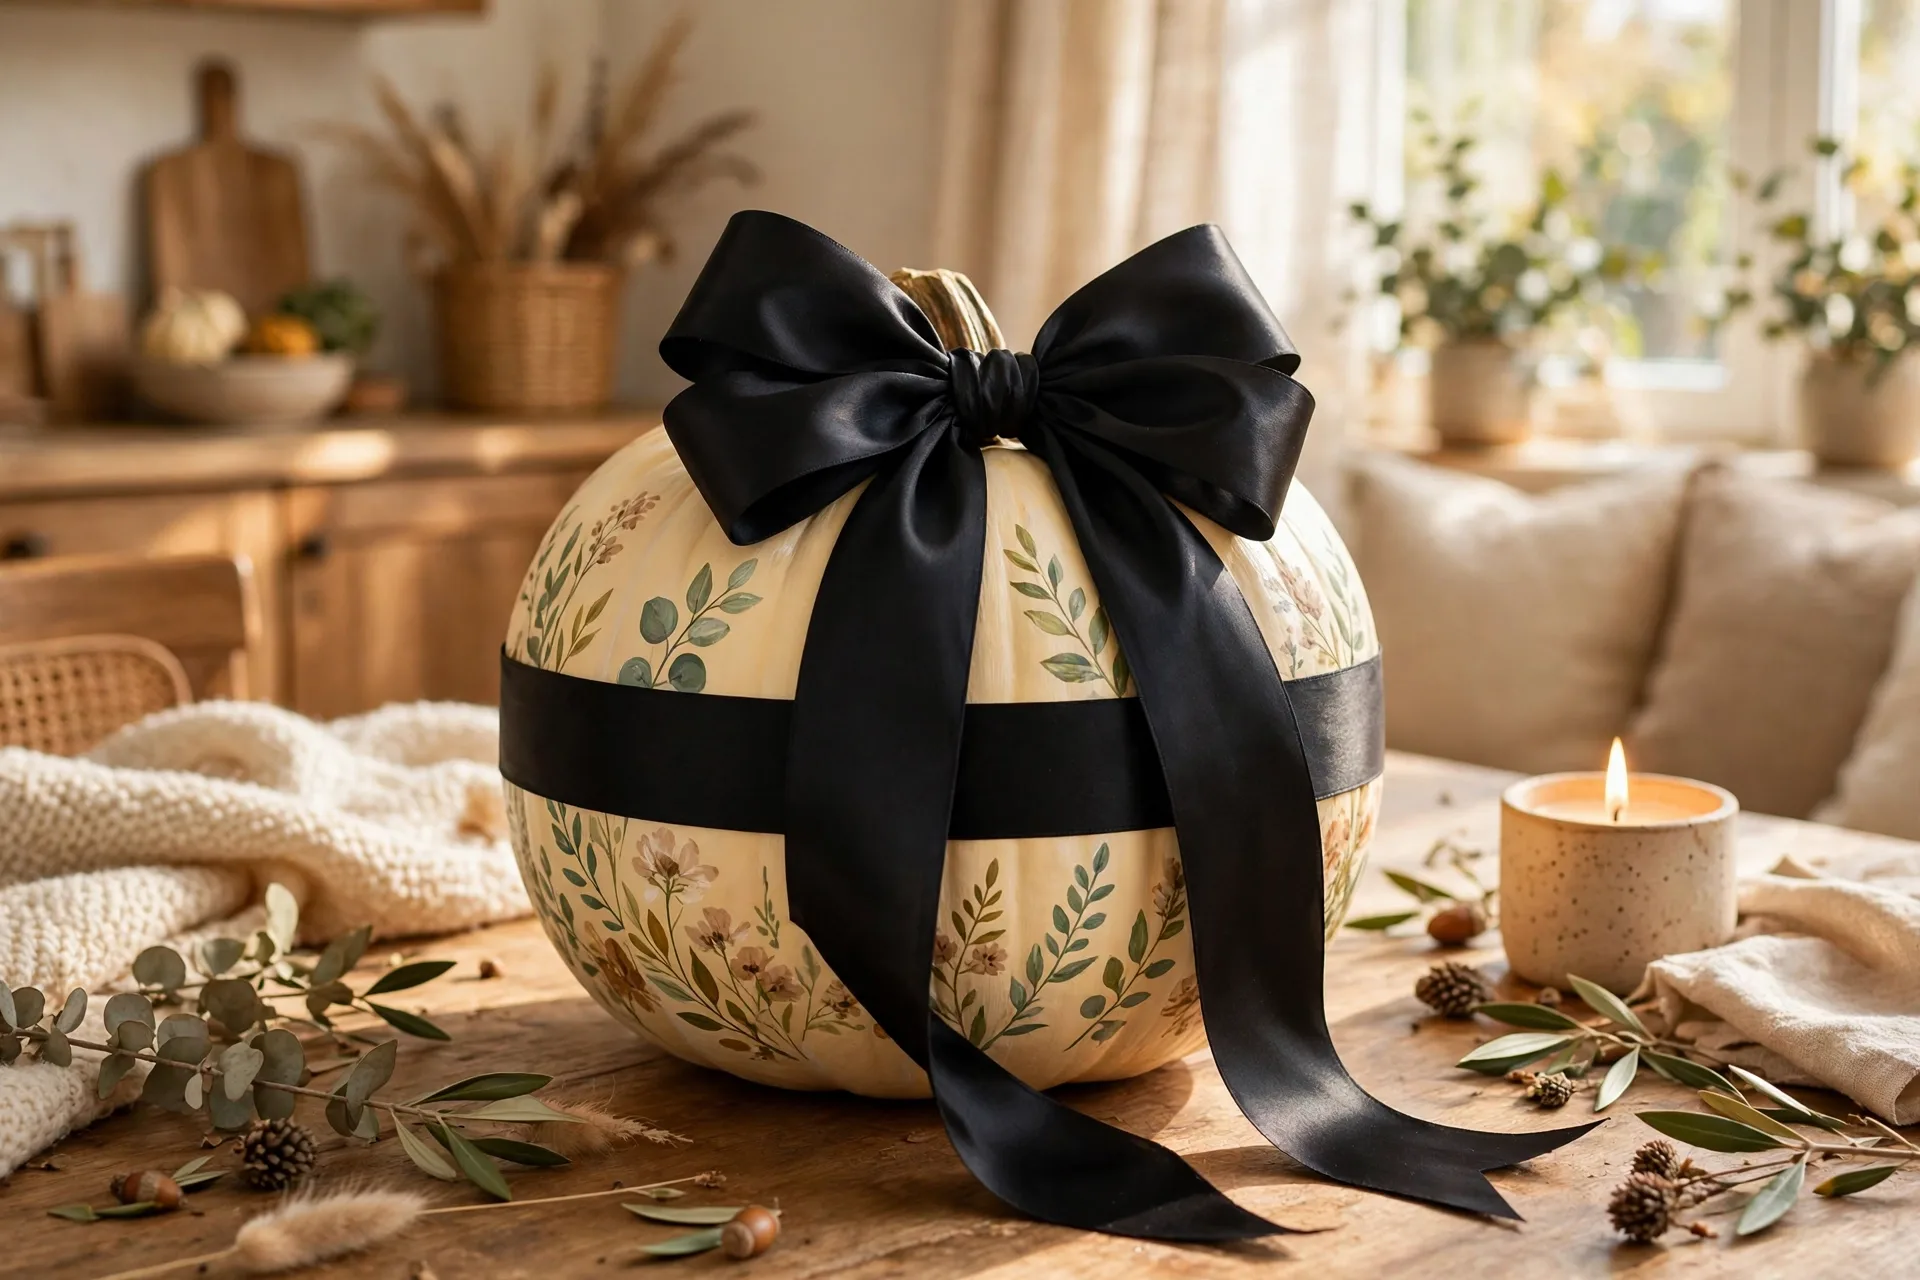
The look: a painted pumpkin wrapped with a big ribbon bow, like a present.
How to make it: Paint the pumpkin any solid color and let it dry. Then wrap a wide ribbon around the middle and tie a big bow on the front, taping the ends down at the back. Black ribbon on orange, gold on white, gingham on cream: the ribbon does the decorating. It is the pumpkin for the mom who is out of time and out of patience.
Ages: 3 and up. Kids pick the ribbon; the grown-up ties the bow.
64. The Smiley Face
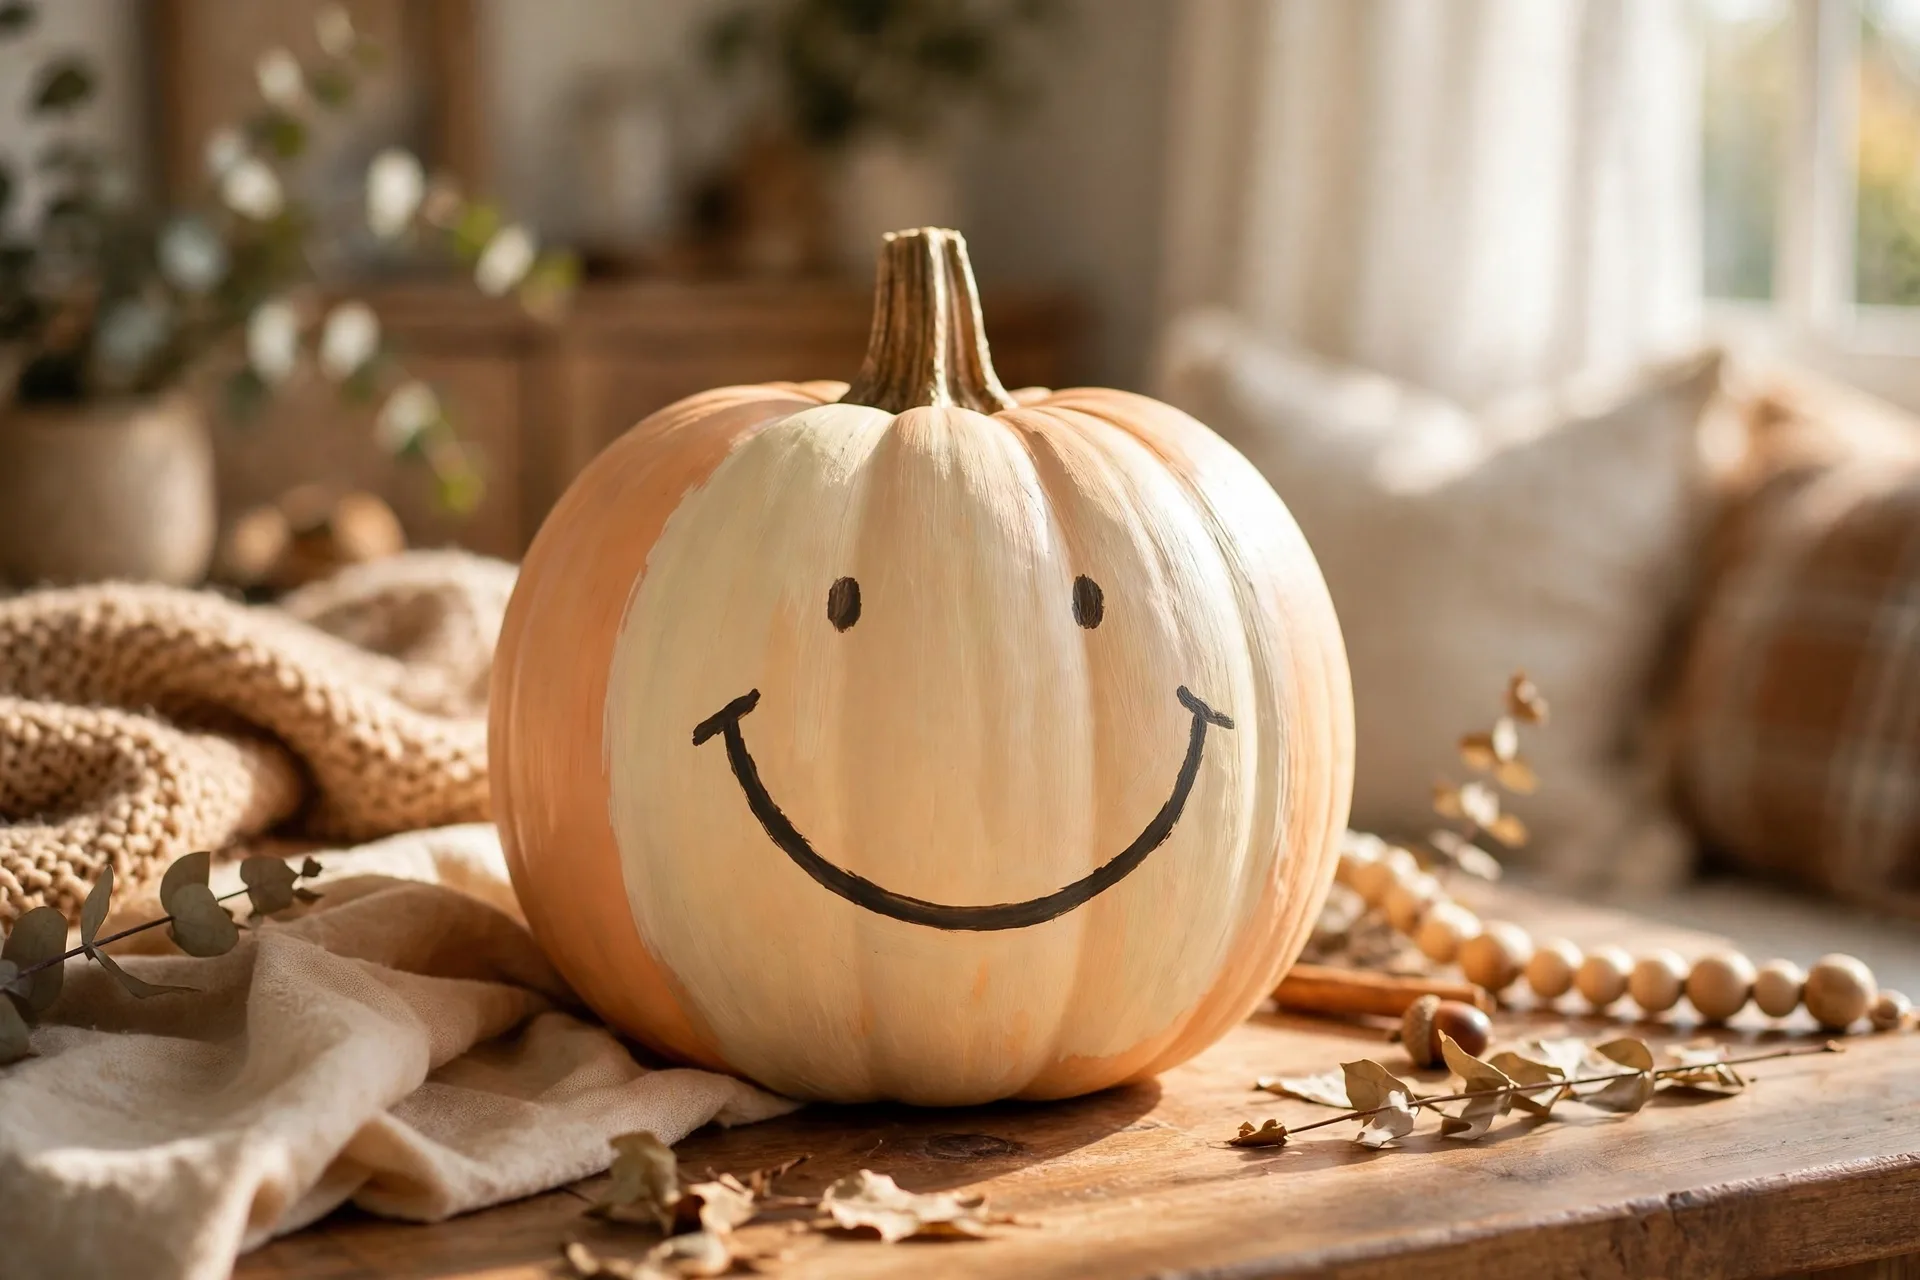
The look: the simplest happy face there is: two dot eyes and a big curved smile.
How to make it: Paint the pumpkin yellow or leave it natural orange. The grown-up paints two round eyes and one big curved smile, nothing else. No nose, no teeth, no details. It is the pumpkin a two-year-old can describe, a four-year-old can paint, and a grown-up can finish in three minutes. Sometimes simple wins the porch.
Ages: 2 and up. The first face every kid learns to paint.
65. The Starry Night Toddler
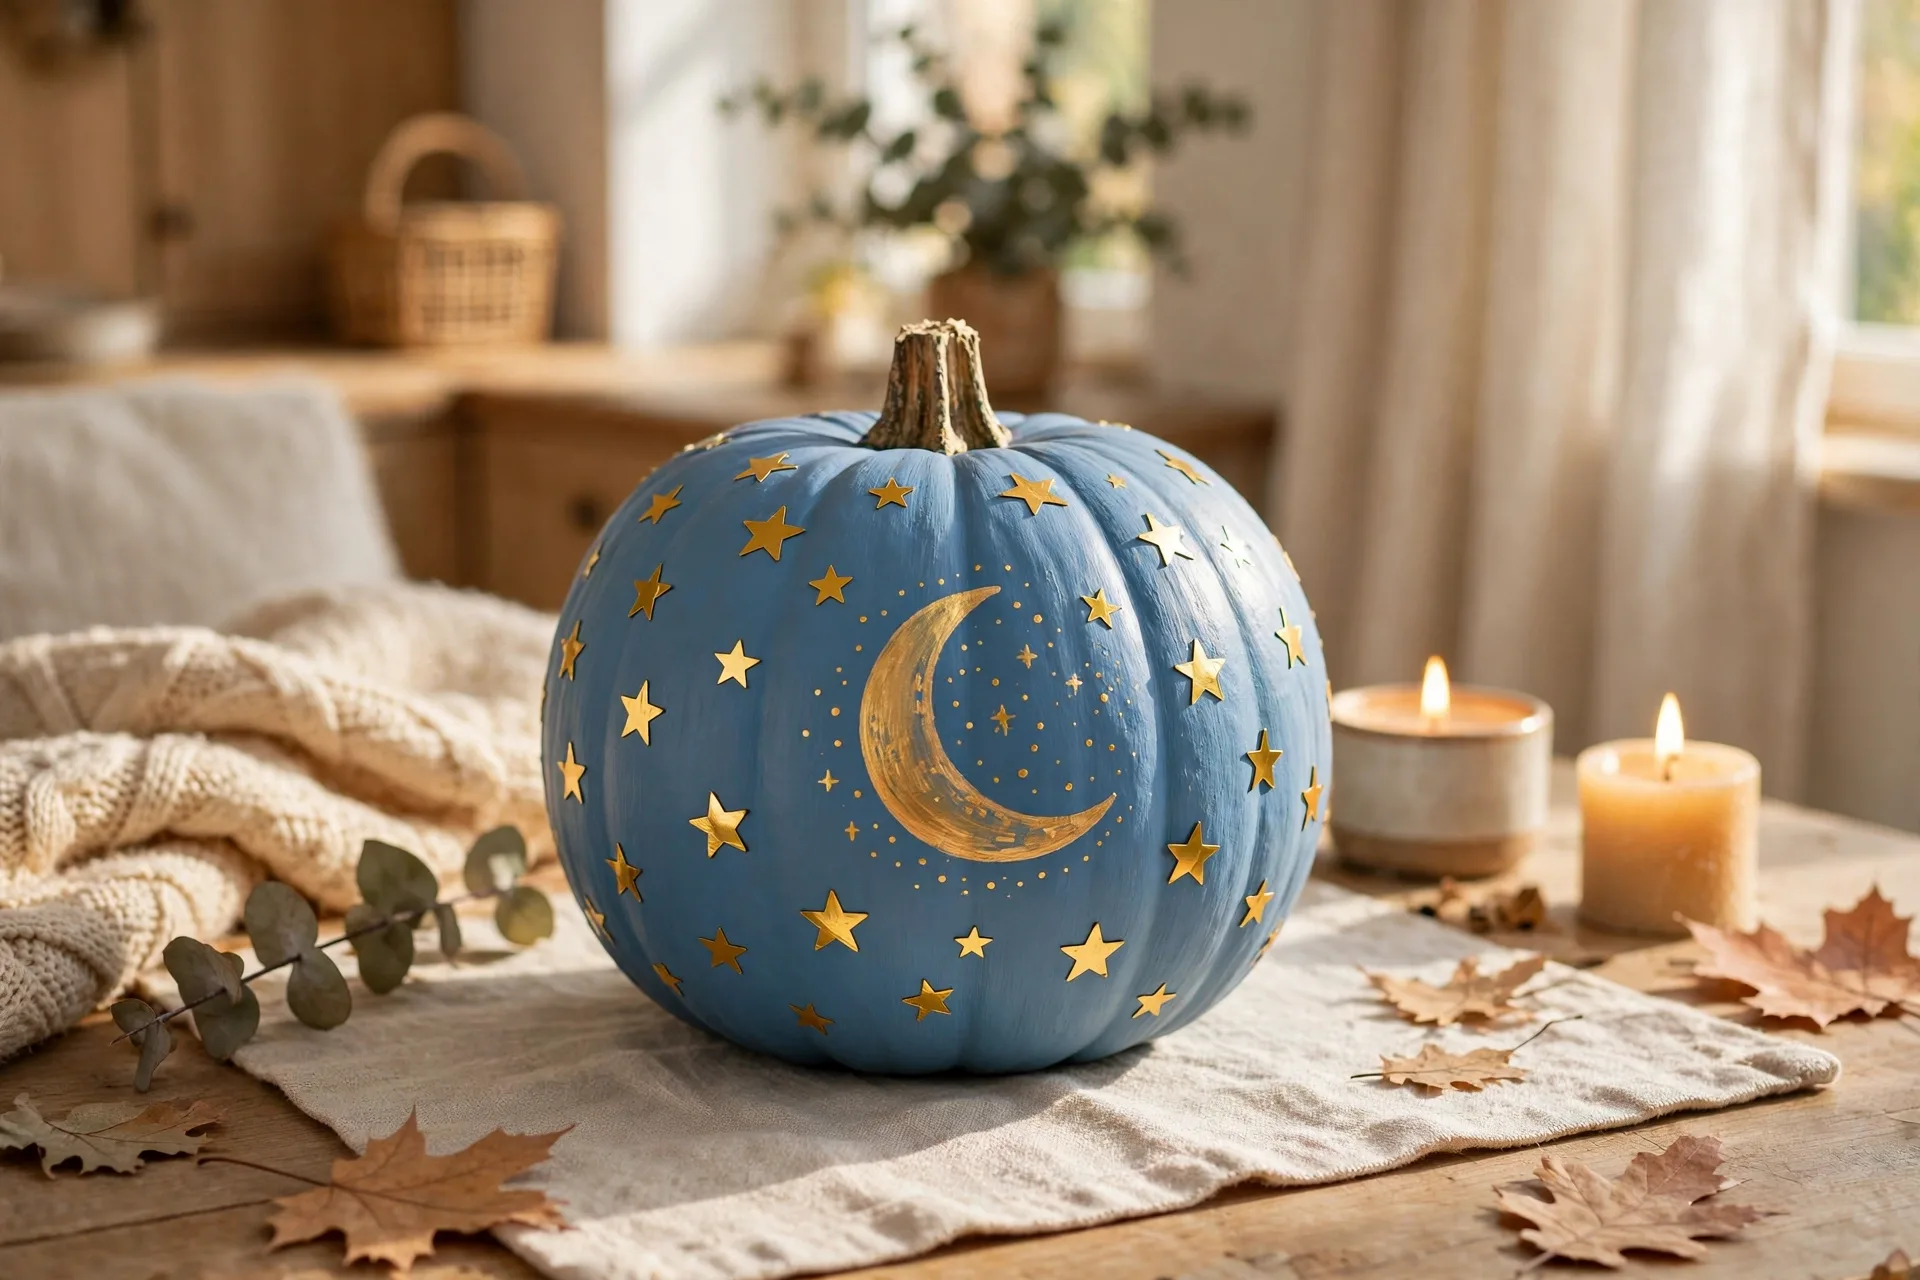
The look: a blue pumpkin with star stickers and a painted moon, made for the littlest hands.
How to make it: Paint the pumpkin soft blue, one coat. Once dry, kids stick gold star stickers all over it and the grown-up paints one big pale moon. No brushes near the details, no paint pens, just stickers and one moon. It is the pumpkin for the two-year-old who wants to help and the parent who wants to survive it.
Ages: 2 and up. Stickers are the safest detail work for the youngest painters.
More Seasonal and Keepsake
66. The Gratitude Tree
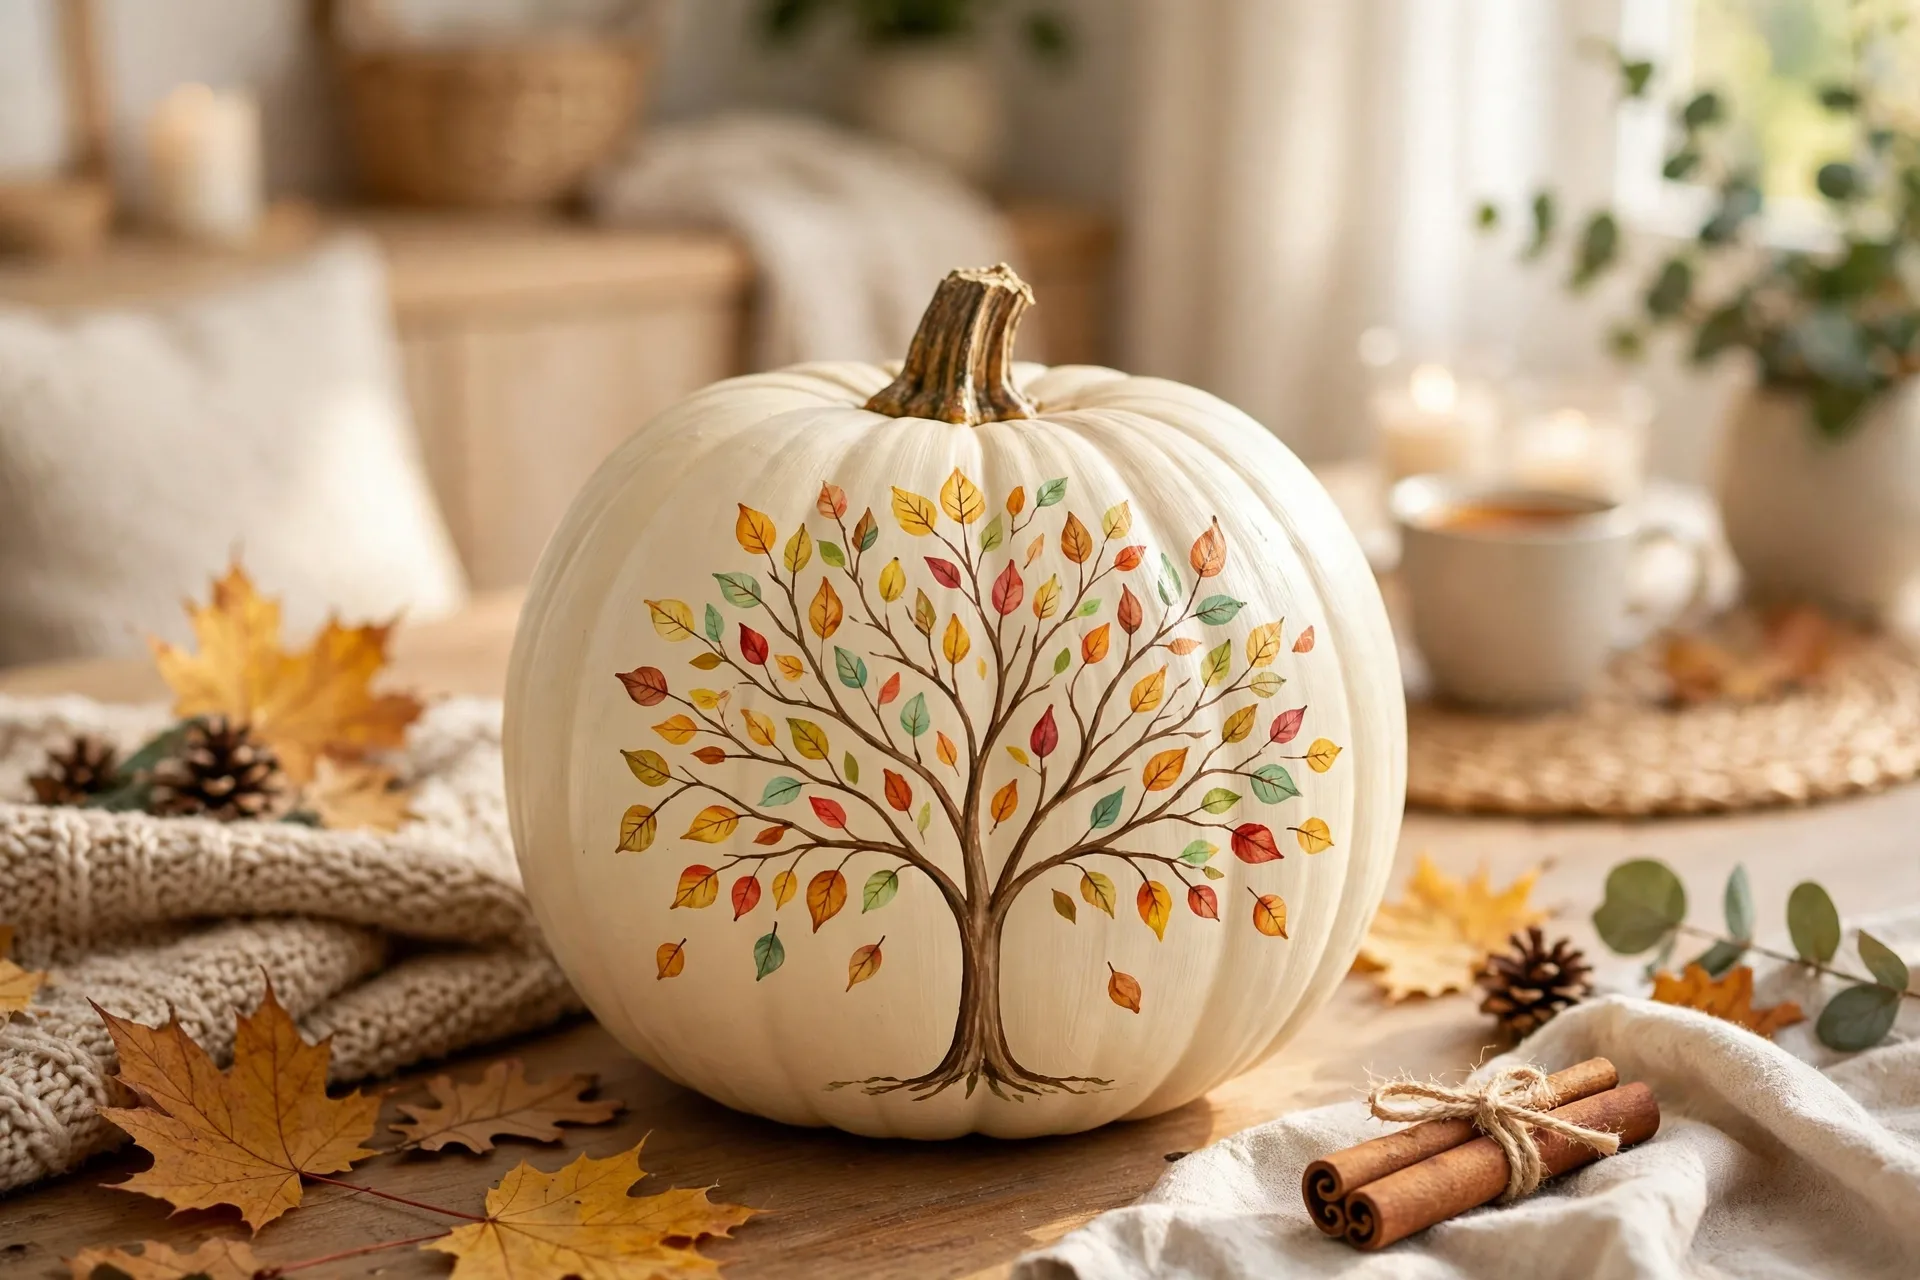
The look: a brown tree painted on the pumpkin, with a thankful leaf for every family member.
How to make it: Paint the pumpkin cream. The grown-up paints a brown tree trunk with branches spreading up from the bottom. Each family member paints one leaf in their favorite color and writes or dictates one thing they are thankful for on it. Add a leaf a week through November and the tree fills up like the month does.
Ages: 3 and up. The tree is grown-up work; the leaves belong to the kids.
67. The Family Portrait Pumpkin
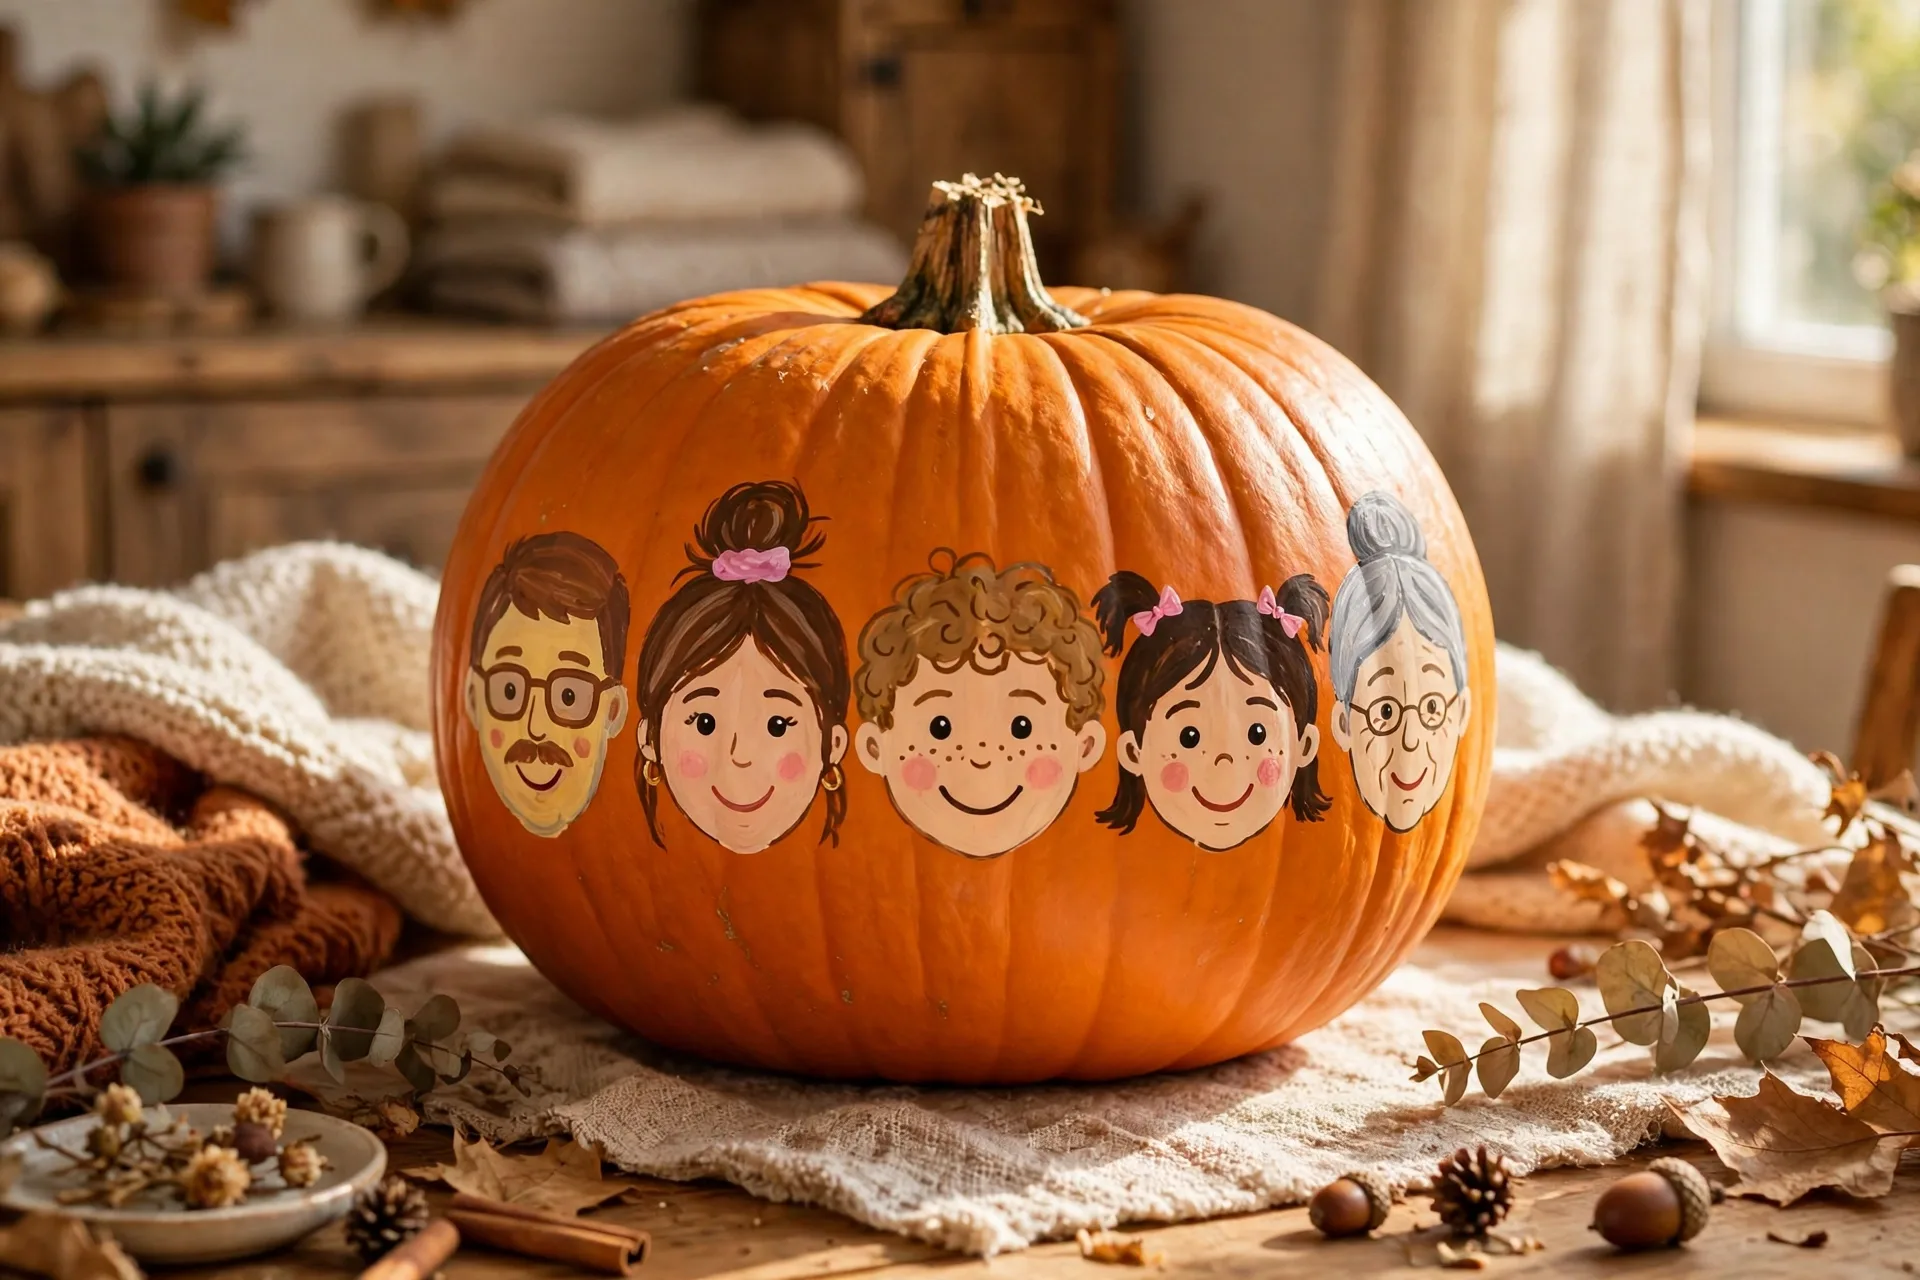
The look: a pumpkin with a painted face for every person in the family.
How to make it: Paint the pumpkin soft blue or sage. The grown-up paints one simple face per family member in a row: mom, dad, big kid, little kid, each with their own hair color and smile. Label each face with a name underneath. It is the pumpkin that makes visitors stop and point, and the one your kids will ask to keep.
Ages: 4 and up. Faces are grown-up work; kids pick who goes where.
68. The Birth Month Pumpkin
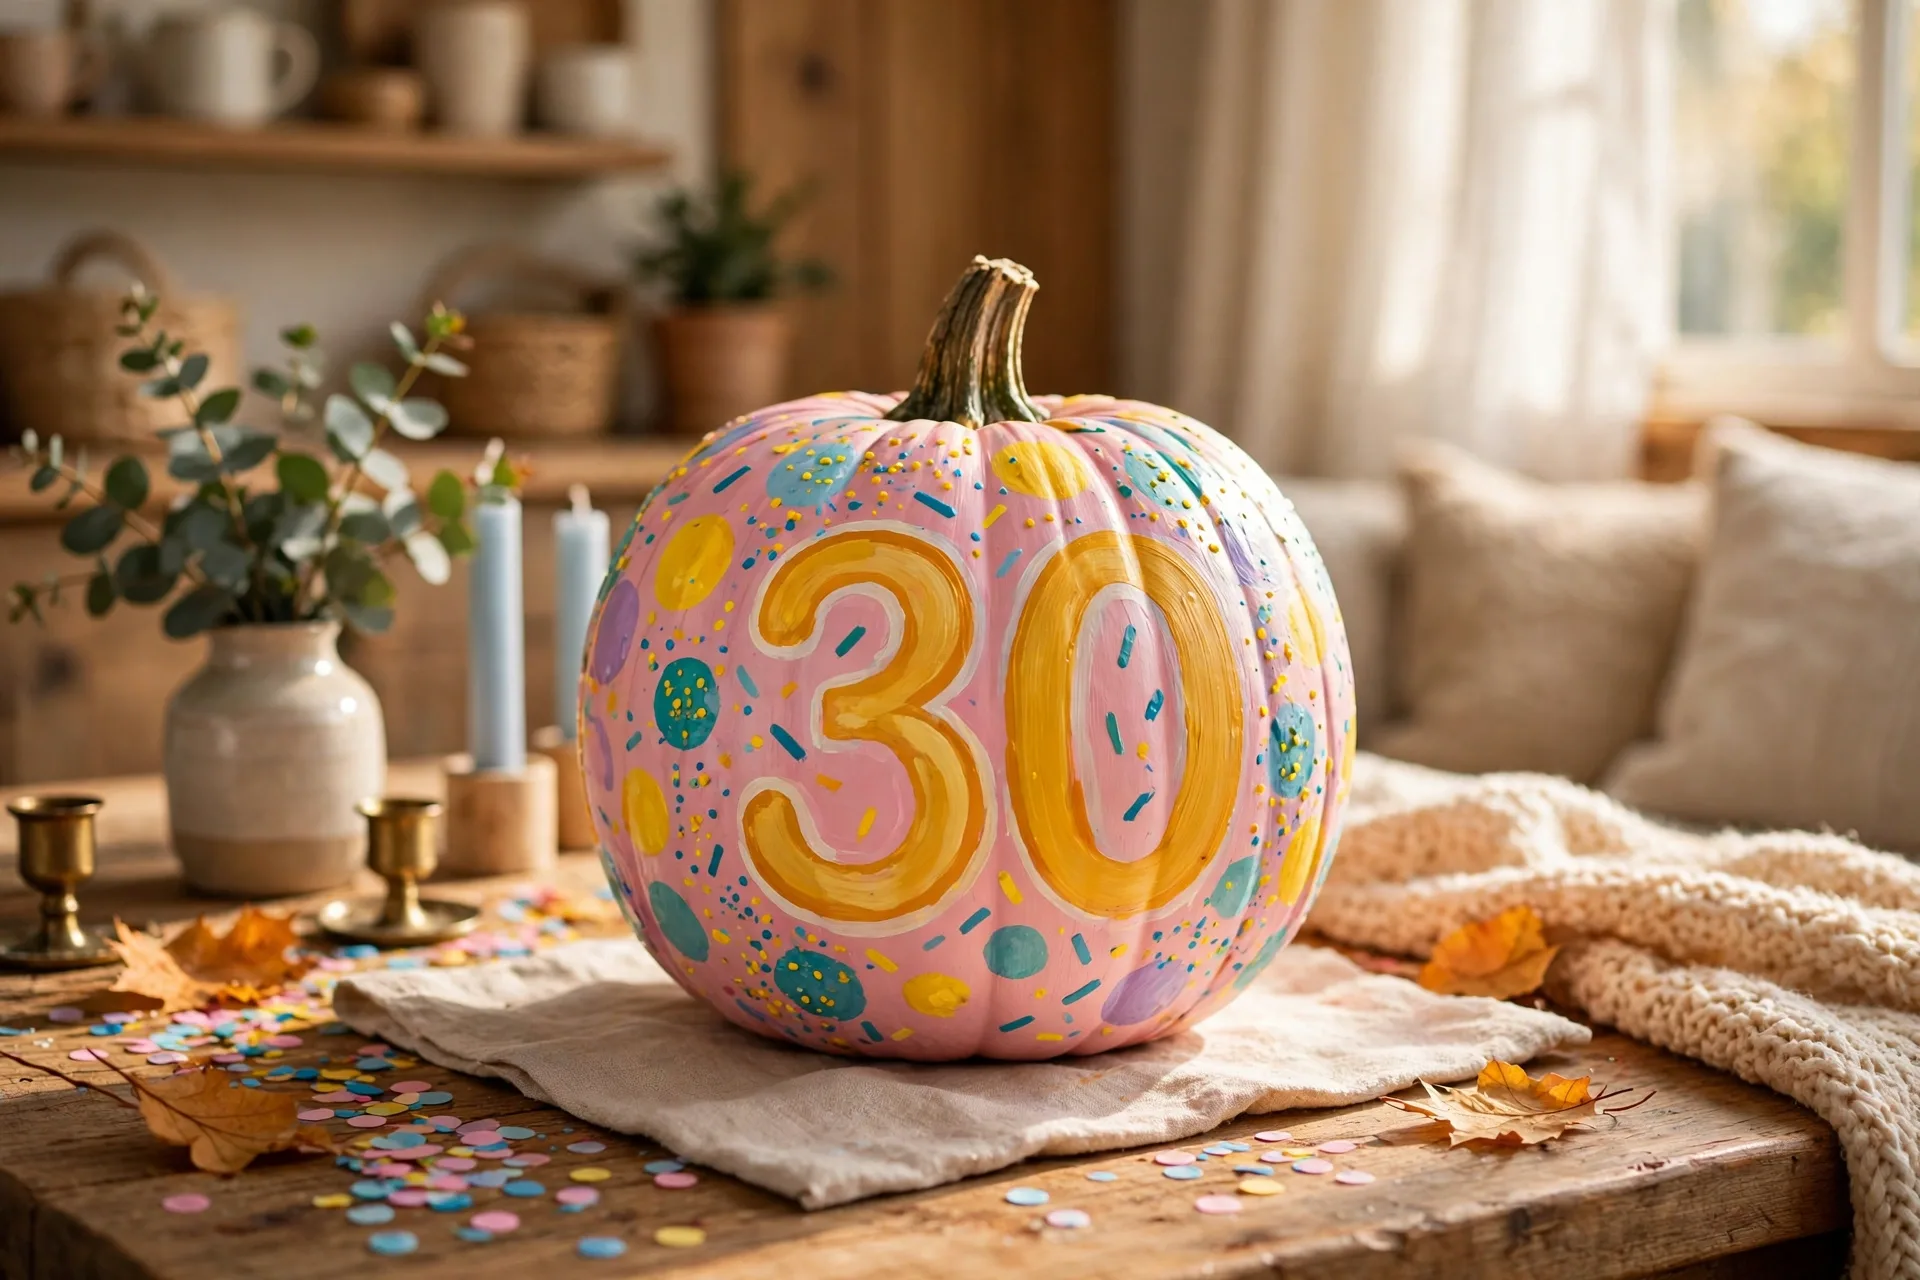
The look: a pumpkin painted in the birthday kid birthstone colors with their age on it.
How to make it: Paint the pumpkin in the birthday kid favorite colors and add their age in big numbers on the front. A September baby gets sapphire blue with gold stars; an October baby gets orange and black with a tiny pumpkin on top. It is a birthday pumpkin that happens to be painted in October, and it makes the birthday kid feel like Halloween is partly theirs.
Ages: 4 and up. Kids pick the colors; the grown-up paints the number.
69. The First Halloween Pumpkin
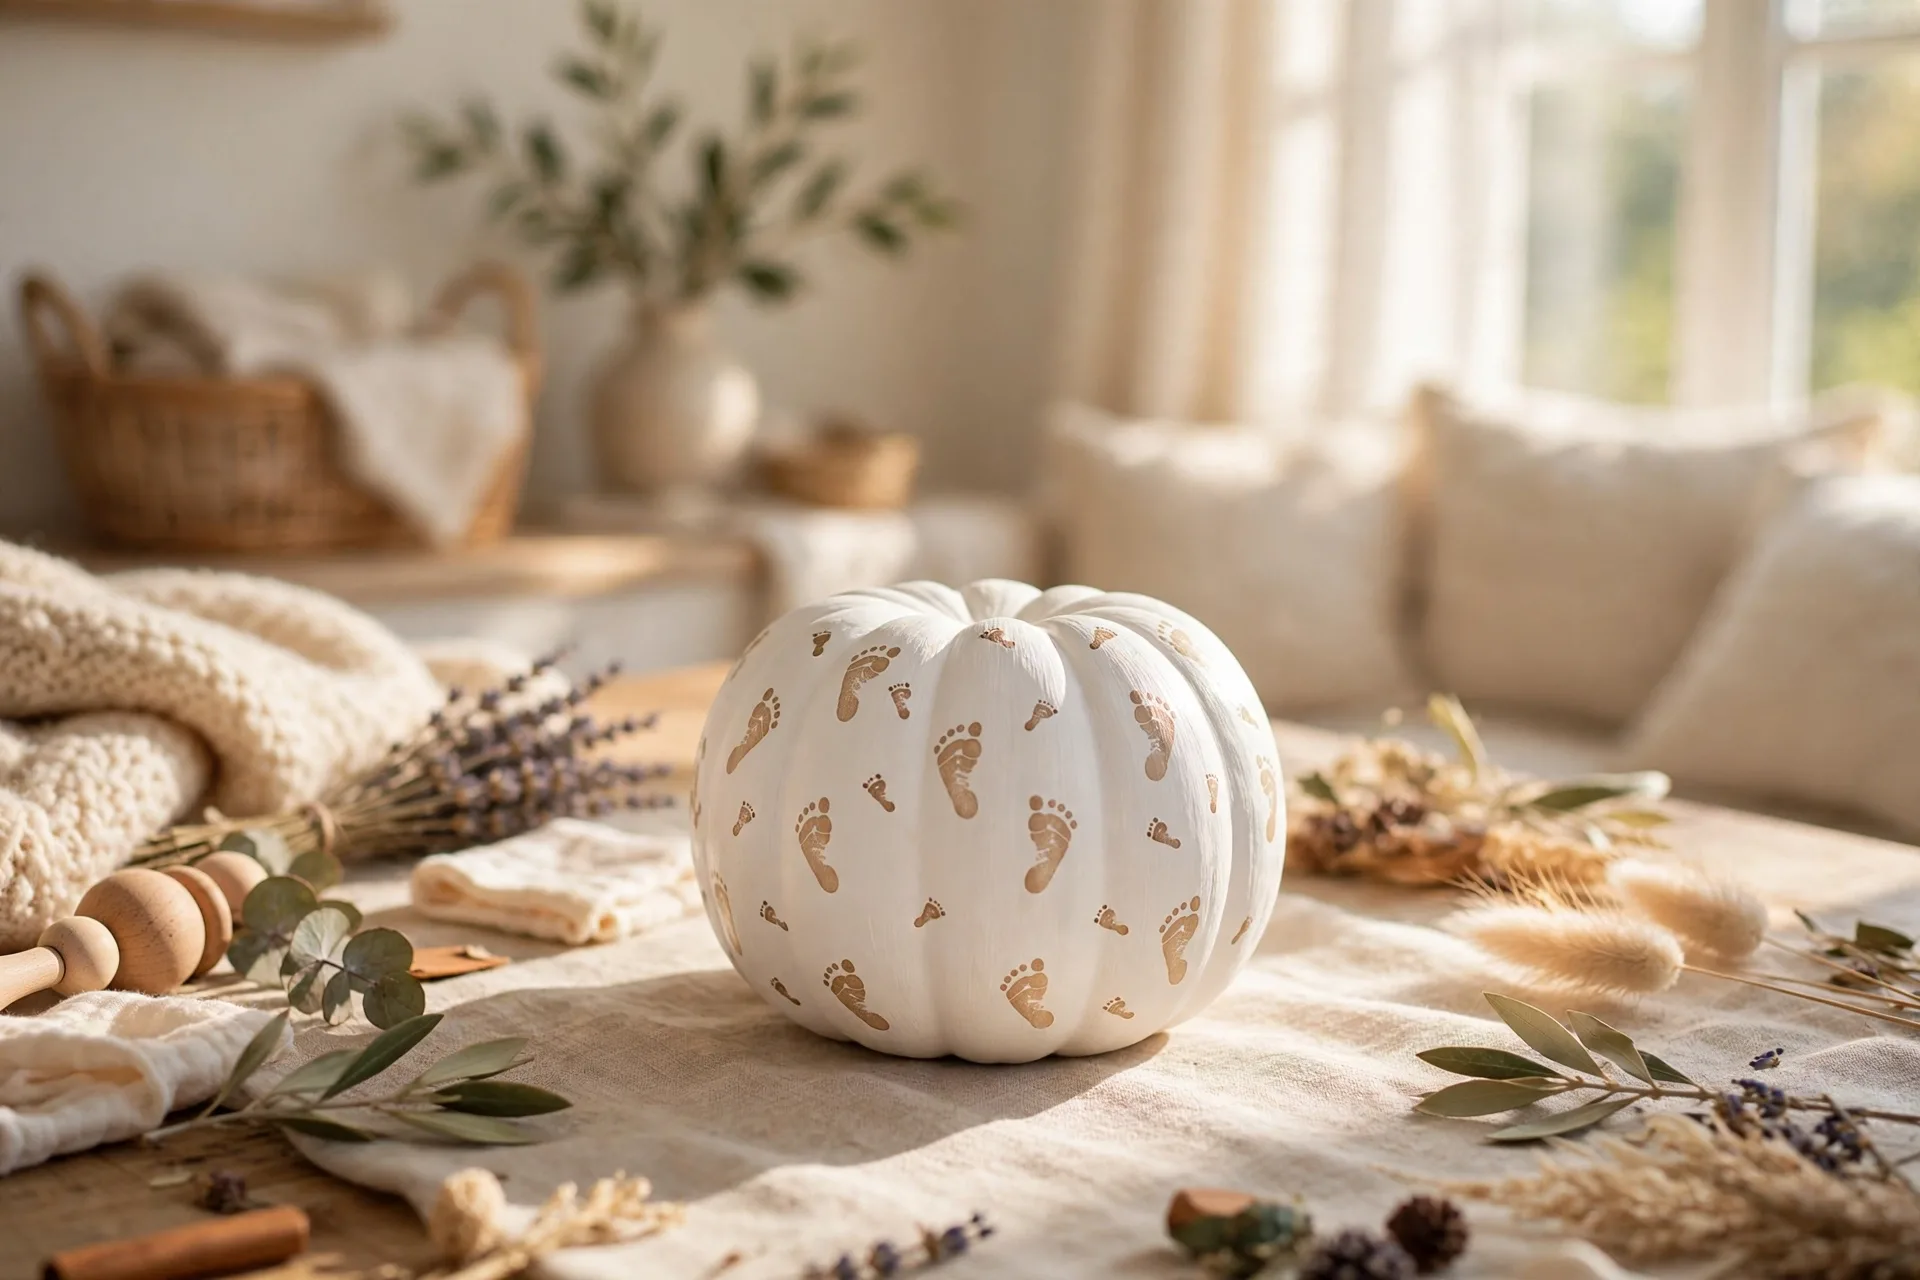
The look: a tiny white pumpkin with the baby name and the year, kept as a keepsake.
How to make it: Pick the smallest white pumpkin you can find and paint it soft white if it needs it. The grown-up writes the baby first name and the year in neat letters, then adds two tiny footprints in soft grey paint. Keep it indoors on a shelf, not on the porch. It is the pumpkin you will find in a memory box in ten years.
Ages: Grown-up project. The footprints are the only kid part, and they are the best part.
70. The School Photo Pumpkin
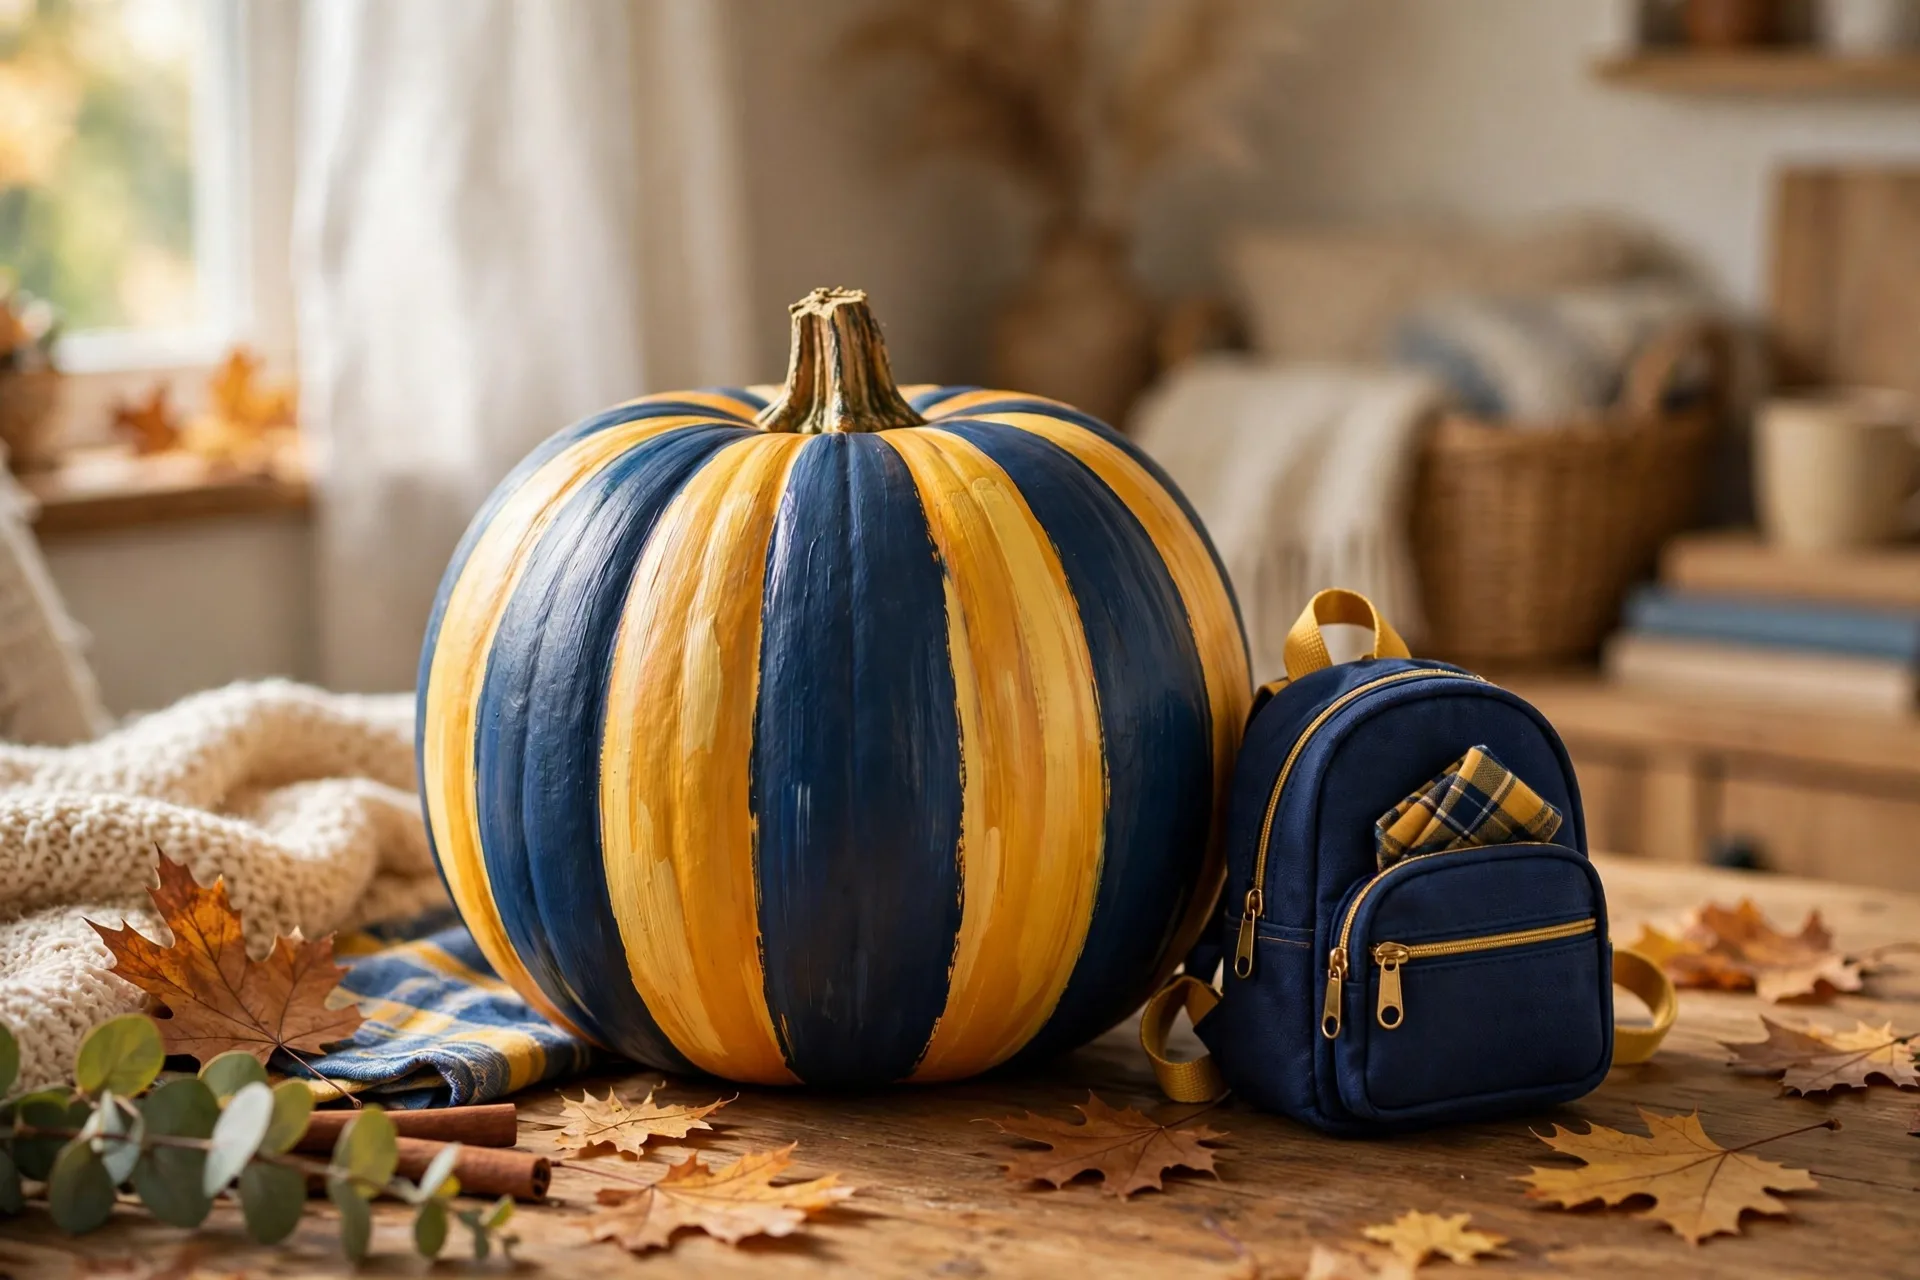
The look: a pumpkin painted with the school year and a tiny backpack.
How to make it: Paint the pumpkin in the school colors. The grown-up paints the school year in big numbers and a small backpack with two straps on the front. Add the teacher name if your kid insists, which they will. It is the pumpkin for the back-to-school photo that happens to land in October, and it beats a plain backdrop every time.
Ages: 5 and up. Kids pick the colors; the grown-up paints the year.
71. The Thanksgiving Transition
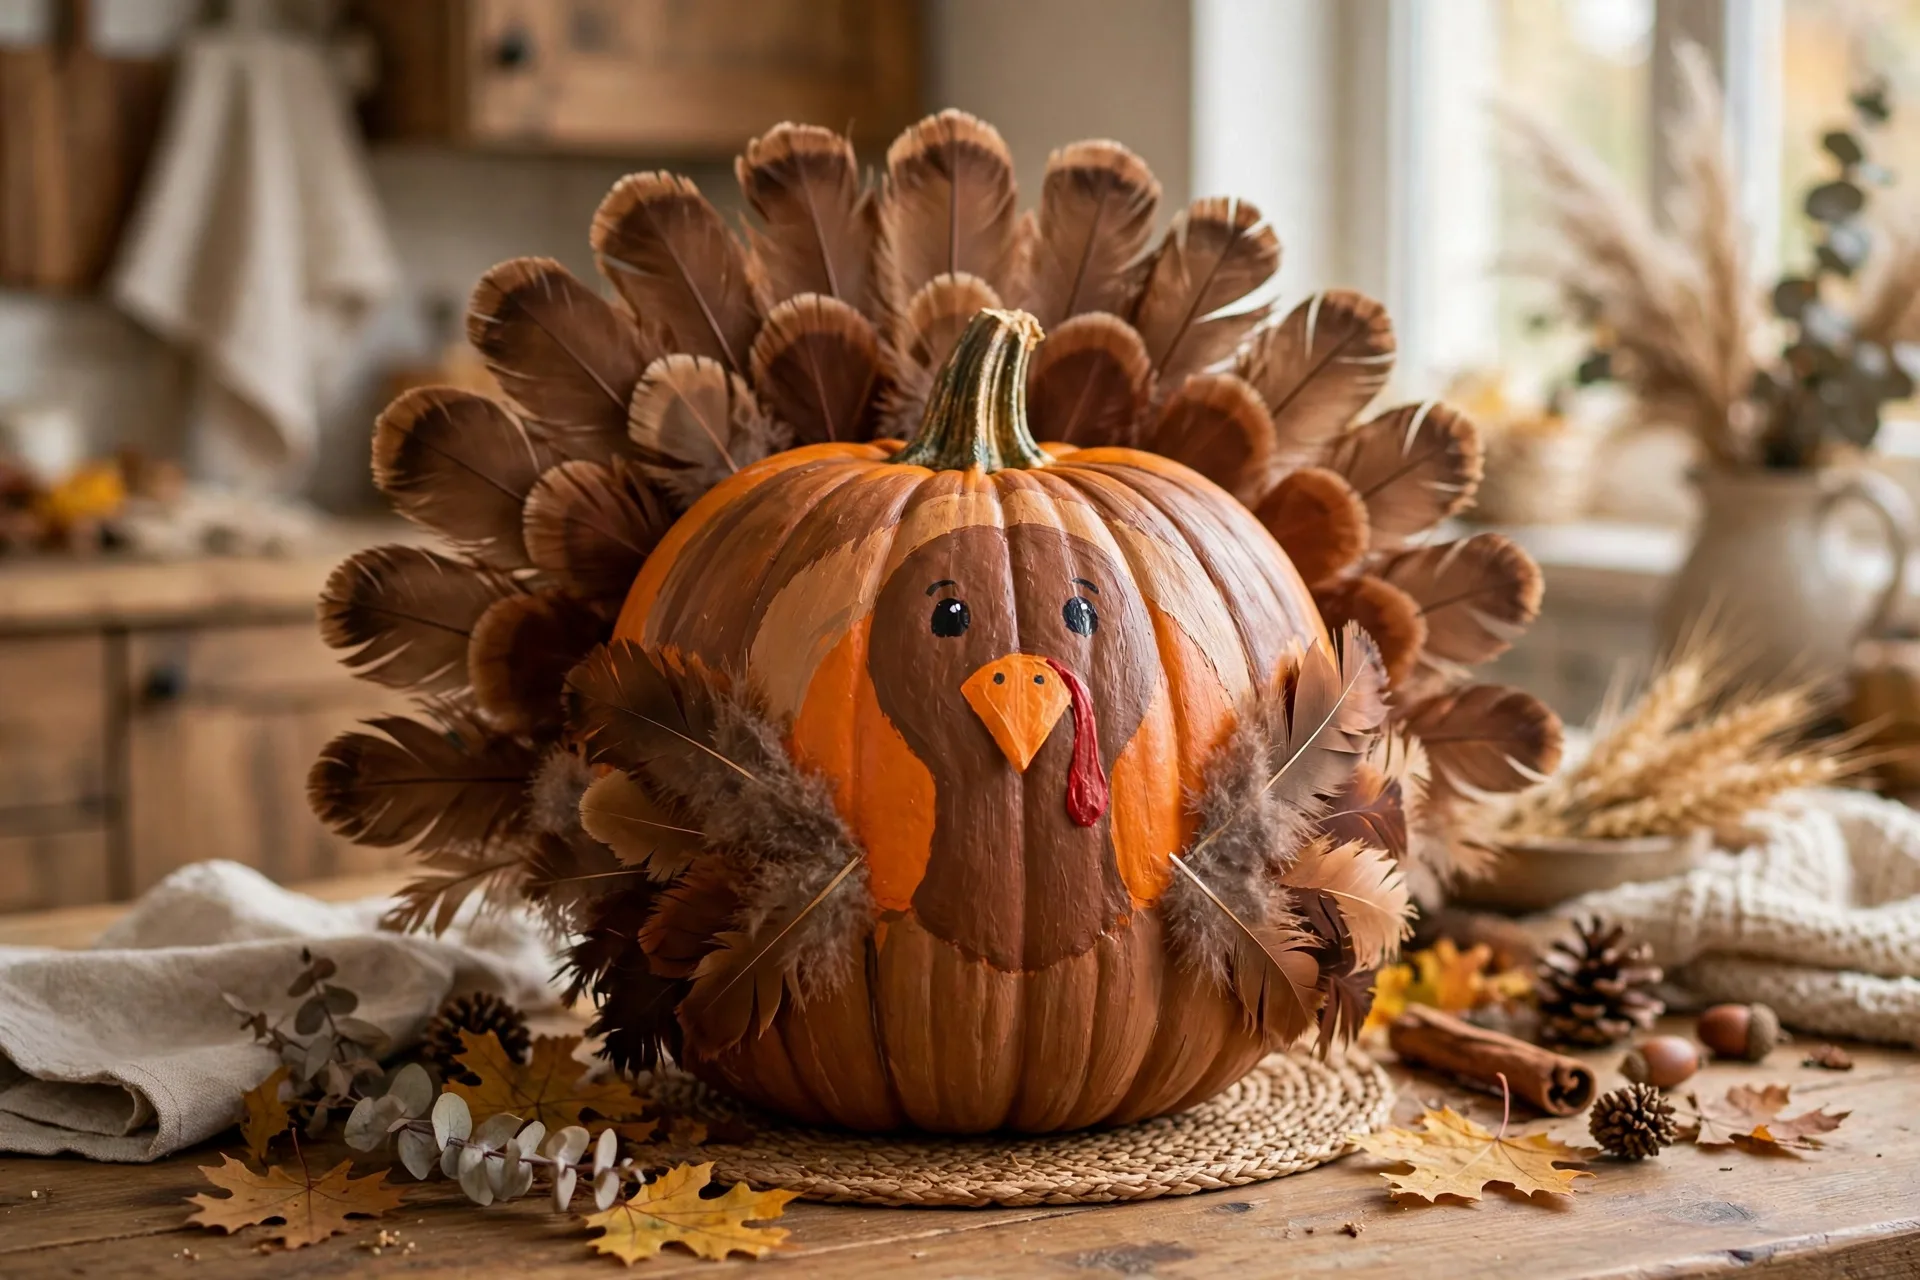
The look: a Halloween pumpkin repainted for Thanksgiving with turkey feathers.
How to make it: Take a Halloween pumpkin whose paint is still good and paint a turkey over it: brown feathers fanning out, a red wattle, a beak, and two eyes. The old design hides under the new one, which is the point. One pumpkin, two holidays, zero extra pumpkins bought. It is the thriftiest idea on this list and the one that teaches kids that crafts can change.
Ages: 4 and up. Kids paint the feathers; the grown-up paints the face.
72. The November Leaves

The look: a pumpkin painted with falling autumn leaves and nothing spooky at all.
How to make it: Paint the pumpkin warm cream. The grown-up paints falling leaves in rust, gold, and burgundy drifting down from the top, a few mid-air, a few resting at the bottom. No faces, no bats, no ghosts. It is the pumpkin for the family that is done with Halloween by November first and ready for the quiet part of fall.
Ages: 4 and up. Kids paint the leaves; the grown-up places the falling pattern.
73. The Memory Pumpkin
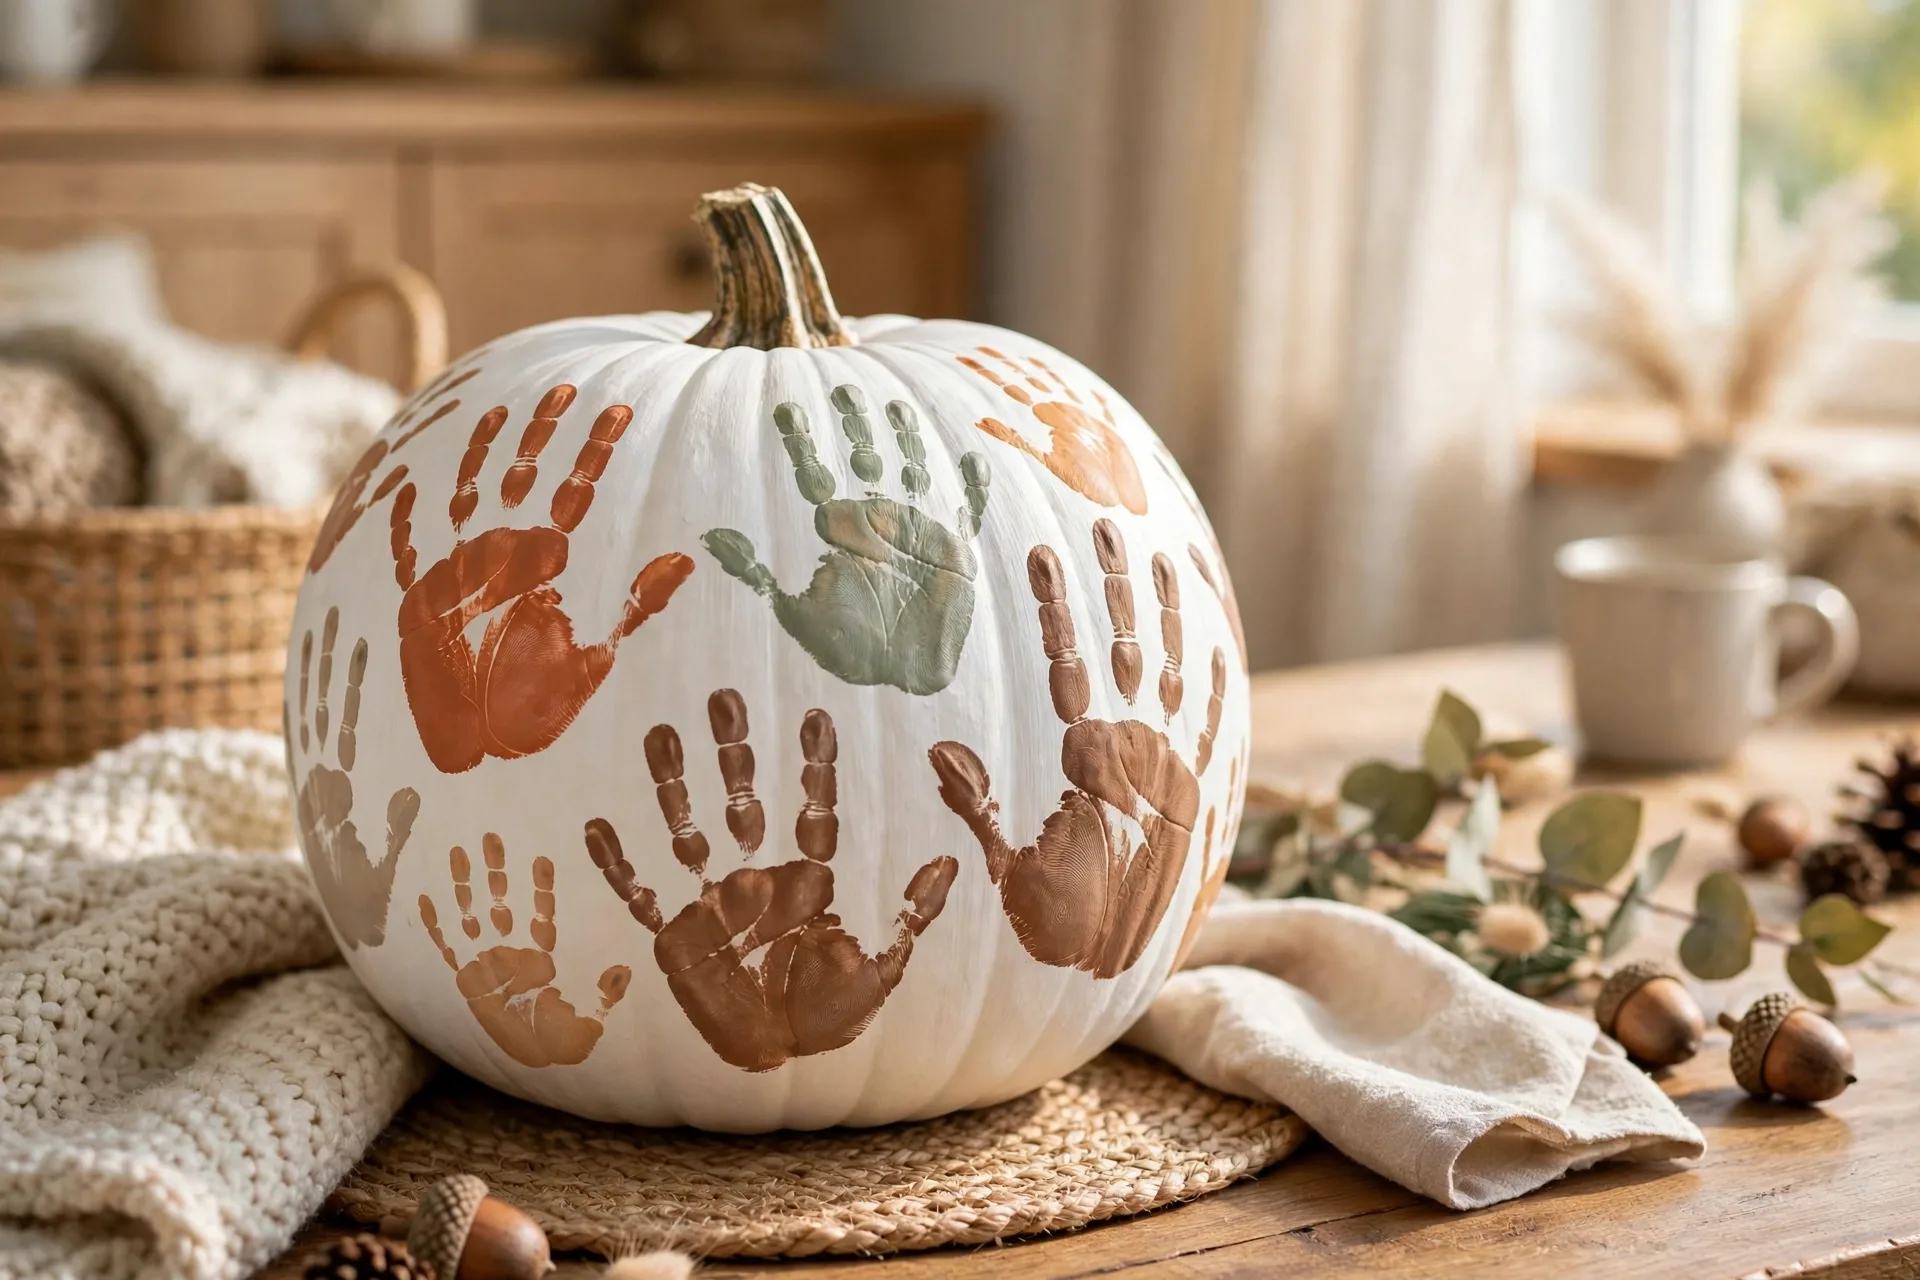
The look: a pumpkin with every family member handprint and the year, saved year after year.
How to make it: Paint the pumpkin white or pale sage. Each family member presses a painted hand onto it, and the grown-up writes the name and the year under each print. Seal it if it is a fake pumpkin, or photograph it well if it is real. It is the last pumpkin on this list because it is the one that matters most: the hands, the year, the proof that this October happened.
Ages: 2 and up. Handprints are the whole craft; the grown-up adds the names.
Make Them Last (the 5-Minute Care Routine)
Painted pumpkins outlast carved ones because the rind stays sealed — a carved pumpkin softens within days; a whole painted one can decorate for weeks. Start healthy: no soft spots, no bruises, stem intact. Keep it dry — under cover on rainy nights, since washable paint runs in water. Handle by the bottom, not the stem; check the underside weekly. For porch acrylic designs, a clear craft sealer (adults only, outdoors, per the product’s directions) adds protection. A sealer can’t stop a real pumpkin from eventually composting, but it buys the design extra weeks.
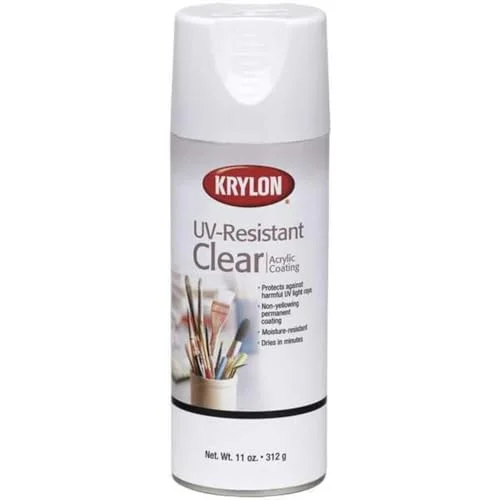
Krylon UV-Resistant Clear Coating Spray
This is the clear sealer the care routine above is talking about. Krylon’s clear coating sprays on as a protective gloss finish, and the built-in UV resistance helps porch designs hold their color in the sun instead of fading within the week. Grown-ups spray outdoors only, following the can’s directions, and the pumpkin dries fully before it goes back on display.
Shop This Post
Everything mentioned in this guide, in one place:
| Product | Used For | Price |
|---|---|---|
| Crayola Washable Kids’ Paint — 10 Colors |
The only paint little hands touch — all toddler and preschooler designs | Check Price |
| ARTISTRO Acrylic Paint Pens |
Grown-up details: faces, webs, lettering, chalk-style designs | Check Price |
| Self-Adhesive Googly Eyes — 520 Pcs |
The friendly monster’s mismatched eyes — ages 3+ only | Check Price |
| Flameless LED Tea Light Candles |
Night glow around the ghost family — no real flames near paint | Check Price |
| Krylon UV-Resistant Clear Coating Spray |
Sealing painted pumpkins so the designs last | Check Price |
| Apple Barrel Acrylic Paint Set, 16 Colors |
The acrylic paint set for the pumpkin designs | Check Price |
| Elmer’s Washable School Glue — 4 oz |
Sticking the black cat’s cardstock ears on (#3) | Check Price |
Frequently Asked Questions
What kind of paint actually sticks to a pumpkin?
Acrylic craft paint for ages 5 and up — bright and water-resistant once dry. Washable kids’ paint for ages 2–4 — sticks fine but runs in rain, so those pumpkins live indoors or under cover. Two thin coats with drying between fixes the streaky first coat.
Do I need to prime or seal a painted pumpkin?
No priming needed — paint straight onto the cleaned rind. Sealing is optional: skip it for indoor or short displays. For porch acrylic designs, a clear craft sealer (adults only, outdoors, per the product’s directions) adds moisture protection. No sealer stops a real pumpkin from eventually softening.
Is painting pumpkins really safer than carving?
Yes — no knife, no scooping, no open flame. Kids paint while grown-ups handle paint pens, sealers, and anything with fumes. If you carve at all, carving is strictly adults-only, and googly eyes stay away from children under 3.
How do painted pumpkins differ from painted rocks?
Rocks are porous and weather-tough; pumpkin rind is waxy and delicate. Washable paint that survives a rainy week on a rock will run right off a pumpkin — so pumpkins get gentler paint, two thin coats, and a sheltered display spot.
How long will a painted pumpkin last?
An uncarved, healthy pumpkin can decorate for weeks if kept cool and dry — bring it in on rainy or frosty nights and check the bottom weekly. When it softens, leaks, or molds, it’s done. Pumpkins painted with acrylics or glitter go in the trash, not the compost.
Start With the Ghost Family Tonight
Seventy-three pumpkins and a painted toddler staring at you? Make the ghost family tonight: two white coats, two oval eyes, done — fifteen minutes, and the flameless tea lights around it at night will make your four-year-old gasp.
Then keep the paint box out. October is short, little hands grow fast, and next year’s ghost will have a bigger hand behind it. Happy haunting, mama.