Autumn Tree Painting Sensory Craft for Toddlers and Kids

There is a tree outside our window that turns a ridiculous shade of red every October, and my 4-year-old insists it is showing off. Autumn is the easiest season to paint with small kids because the colors do the work: red, orange, yellow, and brown, all of them loud and forgiving. This autumn tree painting sensory craft for toddlers and kids takes that palette and turns it into a full sensory experience. Fingers press leaves on, cotton balls dab them, pine cones roll them, sponges stamp them. No brush is required, although one is welcome.
This is a single-craft guide, start to finish: the supplies, the setup, eight numbered steps, how to change it for a 2-year-old versus a 5-year-old, a low-mess version, and a cleanup that takes five minutes. The painting takes about 20 to 30 minutes, plus drying time, and it ends with a piece of art worth putting on the fridge. It is one of our favorite easy kids craft ideas for fall, and it works just as well on a rainy Tuesday as it does as a weekend project.

Heads up: this post contains affiliate links. If you buy through them, MamaKinder may earn a small commission at no extra cost to you, it helps keep these guides free.
At a Glance
| Detail | Answer |
|---|---|
| Ages | 2 to 5 (toddler and preschool) |
| Active time | 20 to 30 minutes |
| Drying time | 1 to 2 hours |
| Mess level | Medium |
| What you get | One finished autumn tree painting |
What You Need
You probably own most of this already. The only thing worth buying on purpose is washable paint, because regular craft paint stains clothes, hands, and one memorable cream-colored rug. Everything else comes from the kitchen drawer, the garden, or the recycling pile.
- White cardstock or heavy paper (one sheet per child, plus a spare)
- Washable paint in fall colors: red, orange, yellow, and brown
- A pencil and a thick brown marker
- A paintbrush (one wide one is enough)
- A paper plate or muffin tin for the paint palette
- Cotton balls, Q-tips, and a kitchen sponge cut into small pieces
- A pine cone or two, plus a few real leaves from outside
- A cup of water and a damp cloth
- Newspaper, a plastic tablecloth, or an old shower curtain for the table
- An old shirt or art smock for your child
- A straw (optional, for the blow-painting variation in Step 6)
The star supply is the paint. We use Crayola Washable Kids’ Paint, the 10-count set, because it washes out of clothes and off skin with soap and water, and the colors are bright enough that the reds actually look red on white paper.
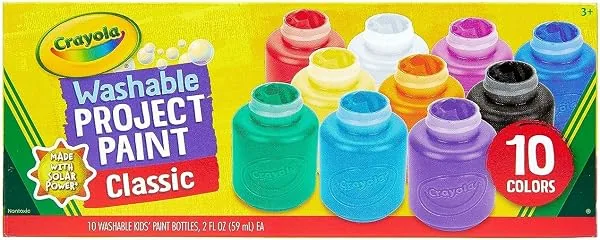
Crayola Washable Kids’ Paint, 10 Count
The paint behind this whole craft: washable and non-toxic, with bright fall colors. Washes out of clothes and off skin with soap and water.
For the paper, thick cardstock matters more than you would think. Thin printer paper buckles and tears once it is wet with paint, and a torn painting is a crying toddler. A pack of Crayola construction paper, 480 sheets, does the job and gives you colored sheets for the trunk.
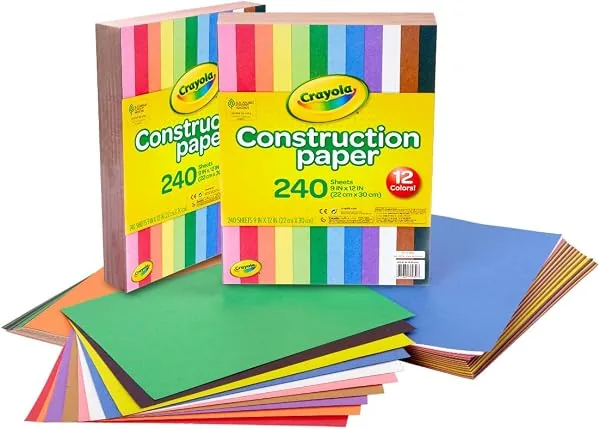
Crayola Construction Paper, 480 Sheets
A big 480-sheet pack in assorted colors, thick enough to hold wet paint without buckling.
The Sensory Tool Menu
Every tool feels different in a small hand. Here is what each one does, and which age it suits best.
| Tool | What it feels like | Best age |
|---|---|---|
| Fingers | Squishy, cold, direct | 2 and up (the classic) |
| Cotton balls | Soft, springy, gentle | 2 and up |
| Q-tips | Precise, light, dotty | 3 and up |
| Sponge pieces | Bouncy, blotchy, big coverage | 2 and up |
| Pine cones | Bumpy, rolly, unpredictable | 3 and up (supervised) |
| Real leaves | Crisp, veiny, nature-textured | 3 and up |
| Straw (blowing) | Tricky, breathy, magical | 4 and up only |
An adult should stay close whenever a toddler is using a pine cone or a straw. Pine cones are not a mouthing toy, and blowing through a straw takes breath control that most 2-year-olds do not have yet. If your child still puts everything in their mouth, stick to fingers, cotton balls, and sponges, and read the taste-safe paint note below.
The Method: 8 Steps to Your Autumn Tree
Step 1: Set Up the Painting Station
Cover the table first, before a single paint pot opens. Newspaper works, a plastic tablecloth works better, and an old shower curtain is the gold standard because paint wipes straight off it. Put the paper in the middle, the paint palette on one side, and the tools on the other. Dress your child in the smock or old shirt now, while hands are still clean, and roll sleeves up past the elbow. Keep the cup of water and the damp cloth within your reach, not theirs.

Step 2: Draw the Trunk and Branches
Draw the tree. A thick trunk that starts at the bottom of the page, splits into three or four branches, and reaches toward the top corners. Use a pencil first so wobbles can be fixed, then go over the lines with a thick brown marker so they stand out under the paint. Squiggly lines along the trunk make it look like bark. If your child is 2, you draw the tree and they watch. If your child is 4 or 5, let them draw it themselves and accept that their tree may look like a very cheerful fork.
If nobody in the house likes drawing, cut the trunk and branches from brown construction paper instead and glue them down. It takes five minutes, and it gives a toddler a gluing job before the painting even starts.

Step 3: Paint the Trunk Brown
Paint the trunk and branches brown with the brush, staying roughly inside the marker lines. A 2-year-old will paint the trunk, the branches, and a good portion of the sky brown, and that is a perfectly good autumn sky. Let the trunk dry for about 15 minutes before the leaves go on, or the brown will smear into the leaf colors and turn everything the color of mud. If your child cannot wait, hand them a marker and let them add bark squiggles while the paint dries, or use the construction-paper trunk from Step 2, which needs no drying at all.

Step 4: Fingerprint the Leaves
Now for the fun part. Put a blob of each fall color on the paper plate, one color per section, and show your child the move: dip one fingertip in the paint, press it on the branches, lift. One press, one leaf. Red, orange, yellow, repeat. Fingerprints make the best leaves because every one is slightly different, and the paint on a fingertip is the purest sensory hit in this craft: cold, smooth, and a little bit sticky. Work around the branches first, then add a few prints under the tree for fallen leaves. If your child hates the feeling of paint on their hands, skip straight to Step 5 and let the tools do the touching instead.

Step 5: Stamp and Dab with Sensory Tools
This is where the craft earns the word sensory. Hand your child a cotton ball on a clothespin and let them dab soft, round leaves. Give them a Q-tip for tiny dot leaves along the thin branches. Let them press a sponge piece down for big blotchy patches of color. Then the pine cone: roll it in the paint, then roll it across the branches and watch the bumpy pattern it leaves behind. A real leaf works as a stamp too, paint on the veiny side, press, peel, and a leaf-shaped print appears. Try one tool at a time so your child can feel the difference between them, and talk about it while you go. Bumpy, soft, squishy, scratchy.

Step 6: Add Fallen Leaves and Finishing Touches
The ground needs leaves too. Dab fingerprints, Q-tip dots, and sponge prints along the bottom of the page so the tree looks like it is shedding. If your child is 4 or older, try the straw trick: put a few drops of watery paint on the branches and let them blow through the straw to push the paint into spiky leaf shapes. It takes practice and it splatters, so keep the paper inside the tray. Once everything is in place, an older child can outline a few leaves with a marker. Toddlers can stop here, and they should.

Step 7: Let It Dry
Put the painting somewhere flat and out of reach, and leave it alone for 1 to 2 hours. Washable paint on cardstock dries faster than you expect on the surface and slower underneath, so test a corner with a fingertip before you pick it up: if it feels cool or tacky, give it another 30 minutes. Overnight is the safest option if you can wait. Do not use a hairdryer on it. Hot air can crack the paint and warp the paper.

Step 8: Display It and Keep It
Hang it up. The fridge is the classic gallery, a frame on the wall is the upgrade, and a piece of clear contact paper over the front turns it into a wipe-clean placemat for the season. Write your child’s name and the year on the back in pencil. If you do this craft every fall, you end up with a little gallery that shows your child’s hand growing year by year, which is the kind of keepsake that makes grandparents cry. For a version that can hang on the actual Christmas tree later, our Easy Ribbon Star DIY Tree Ornament Craft for Kids uses the same paint-and-press idea on a star shape.

Toddler vs Preschool: How to Adjust It
The same craft, two different children. The changes are small, and they make the difference between a fun afternoon and a frustrated one.
| Toddler (age 2 to 3) | Preschool (age 4 to 5) | |
|---|---|---|
| Tree | You draw or cut it | They draw it themselves |
| Leaves | Fingers, cotton balls, sponge | Plus Q-tips, pine cones, straw |
| Session length | 10 to 15 minutes | 20 to 30 minutes |
| Your job | Hands-on helper, paint manager | Coach, occasional rescuer |
| Finishing touches | Skip them | Markers, birds, outlines |
For toddlers, the honest truth is that 10 minutes of painting is a full session, and the craft is a success if they enjoyed the paint and the paper survived. Keep the palette small, keep the tools big, and end while they are still happy. For preschoolers, the craft can stretch: let them mix red and yellow on the plate to make their own orange, and let them decide when the tree is finished. If you want more guidance on what a 2-year-old can actually do versus what looks good on the internet, our Toddler Parenting Tips guide is the honest read.
Low-Mess Options
Some days you want the craft without the cleanup. Two versions of this tree keep the sensory play and skip most of the mess:
The bag version. Squeeze dollops of fall-colored washable paint onto the paper, slide the paper into a gallon zip-top bag, seal it, and tape the bag to the table. Your child squishes and presses the paint through the plastic, and the tree appears underneath without a drop on the table. Tape the seal shut for extra safety. When they are done, peel the bag off, let the paper dry, and add the trunk with a marker. This is the version for babies and very young toddlers.
The spice-paint version. Stir a pinch of cinnamon, cocoa powder, or nutmeg into each paint color before you start. The paint smells like autumn, the tree dries with a faint scent, and your child gets a smell sense along with the touch sense. Use spices you already have in the kitchen, keep the amounts small, and skip this one if your child has a spice allergy or still tastes the paint.
Taste-Safe Paint for Mouthing Toddlers
If your child still puts paint-covered fingers in their mouth, you have two safe routes. The first is to buy paint that is labeled non-toxic and washable, which the Crayola set above is, and to supervise closely so tasting stays a rare accident rather than the activity. The second is to make a taste-safe paint at home: plain yogurt tinted with a few drops of food coloring works for a 20-minute session. Homemade paint stains more and dries slower, so use it on a day when you do not mind the mess.
Display and Keepsake Ideas
- The fridge gallery: one magnet per corner, changed every season.
- A simple frame: the cheapest frame you own, hung at your child’s eye level.
- A yearly collection: same craft, same month, every year, stored flat in a folder.
- A gift for grandparents: a framed tree painting is the easiest grandparent gift in existence, and it costs less than a card.
Cleanup in Five Minutes
Cleanup is part of the craft, not the punishment after it. While the painting dries, hands go straight to the sink with soap and warm water, and washable paint comes off in one wash. Wipe the table with the damp cloth, fold up the newspaper or tablecloth and throw it away, and put the tools in the cup of water to soak. Paint on clothes goes straight into the wash, and washable paint usually comes out completely. The whole reset takes about five minutes if you set the table up right in Step 1.
Shop This Post
Everything we used in this guide, in one place:
| Product | Used For | Price |
|---|---|---|
| Crayola Washable Kids’ Paint, 10 Count |
Painting the leaves and the trunk | Check Price |
| Crayola Construction Paper, 480 Sheets |
The paper and the cut-out trunk | Check Price |
Frequently Asked Questions
What age is this autumn tree painting craft best for?
Ages 2 to 5. Toddlers do the finger and sponge version in about 10 minutes, and preschoolers can do the full 8 steps in 20 to 30 minutes. Under-2s can do the sealed-bag version above.
What paint should I use for a toddler tree painting?
Washable, non-toxic paint in fall colors. It comes off skin, clothes, and tables with soap and water. Avoid acrylic paint for toddlers, because it does not wash out.
How do I keep the paint from getting everywhere?
Cover the table before you start, dress your child in a smock or old shirt, keep the palette small, and keep the water cup on your side of the table. The sealed-bag version in the low-mess section removes the mess almost entirely.
Can I use real leaves in this craft?
Yes. Real leaves make excellent stamps: paint the veiny side, press, and peel. Pick leaves that are dry and flat, and check them for dirt and tiny insects first.
What if my child hates getting paint on their hands?
Skip the fingerprint step and use cotton balls, sponges, and pine cones instead. Some children are sensitive to the texture of paint, and the craft works just as well with tools.
How long does the painting take to dry?
About 1 to 2 hours on cardstock, and overnight is the safest. Test a corner first: if it feels cool or tacky, wait another 30 minutes.
More Autumn Crafting
If the tree is a hit, the season has more to give. When spring comes around, our DIY Spring Craft Ideas guide has the same kind of simple, sensory projects for warmer days.