
Easy Ribbon Star DIY Tree Ornament Craft for Kids

Every December, my 4-year-old counts the ornaments on our tree, and every year she asks which one we made ourselves. This easy ribbon star DIY tree ornament craft for kids is the one she points to first. Five sticks, a length of ribbon, and ten small steps turn into a star that looks far fancier than the effort it took. If you have ribbon left over from wrapping gifts, you already own the star supply.
This is a single-craft guide, start to finish: the supplies, a ribbon menu, ten numbered steps, age tweaks for a 2-year-old versus a 5-year-old, three wrapping patterns, troubleshooting, and a five-minute cleanup. The star takes about 20 to 30 minutes to make, plus drying time, and it ends with an ornament sturdy enough to hang on the tree year after year. It is one of our favorite easy kids craft ideas for the holidays, and it works on a snowy afternoon or as a gift-making session.

Heads up: this post contains affiliate links. If you buy through them, MamaKinder may earn a small commission at no extra cost to you, it helps keep these guides free.
At a Glance
| Detail | Answer |
|---|---|
| Ages | 2 to 5 (toddler and preschool) |
| Active time | 20 to 30 minutes |
| Drying time | 15 to 30 minutes (glue) |
| Mess level | Low |
| What you get | One finished ribbon star ornament |
What You Need
You probably own most of this already. The only thing worth buying on purpose is ribbon in Christmas colors.
- Five craft sticks, twigs, or BBQ skewers, cut to 4 inches each
- Ribbon, string, yarn, or twine (about 2 yards per star)
- Hot glue, a low-heat glue gun, or white school glue (see the safety note below)
- Scissors (an adult handles these for under-4s)
- A ruler or a piece of paper marked at 4 inches
- A small button, a wooden bead, or a ribbon scrap for the center
- A spare length of ribbon or twine for the hanging loop
- Newspaper or a plastic tablecloth for the table
- An old shirt or art smock for your child
The glue choice matters most. Hot glue holds the star frame fast, but a hot glue gun is an adult-only tool. White school glue is the kid-safe choice: a child can squeeze it, it washes off hands with soap and water, and it dries clear. We keep Elmer’s Washable School Glue on hand, because the ribbon knots and the center decoration can be secured with it while an adult handles the hot glue for the frame.
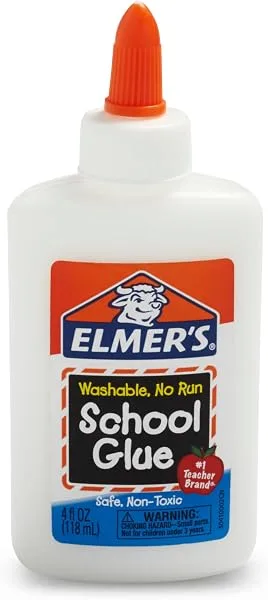
Elmer’s Washable School Glue
The kid-safe glue for this craft: washable, non-toxic, and dries clear. Use it for the ribbon knots and the center decoration while an adult handles any hot glue for the star frame.
Craft sticks are the easiest, but straight twigs from the garden work just as well and give a rustic look. BBQ skewers also work if an adult cuts off the sharp points first. The five sticks must be the same length, or the star comes out lopsided.
The Ribbon Menu
Not all ribbon wraps the same way. Here is what each kind does.
| Ribbon type | How it wraps | Best for |
|---|---|---|
| Satin ribbon | Smooth and shiny | Ages 3 and up (the classic) |
| Grosgrain ribbon | Textured, stays put | Ages 2 and up (easiest) |
| Curling ribbon | Slippery, slides off | Ages 5 and up (with help) |
| Yarn or string | Soft, grippy, forgiving | Ages 2 and up (great first try) |
| Twine or jute | Rough, holds knots well | Ages 4 and up (rustic look) |
If you only have curling ribbon left over from wrapping gifts, the star still works, but expect it to slip. Tie the starting knot twice and put a tiny dab of white glue on it. Grosgrain is the kind to buy on purpose, because its ribbed texture grips the sticks and the knots stay tied.
The Method: 10 Steps to Your Ribbon Star
Step 1: Set Up the Craft Table
Cover the table first, before a single stick is cut. Newspaper works, a plastic tablecloth works better, and an old shower curtain is the gold standard because glue peels straight off it. Put the sticks on one side, the ribbon on the other, and the glue and scissors on your side of the table. Dress your child in the smock now, while hands are still clean.

Step 2: Cut Five Sticks to Equal Length
You need five sticks of equal length, and 4 inches is the sweet spot for little hands. Shorter than 3 inches is too fiddly to wrap; longer than 5 inches gets floppy. Measure and cut the first stick, then use it as the pattern for the other four. An adult does all the cutting here, and if you are using BBQ skewers, an adult cuts off the sharp points first. Line the five sticks up when you finish and check that the ends match.

Step 3: Glue the Sticks into a Star
This is the grown-up step. Lay the sticks out in a star shape first: two sticks crossed like an upside-down V, two more crossed the other way, and the fifth across the middle. Once it looks right, dot hot glue on one joint at a time, press it down, and hold it for ten seconds. Work around all five joints, then set the star down to cool and dry for about 15 minutes. White school glue works too, but the drying time stretches to about 30 minutes and the star must lie flat while it sets. Do not hand the star to your child until the glue is fully cool and firm.

Step 4: Tie the First Knot
Pick up the ribbon and tie it to any point of the star with a double knot. A double knot matters, because a single knot loosens the moment your child starts pulling. Leave a short tail of about an inch to tuck under the wrapping later. If your child is 2 or 3, you tie the knot and they take over for the wrapping. If your child is 4 or 5, let them tie it themselves and show them how to pull the second knot tight. Curling ribbon needs an extra knot, because it is slippery, and a dab of white glue keeps it from creeping loose.

Step 5: Wrap the Ribbon Criss-Cross
Now for the fun part. Show your child the move: carry the ribbon across the star to the opposite point, loop it around, then carry it back to a different point, and keep going. The ribbon crosses itself in the middle, which is what makes the star look woven instead of just tied. Pull each pass snug but not tight: too loose and the ribbon slides off, too tight and the frame bends inward. Work slowly so every point gets wrapped, and talk about the pattern while you go. If the ribbon slips, hold the last pass down with one finger while you make the next one.

Step 6: Add a Second Color
One color makes a fine star, but two make a star worth showing off. When the first ribbon has covered most of the frame, tie the second ribbon to any point with a double knot, just like Step 4, and keep wrapping over the top of the first layer. Gold over red is the classic pairing, and green over gold looks like a wreath. A few passes across the center are enough to catch the light. Tuck the second ribbon’s starting knot under the first layer, and trim long tails as you go. A third color is fine too, but stop at three, or the star starts to look muddy instead of festive.

Step 7: Tie Off and Secure the End
When the star looks full enough, stop wrapping. Bring the ribbon to the nearest point, tie it off with a double knot, and snip the tail to about half an inch. Now secure that knot so it never comes undone on the tree: put a tiny dab of white school glue on the knot and press it flat against the stick with a fingertip. White glue dries clear in about 30 minutes, and then the knot is locked. Tuck loose ends under the nearest wrap. Shake the star gently over the table: if nothing slips, the wrapping is done.

Step 8: Add the Hanging Loop
Cut a piece of ribbon about 6 inches long, fold it into a loop, and tie the ends together. Then tie that loop to the top point of the star with a double knot, or glue it to the back of the top point while an adult holds it. The loop should be big enough to slip over a tree branch easily, about the size of a plum. Too small and the star sits sideways; too long and it dangles and spins. Test it on a doorknob first: if it hangs straight there, it will hang straight on a branch.

Step 9: Decorate the Center
The middle of the star is the one spot the ribbon never quite covers, and that is where the decoration goes. A small button, a wooden bead, or a tiny bow all work, glued on with a dot of white school glue while an adult watches. Press it into the glue, hold it for ten seconds, and leave the star flat for 15 minutes so it sets. A child can also write their name on the back of one stick. Keep the decoration small and light: a heavy charm makes the star hang crooked.

Step 10: Let It Dry, Check It, and Hang It
Set the star flat and leave it alone for 30 minutes, or until every dab of glue feels dry. Then tug each knot gently and trim anything loose. If a joint feels wobbly, an adult adds one more dot of glue and lets it set again. Now hang it on the tree, at your child’s eye level so they can see it every day. If you made more than one, hang them in a row. For a matching ornament to hang beside it, our Easy Snowflake Ornament Craft for Kids uses the same stick-and-wrap idea in white and silver.

Toddler vs Preschool: How to Adjust It
The same craft, two different children. Small changes make the difference between a fun afternoon and a frustrated one.
| Toddler (age 2 to 3) | Preschool (age 4 to 5) | |
|---|---|---|
| Star frame | You build it first | They watch you build it |
| Wrapping | You hold, they pull | They hold and wrap it |
| Ribbon | Yarn or grosgrain (grippy) | Plus satin, twine, curling ribbon |
| Session length | 10 to 15 minutes | 20 to 30 minutes |
| Your job | Hands-on helper, knot tier | Coach, occasional rescuer |
| Decorating | You glue, they choose | They glue and place it |
For toddlers, 10 minutes of wrapping is a full session, and the craft is a success if they enjoyed pulling the ribbon and the star survived. Keep the ribbon short, hold the star while they wrap, and end while they are still happy. For preschoolers, let them pick the colors, count the five points out loud, and decide when the star is finished. If you want more guidance on what a 2-year-old can actually do versus what looks good on the internet, our Toddler Parenting Tips guide is the honest read.
Wrapping Patterns to Try
Once your child has wrapped one star, three patterns keep the next ones interesting. The criss-cross is the one in Step 5: carry the ribbon from point to opposite point so it crosses in the middle. The zig-zag stays near the edge: wrap the ribbon around each point in turn, moving around the star like a clock, which makes a neat border. The edge wrap is the simplest: wind the ribbon around one stick at a time, which covers the wood completely and looks like a candy cane. Our Autumn Tree Painting Sensory Craft for Toddlers and Kids uses the same one-tool-at-a-time idea.
Troubleshooting: When the Star Fights Back
Most ribbon stars go wrong in one of four ways. If the ribbon keeps slipping, switch to grosgrain or yarn, or put a dab of white glue on each point before you wrap past it. If the knots keep coming undone, tie a double knot every time and add a dab of glue on top. If the star looks lopsided, check the stick lengths first: one long stick throws the whole shape off, so trim it and re-glue that joint. If the frame wobbles, an adult adds another dot of hot glue to each joint. If the ribbon runs out, tie on a new length and tuck the knot under the next wrap.
Display, Keepsake, and Gift Ideas
- Hang this year’s star at your child’s eye level, where they can find it every morning.
- Make one star every December, write the year on the back, and store them flat in a box.
- A handmade star in a small gift bag is the easiest grandparent gift in existence, and it costs less than a card.
- One star per child, each in a different color, hung together on a classroom tree or a window.
- Hang it in a sunny window, where the ribbon catches the light all December.
Cleanup in Five Minutes
While the star dries, hands go straight to the sink with soap and warm water, and white school glue comes off in one wash. Snip the ribbon scraps into the bin, fold up the newspaper and throw it away, and put the scissors and glue back on the shelf where small hands cannot reach them. Glue on clothes goes straight into the wash.
Shop This Post
Everything we used in this guide, in one place:
| Product | Used For | Price |
|---|---|---|
| Elmer’s Washable School Glue |
Securing ribbon knots and the center decoration | Check Price |
Frequently Asked Questions
What age is this ribbon star ornament craft best for?
Ages 2 to 5. Toddlers wrap with a grown-up holding the star in about 10 minutes, and preschoolers can do the full 10 steps in 20 to 30 minutes.
What ribbon works best for a ribbon star ornament?
Grosgrain ribbon is the easiest, because its texture grips the sticks. Yarn and string are good first choices for toddlers. Curling ribbon looks lovely but slips, so it suits ages 5 and up.
Can kids use a hot glue gun for this craft?
No. The hot glue gun is an adult-only tool, and an adult should build the star frame ahead of time. Children use white school glue for the knots and the decoration.
How long should the sticks be for a ribbon star?
Four inches is the sweet spot. Shorter than 3 inches is too fiddly to wrap, and longer than 5 inches makes the star floppy. All five sticks must be the same length.
What if my child cannot tie a knot yet?
You tie the knots and your child does the wrapping, which is the fun part anyway. A double knot from you, plus a dab of white glue, holds everything while they pull.
How do I keep the ribbon from slipping off the star?
Use grosgrain ribbon or yarn, pull each pass snug but not tight, and hold the last pass down with a finger while you make the next one. A dab of white glue on each point also helps.
More Christmas Crafting
If the star is a hit, the season has more to give.